Enterprise Tester Rover RoverX is a plugin for Enterprise Tester that gives provides users with the flexibility to test conduct testing anywhere. With Rover, users will now be able to access Enterprise Tester’s core features whether you’re working offsite or all the way , including in remote locations or even in outer space.!
| Panel |
|---|
Features
|
| Panel | ||
|---|---|---|
| ||
|
| Panel | |||||
|---|---|---|---|---|---|
System RequirementsRover RoverX is a plugin for Enterprise Tester that allows users to be able to work with enables offline access and management of Enterprise Tester data offline. Getting started is easy and there are only a few simple requirements: To get started, ensure the following requirements are met:
RoverX is a plugin for Enterprise Tester that enables offline access and management of Enterprise Tester data. To ensure compatibility and functionality, please meet the following requirements:
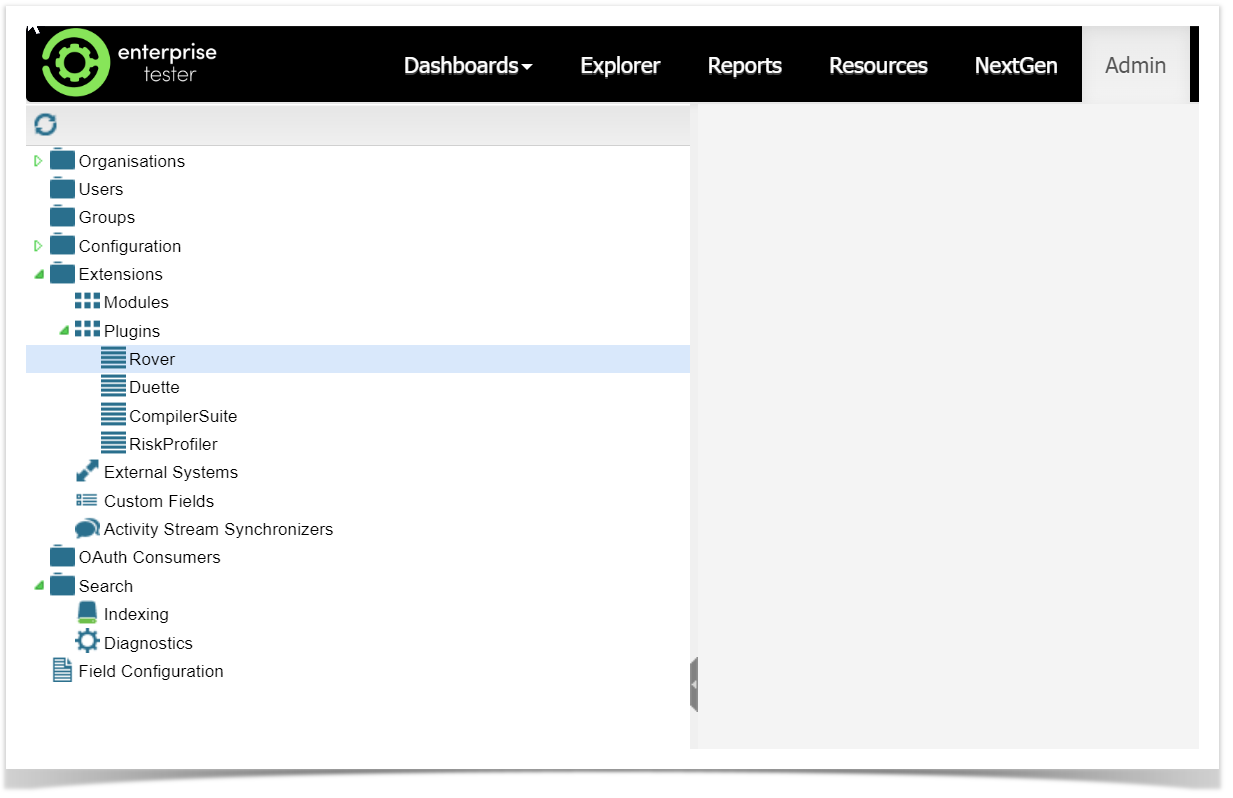
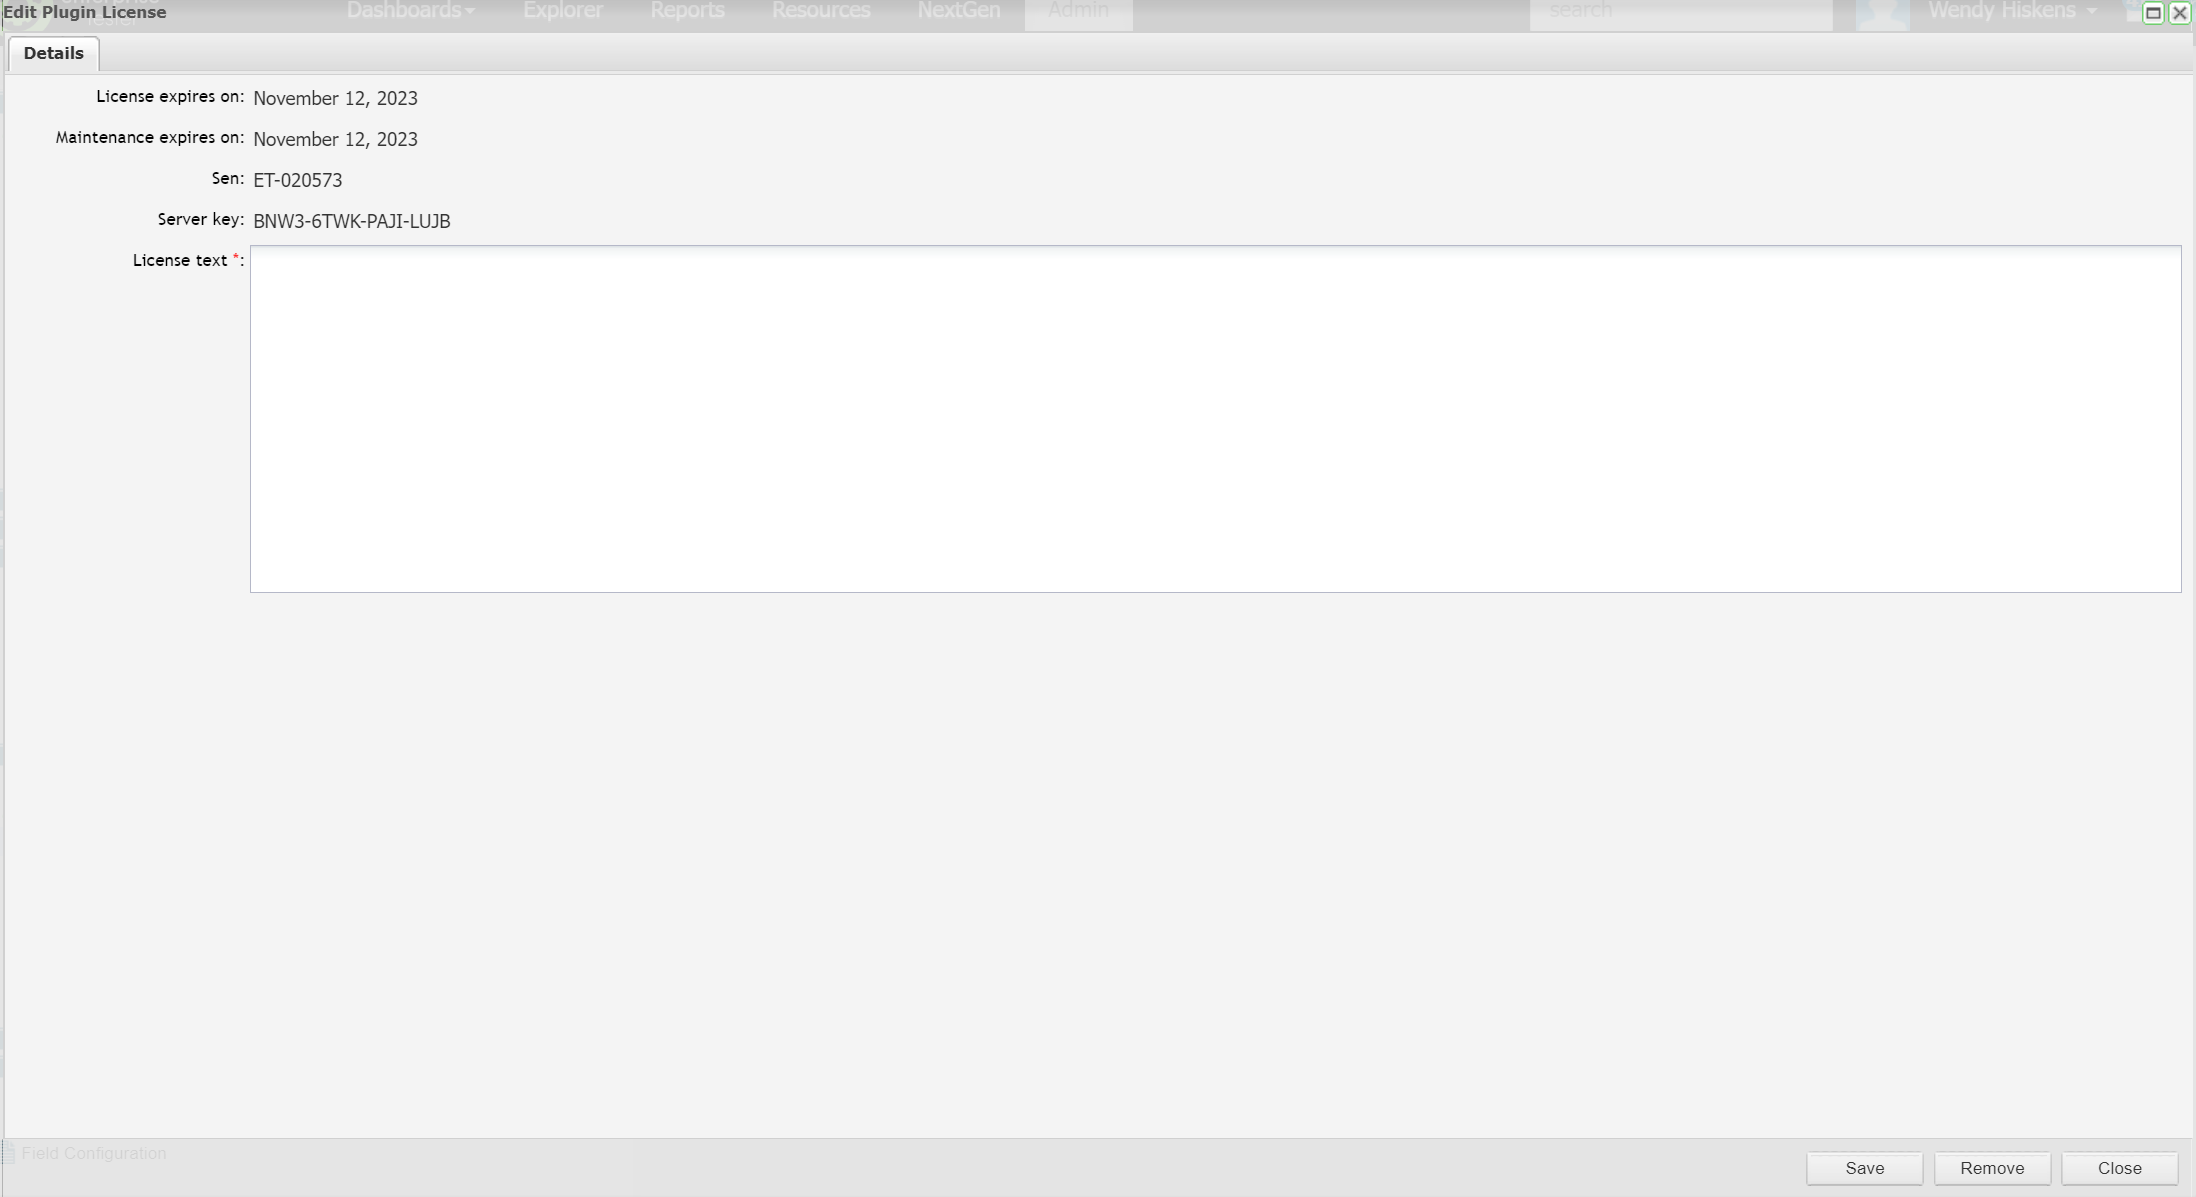
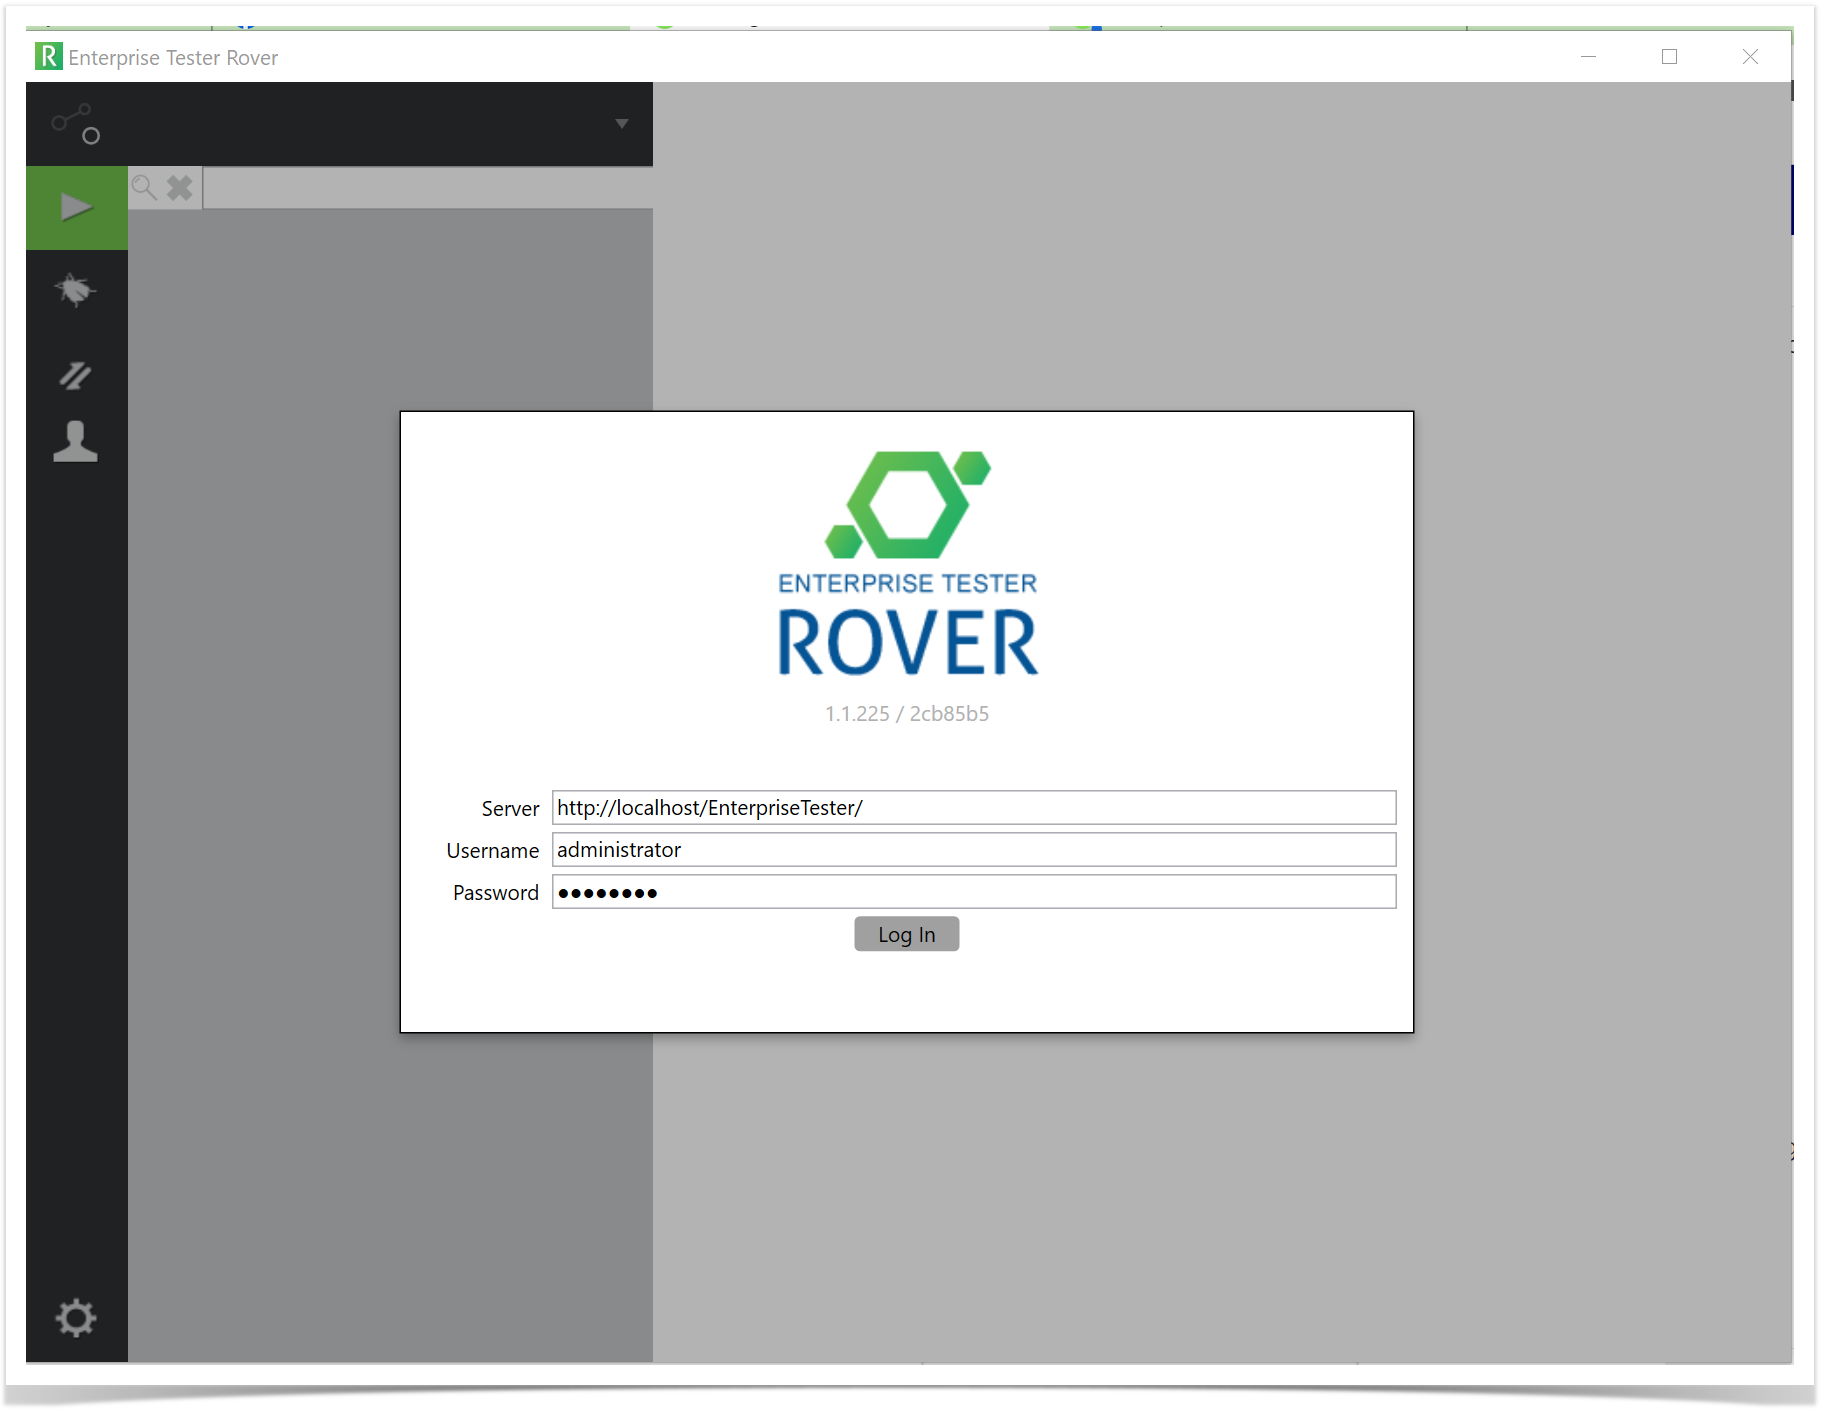
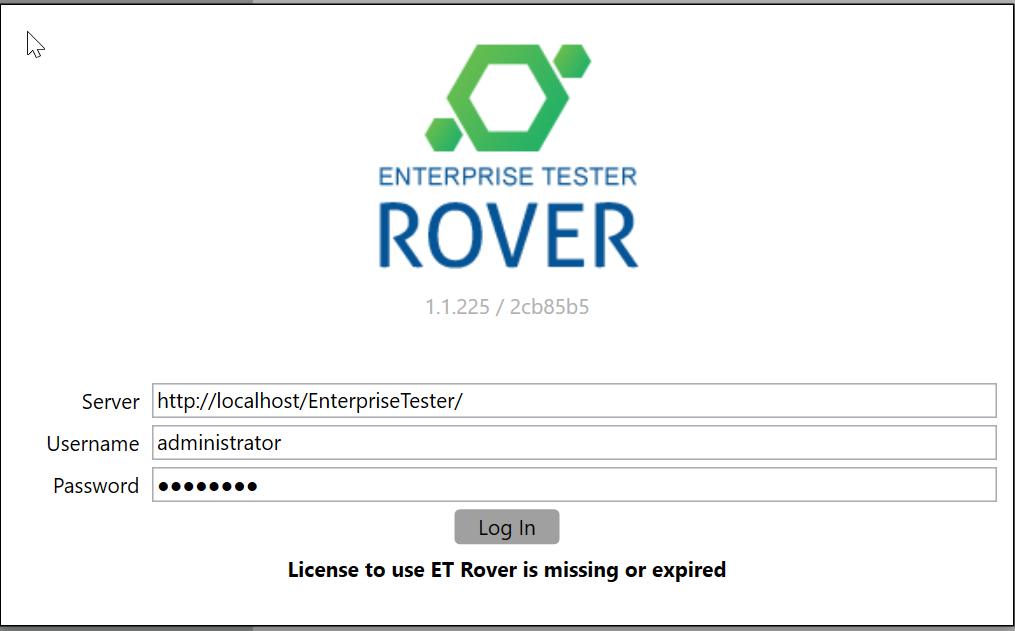
Applying your Rover LicenseTo apply your Rover License, you will need to have Administrator rights to Enterprise Tester. Navigate to the Admin tab, expand the Extensions folder and double click on Rover.
Add the license text ( if you do not have a license text, please contact Catch Sales) to the License Text field:
Operating Systems (Client)The client application supports the following Operating Systems:
.NET FrameworkRover requires .NET 4.5 to be installed. When installing the .Net Framework 4.5 you have two options - either install from a "web download" (a small download, which will then install only the components you require) or you can download a "redistributable" which is a large file containing all the files necessary for the .Net Framework 4.5 to be installed on any machine. If you plan on installing the Framework on more than one machine within your organization it is suggested that you use the redistributable, to avoid multiple downloads. The web downloader can be downloaded from: http://www.microsoft.com/en-us/download/details.aspx?id=30653 The redistributable can be downloaded from: http://download.microsoft.com/download/2/7/3/273CB528-CAB3-4E8D-88D2-4477F0A1DAE4/enu_vs_common/netfx_ult/dotnetfx45_full_x86_x64.exe |
| Panel | ||||||||
|---|---|---|---|---|---|---|---|---|
Getting StartedEnterprise Tester Rover RoverX is an offline mobile client for Enterprise Tester . Rover gives you the that provides flexibility to run your tests and log incidents offline when without internet access maybe limited or unavailable. With Rover, you can: Select the. Here’s a detailed look at its capabilities: Key Features and Functions:
Usage Workflow:
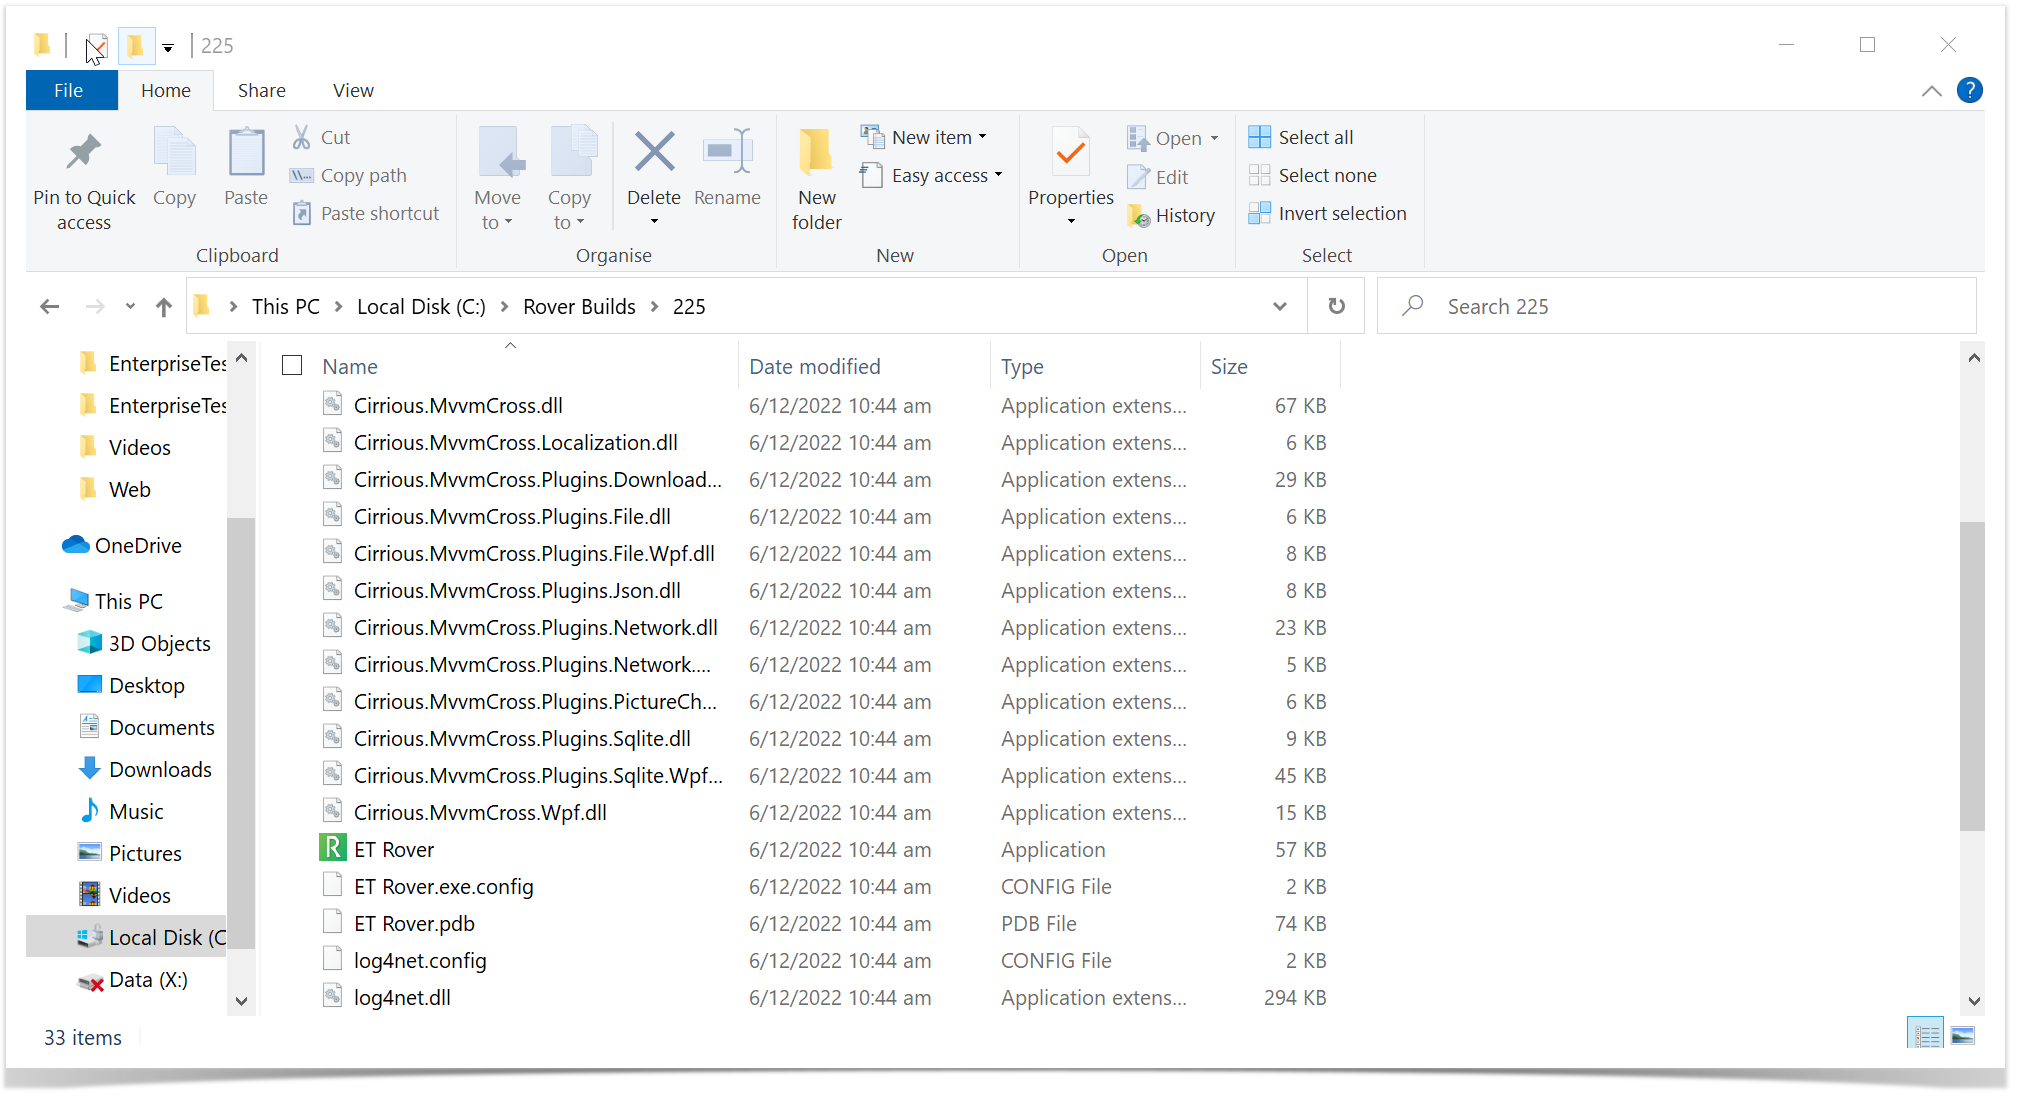
Installing RoverRover is supported on Windows Operating Systems. For more information, please see System Requirements. To install Rover download the application zip file from the Catch website https://catchsoftware.com/enterprise-tester-platform-edition/rover/.
The Login screen will launch. You can pin the application to your start menu or your task bar to make it easier to launch the application.
The first time you log into the client, you will need to be able to connect to your Enterprise Tester server. This may mean that you need to be connected to the internet or be able to access your corporate or office network. From the Login screen, enter in
RoverX ensures that testing processes can continue seamlessly even in remote or offline conditions, making it a versatile tool for testers working in diverse environments.
| ||||||||
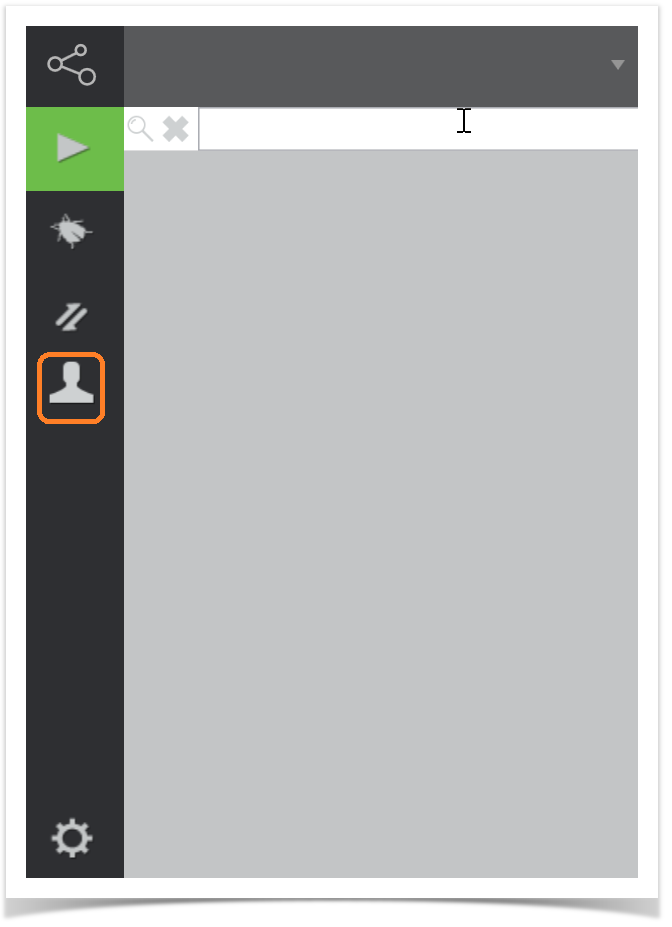
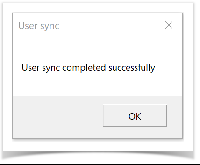
| Anchor | UserSync | UserSync | Once you have successfully logged into Rover you need to download users from Enterprise Tester server to Rover. This enables you to Assign Bugs when using Rover.||||||
| Icon | State Description | |||||||
 | Synced (copied locally) | |||||||
 | Not Downloaded (only resides on Enterprise Tester server) | |||||||
 | Changed on server (downloaded, but the entity has been updated on the server since the download) | |||||||
 | Changed Locally (server has a copy but local version is newer) | |||||||
 | Changed Both (each have a copy with changes that need merging) | |||||||
 | Deleted On Server (downloaded, but has since been deleted from the server) | |||||||
| Icon | State Description | |||||||
 | Synced (copied locally) | |||||||
 | Not Downloaded (resides on Enterprise Tester server) | |||||||
 | Changed on server (downloaded, but the entity has been updated on the server since the download) | |||||||
 | Not Uploaded (created locally, server doesn't have a copy yet) | |||||||
 | Changed Locally (server has a copy but local version is newer) | |||||||
 | Changed Both (each have a copy with changes that need merging) | |||||||
 | Deleted On Server (downloaded, but has since been deleted from the server) | |||||||
| Panel | ||||||||
| Anchor | Execution Tests | Execution Tests | ||||||
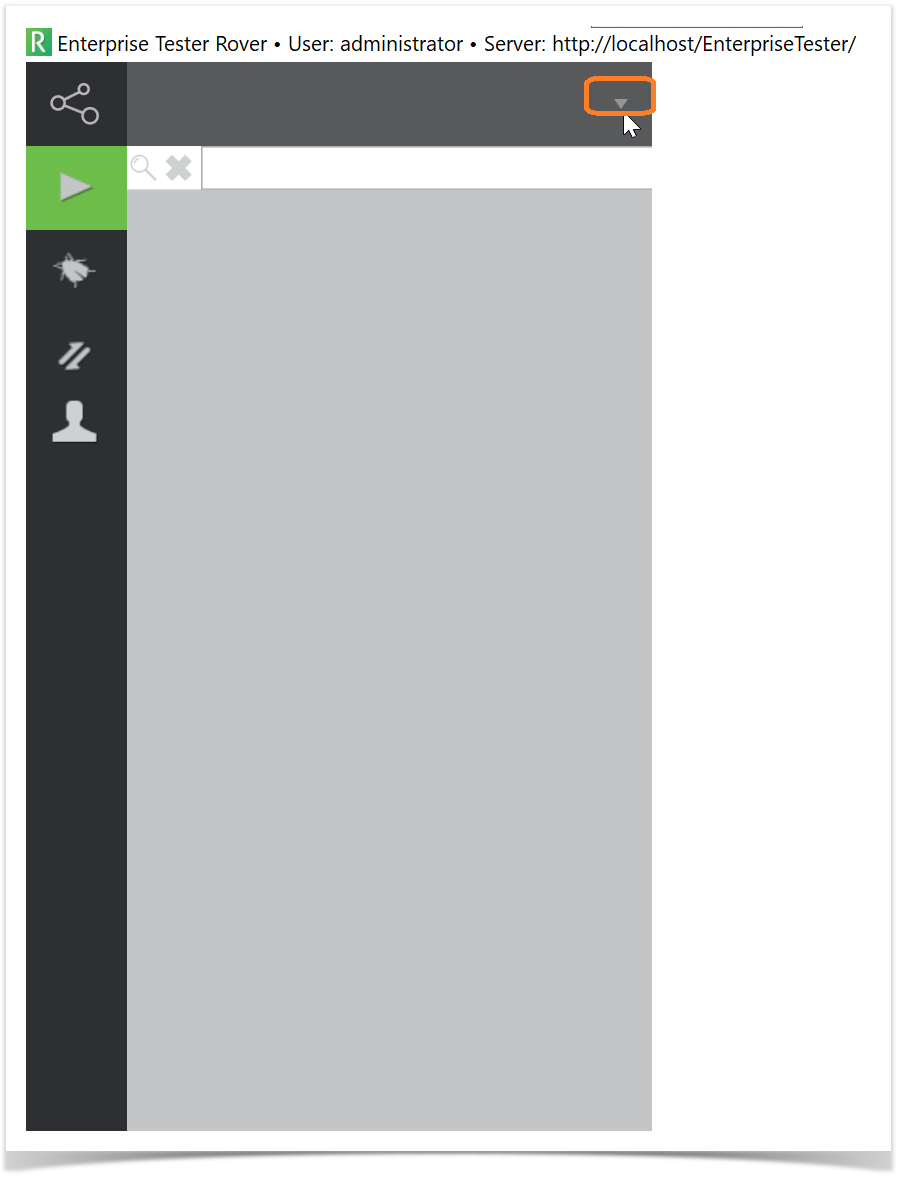
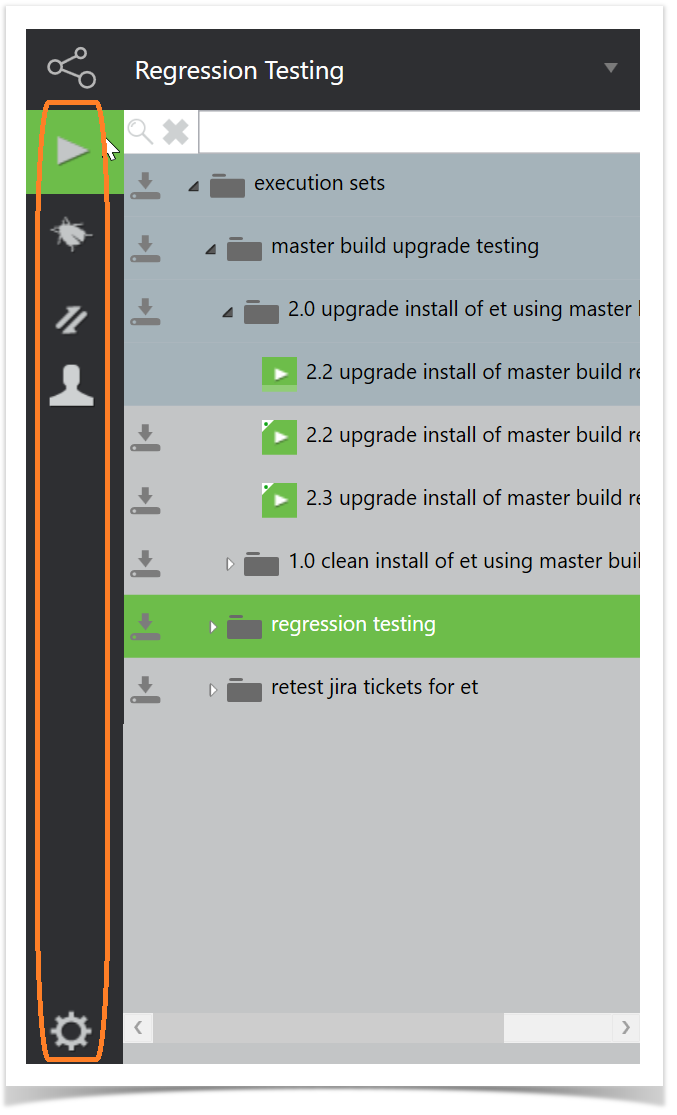
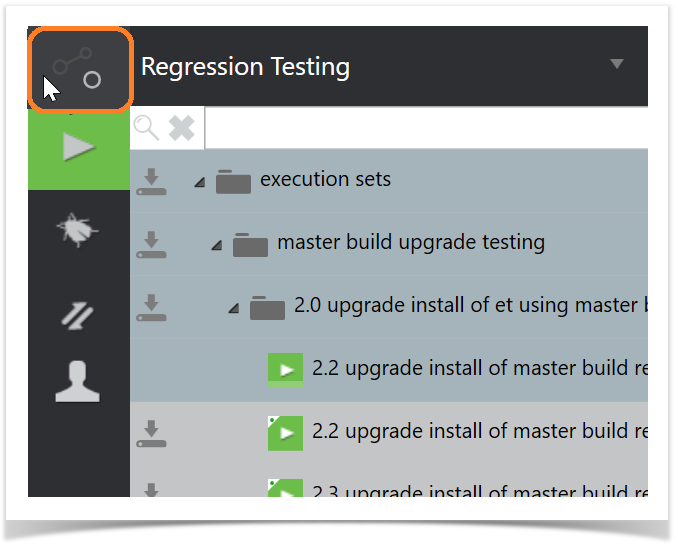
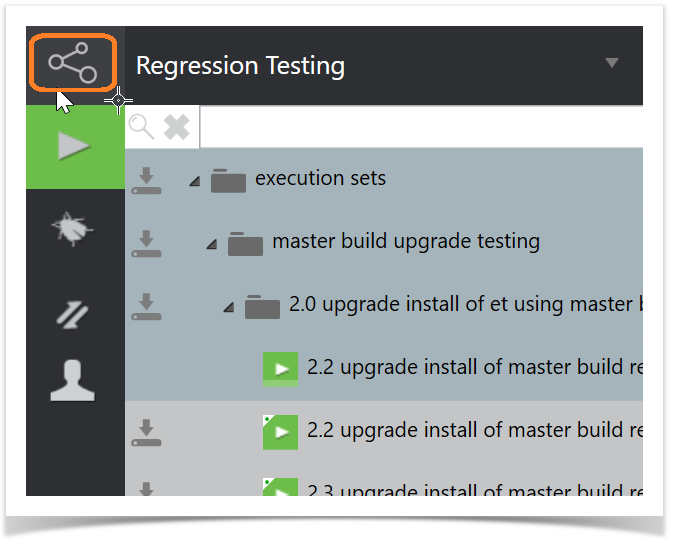
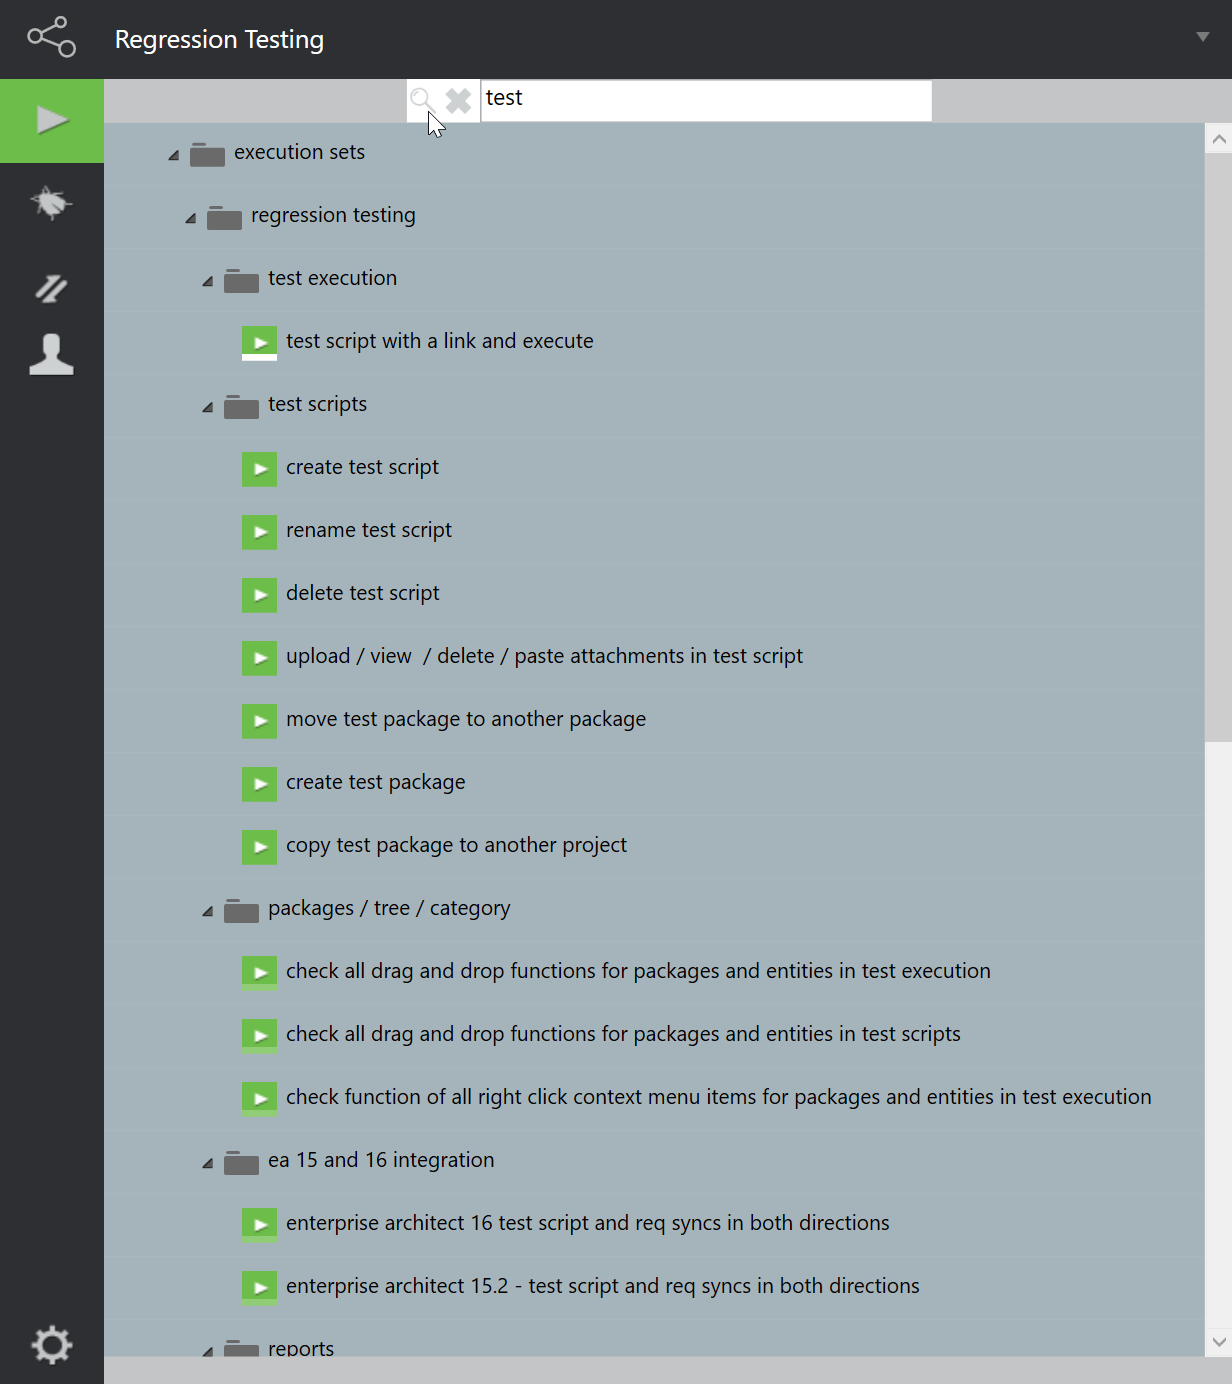
Toggling between these modes allows you to manage your connection status and perform tasks accordingly. Search Bar To find specific items within RoverX, follow these steps:
User SettingsUser settings are accessible by selecting the Settings
Deleting All Data from Local DatabaseWarning: This will delete any local test runs or incidents that have not been uploaded to the Enterprise Tester server. To Delete All Data from the Local Database:
This process ensures that you start with a clean slate, but be mindful to upload any pending data to the Enterprise Tester server before proceeding. Expanding and Collapsing the Right-Hand PanelThe right-hand panel can be expanded and collapsed on any of the screens by selecting the expand
Invoke ErrorThis error message appears when an action is attempted while another process is still running in the background. Click "OK" to close the error dialogue. This error does not impact the functionality of the RoverX application.
Additional Error Message: You may encounter another similar error message. Click "OK" to close it. Like the Invoke Error, it does not affect the operation of the RoverX application.
|


| Panel | ||||||
|---|---|---|---|---|---|---|
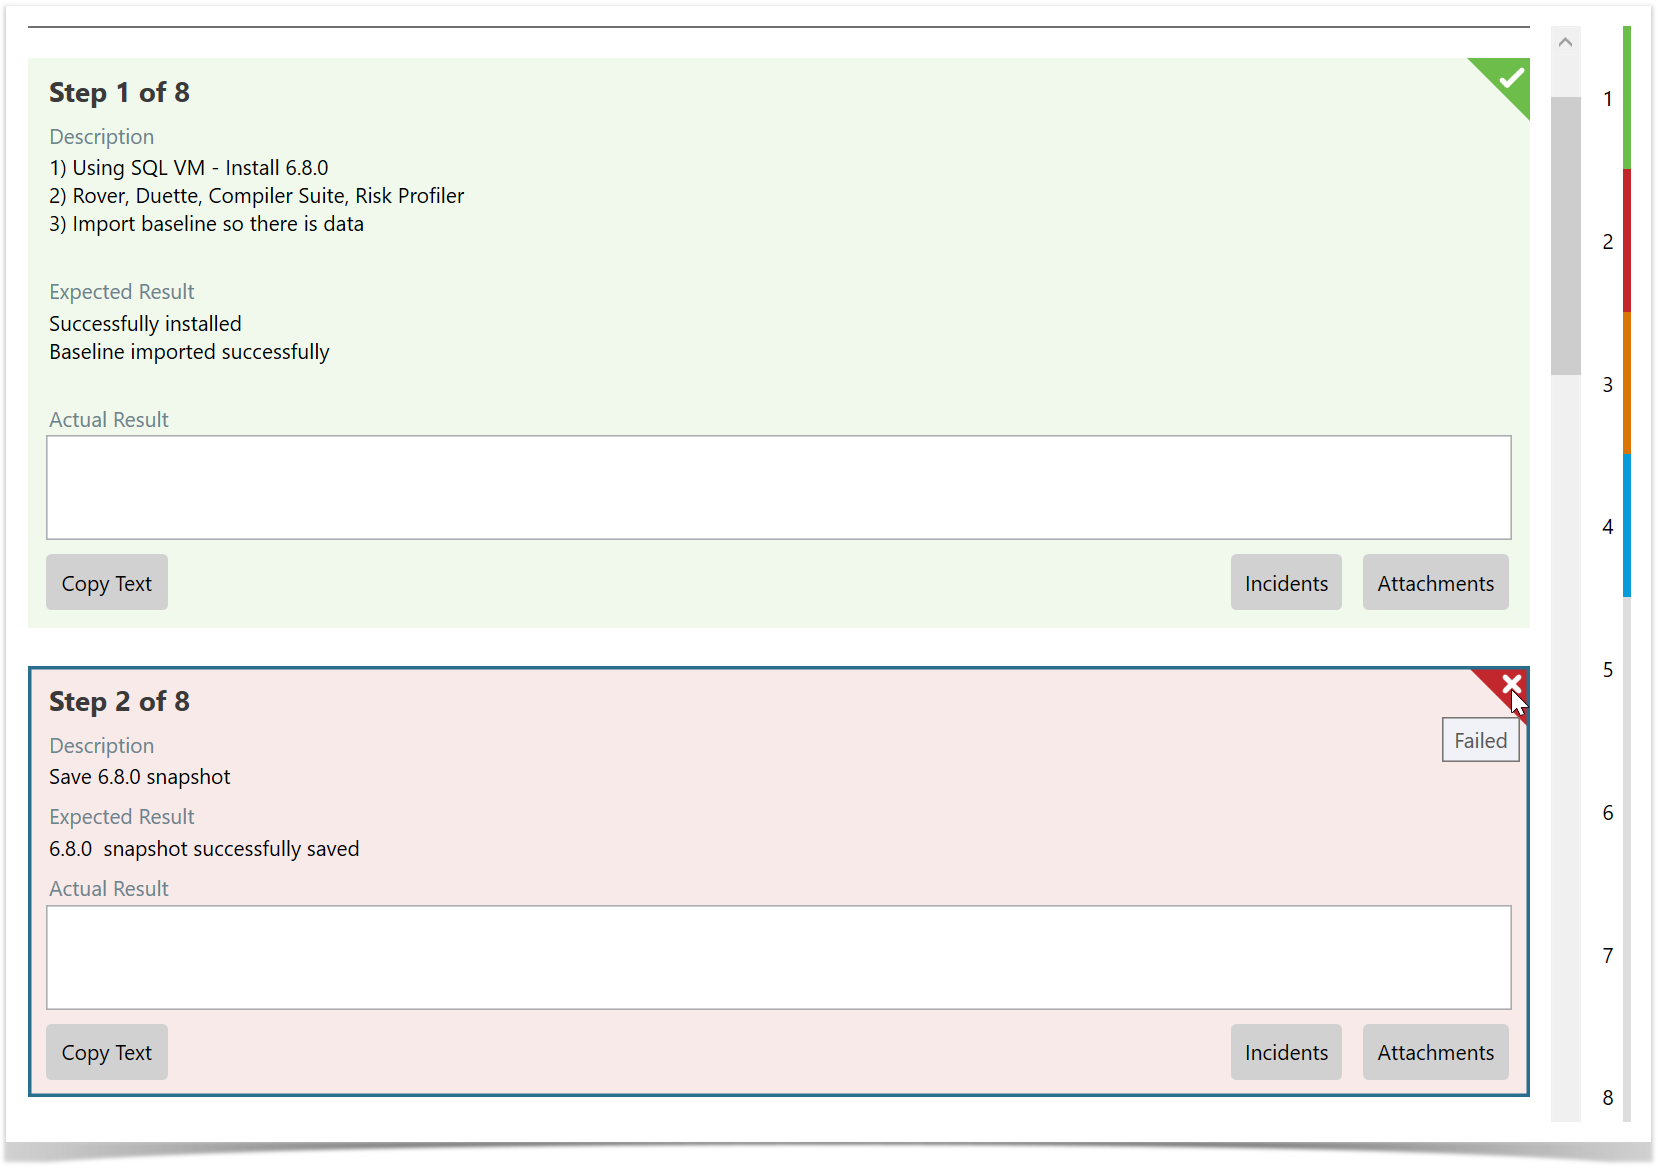
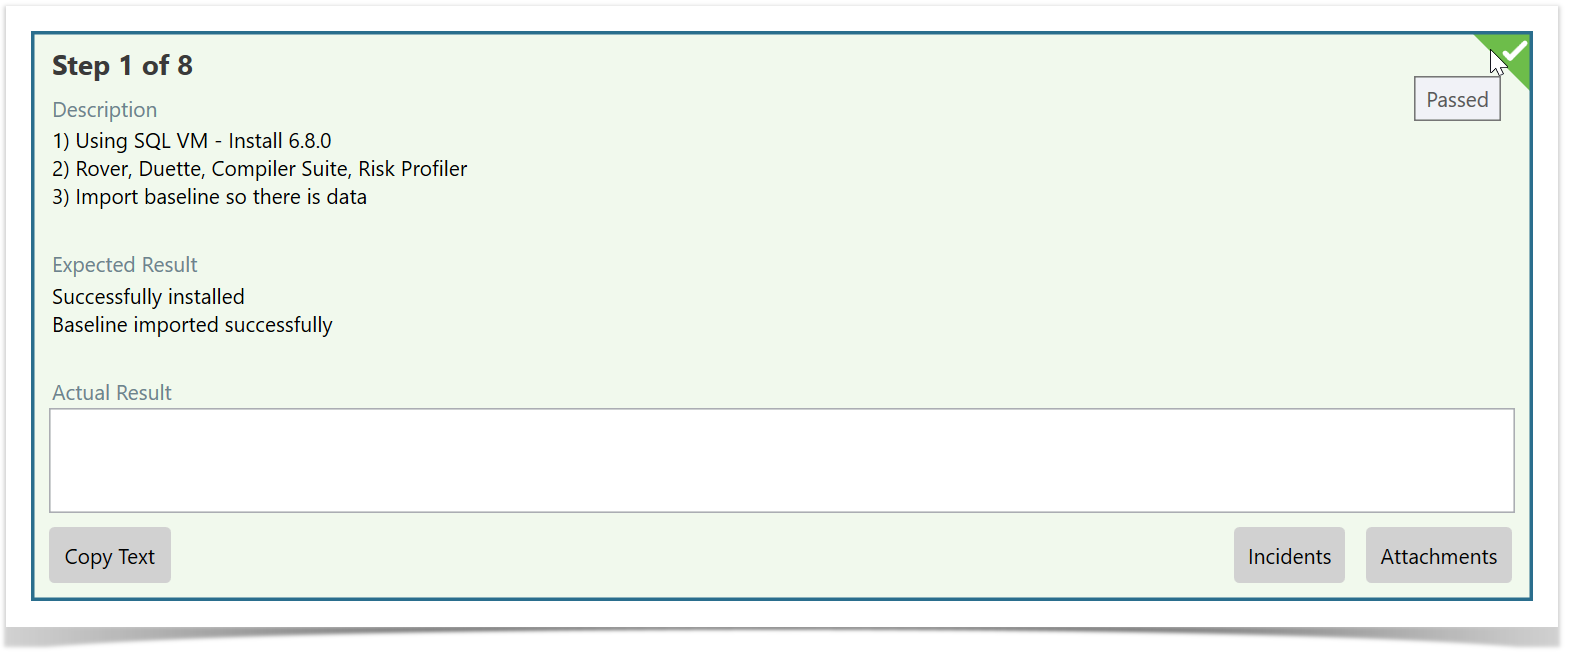
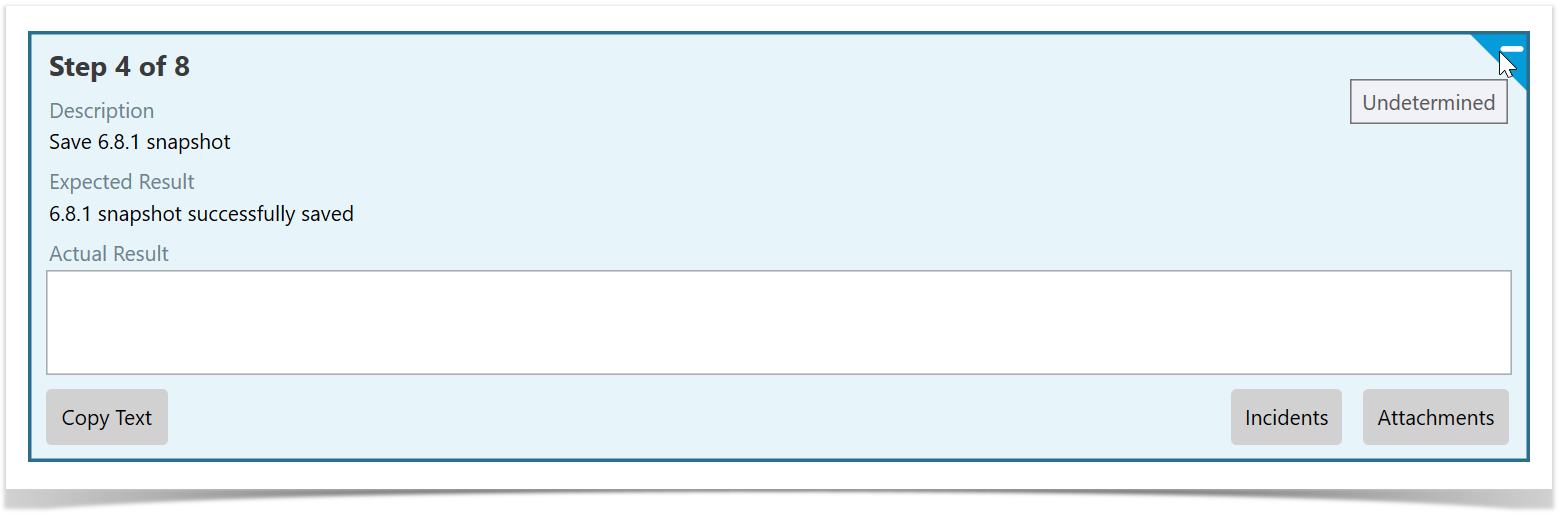
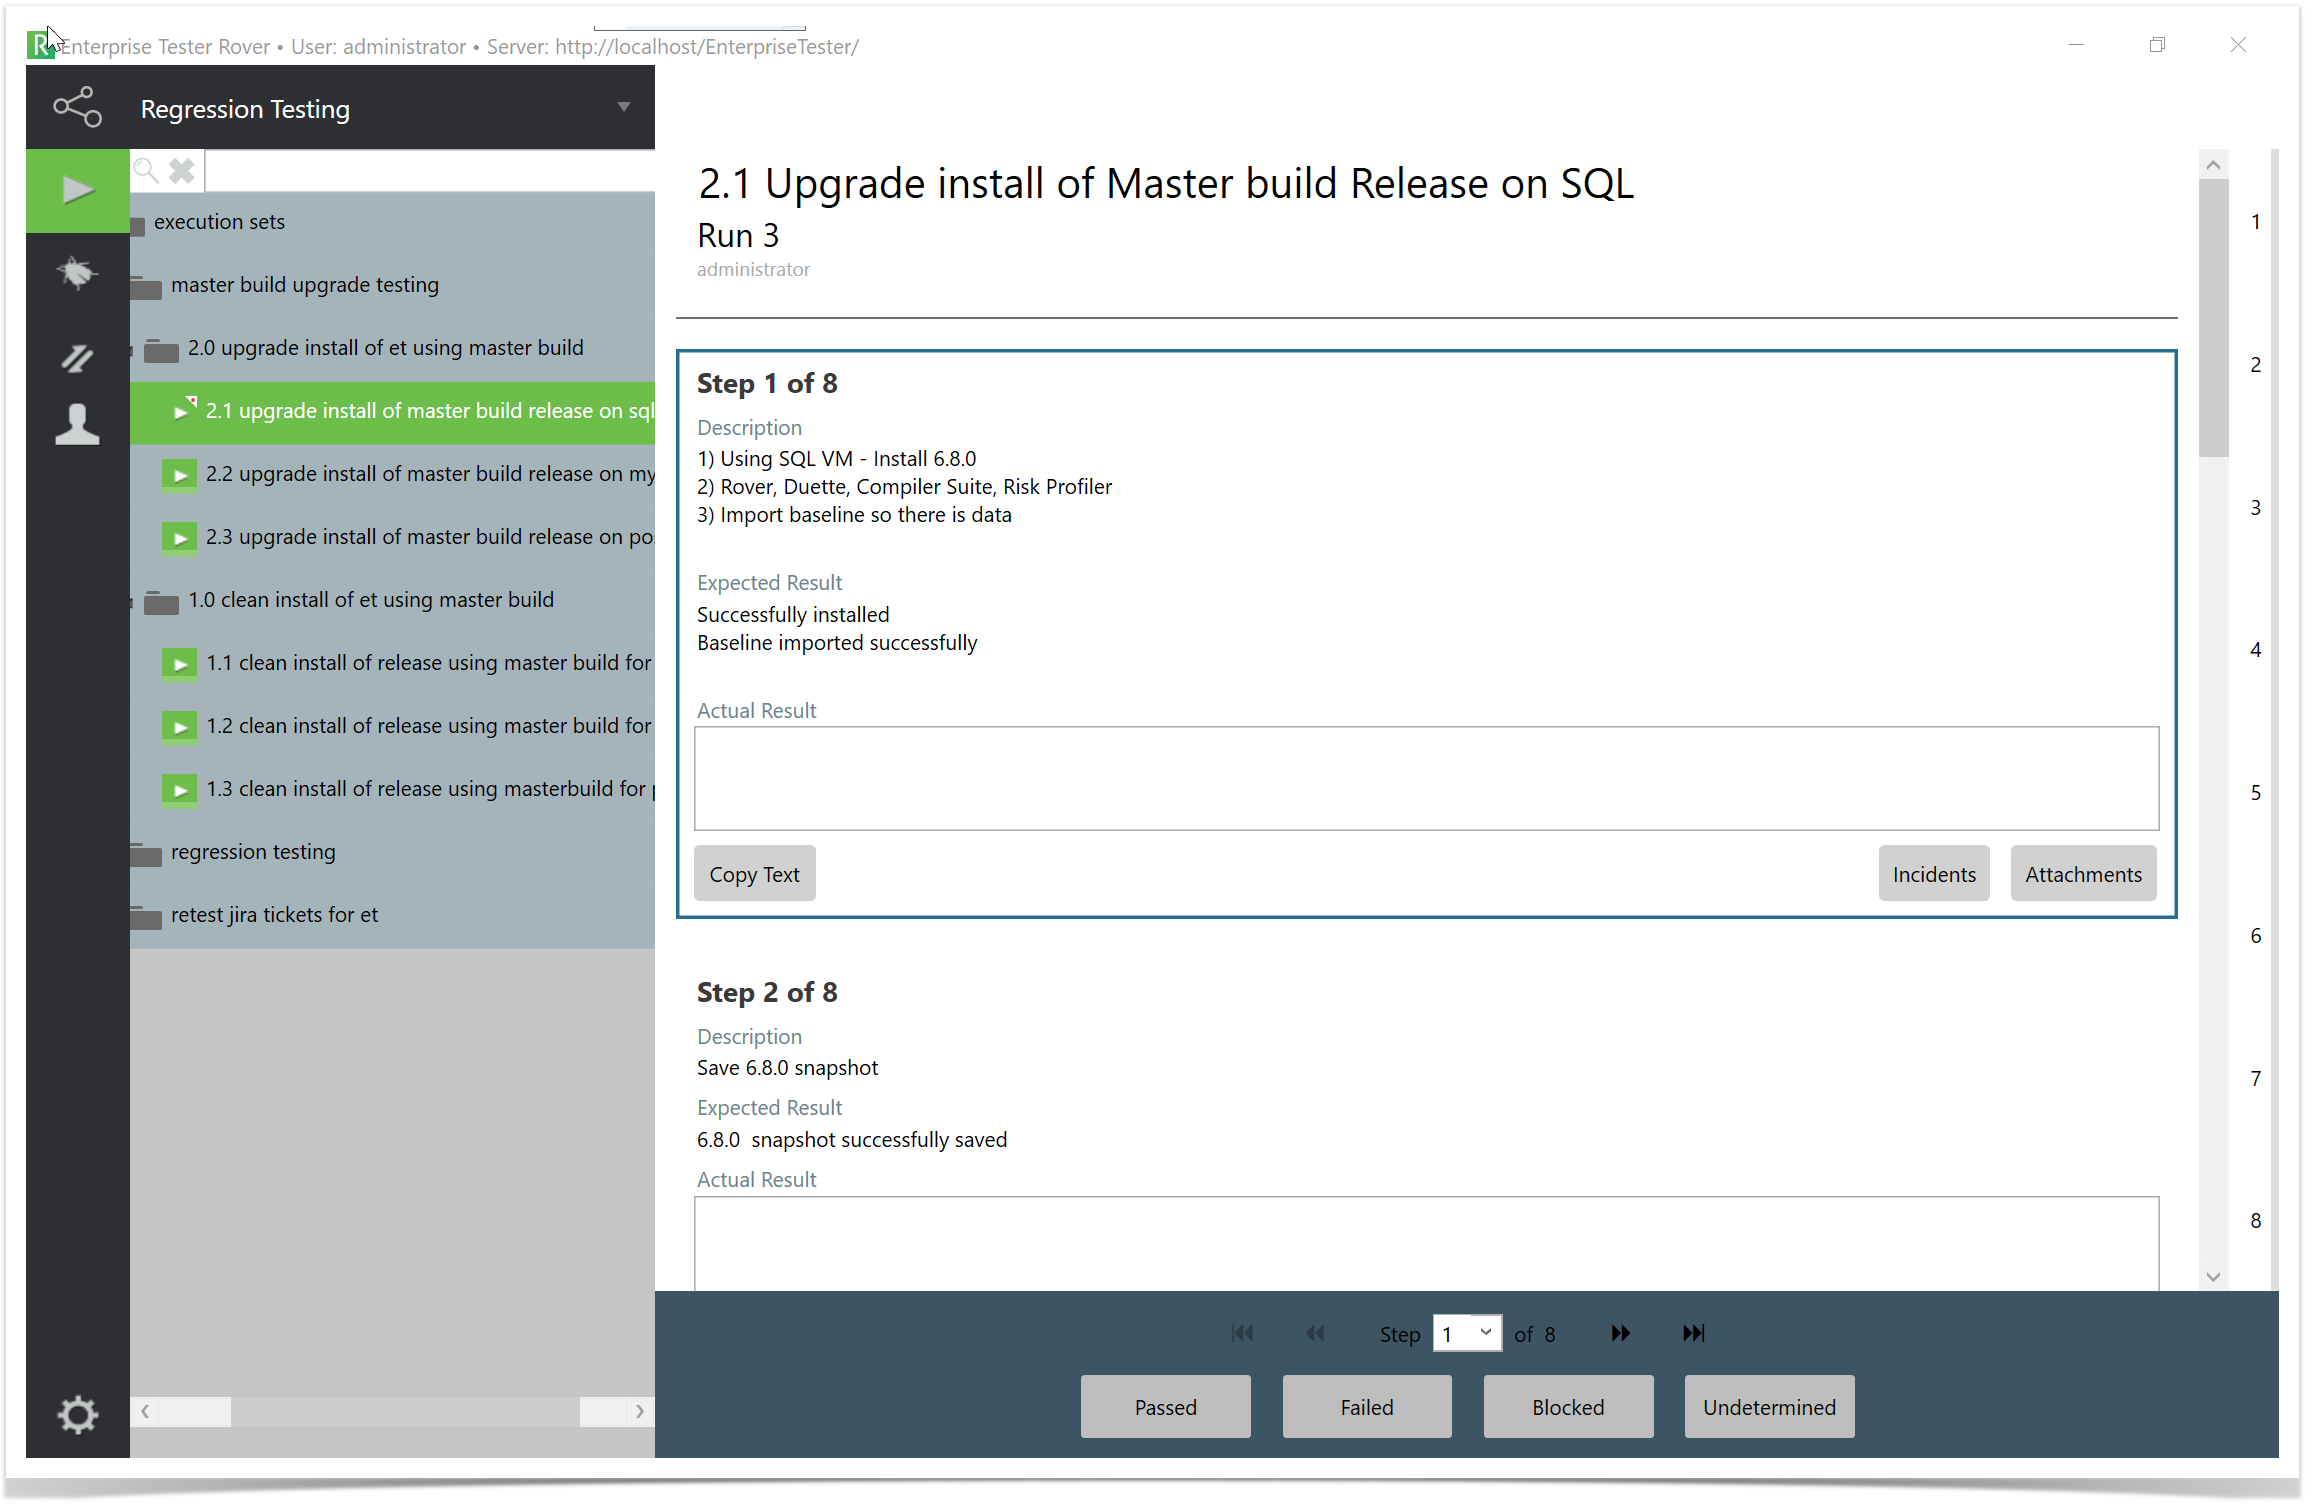
Test Execution
RoverX provides you with the ability to run tests from Enterprise Tester when you are on the go - working in remote locations, or in areas where internet connectivity is unreliable or unavailable. RoverX supports synchronizing both test runs and incidents with Enterprise Tester. This article covers synchronizing and running test runs.
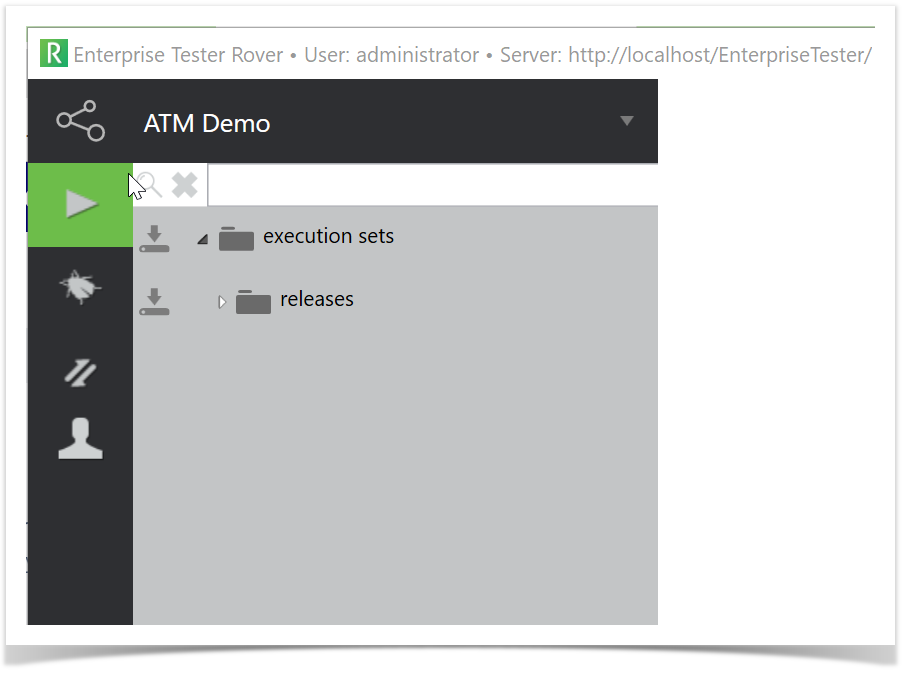
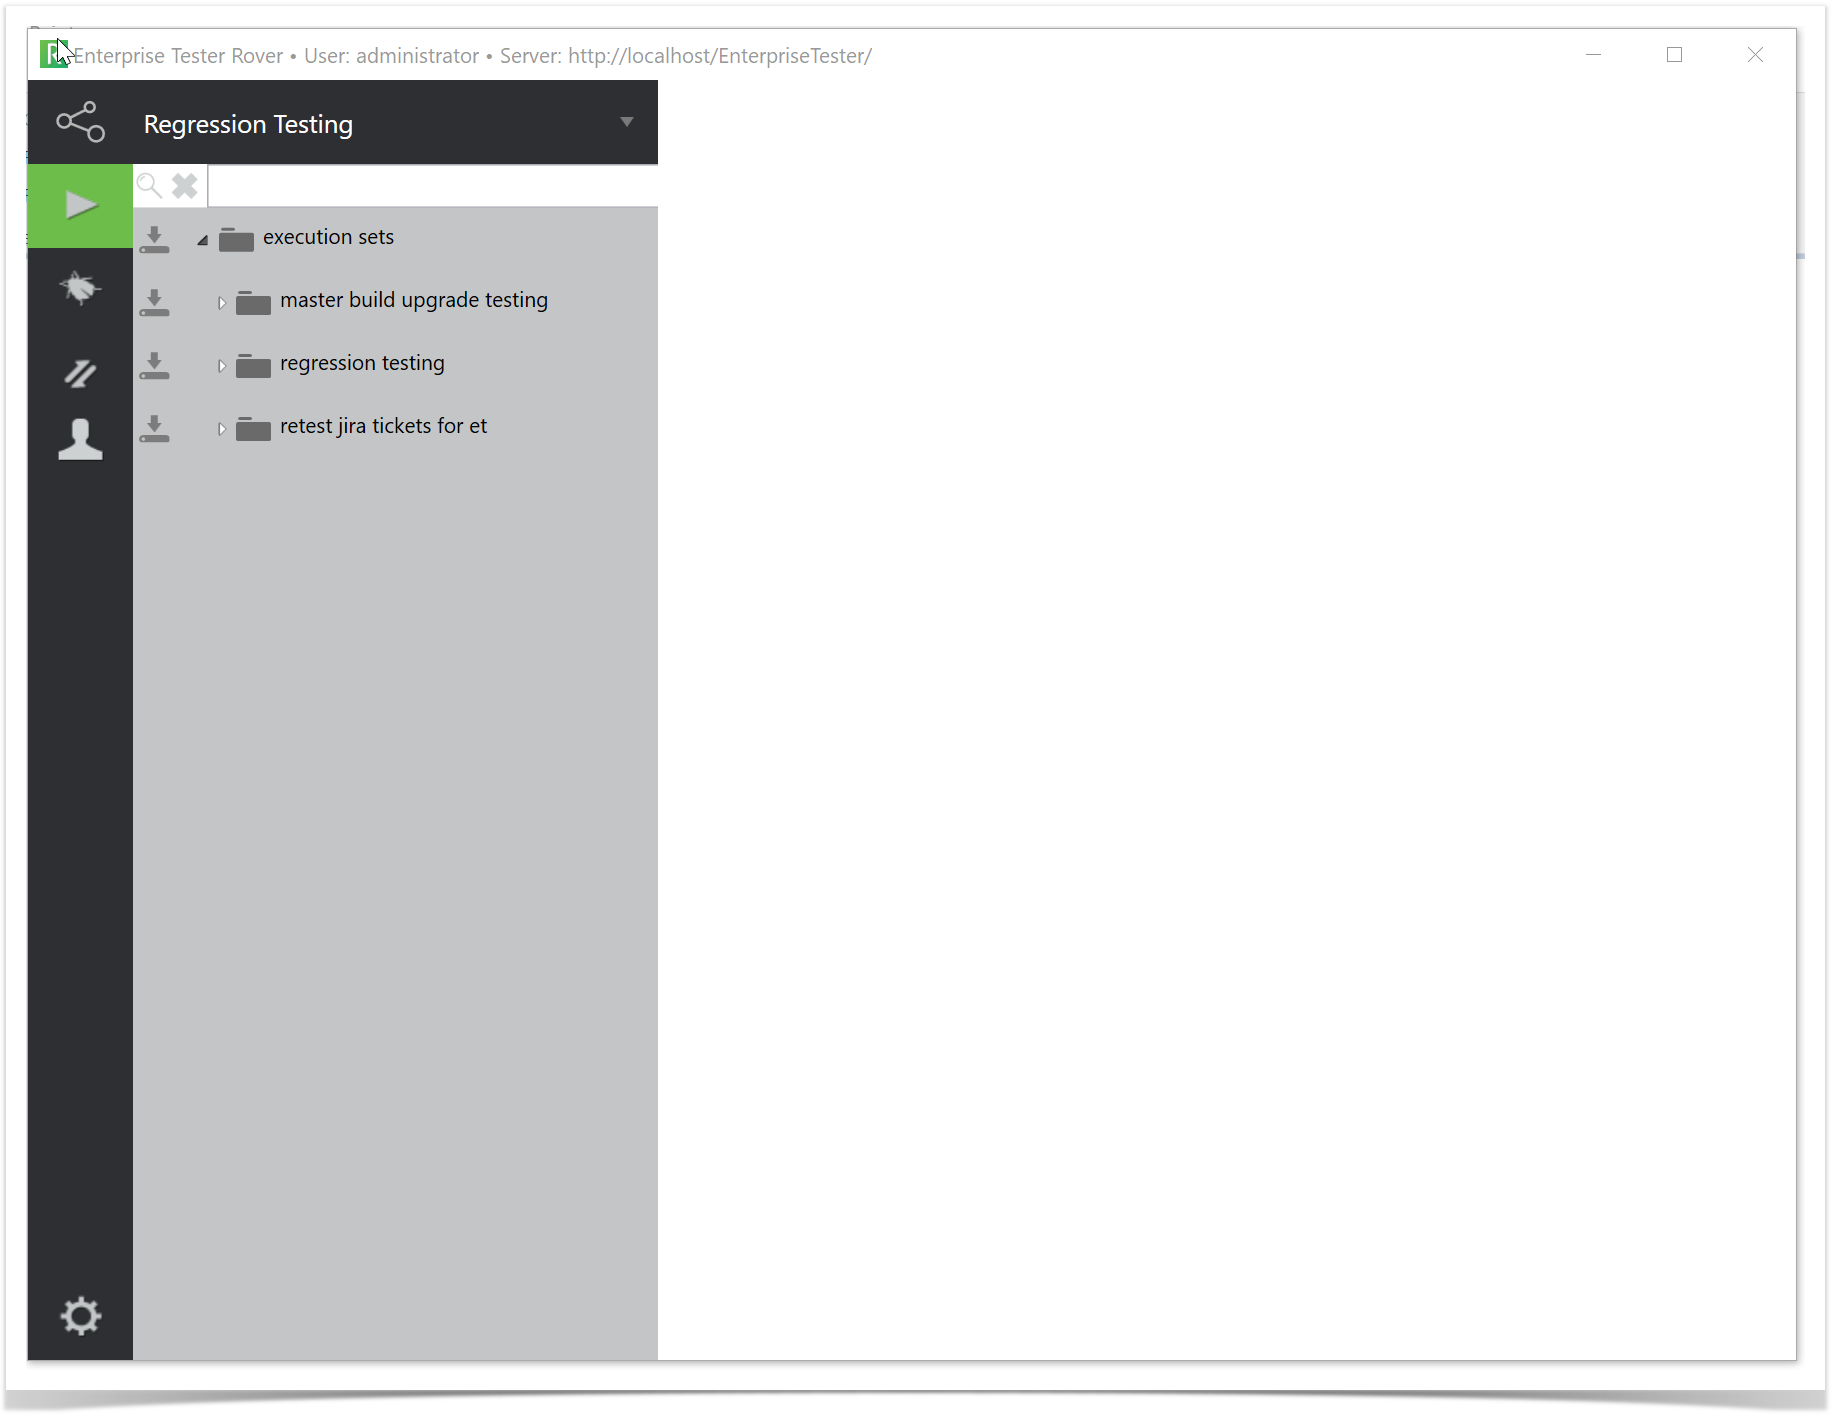
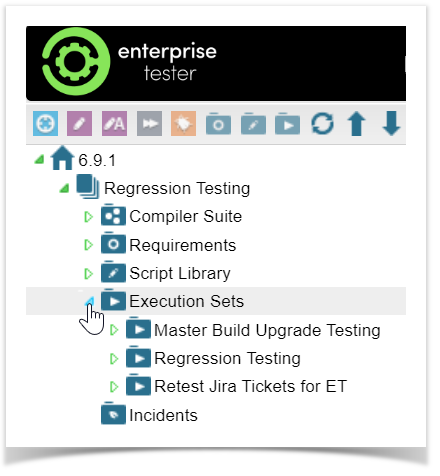
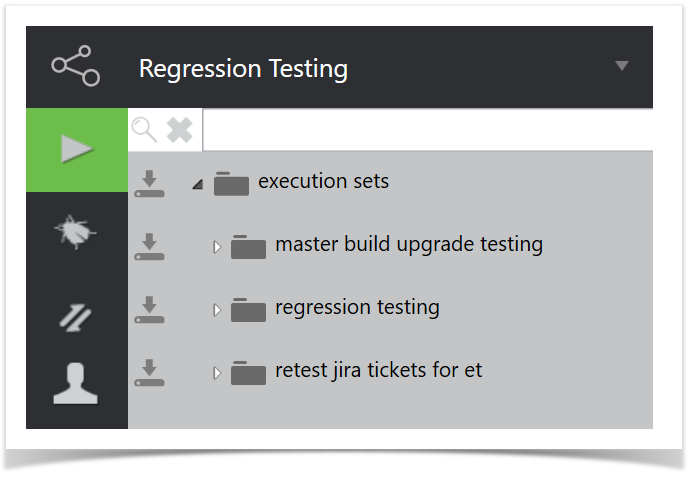
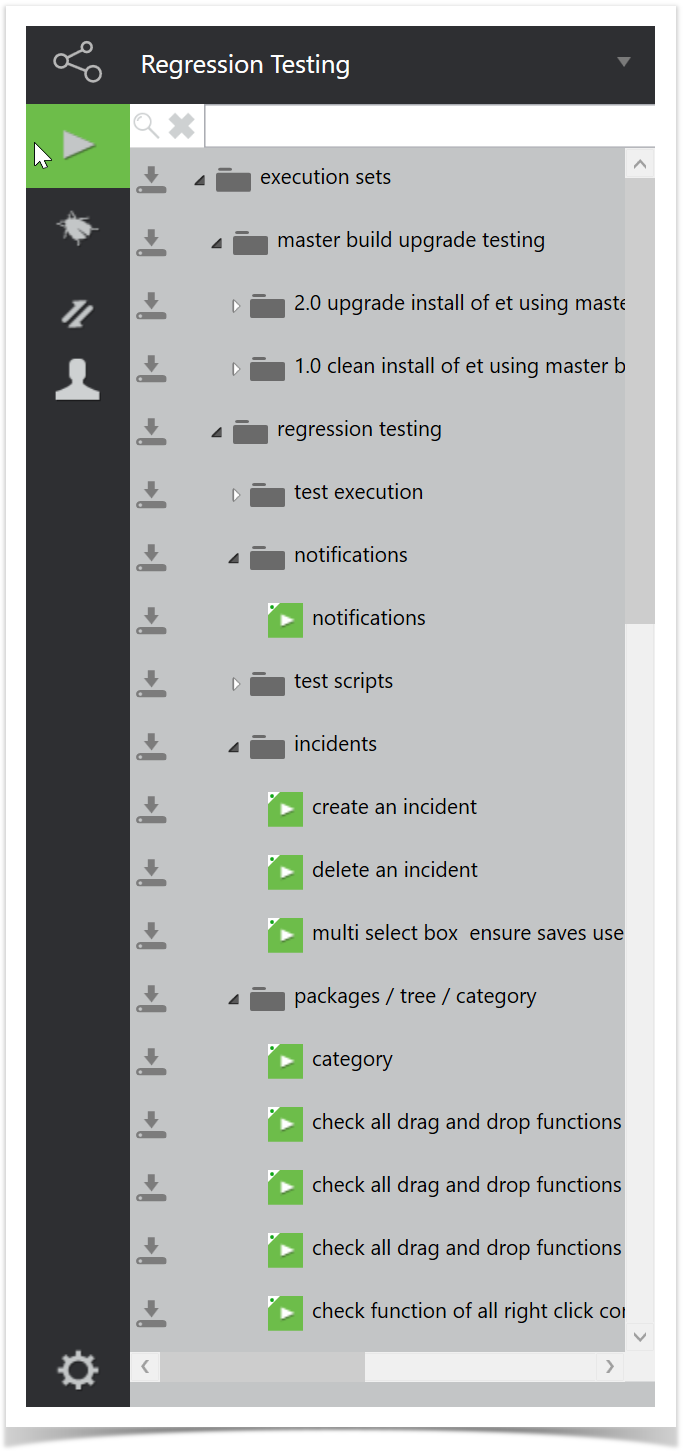
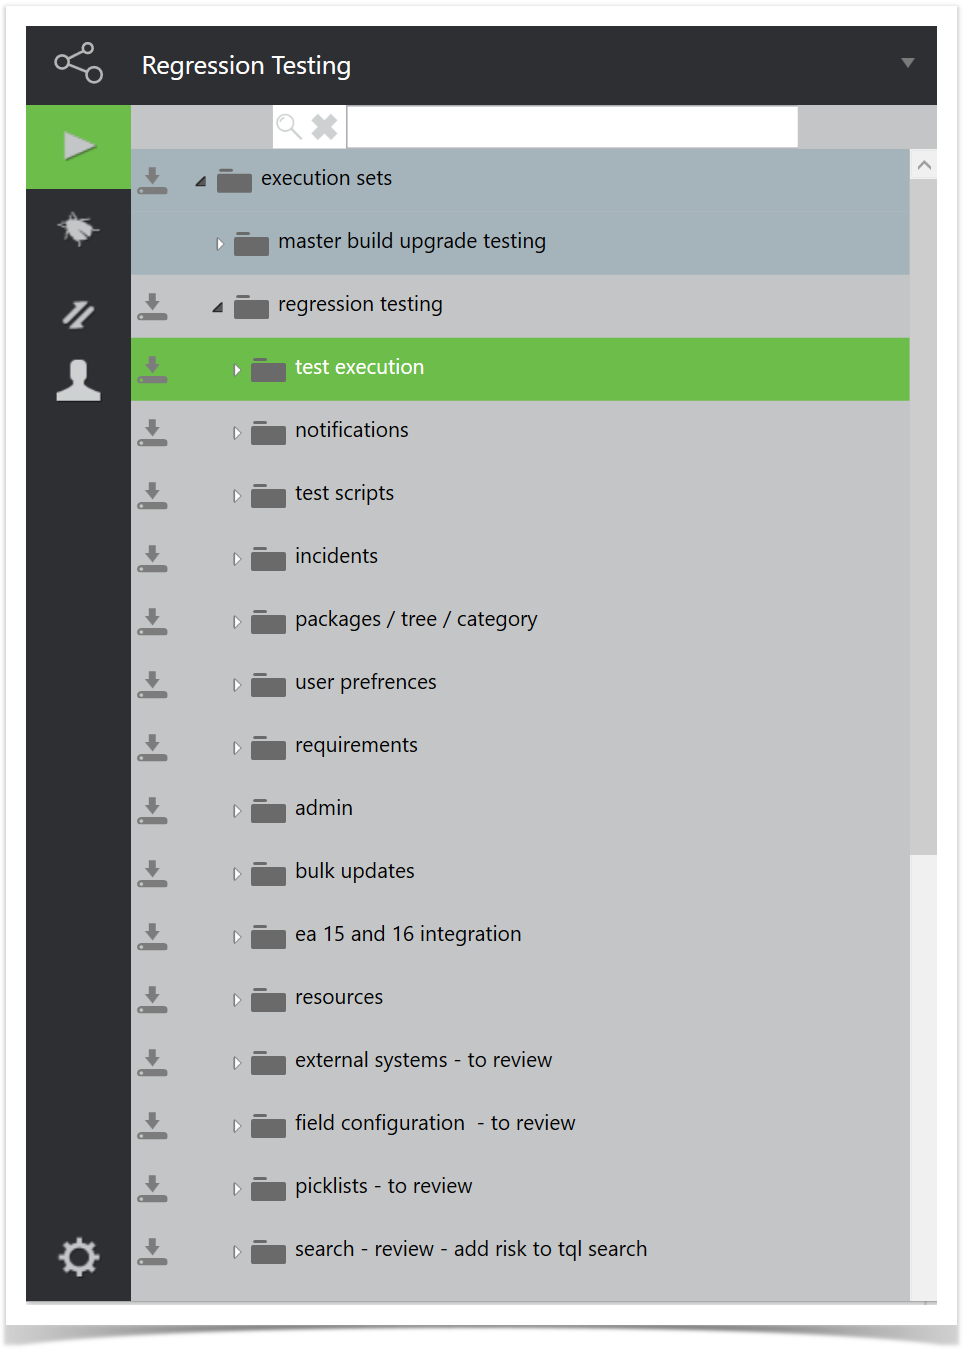
The Getting Started article provides an introduction to help users become familiarized with RoverX. Downloading Execution Sets to RoverXAn internet connection is required for this task. Make sure you are in Online mode in RoverX.
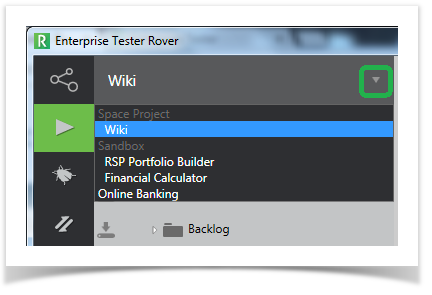
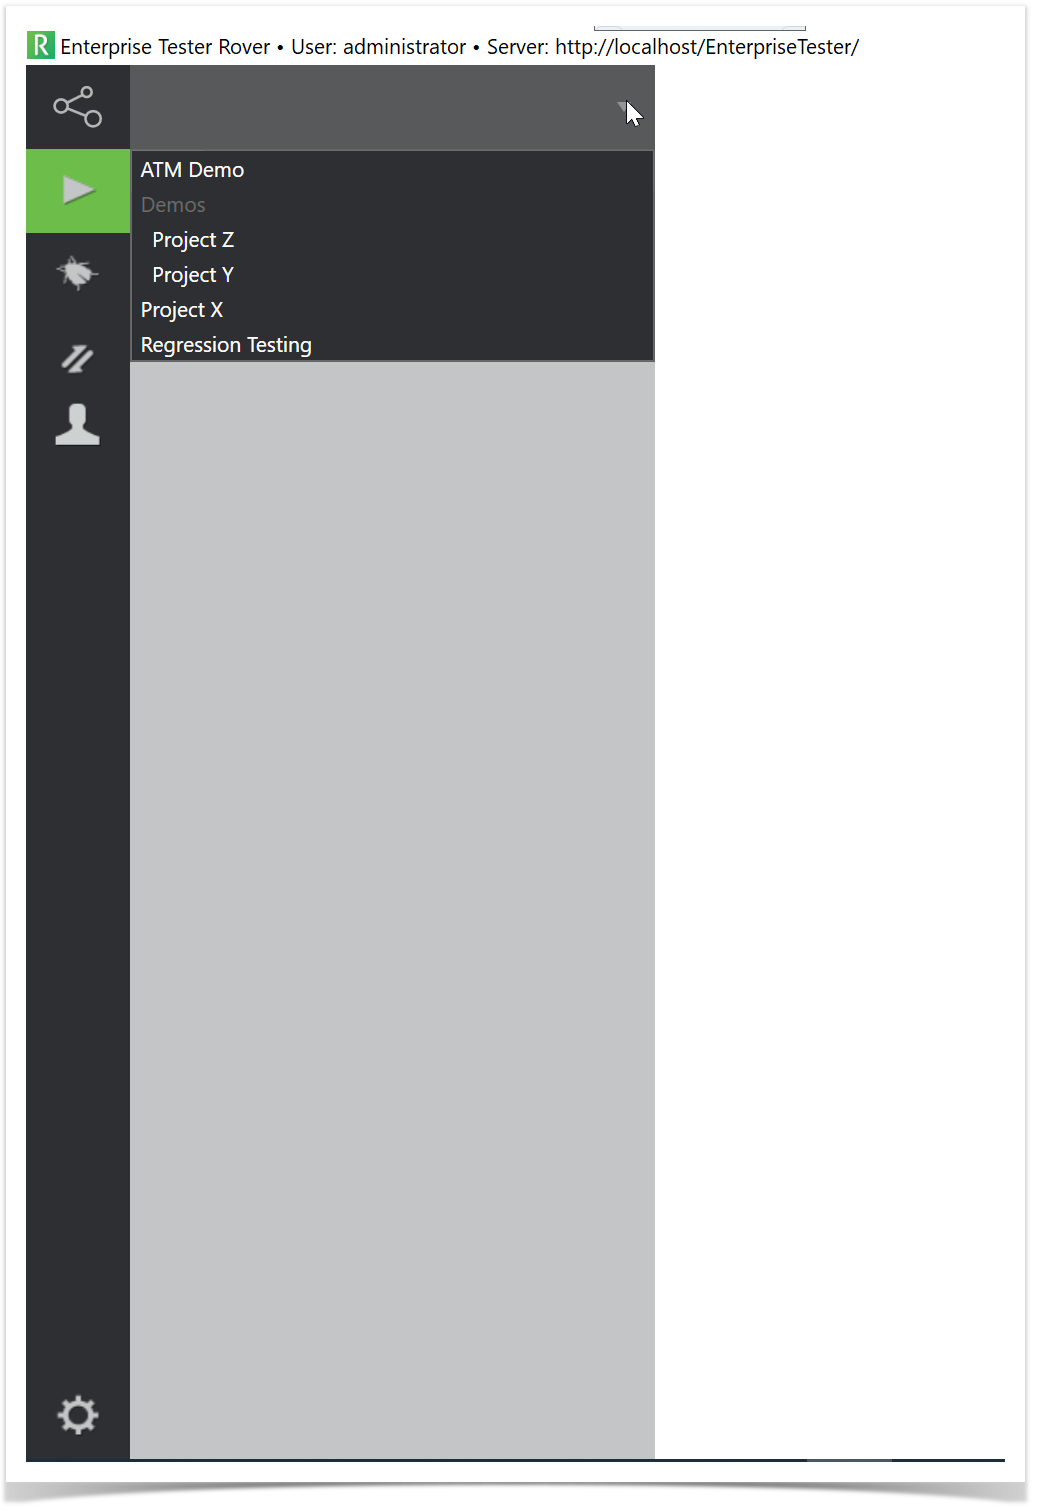
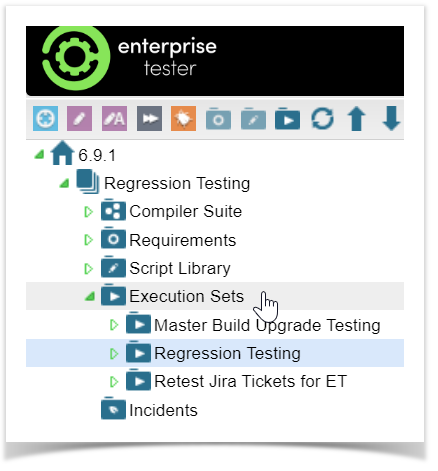
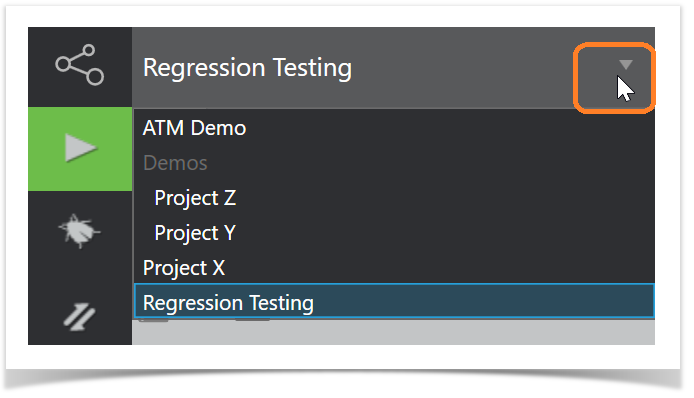
This process allows you to work with Execution Sets offline after downloading them from Enterprise Tester. Selecting a Project
|


| Panel | ||||||
|---|---|---|---|---|---|---|
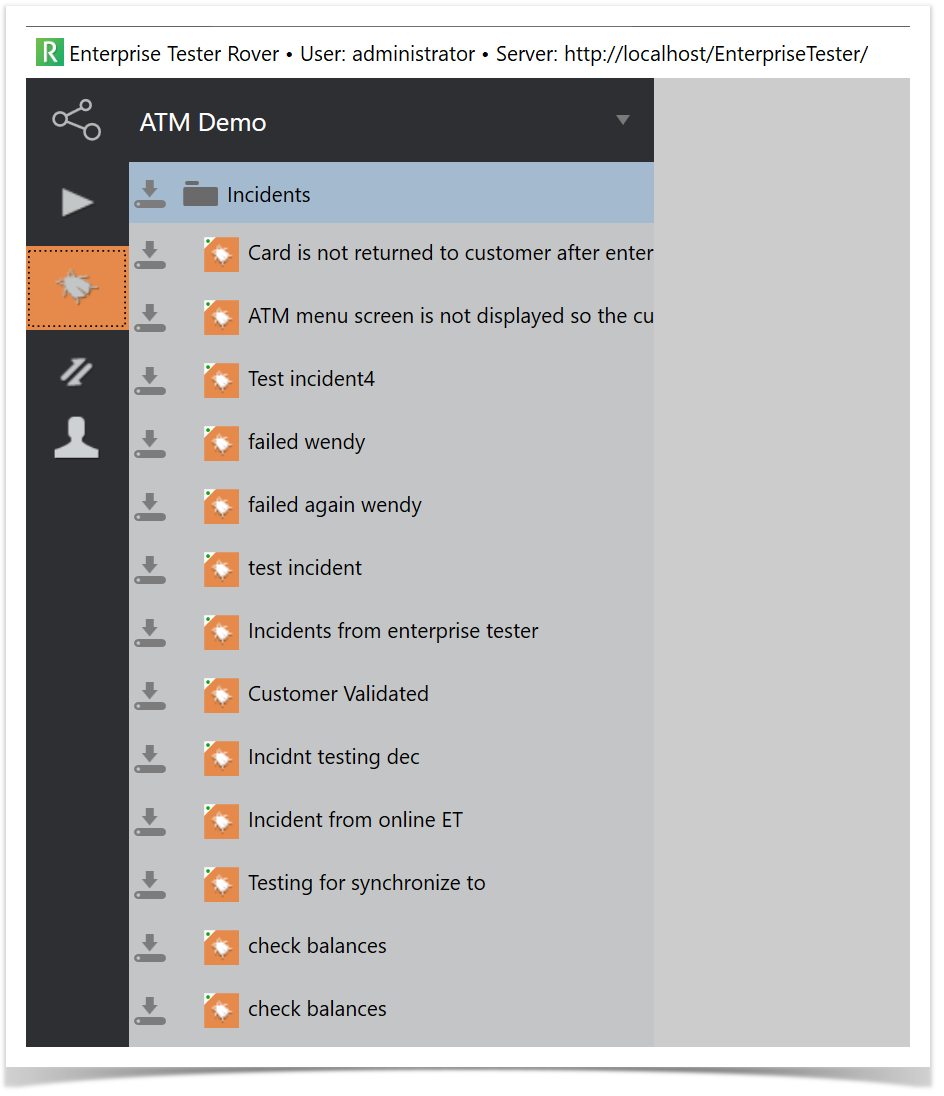
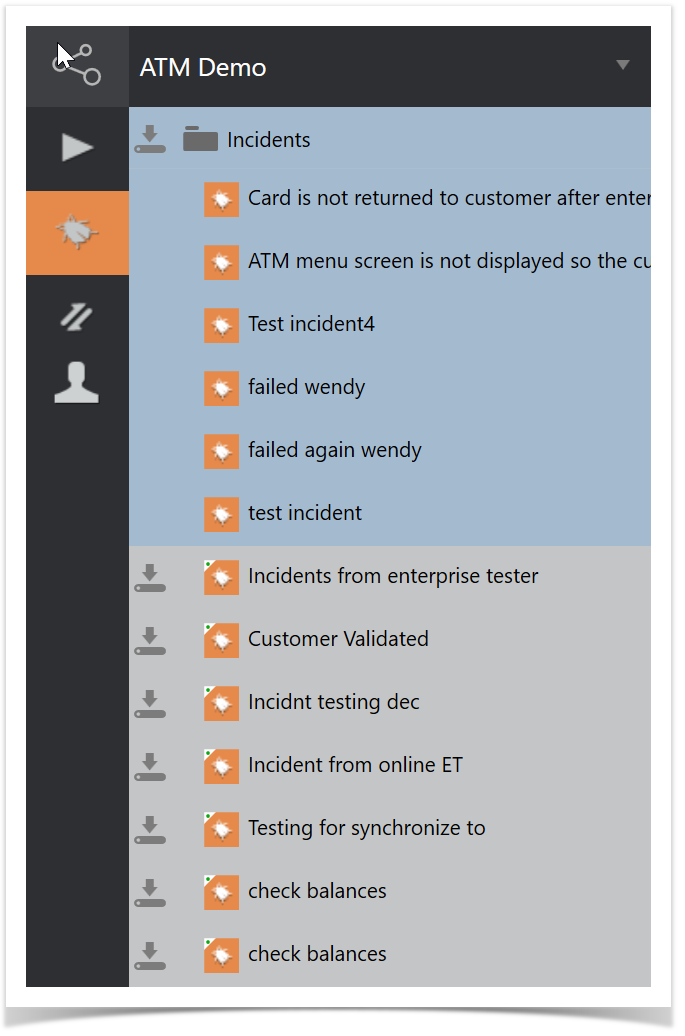
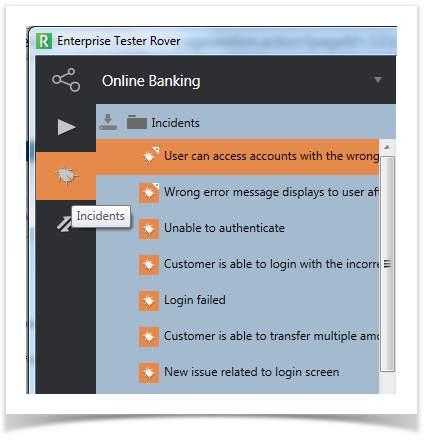
Incidents
RoverX is a tool that enhances the testing capabilities of Enterprise Tester, particularly useful for remote or offline environments. Here’s a summary of its key features and requirements: Key Features:
Internet Connectivity Requirements:
Limitations:RoverX does not currently support the following Enterprise Tester features:
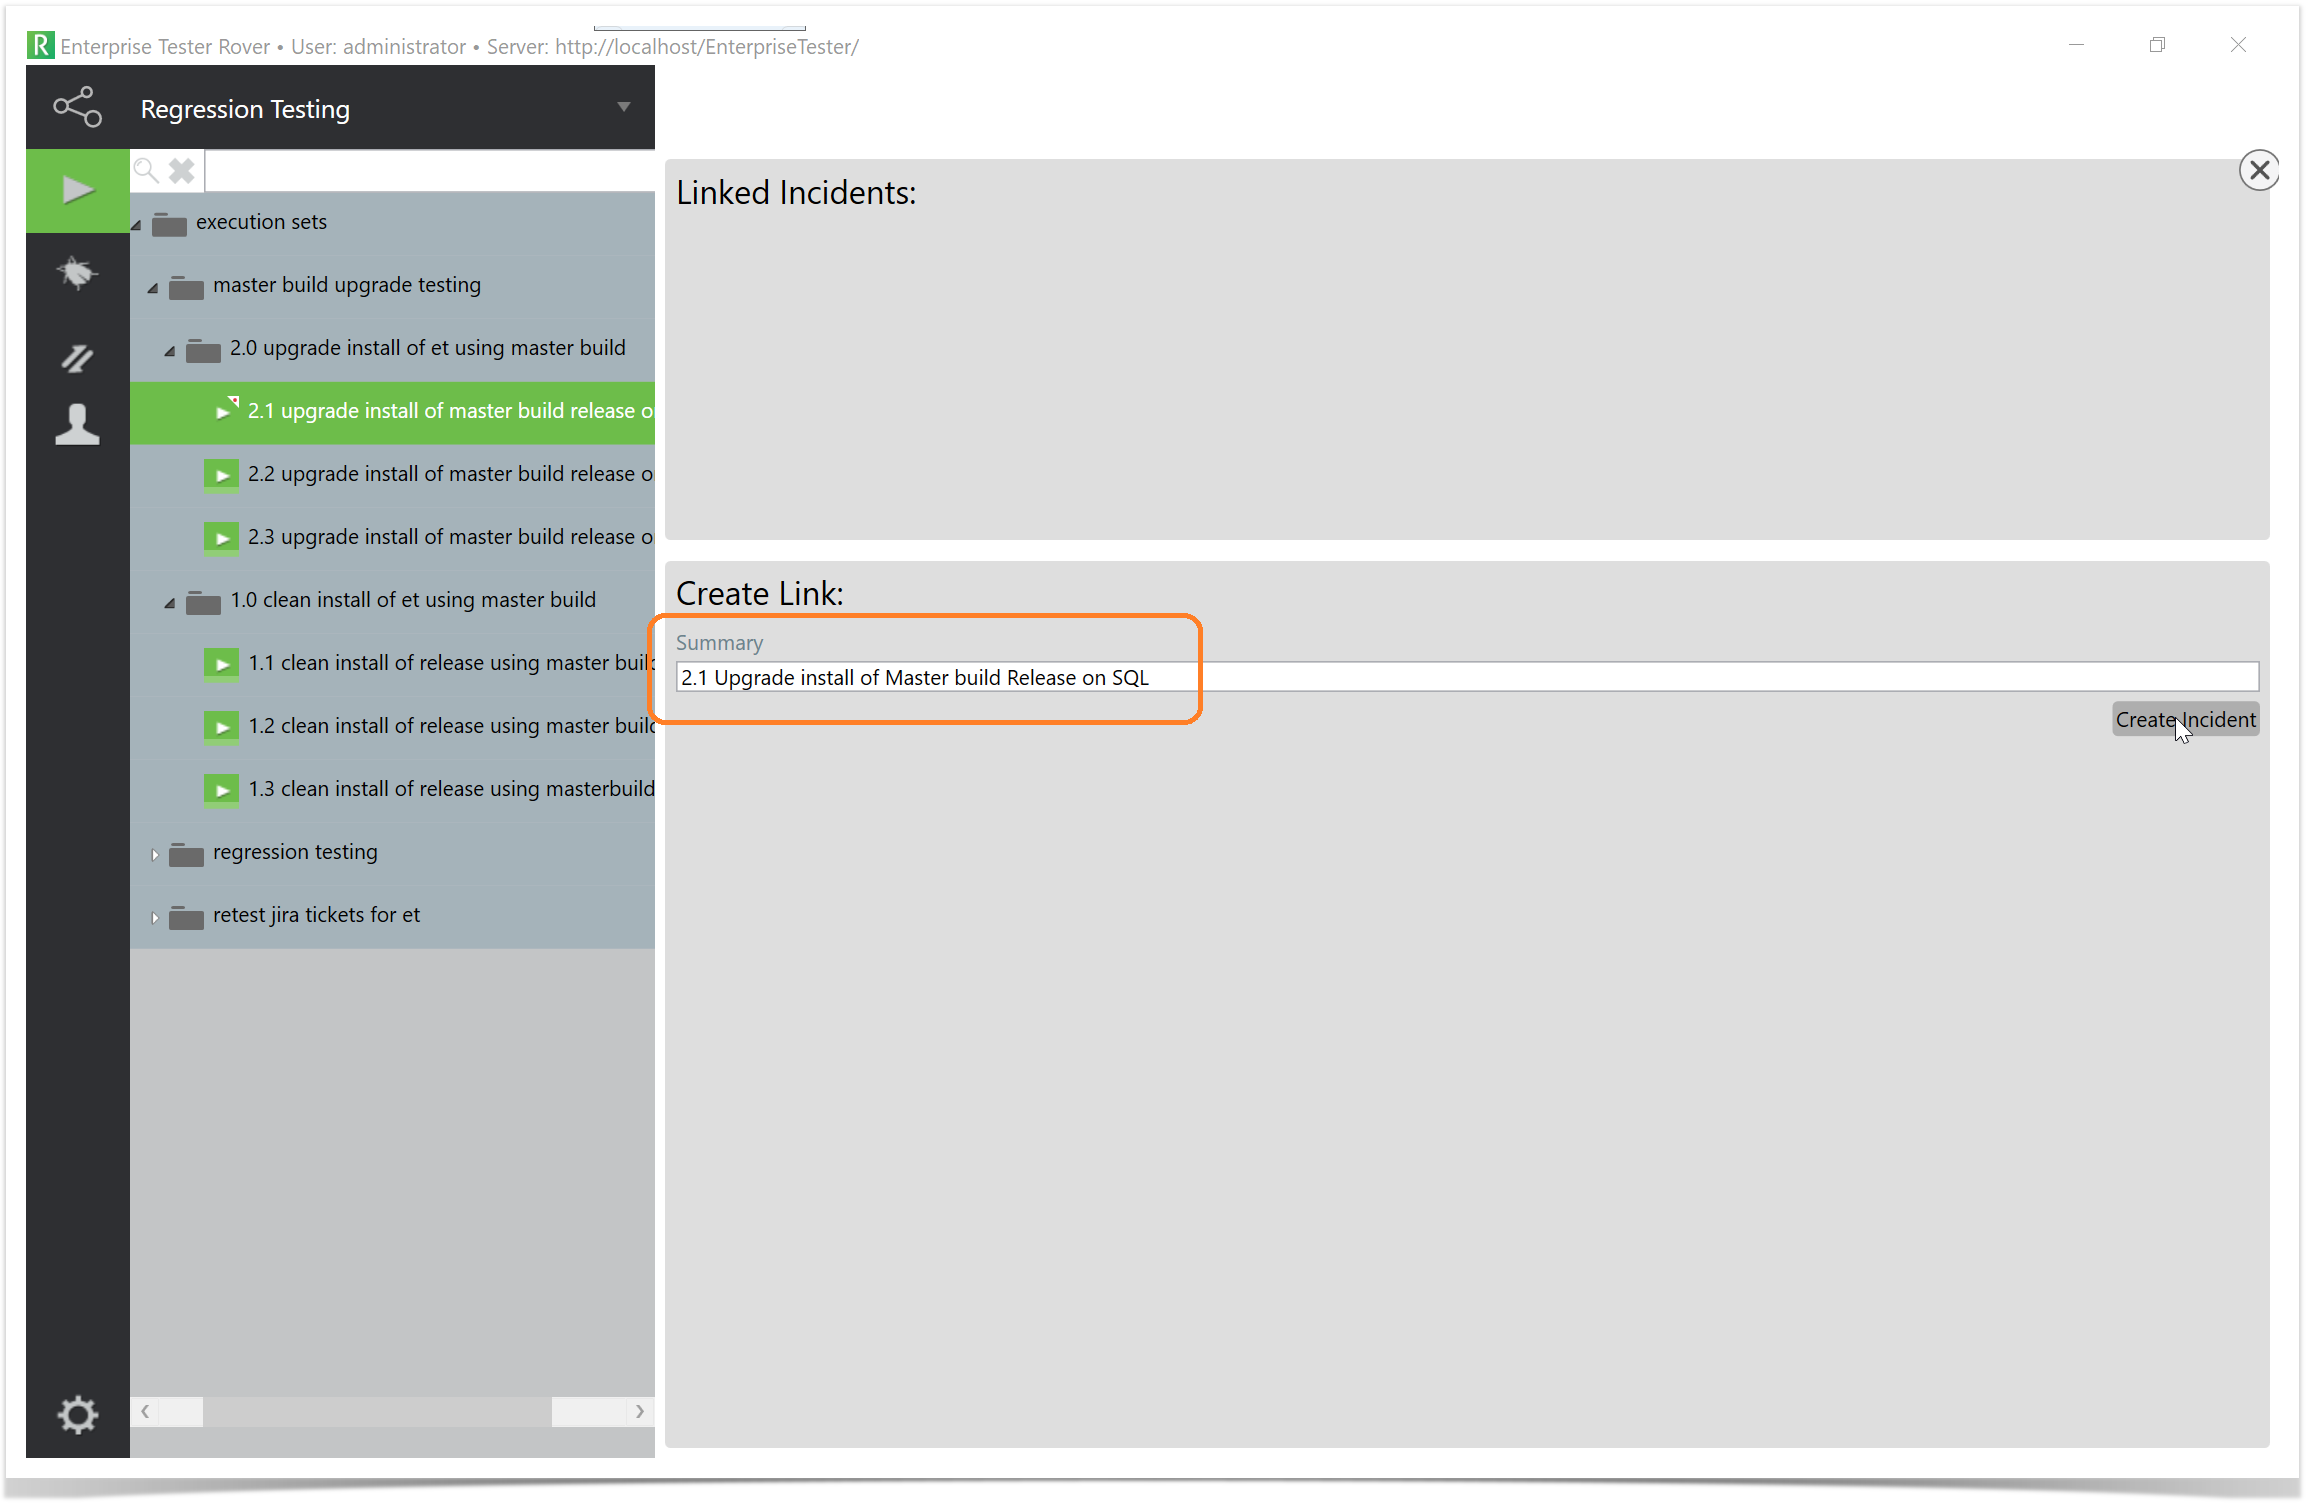
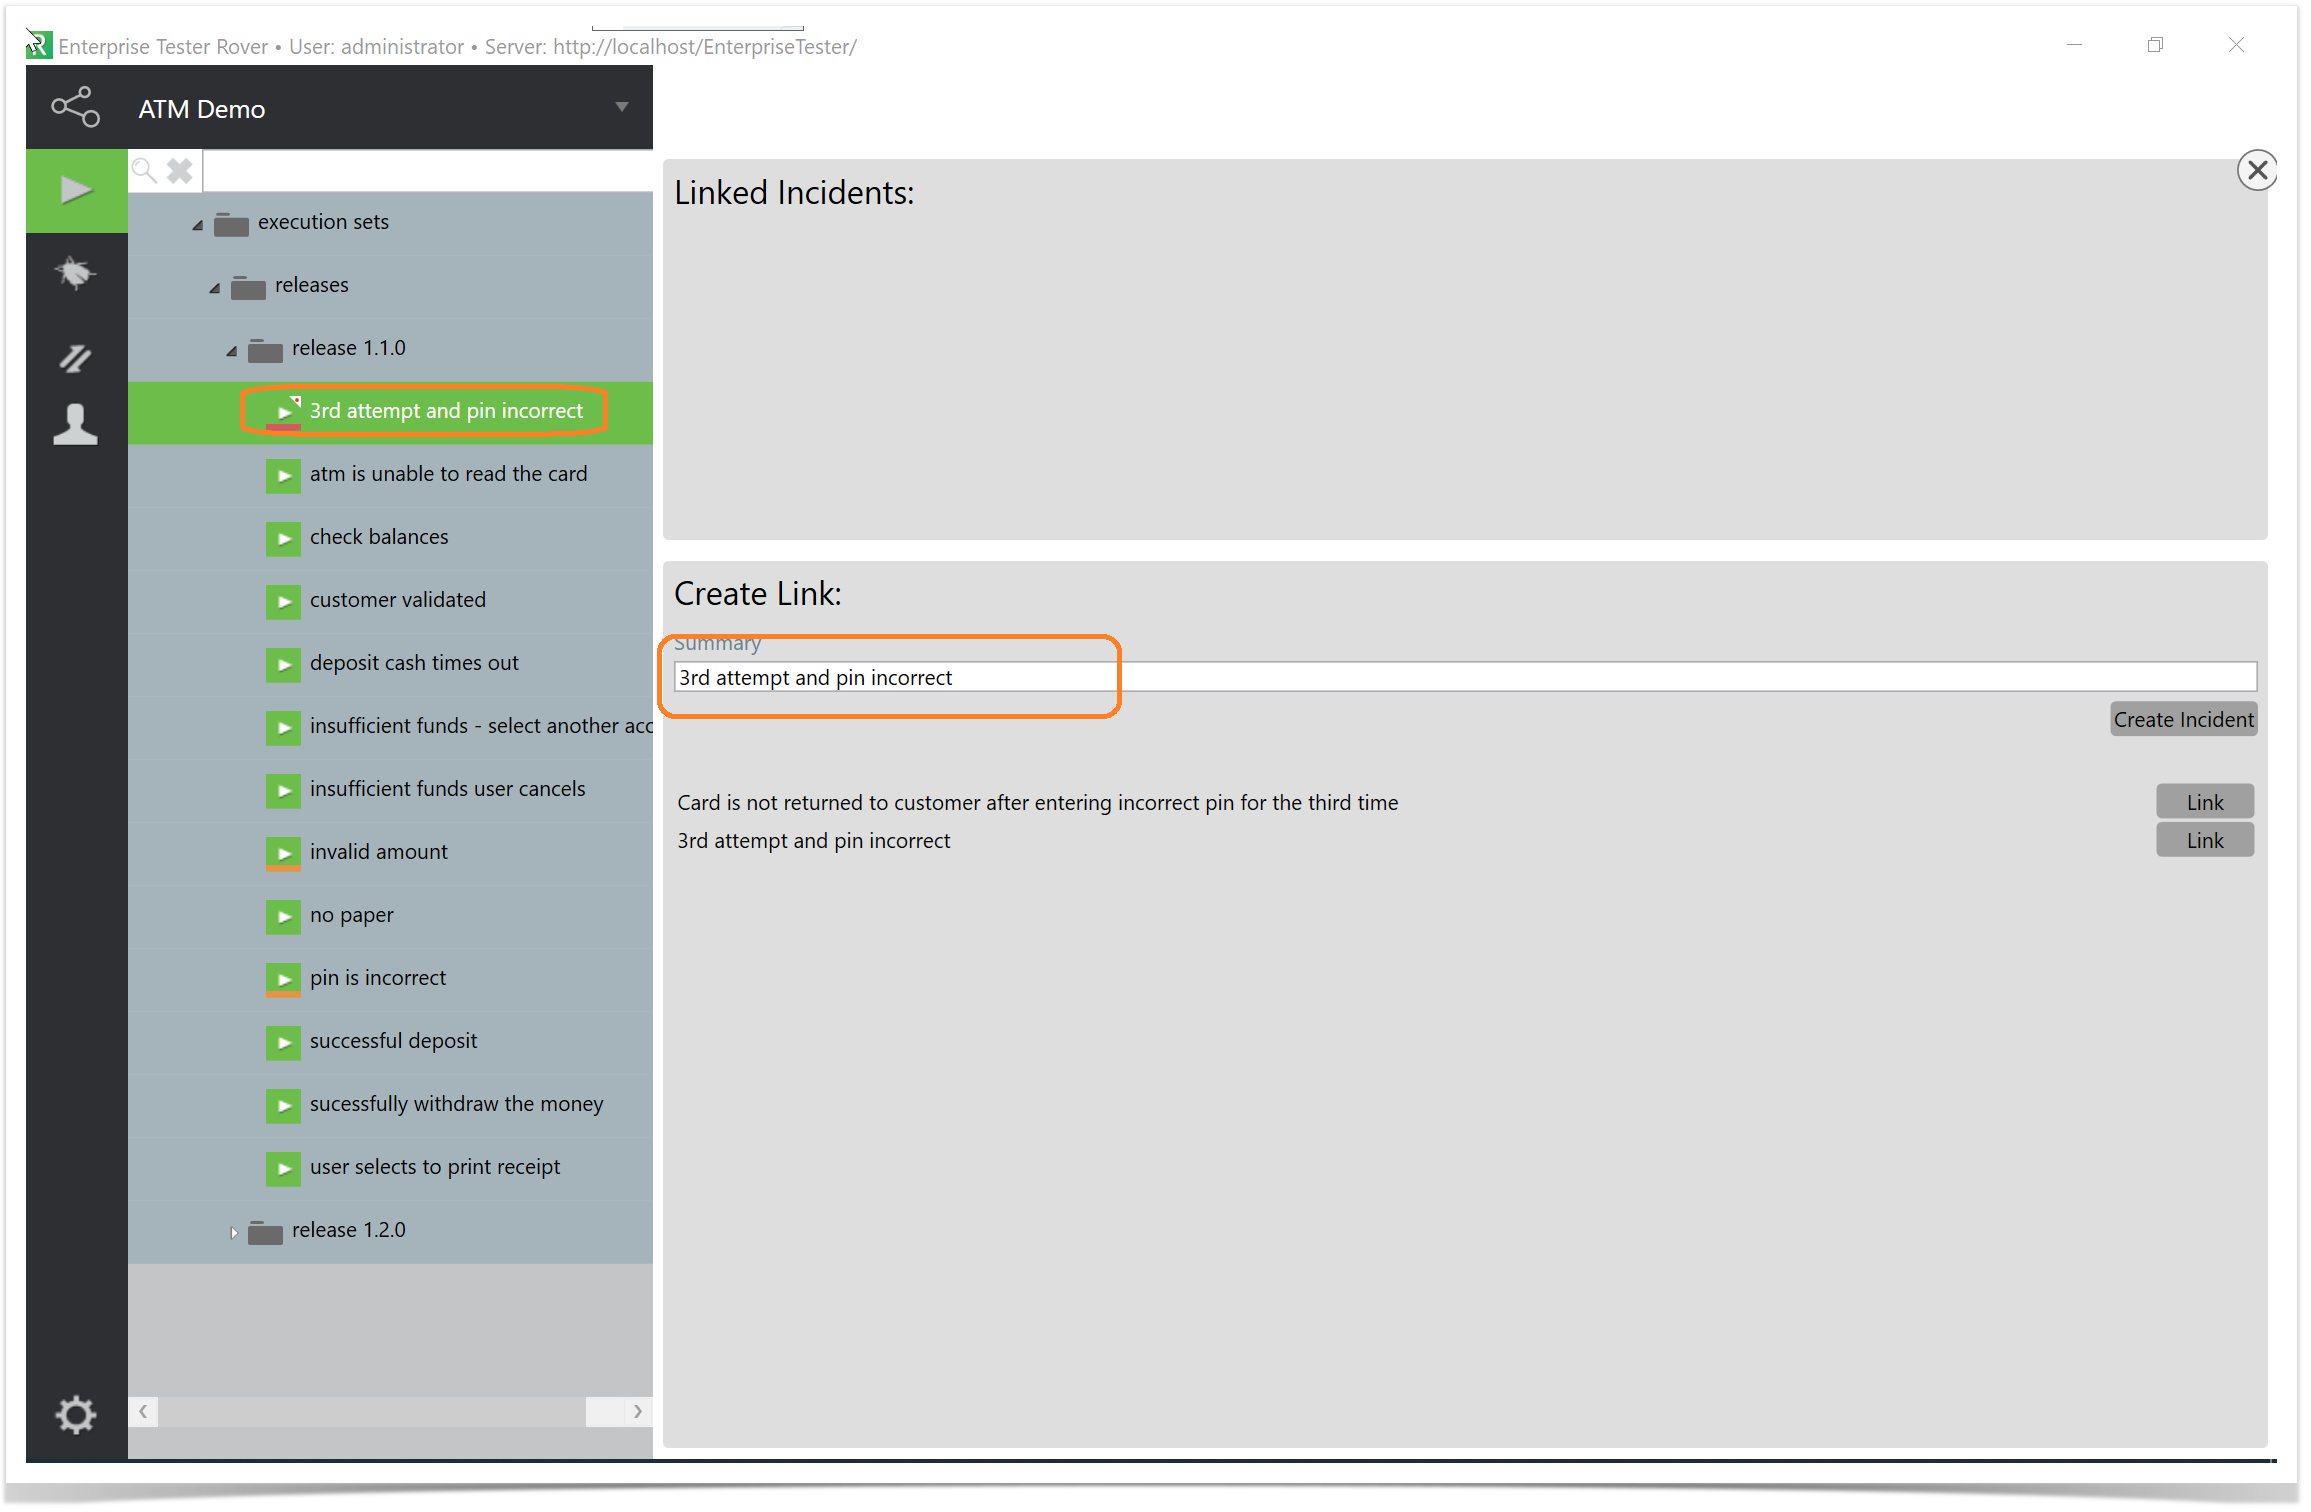
These limitations mean that certain features available in Enterprise Tester will not be accessible while using RoverX. The Getting Started article provides an introduction to help users become familiarized with RoverX. Managing IncidentsIn RoverX, you have the option to manage incidents by either creating new ones or linking them to existing downloaded incidents.
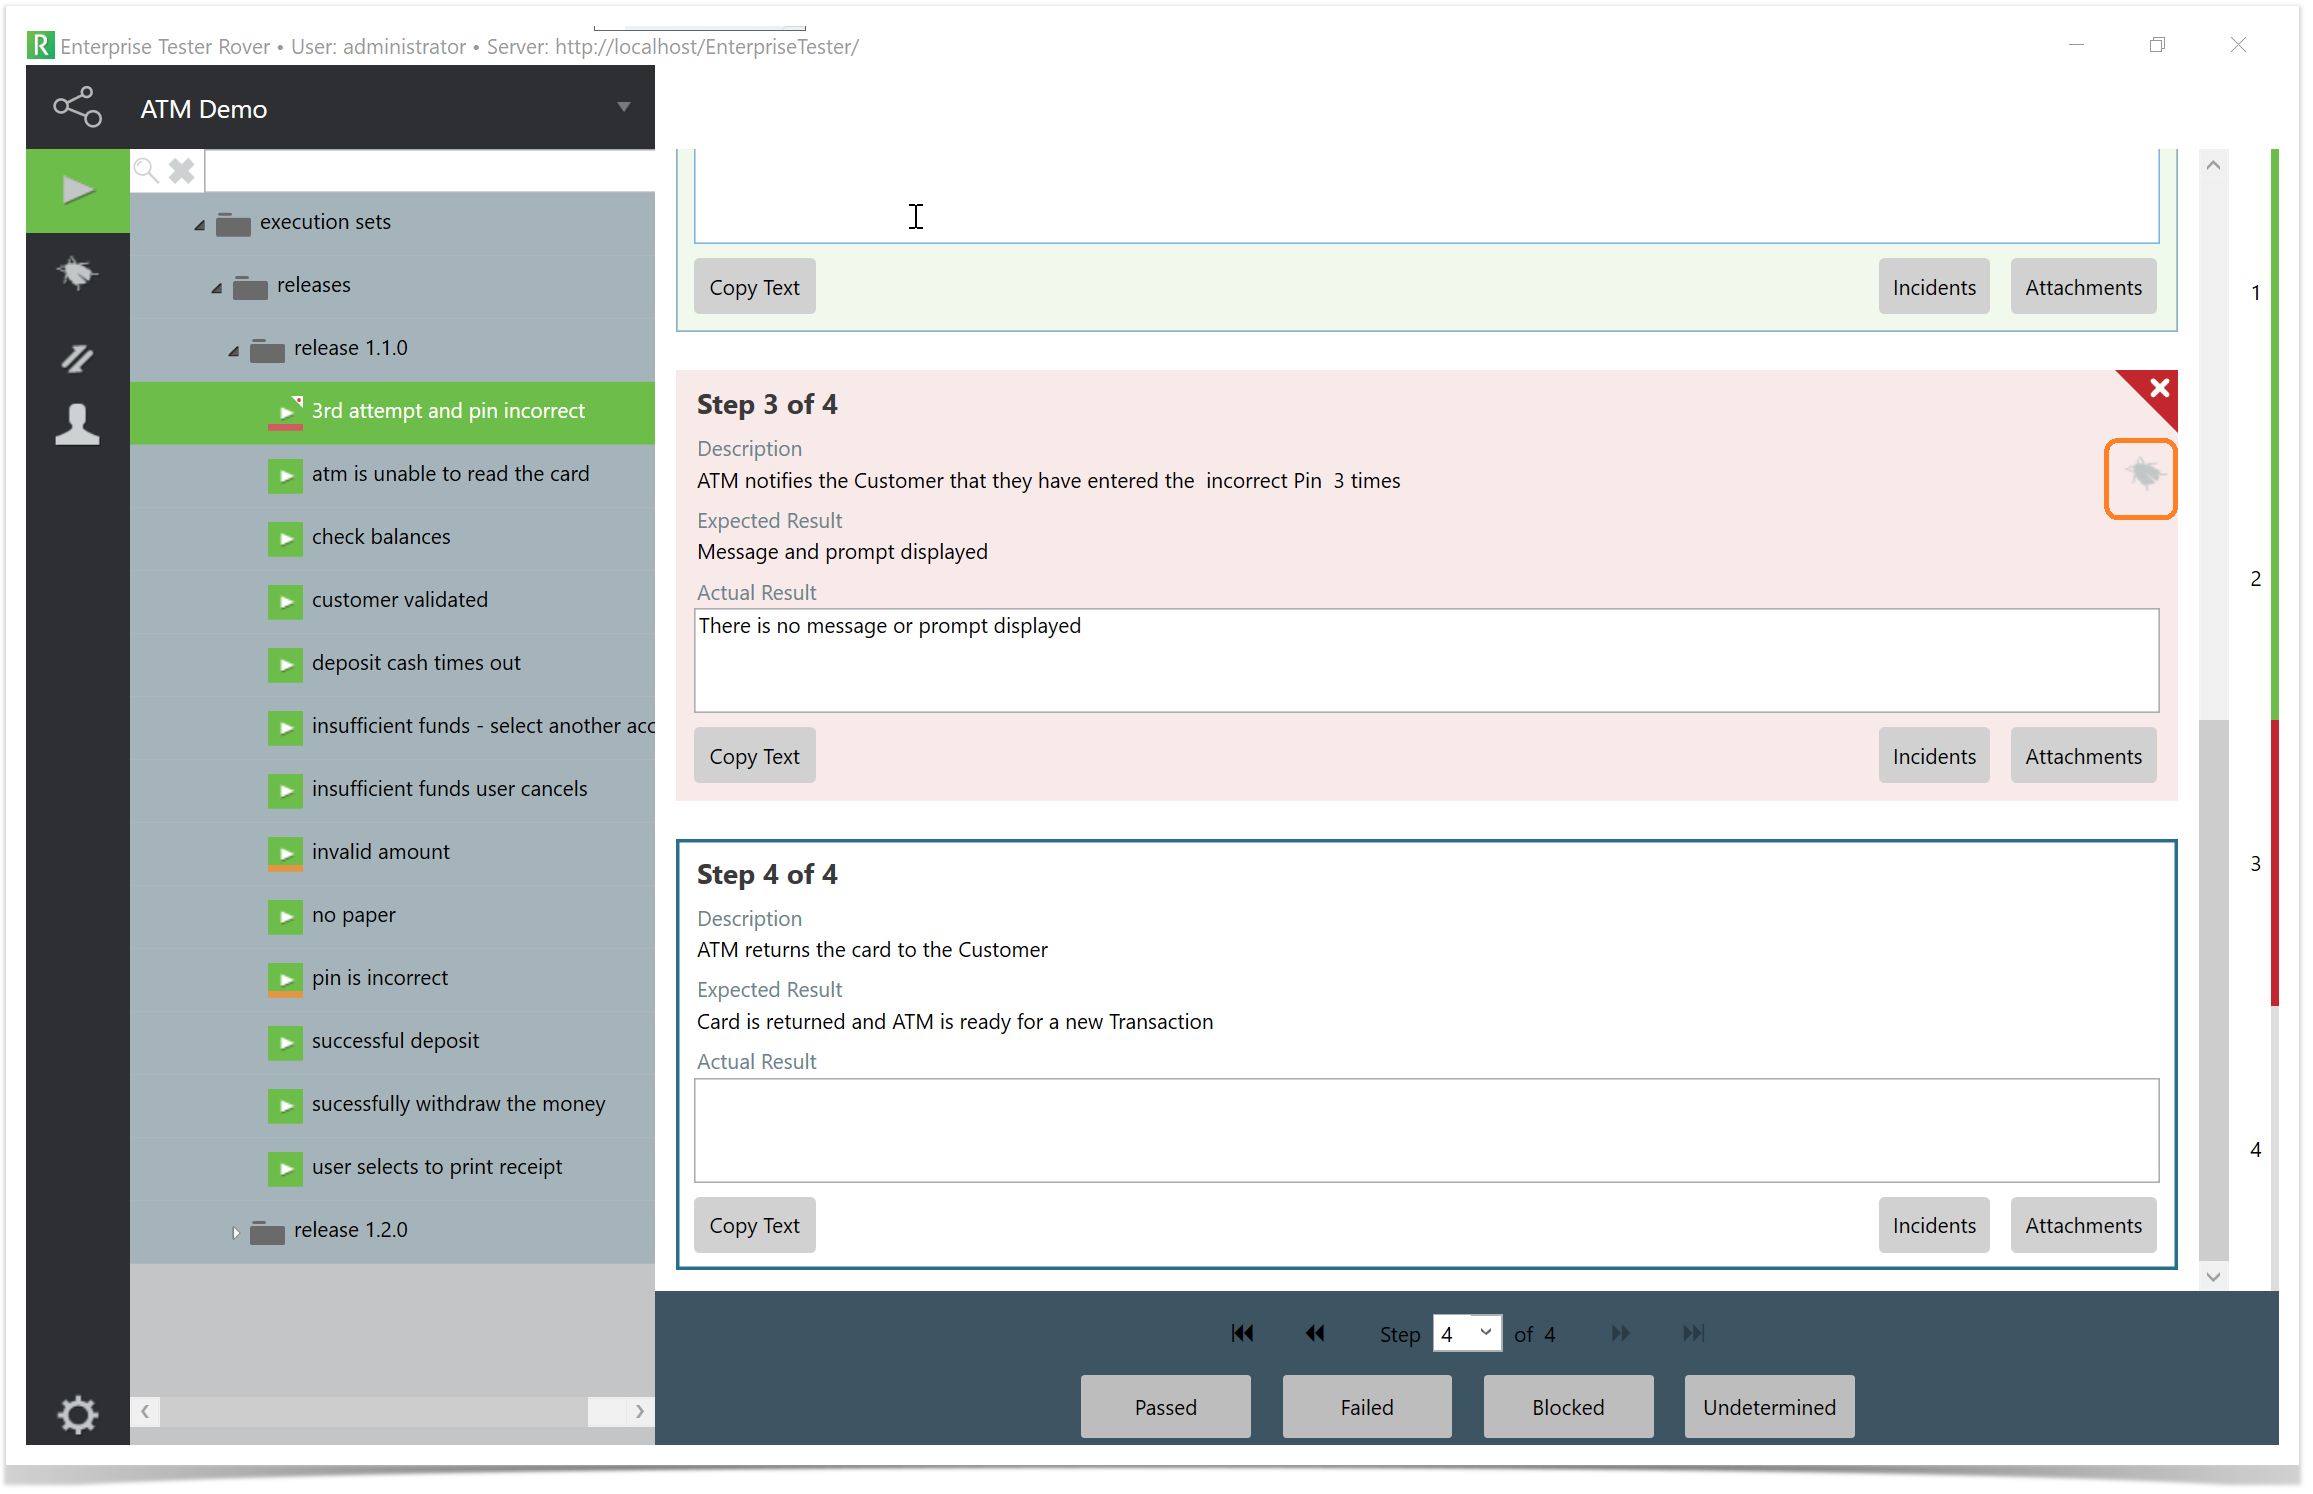
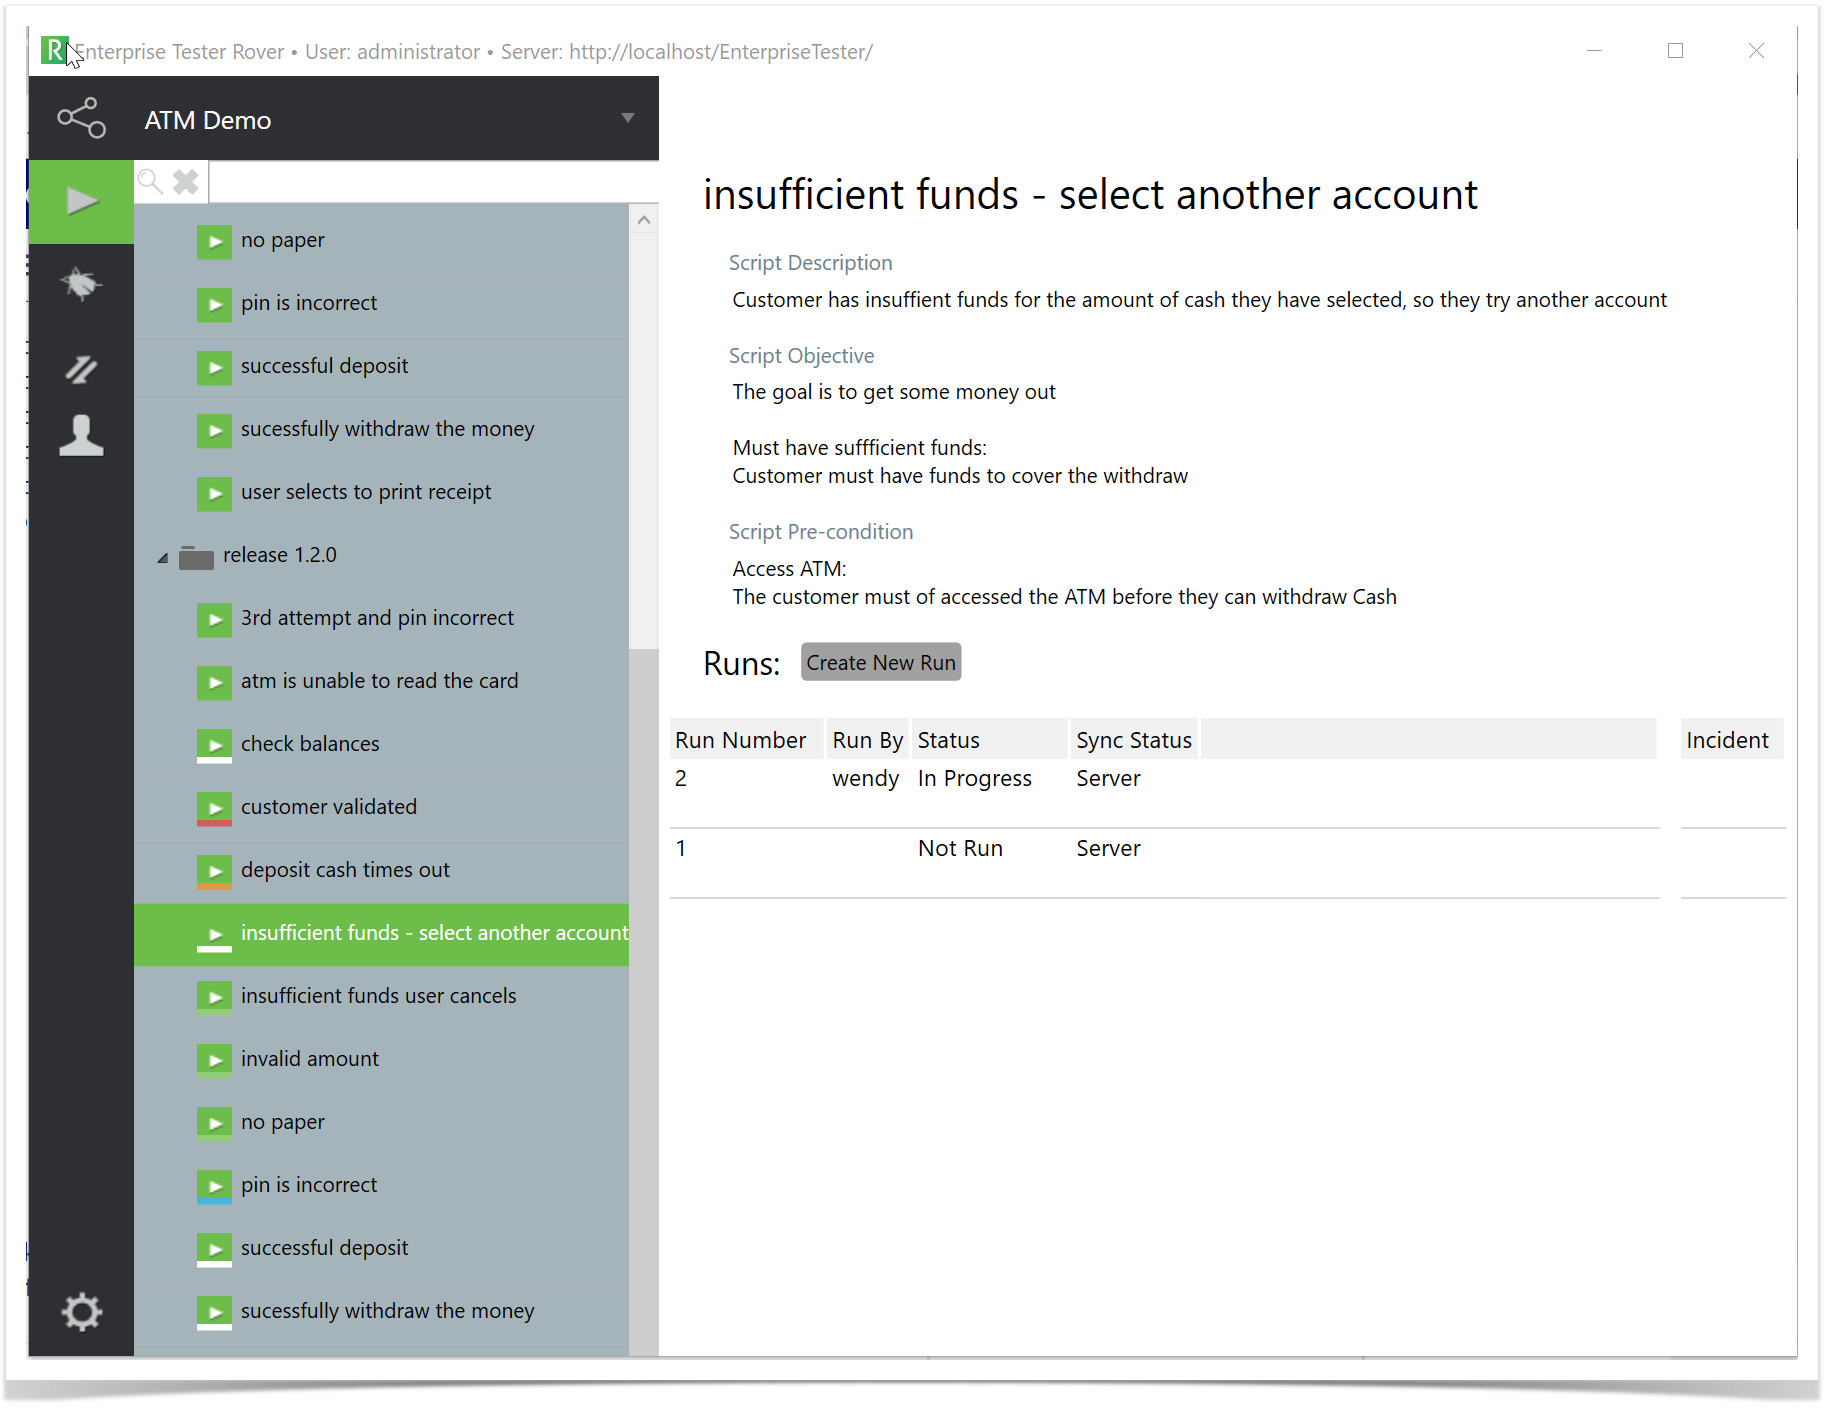
Create IncidentTo log an incident on a failed test step, follow these steps:
External Jira LinksWhen creating an incident, you have the option to link it to an external Jira system, provided that integration has been configured in Enterprise Tester for your project.
This allows you to ensure that incidents are properly linked and synchronized with your external Jira system if configured.
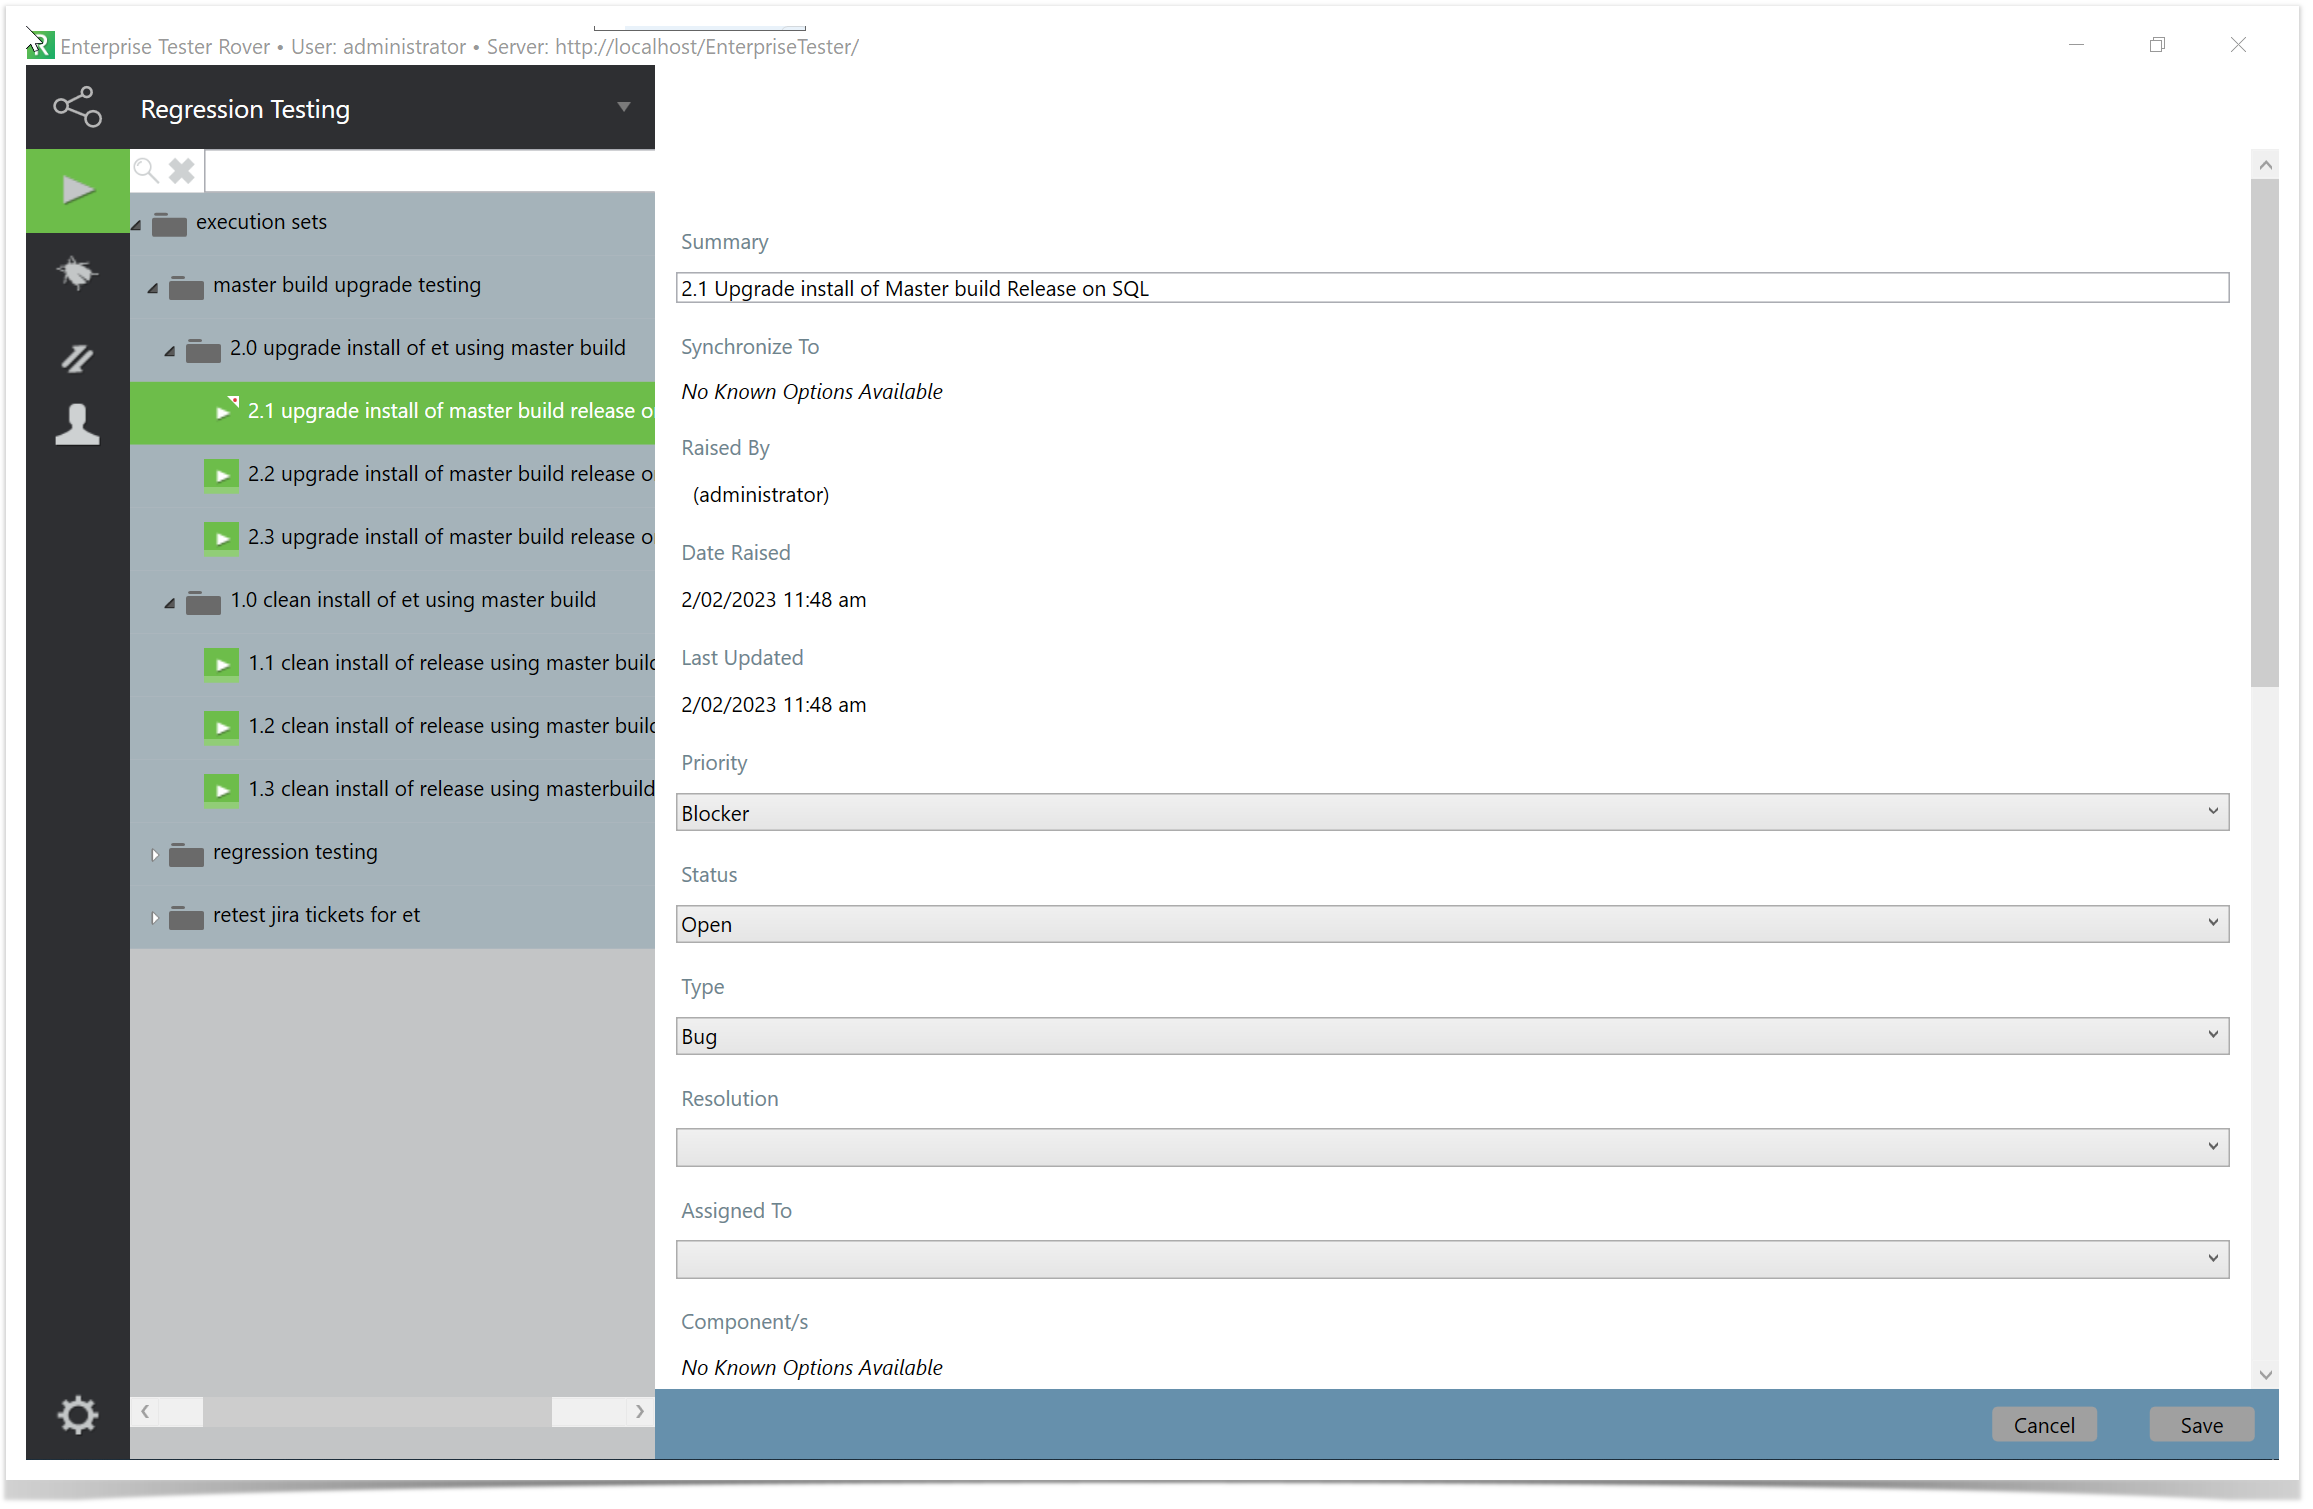
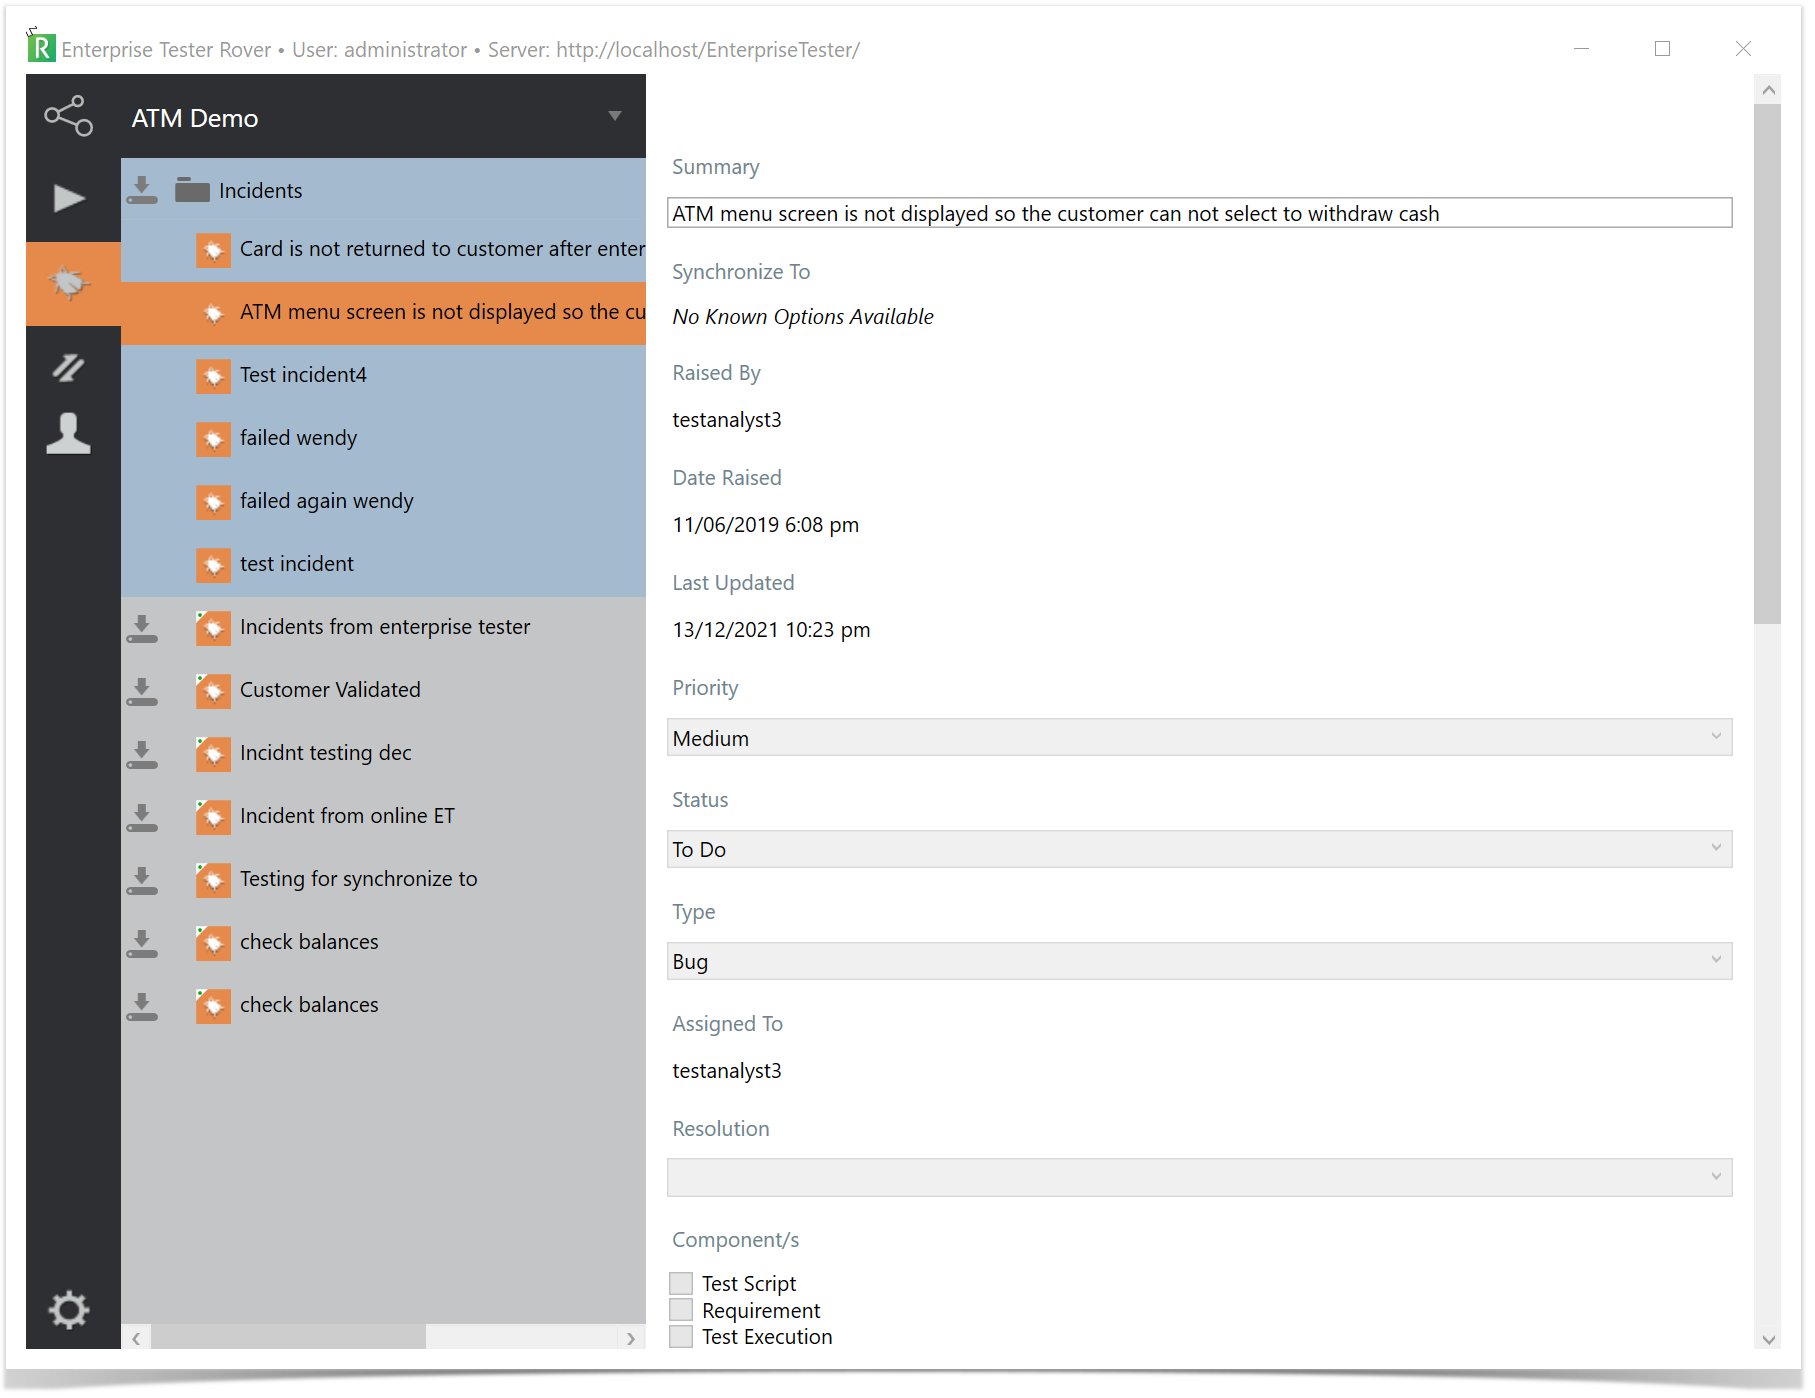
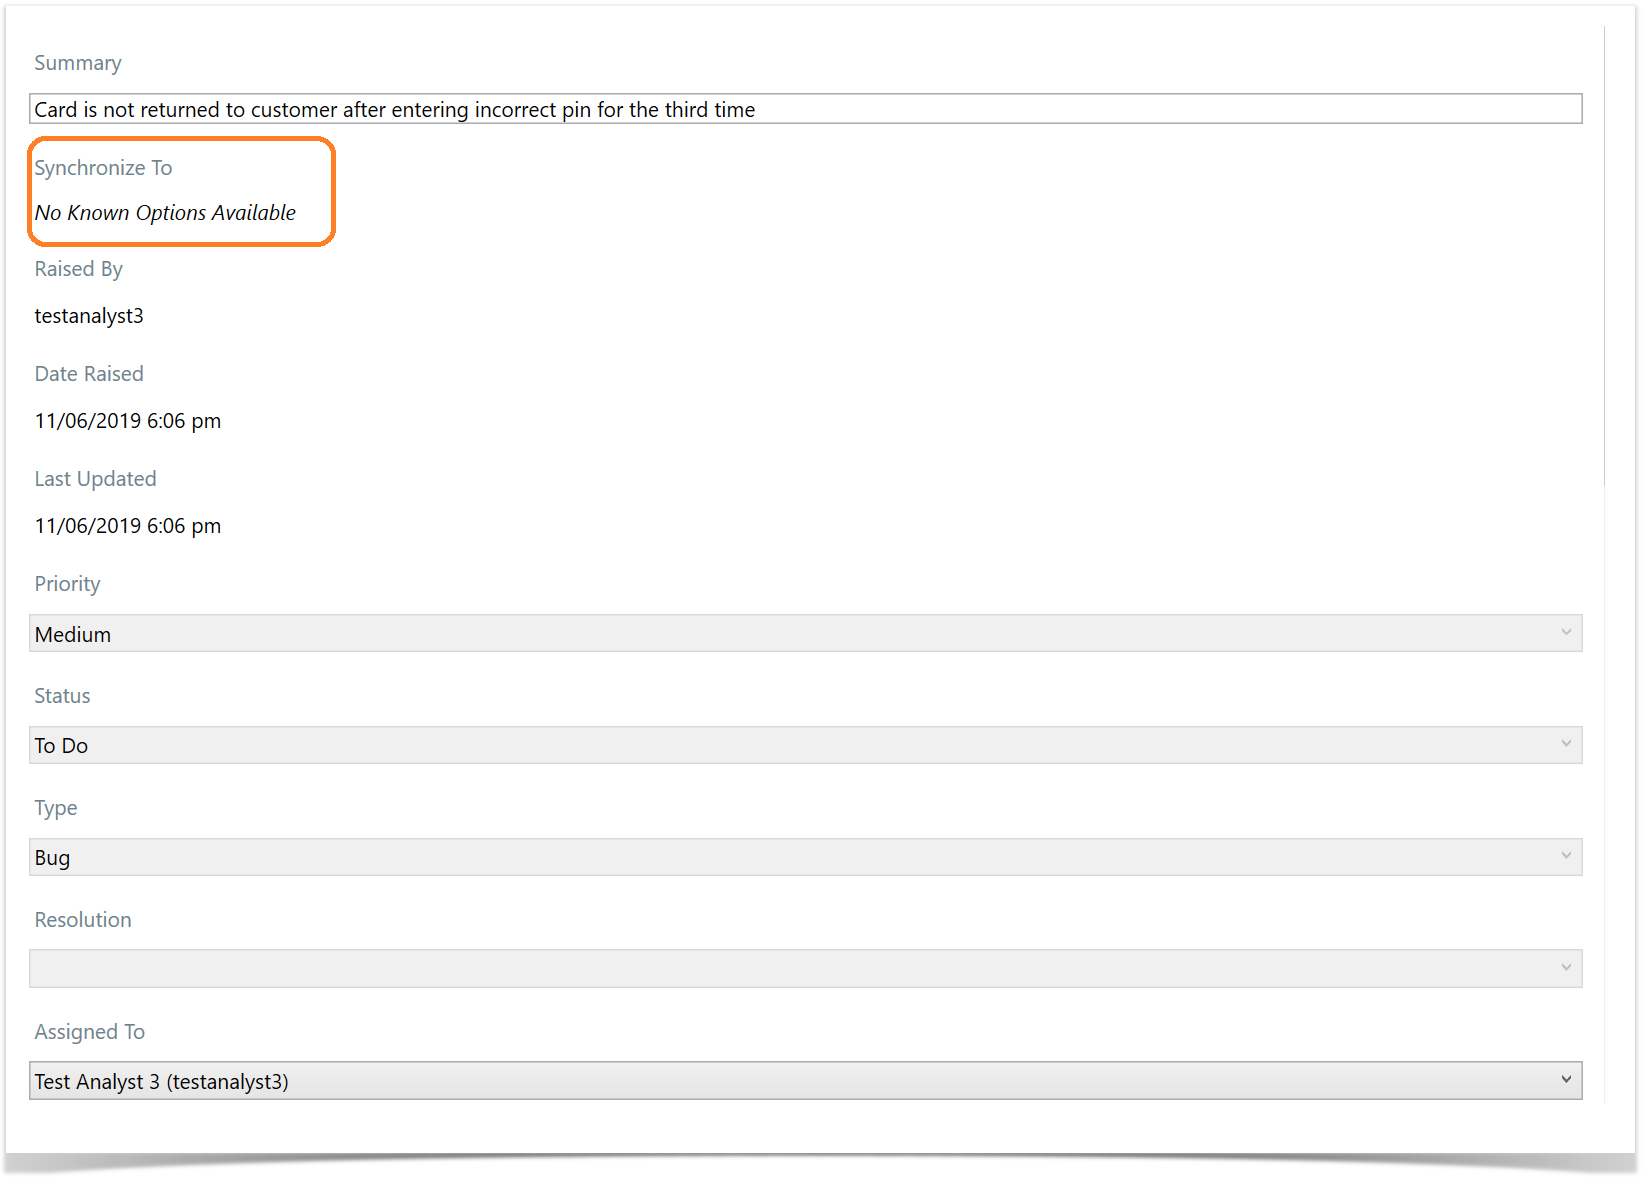
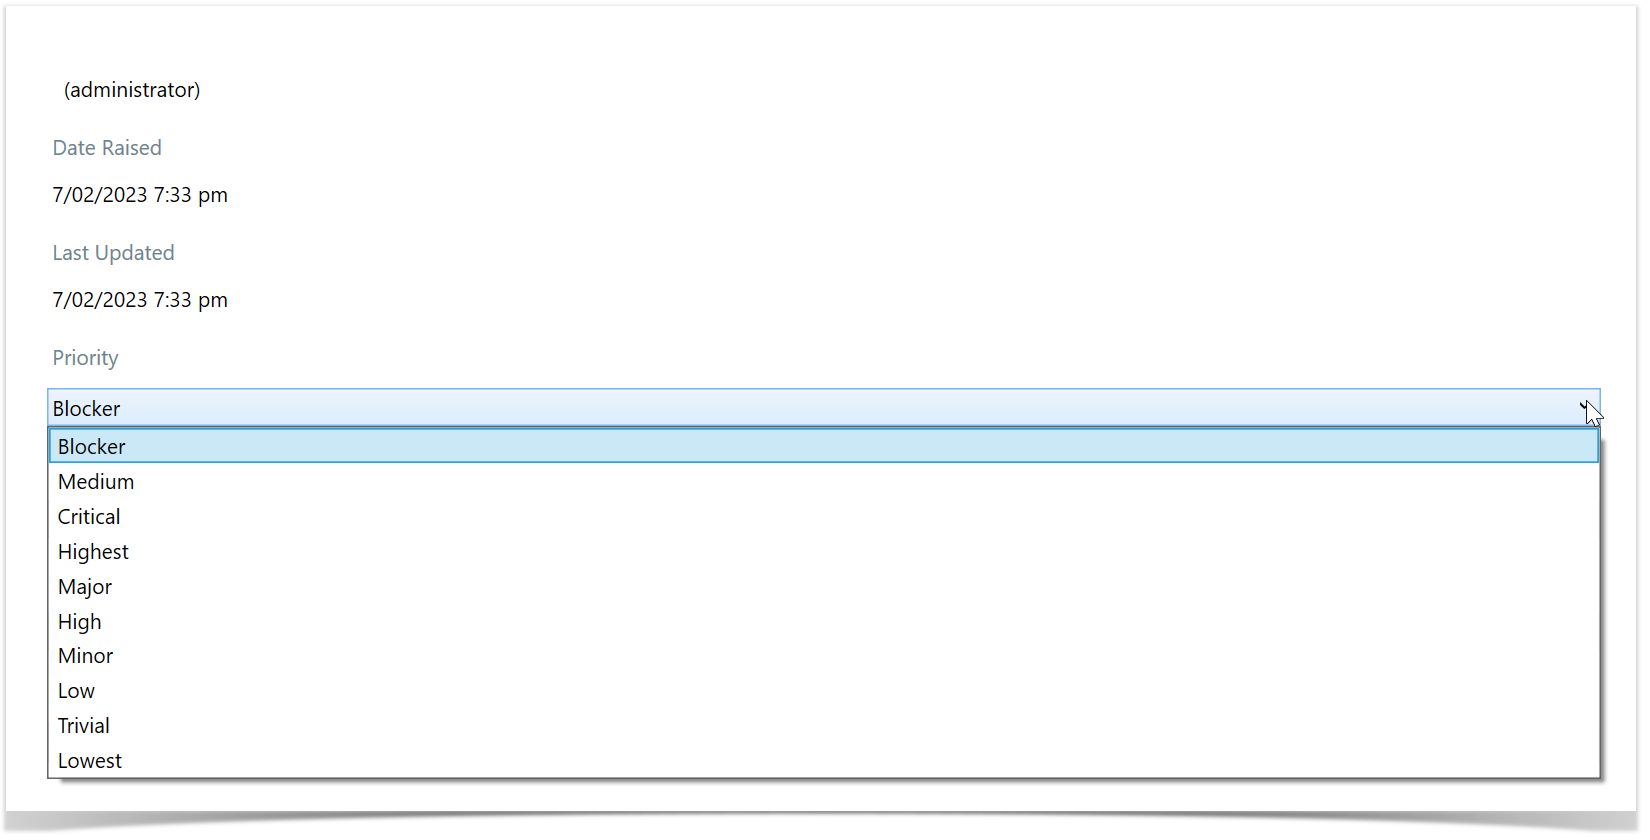
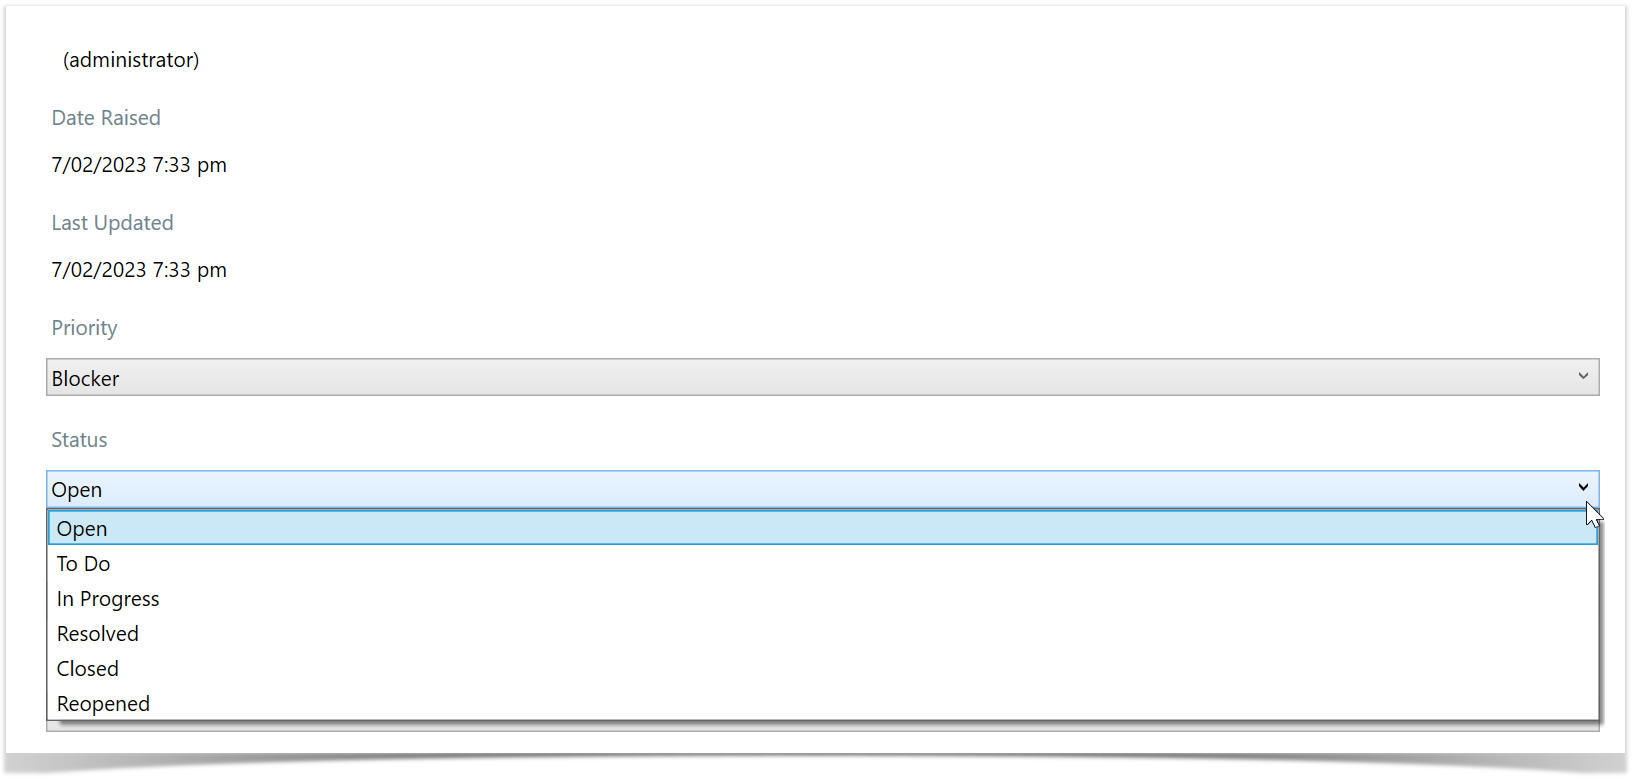
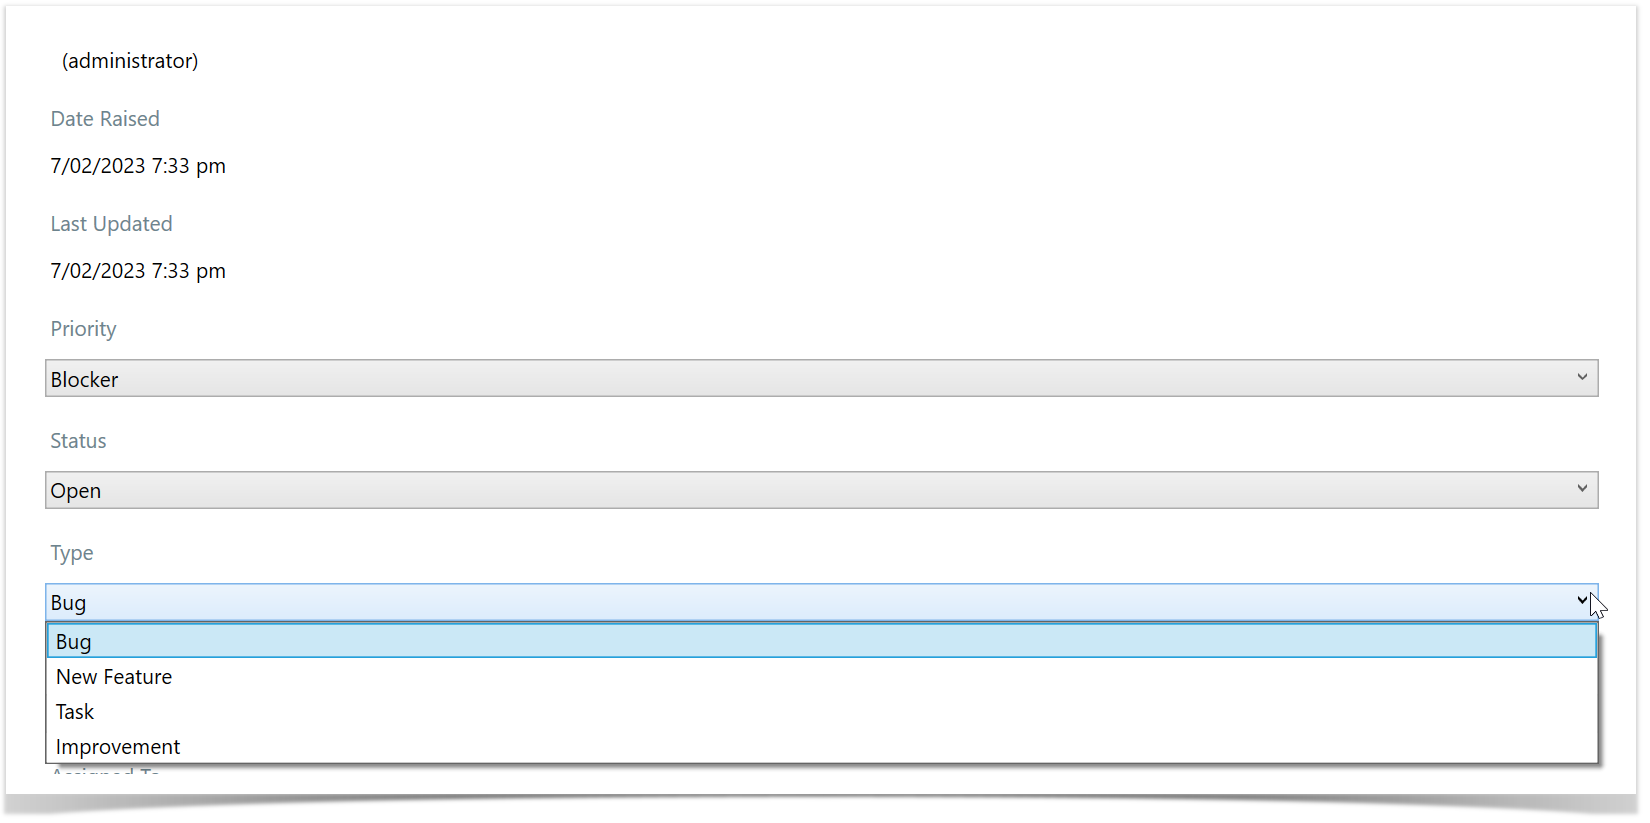
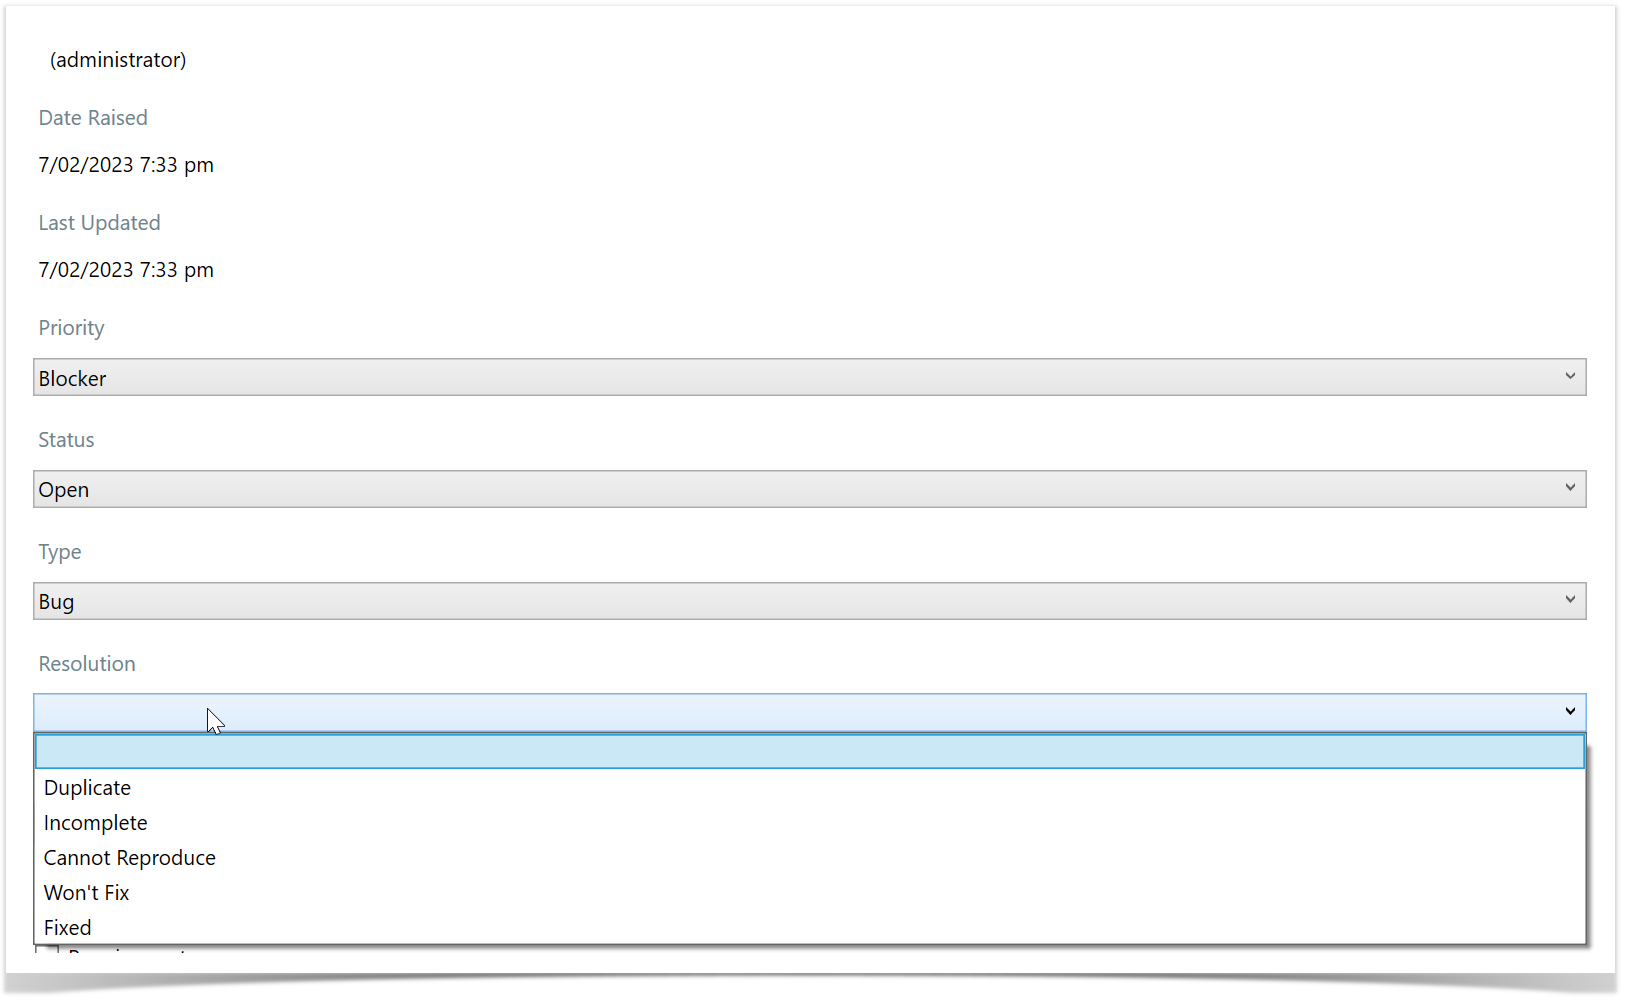
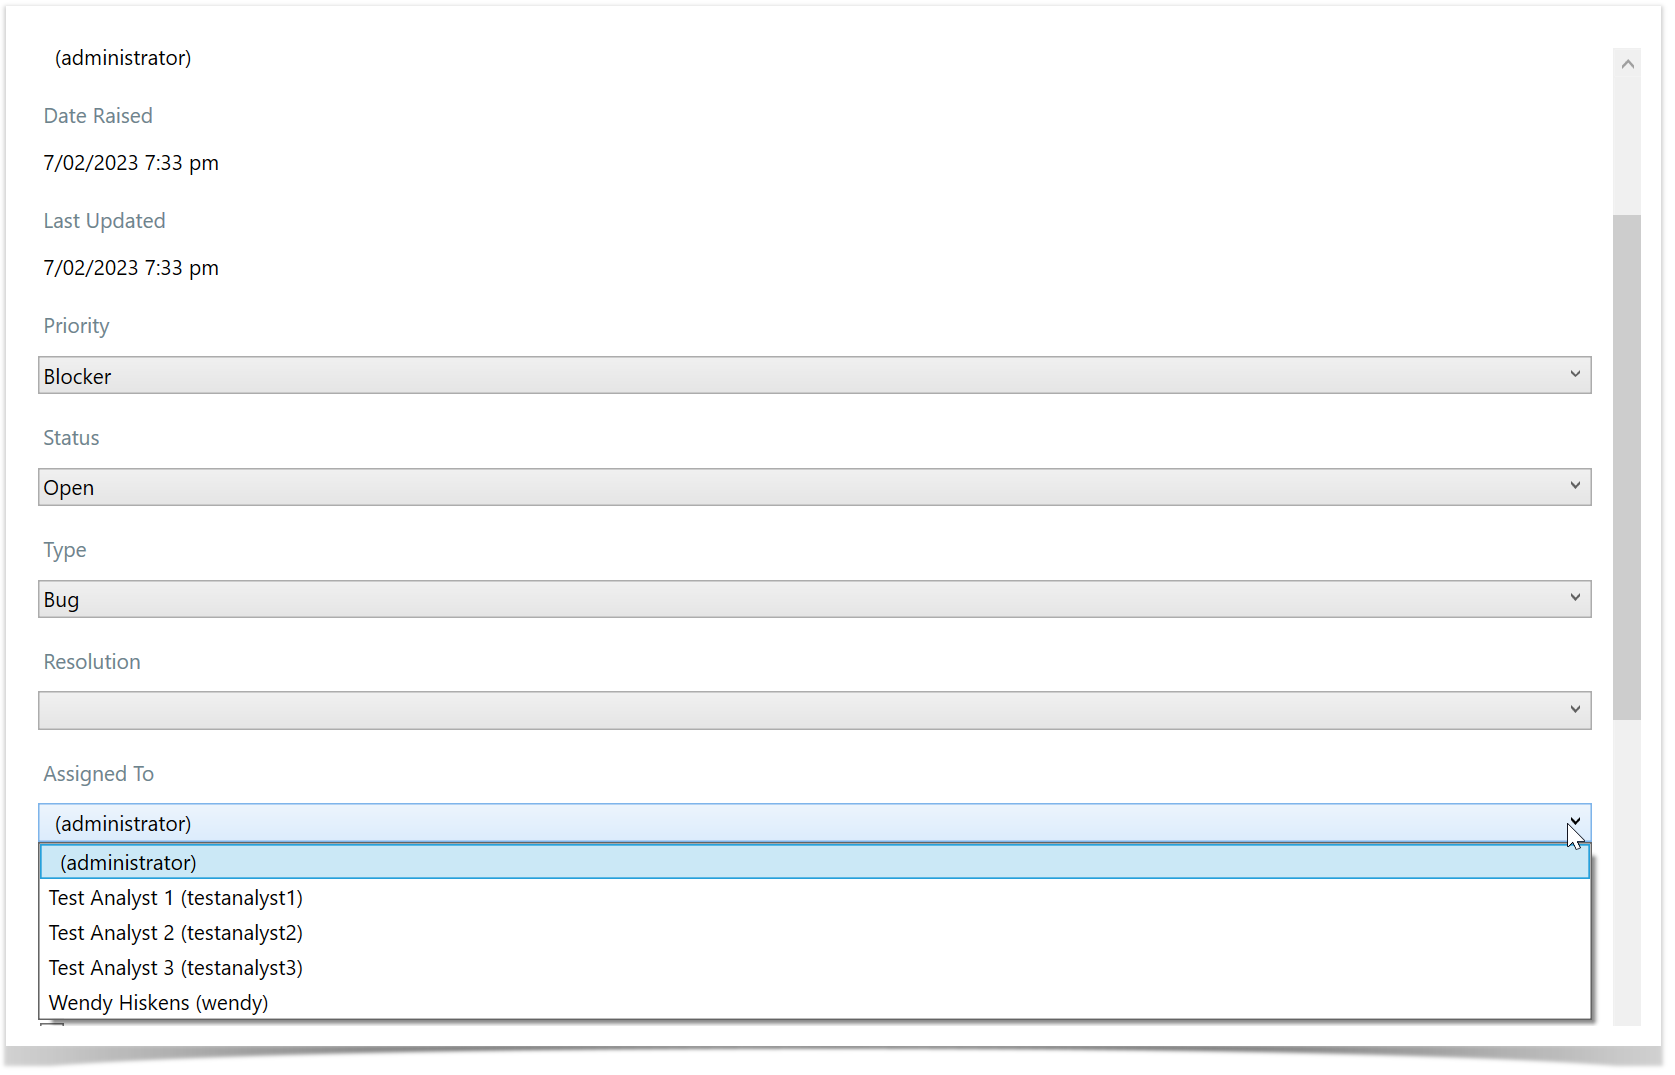
Priority:
Status:
Type:
Resolution:
Assigned To:
Note: If there is nothing in the Assign To: field , this usually means you have not synced the users from Enterprise Tester to Rover. Description field In Enterprise Tester:
In Rover:
Editing an Incident:You can edit an incident while it is still local (i.e., has not been synchronized to Enterprise Tester).
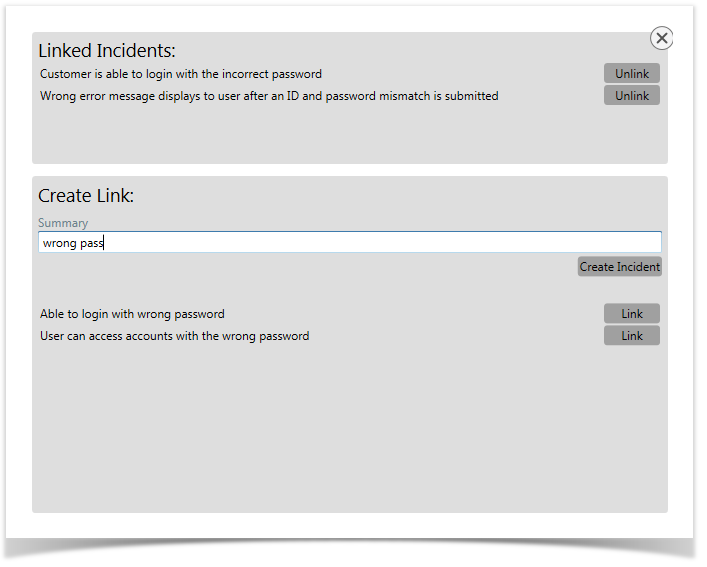
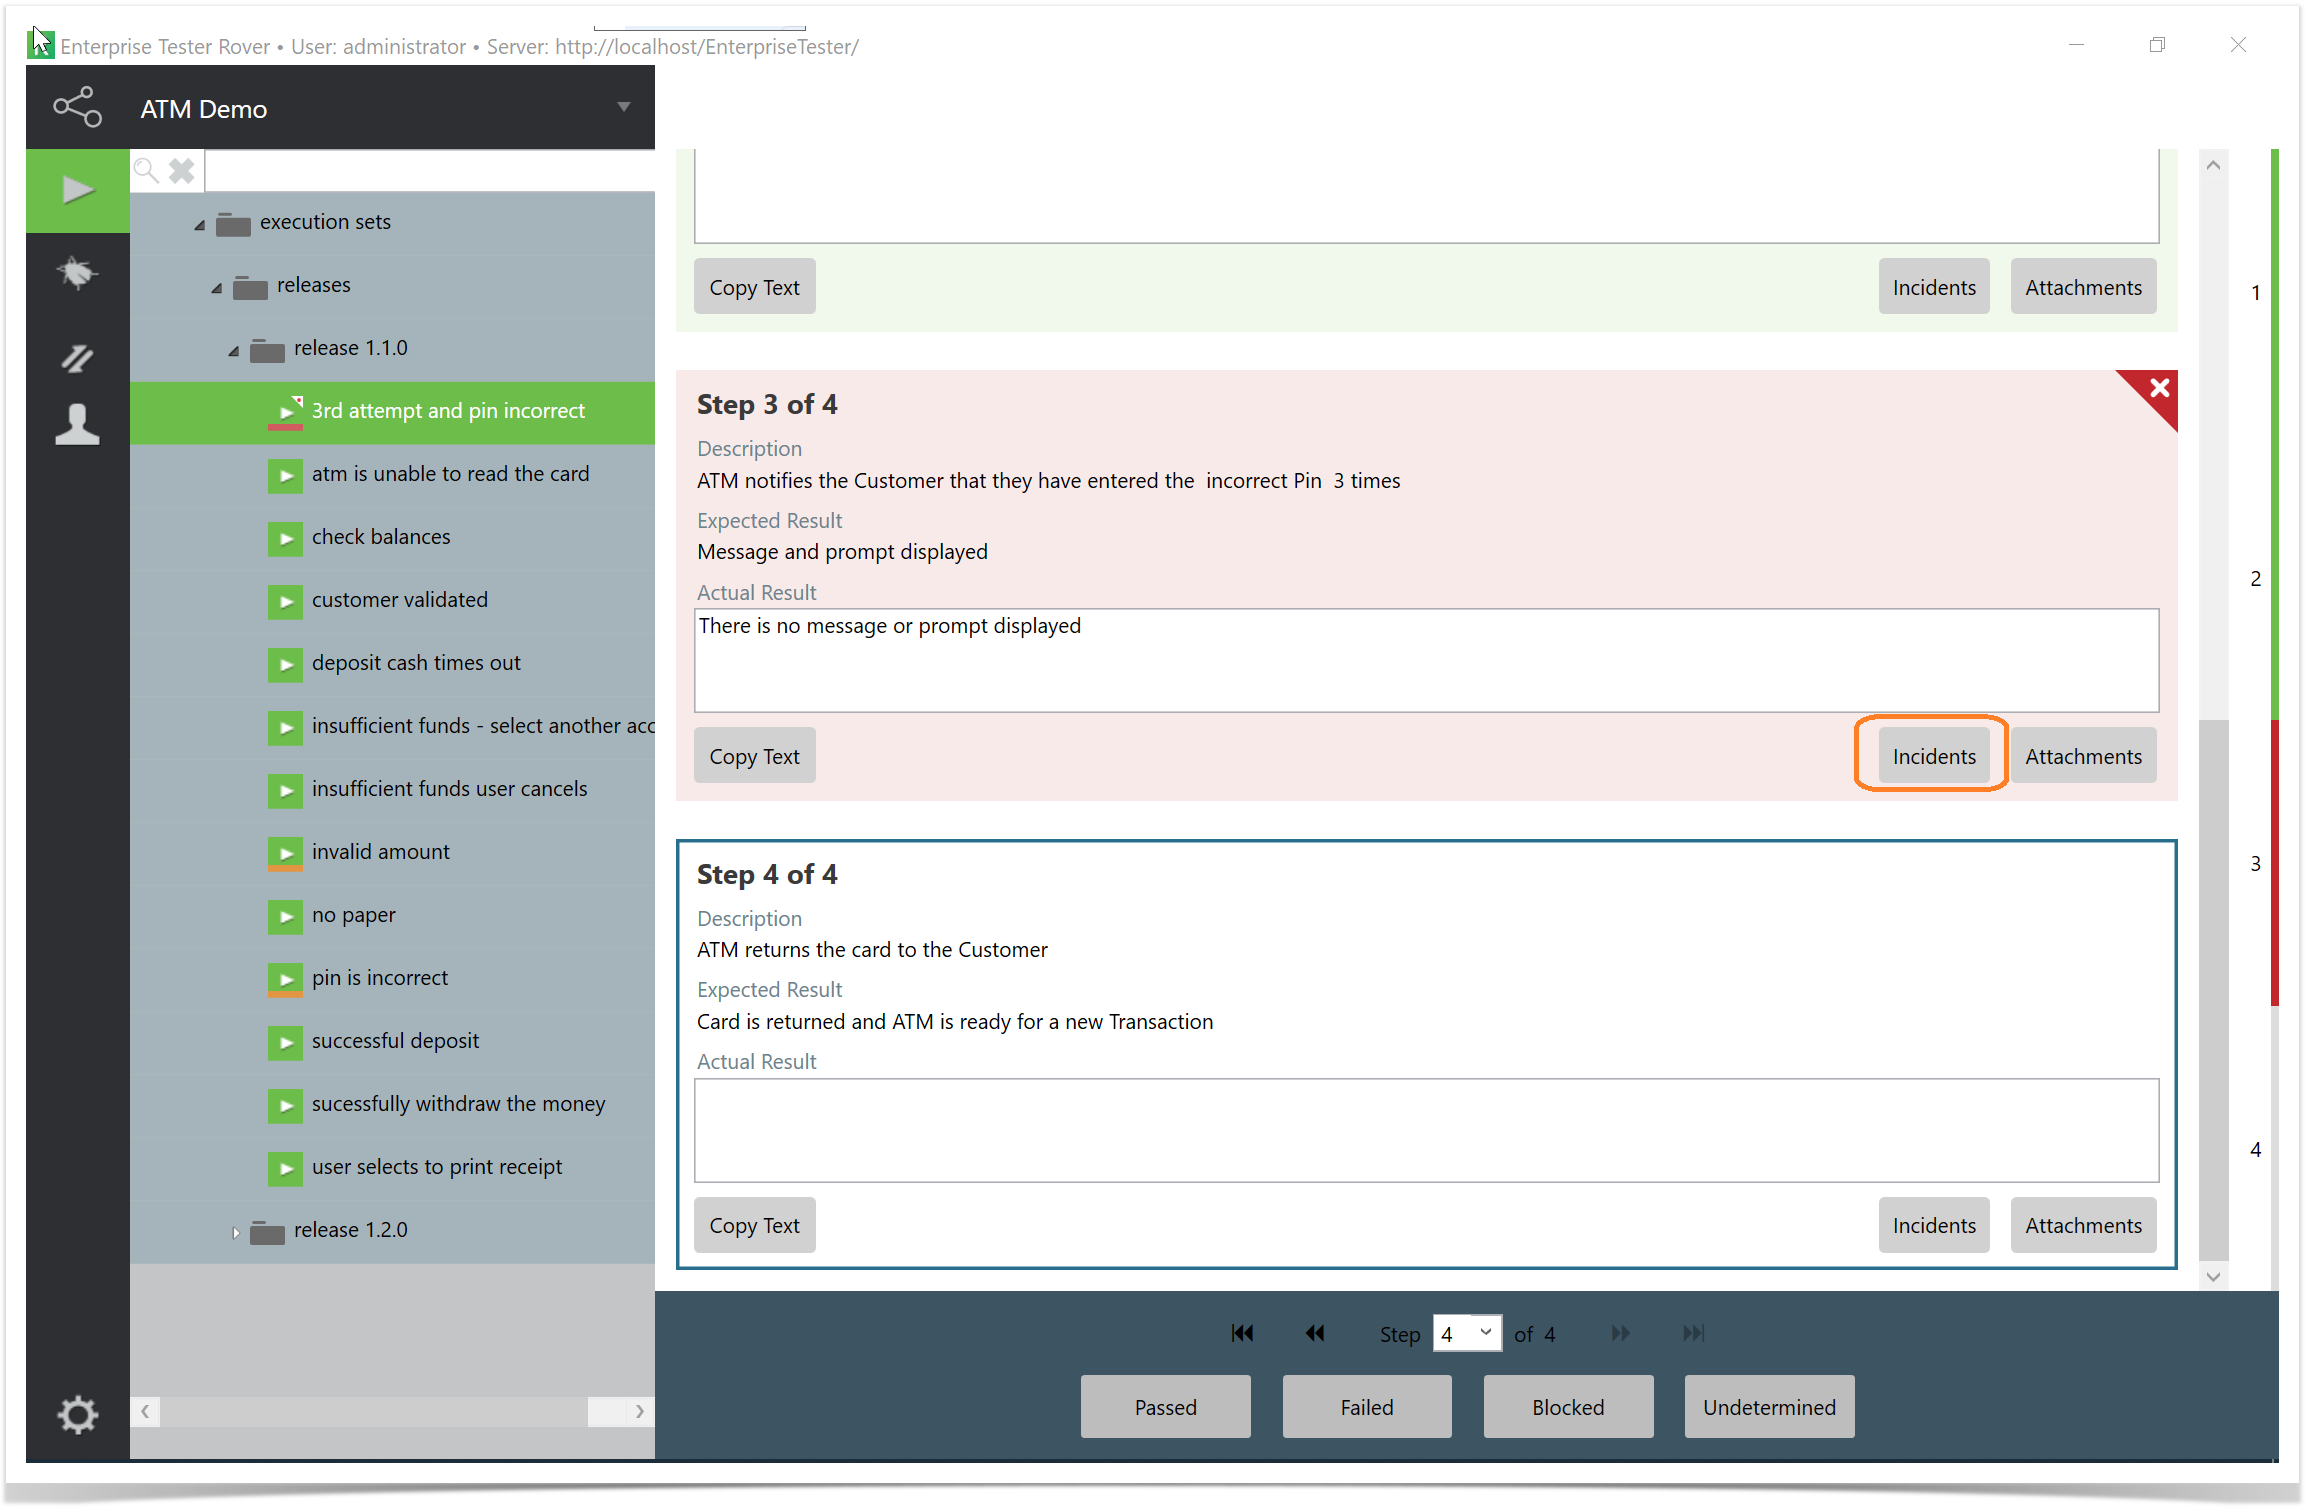
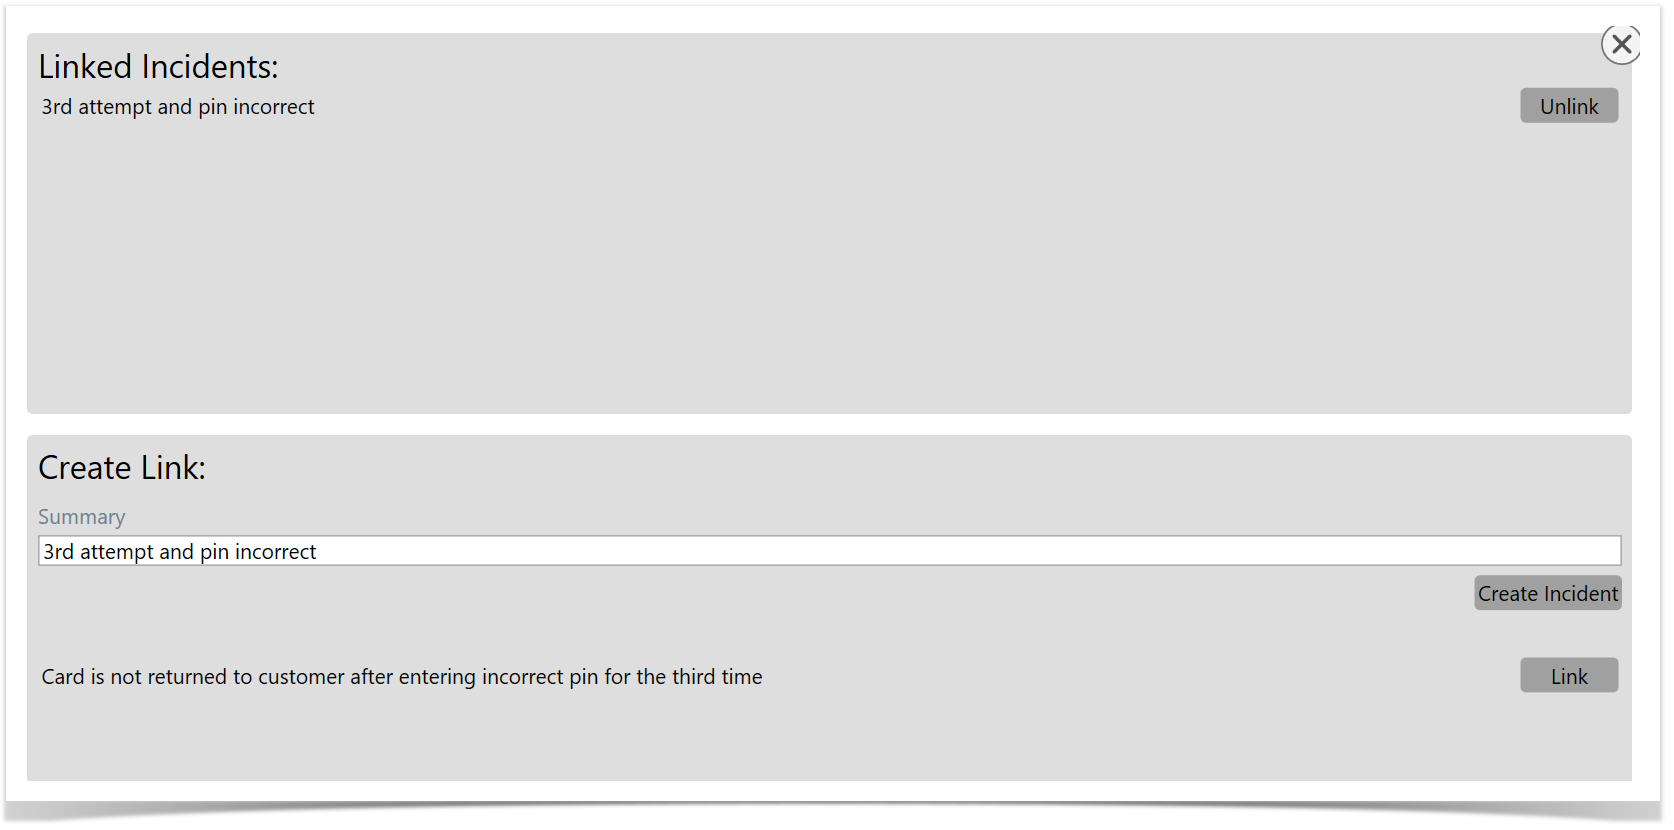
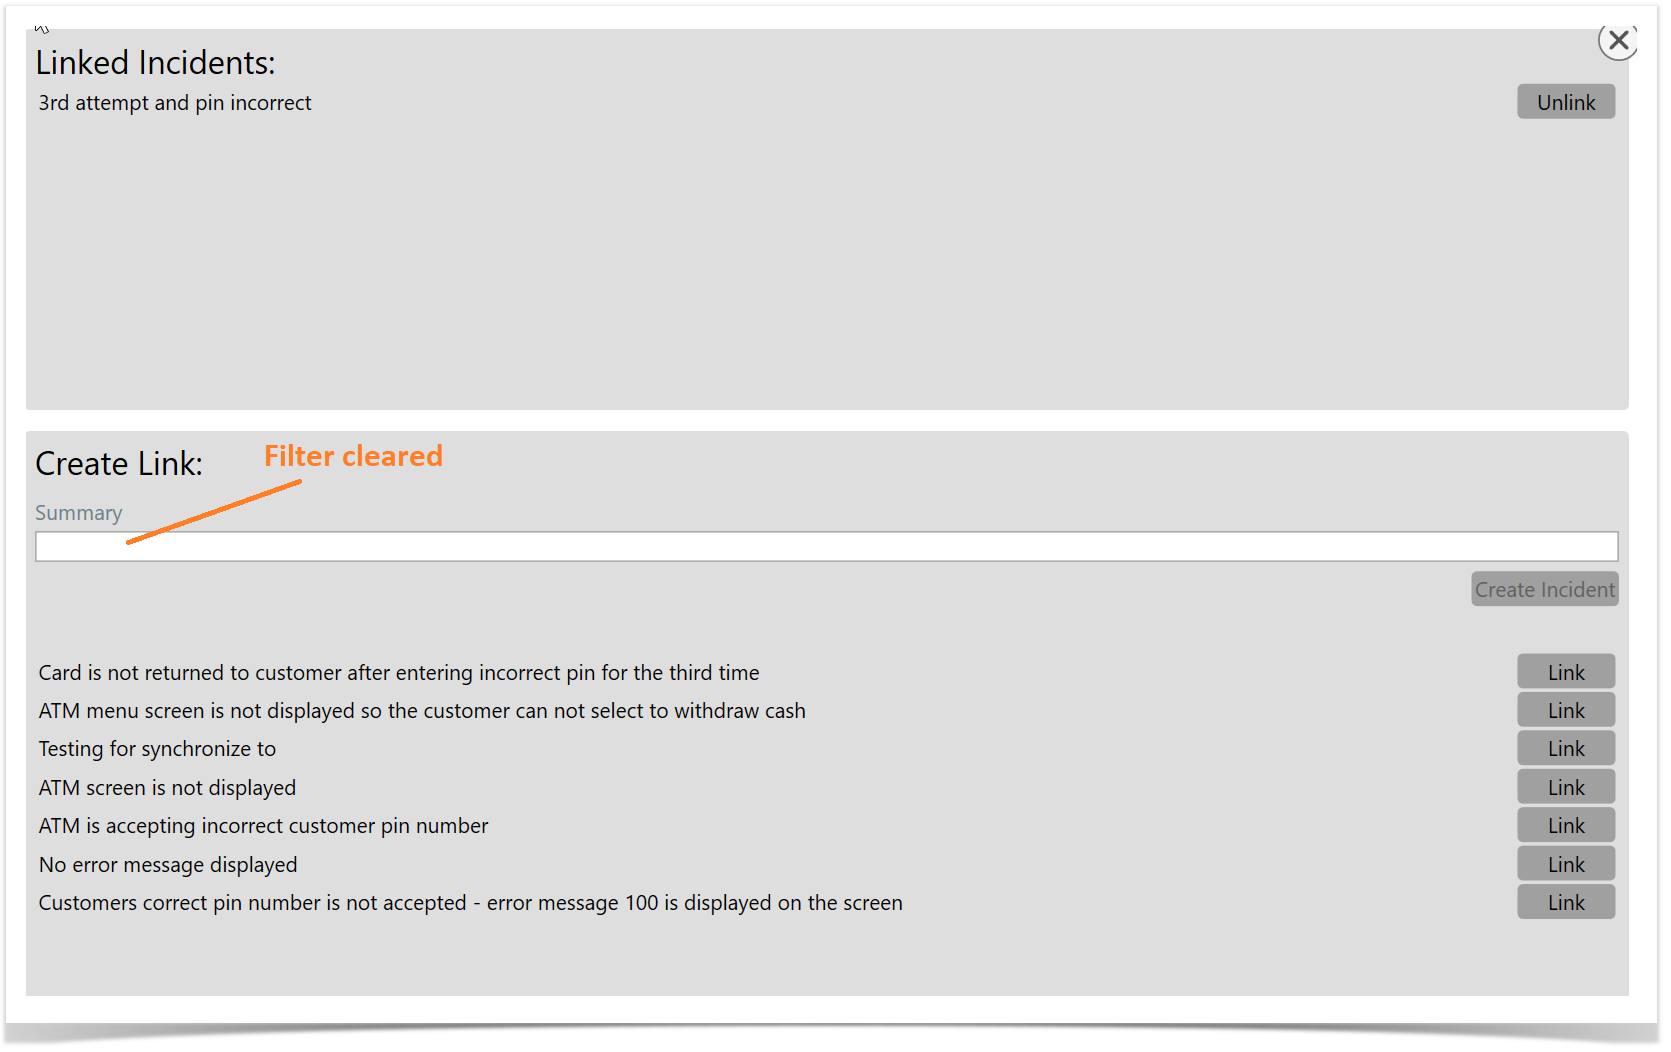
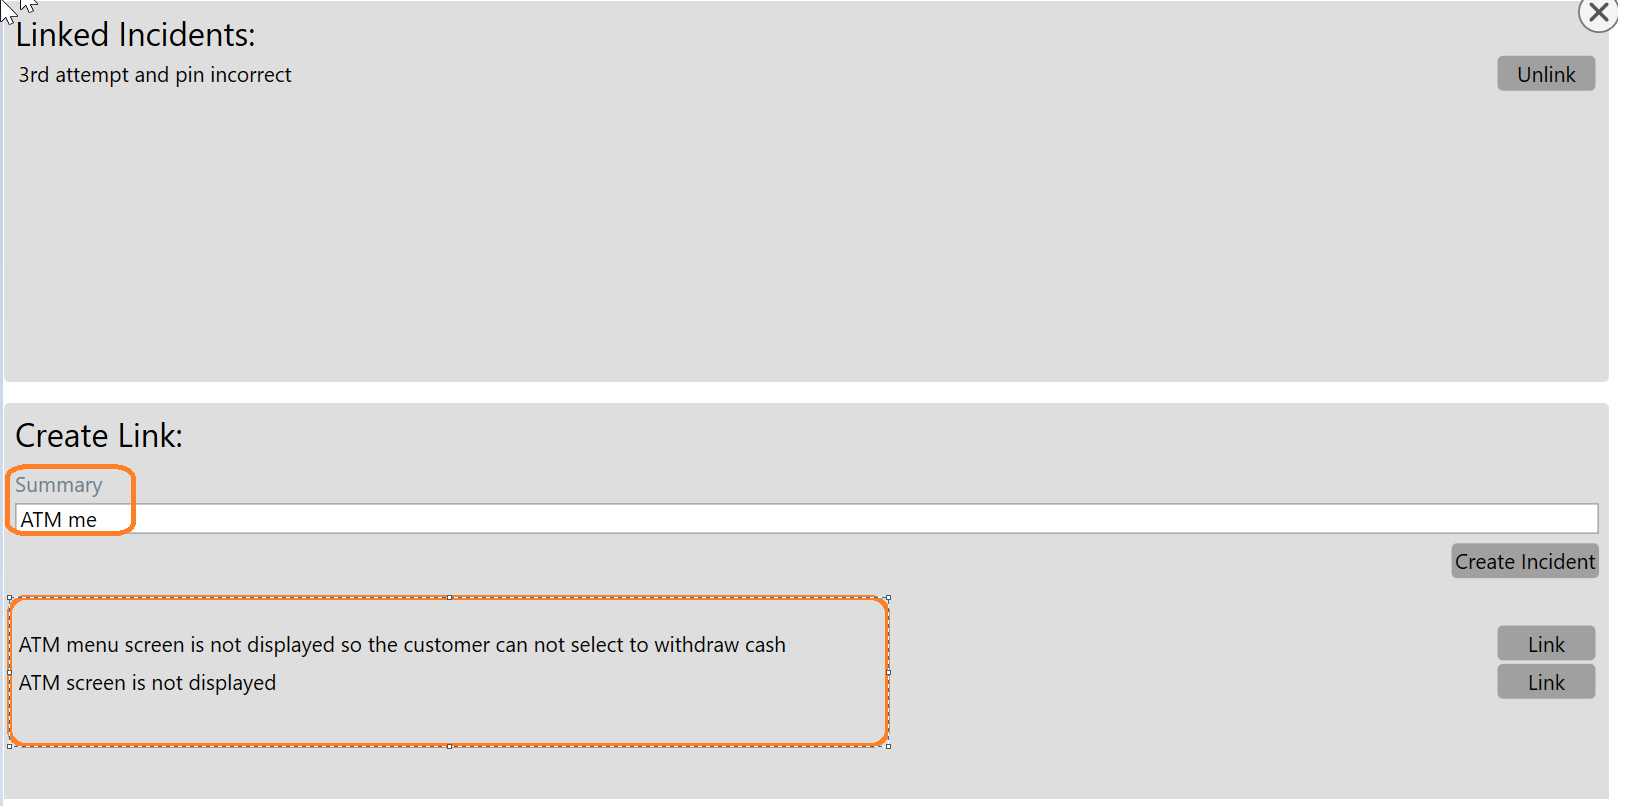
Linking Incidents to a Test Step You can view all linked incidents, link additional incidents, or create a new incident. Here’s how to manage incident links:
Returning to the Test Execution ScreenTo return to the Test Execution screen after managing incidents:
This process ensures that you exit the incident management screens and return to your test run view. Synchronizing Runs and IncidentsOnce you have completed your testing, you can synchronize your runs and incidents back to Enterprise Tester. For detailed instructions on how to perform synchronization, please refer to the Synchronization article. |


| Panel | ||||||||||||
|---|---|---|---|---|---|---|---|---|---|---|---|---|
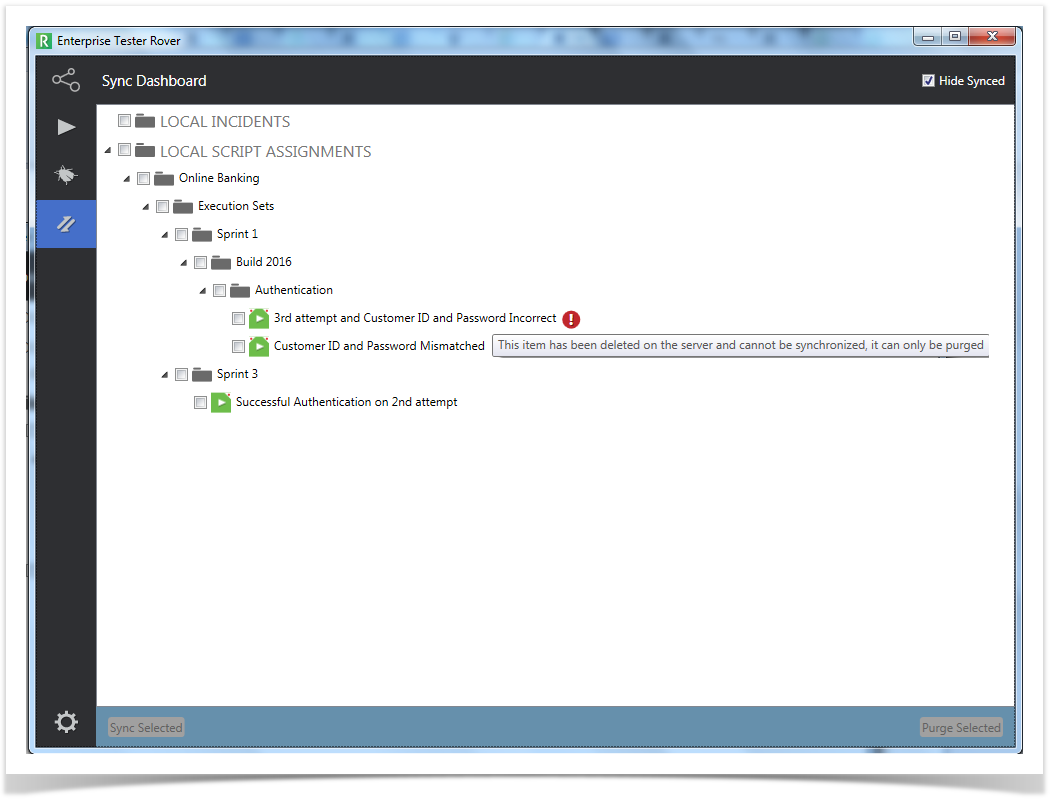
Synchronization
RoverX provides a convenient way to copy your Execution Sets and Incidents to your client machine or device, enabling offline testing. When you are reconnected, you can upload your test runs and incidents back to Enterprise Tester. To synchronize your Execution Sets and Incidents:
Uploading Entities to Enterprise TesterOnce you have completed your testing, you can upload your runs and incidents back to Enterprise Tester by navigating to the Sync Dashboard. To Upload Your Runs and Incidents:
Sync Dashboard at a GlanceThe Sync Dashboard provides a comprehensive view of the synchronization status, allowing you to monitor upload progress and ensure successful data transfer.
Synchronization Process for Completed Test Runs
To ensure smooth and accurate synchronization to Enterprise Tester, the synchronization process is as follows: 1.Upload Completed Test Runs:
2. Upload Incidents Associated with Test Runs:
3. Upload Attachments:
| ||||||||||||
| Panel | ||||||||||||
| Anchor | Incidents | Incidents | ||||||||||
| Panel | ||||||||||||
Synchronization| Anchor | | Synchronisation | Synchronisation |