RoverX provides you with the ability to run tests from Enterprise Tester when you are on the go - working in remote locations, or in areas where internet connectivity is unreliable or unavailable.
RoverX supports synchronizing both test runs and incidents with Enterprise Tester. This article covers synchronizing and running test runs.
Although internet access is not required to run tests in RoverX, internet access is required when performing the following;
When downloading executions sets or individual test runs from Enterprise Tester server. Note: Any incidents that are associated to any of the test runs will be downloaded when the test run is downloaded.
When uploading test run results and new incidents to Enterprise Tester server.
The Getting Started article provides an introduction to help users become familiarized with RoverX.
Downloading Execution Sets to RoverX
An internet connection is required for this task. Make sure you are in Online mode in RoverX.
Ensure Online Mode: Verify that you are connected to Enterprise Tester and in Online mode in RoverX.
Select a Project: Choose the desired project from the Project drop-down list.
View Execution Sets: The navigator will display the execution set folders and their test runs (excluding agile runs) in the selected project, as listed in the Enterprise Tester.
Download Execution Sets: Select the execution sets you want to download. The selected execution sets will be downloaded to RoverX for offline access.
This process allows you to work with Execution Sets offline after downloading them from Enterprise Tester.
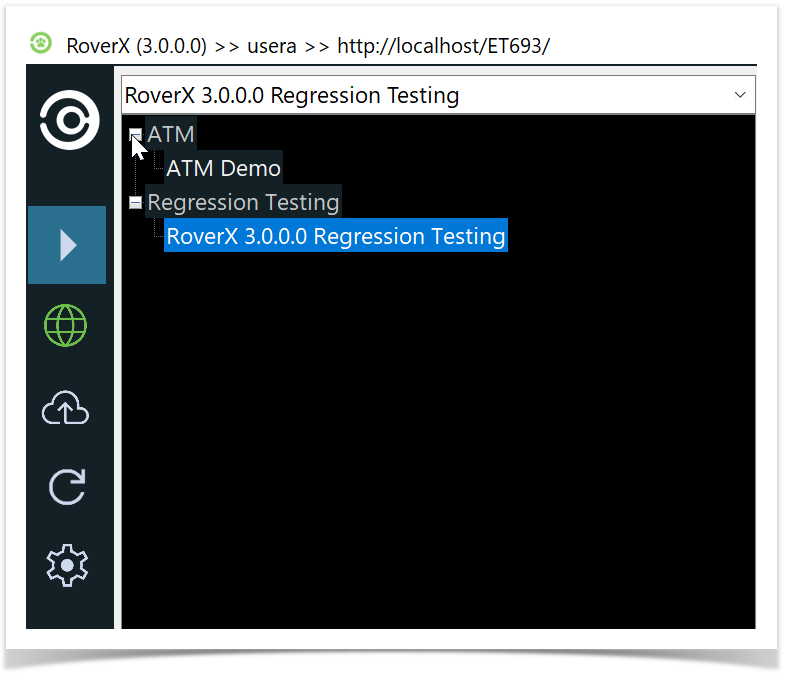
Selecting a Project
Open the Project Dropdown: Click on the Project dropdown list to view the available projects. Projects are organized into categories, similar to how they are structured in Enterprise Tester.
View Accessible Projects: Users will only see projects that are defined in their user permissions on the Enterprise Tester server.
Select a Project: Choose the desired project from the dropdown list. You can change the project at any time by selecting a different project from the dropdown.
Review Execution Sets: Once you have selected a project, you can review and select the execution sets or individual test runs you wish to download from the Enterprise Tester server.
Selecting execution sets
Expand Folders: By default, the folders are collapsed. The
 button indicates that the folder can be expanded and contains sub-folders. Select this button to expand the folder.
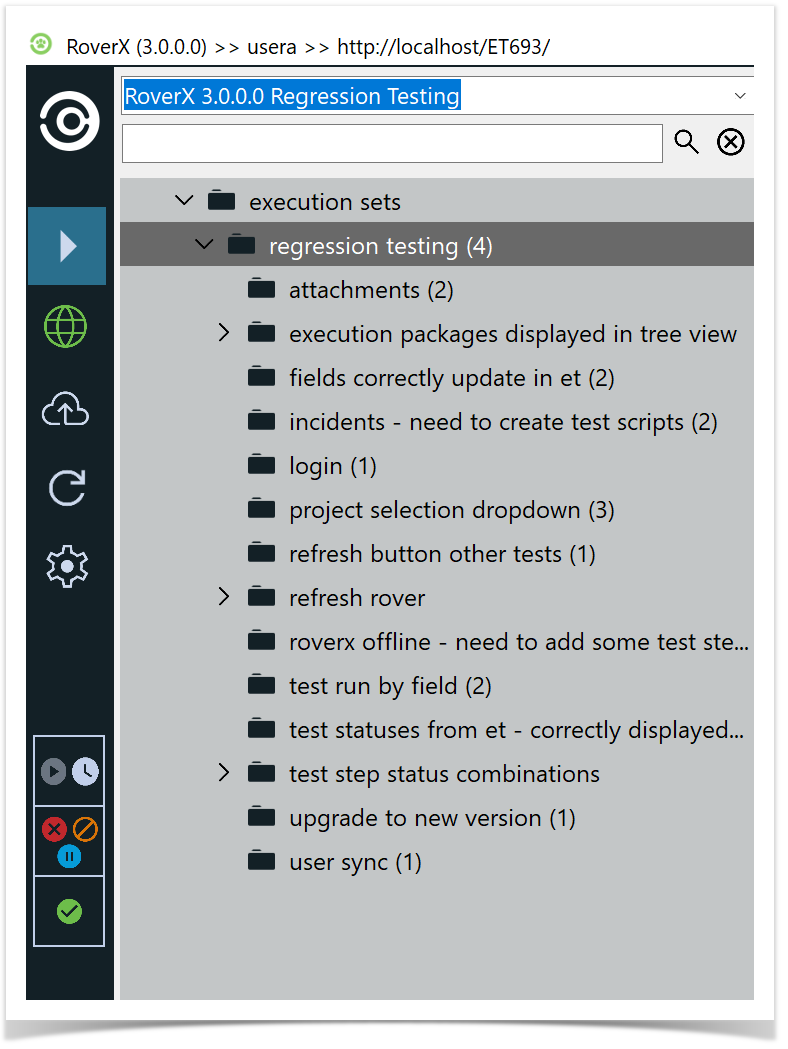
Folder Expansion Indicator: Once the folder can no longer be expanded, the button will change to the following icon
 .
.Expand All Packages: To expand all packages within a folder, right-click on the top execution set or any folder you wish to expand all sub-folders within.
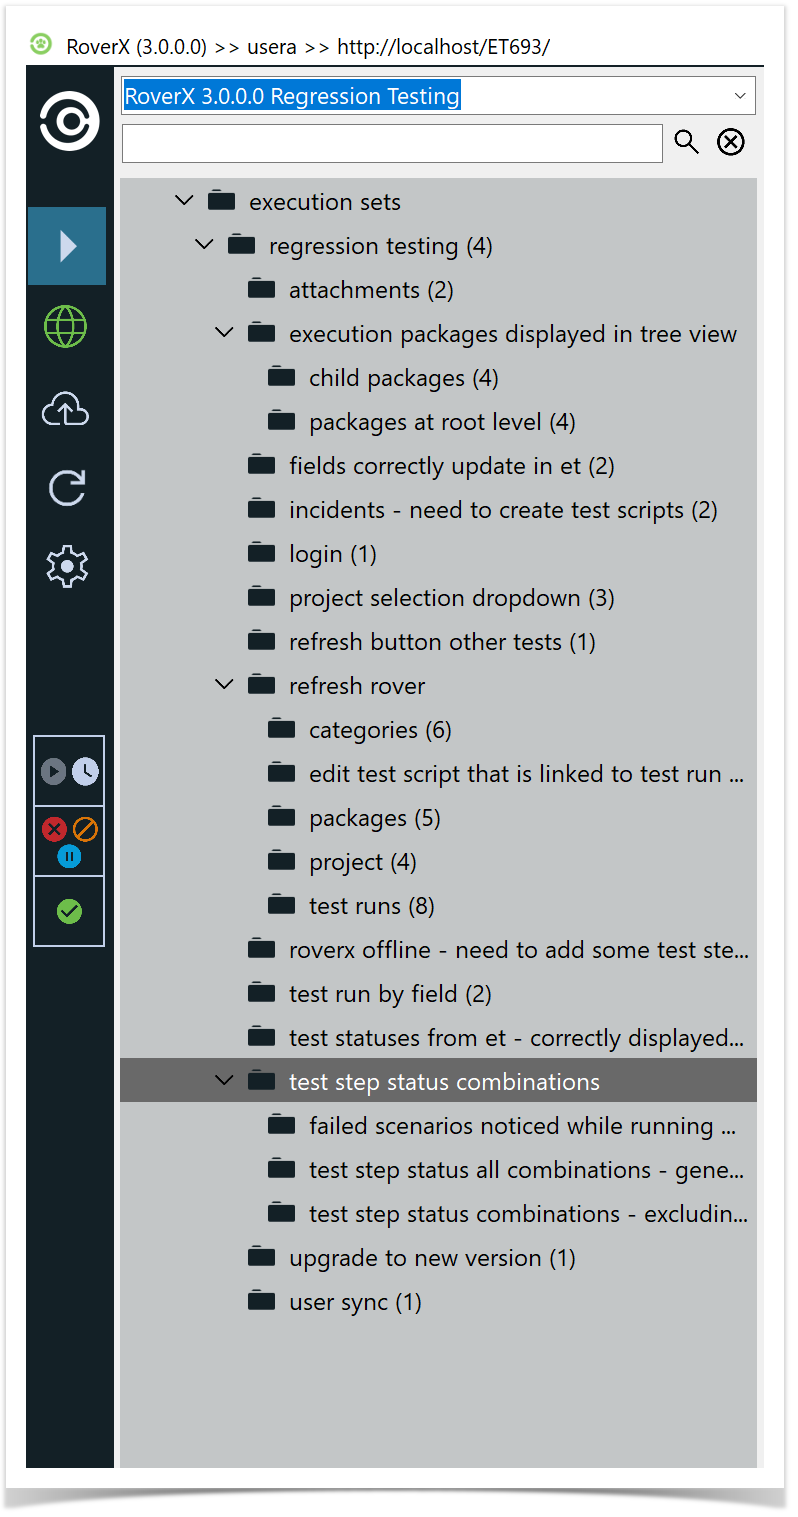
To view test runs in RoverX, follow these steps:
Expand the Folder:
- Navigate to the folder where the test runs are located and expand it.
Select the Folder:
- Click on the folder to display the Test Run table.
View Test Run Count:
- The number of test runs in the folder is displayed in brackets next to the folder name.
Execution sets and individual test runs that you have not yet downloaded to your device, or that have been changed since your last download, will display a download icon ![]() . This helps you identify which items need to be downloaded or updated.
. This helps you identify which items need to be downloaded or updated.
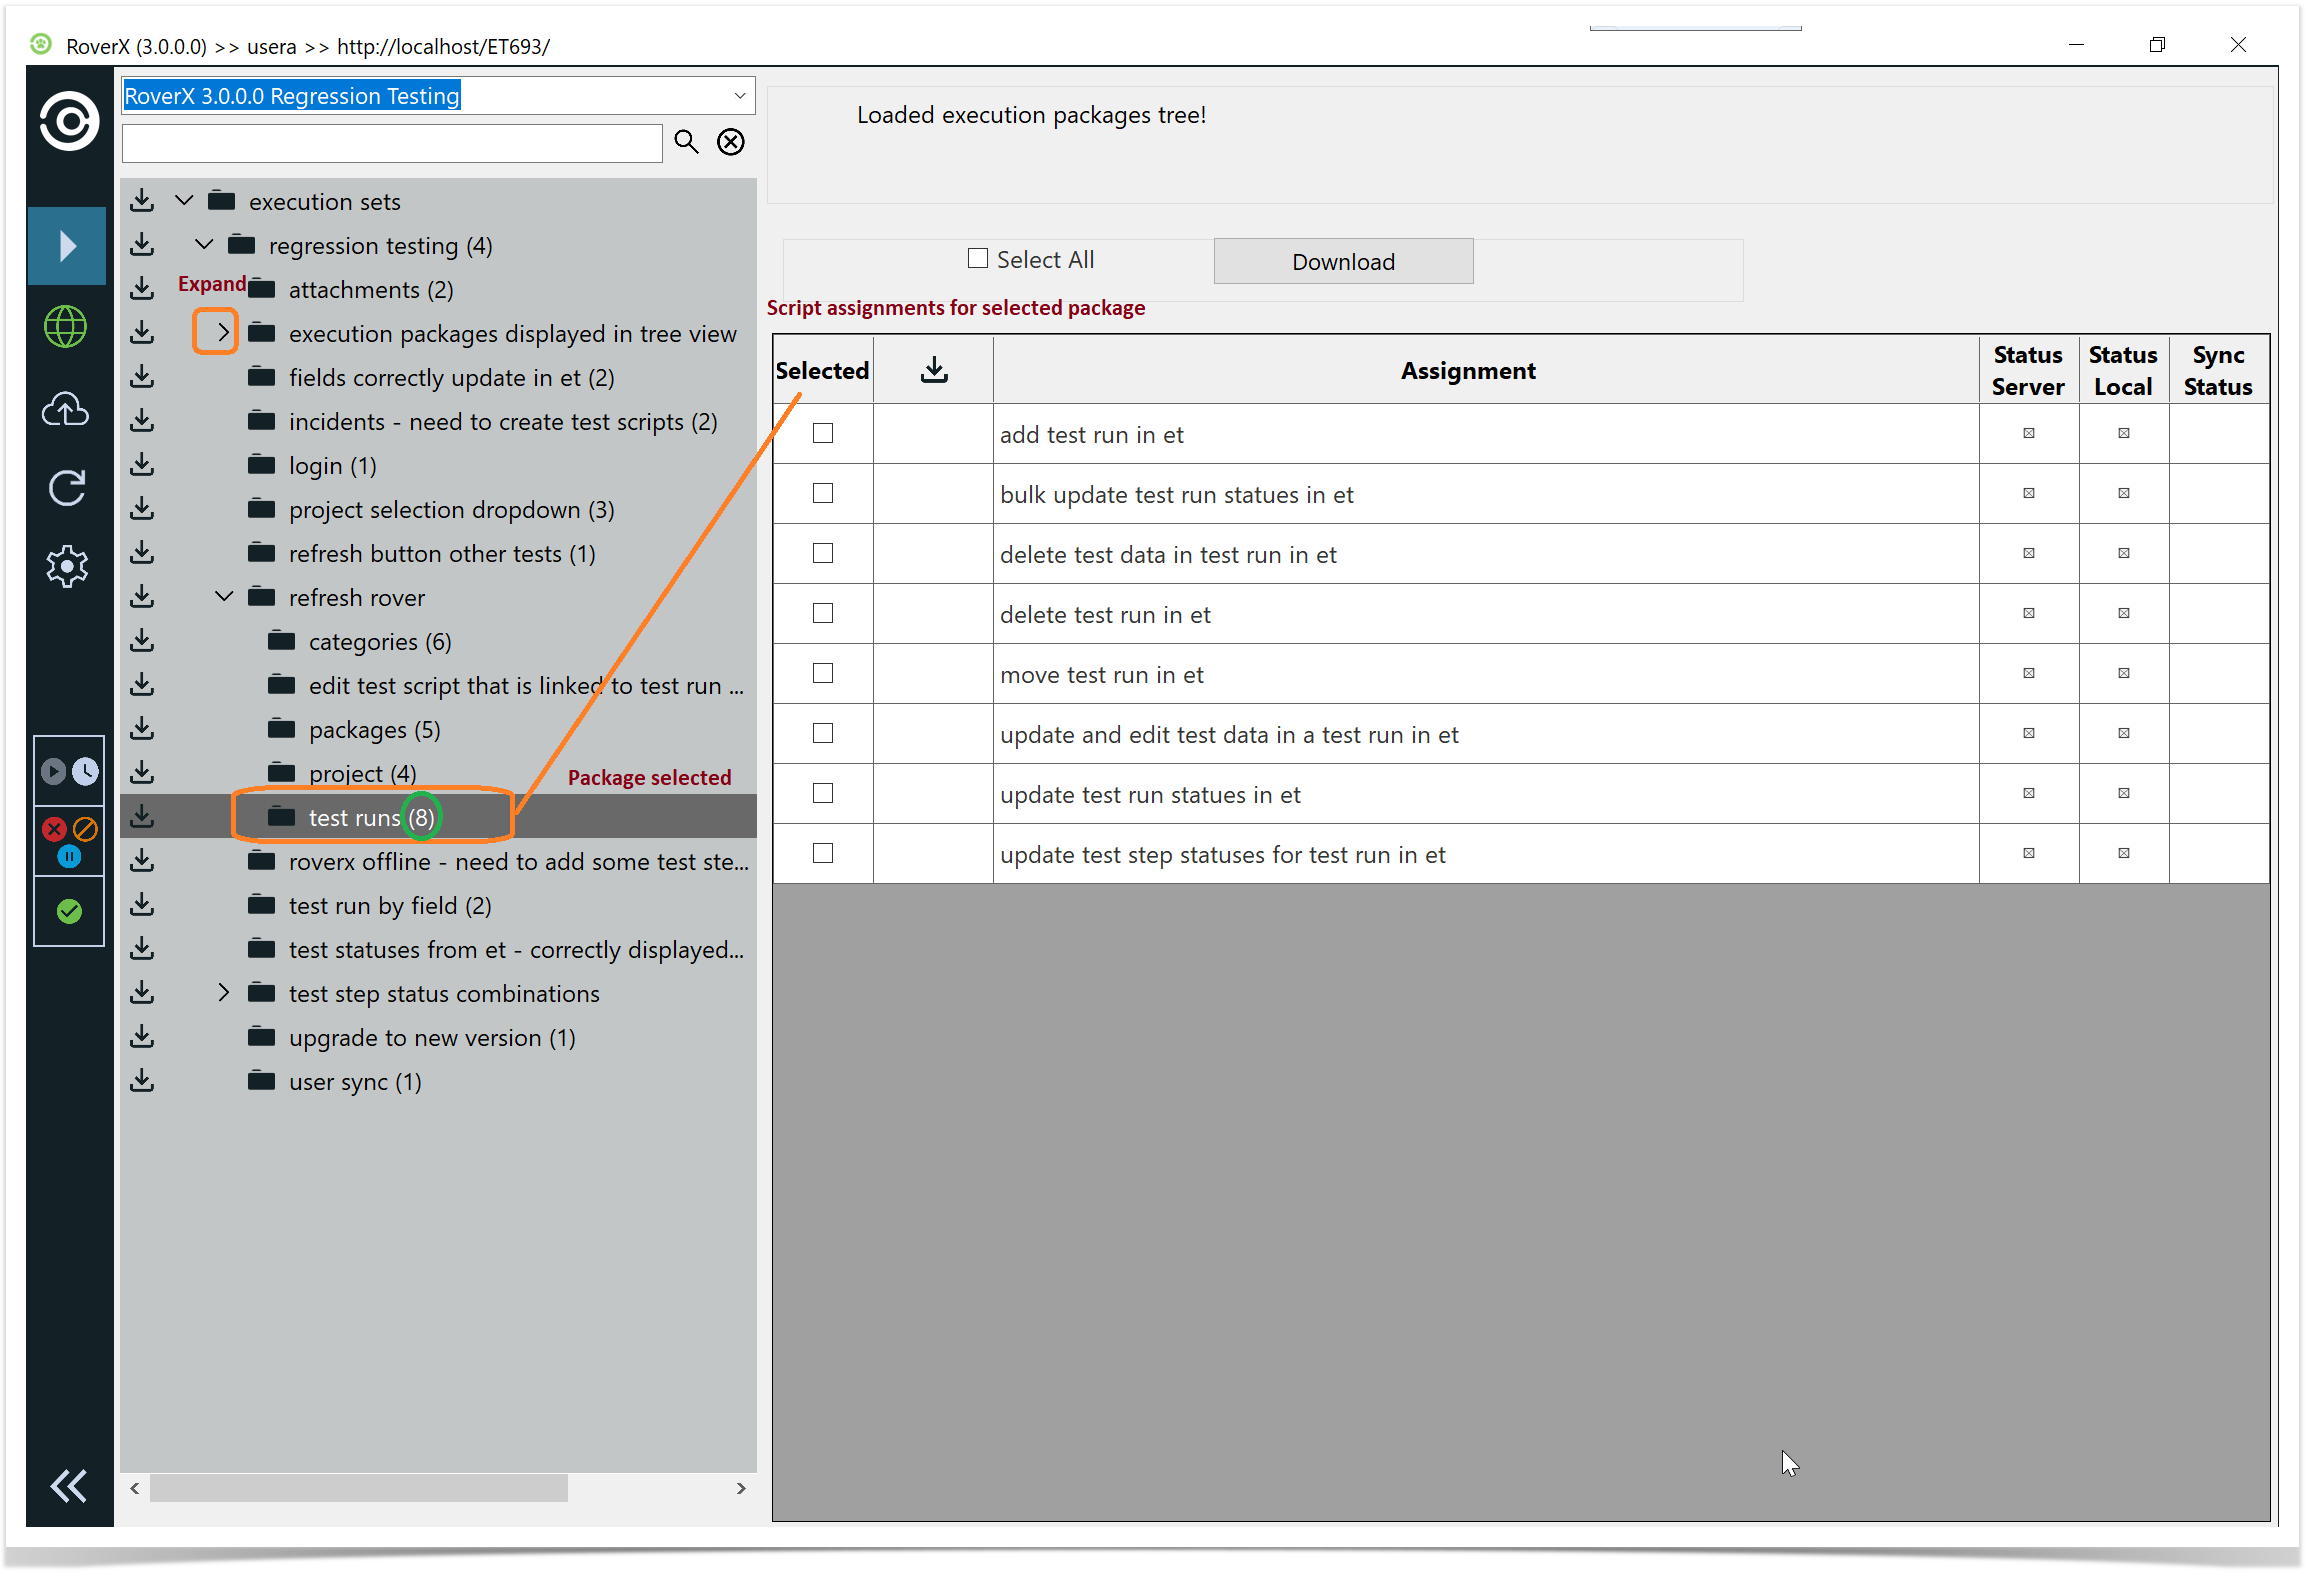
Download execution sets
Locate the Download Icon:
- Find the download icon next to the folder or the individual script assignment you wish to download.
Download Specific Items:
- Click on the download icon for the specific folder or individual script assignment to initiate the download.
Download All Items:
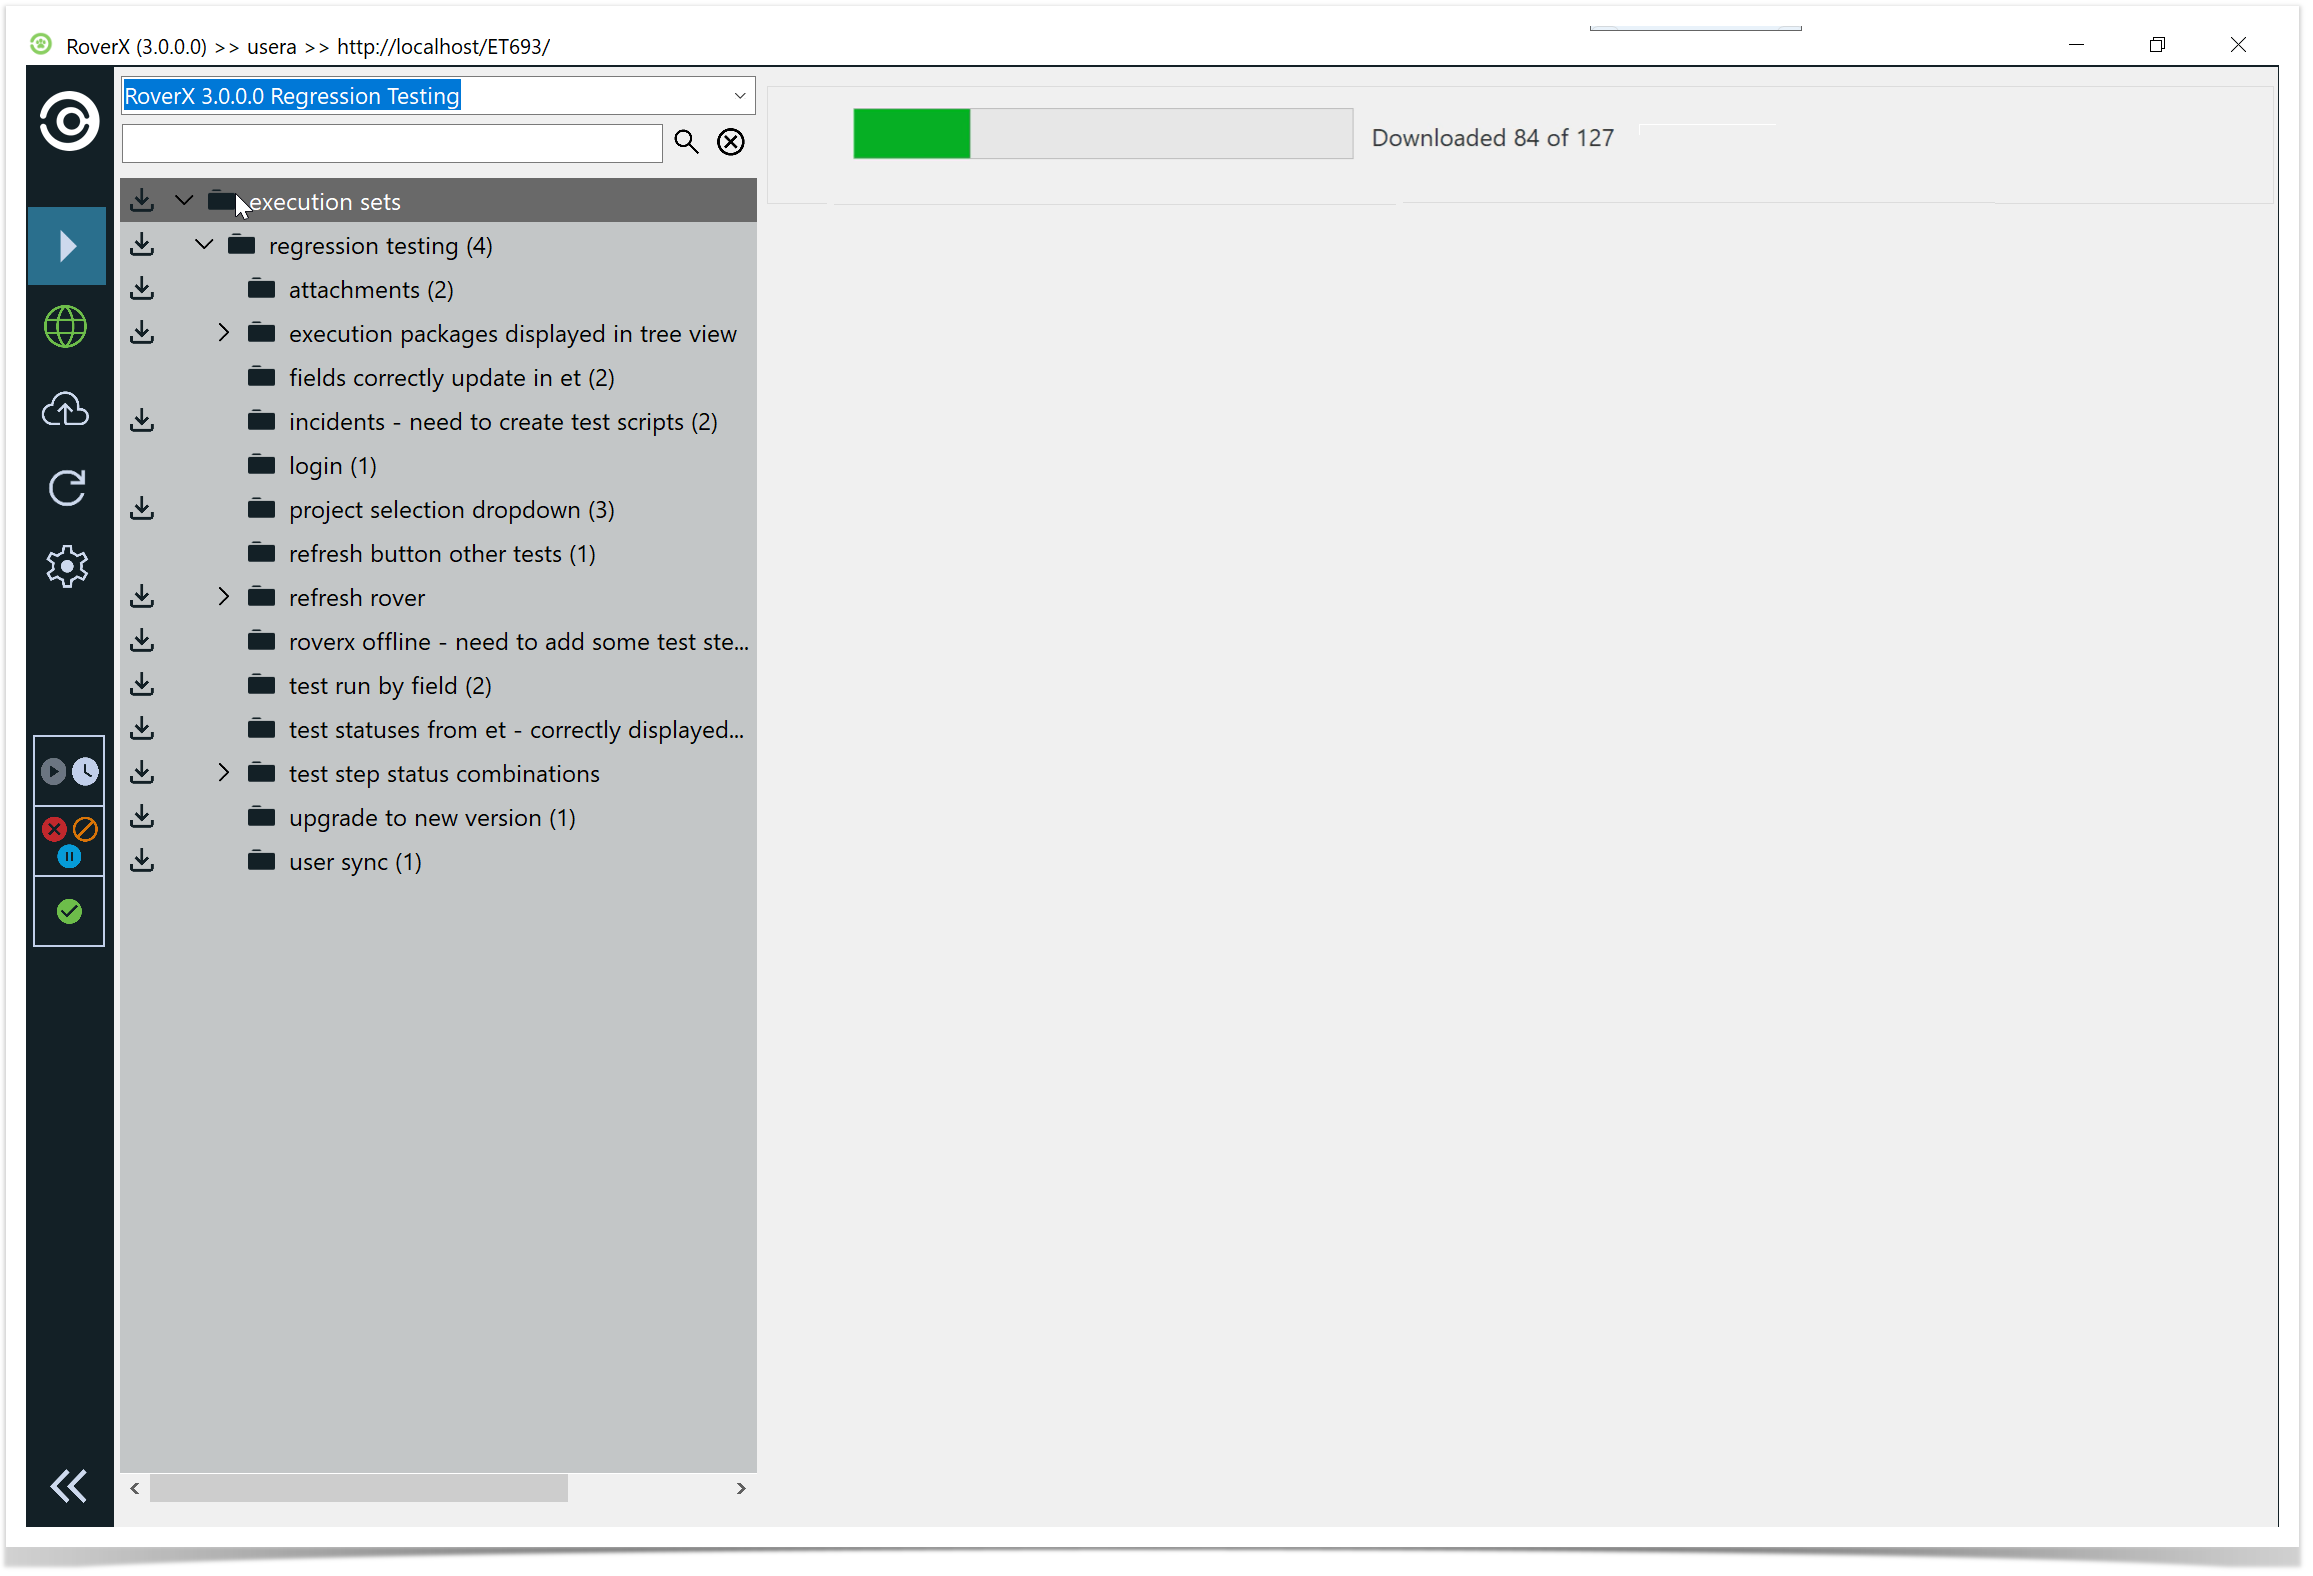
- To download all execution sets and test runs, click on the download icon for the main Execution Sets folder.
While downloading, a progress bar will be displayed to show the download status.
Once you have downloaded the execution set or the test runs the download icon will disappear.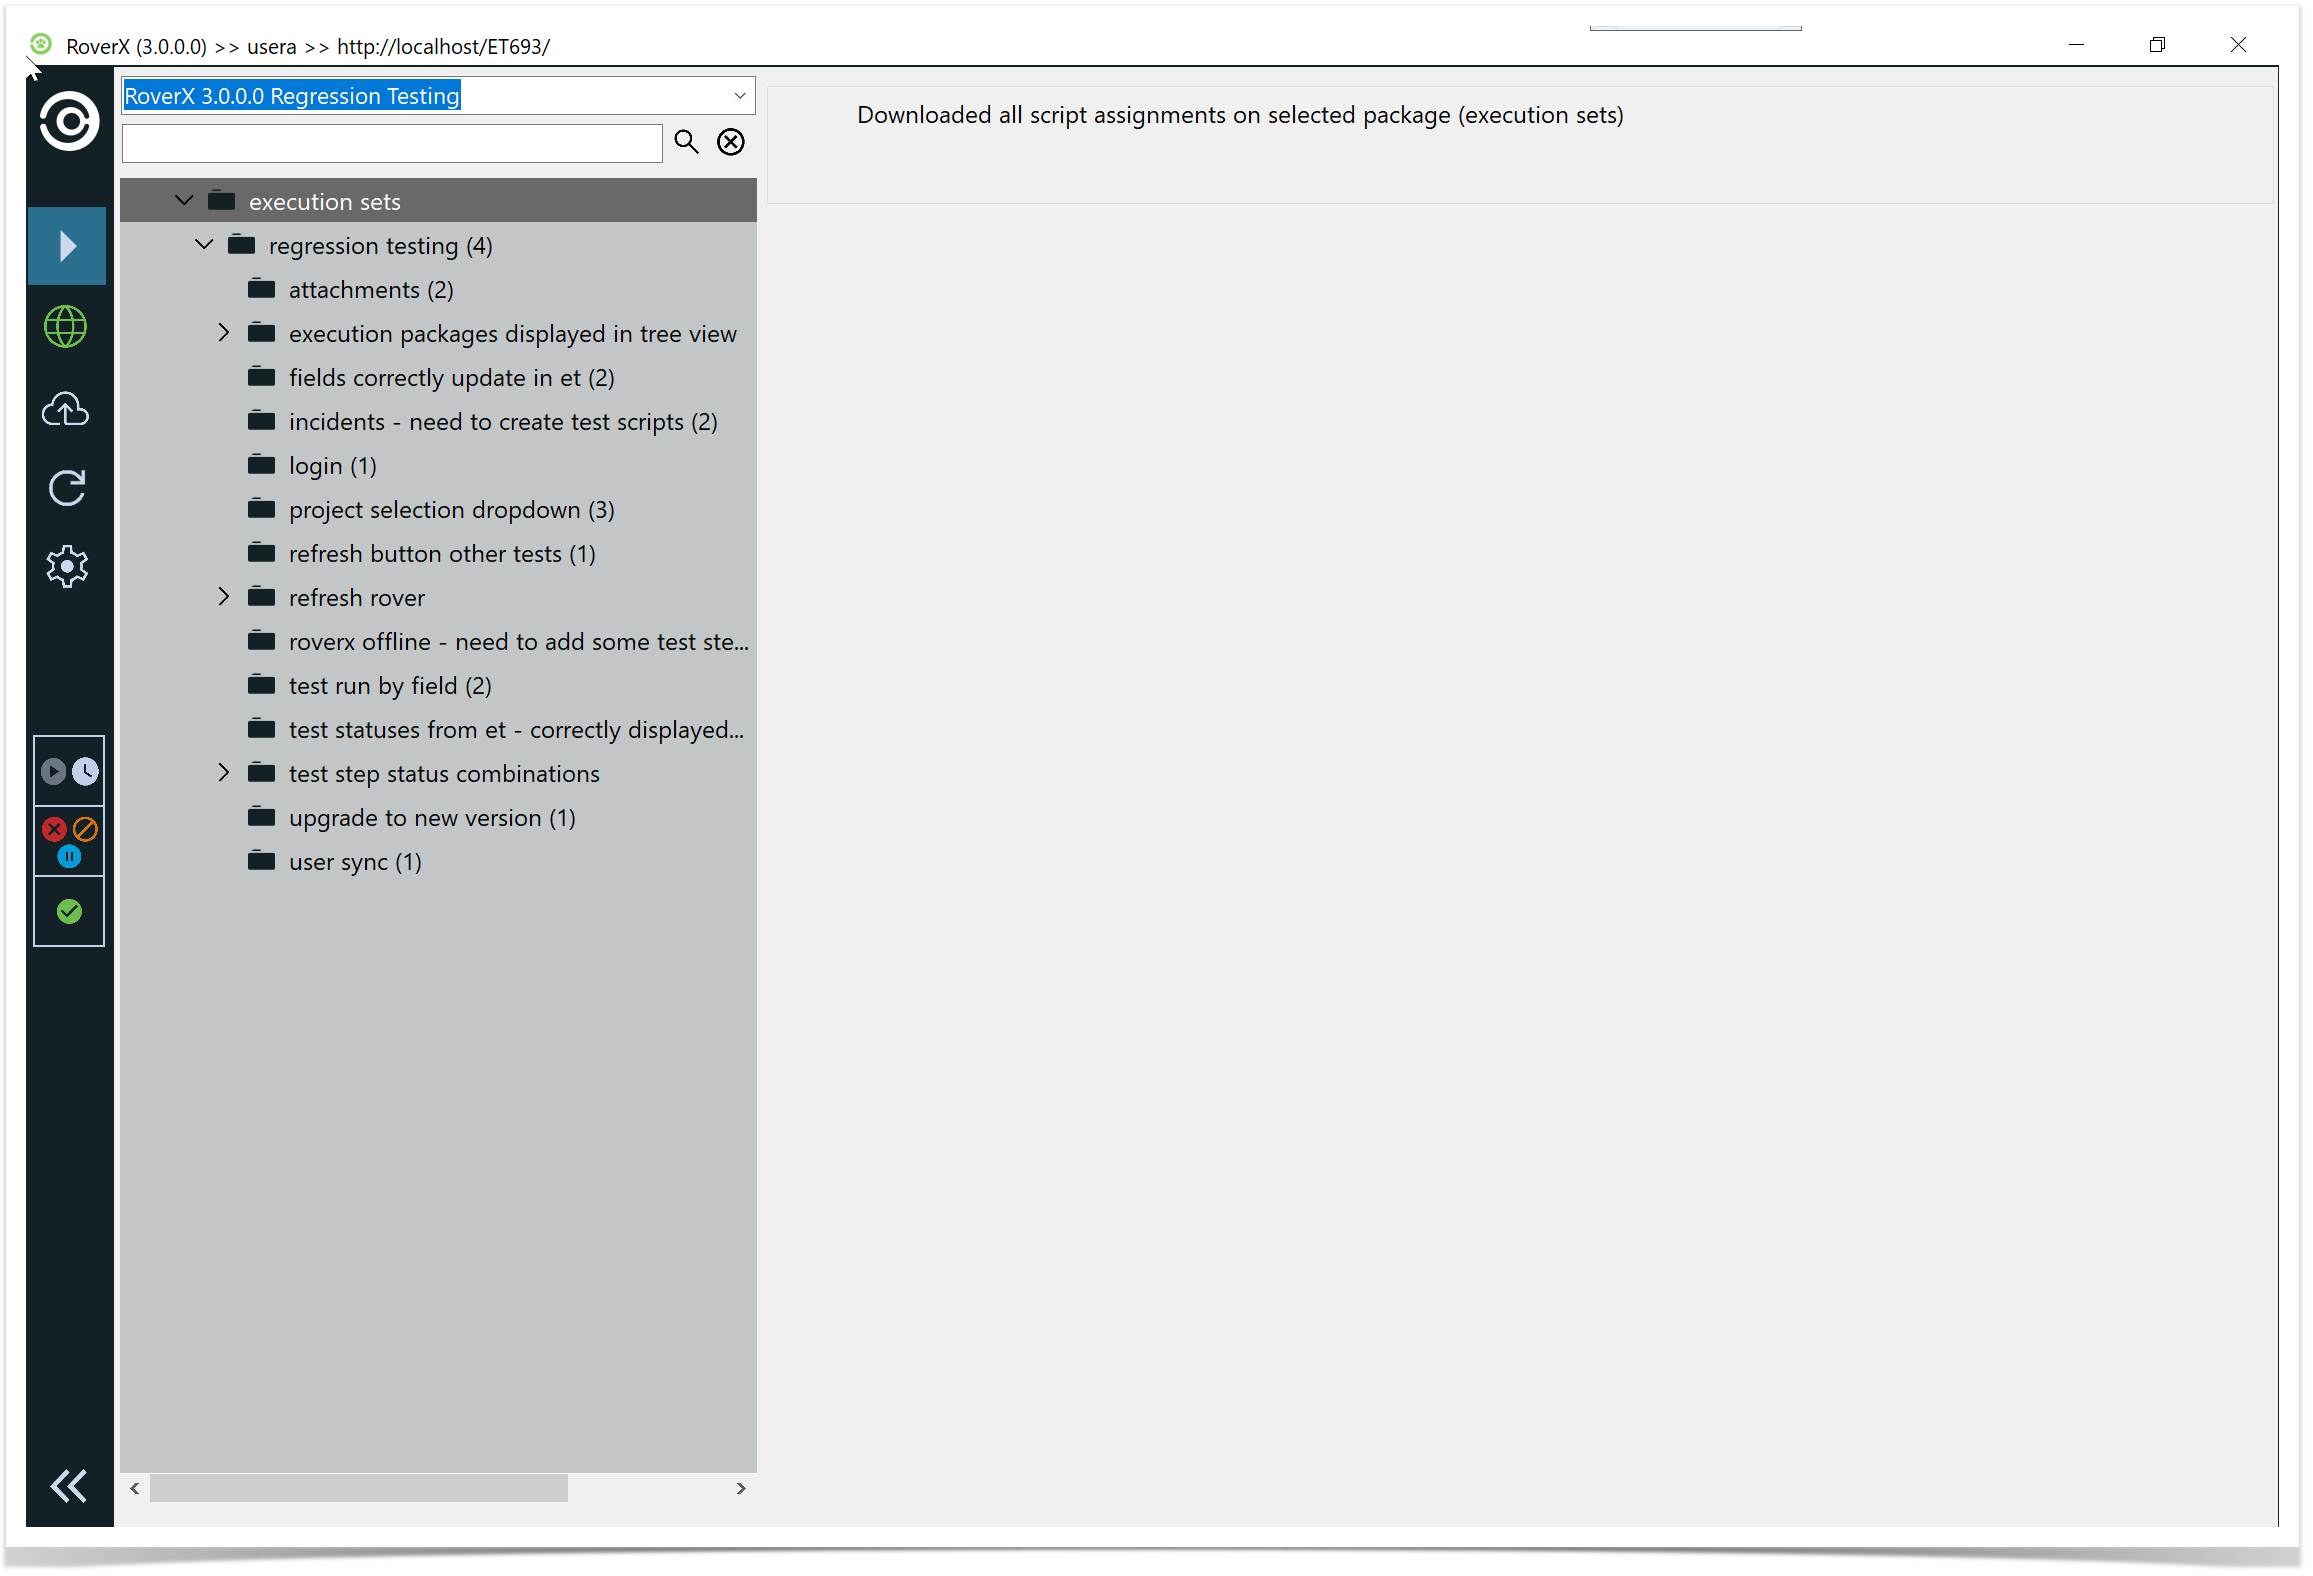
To download one or more test runs, select the folder where the test runs are located.
Select the test runs you want to download.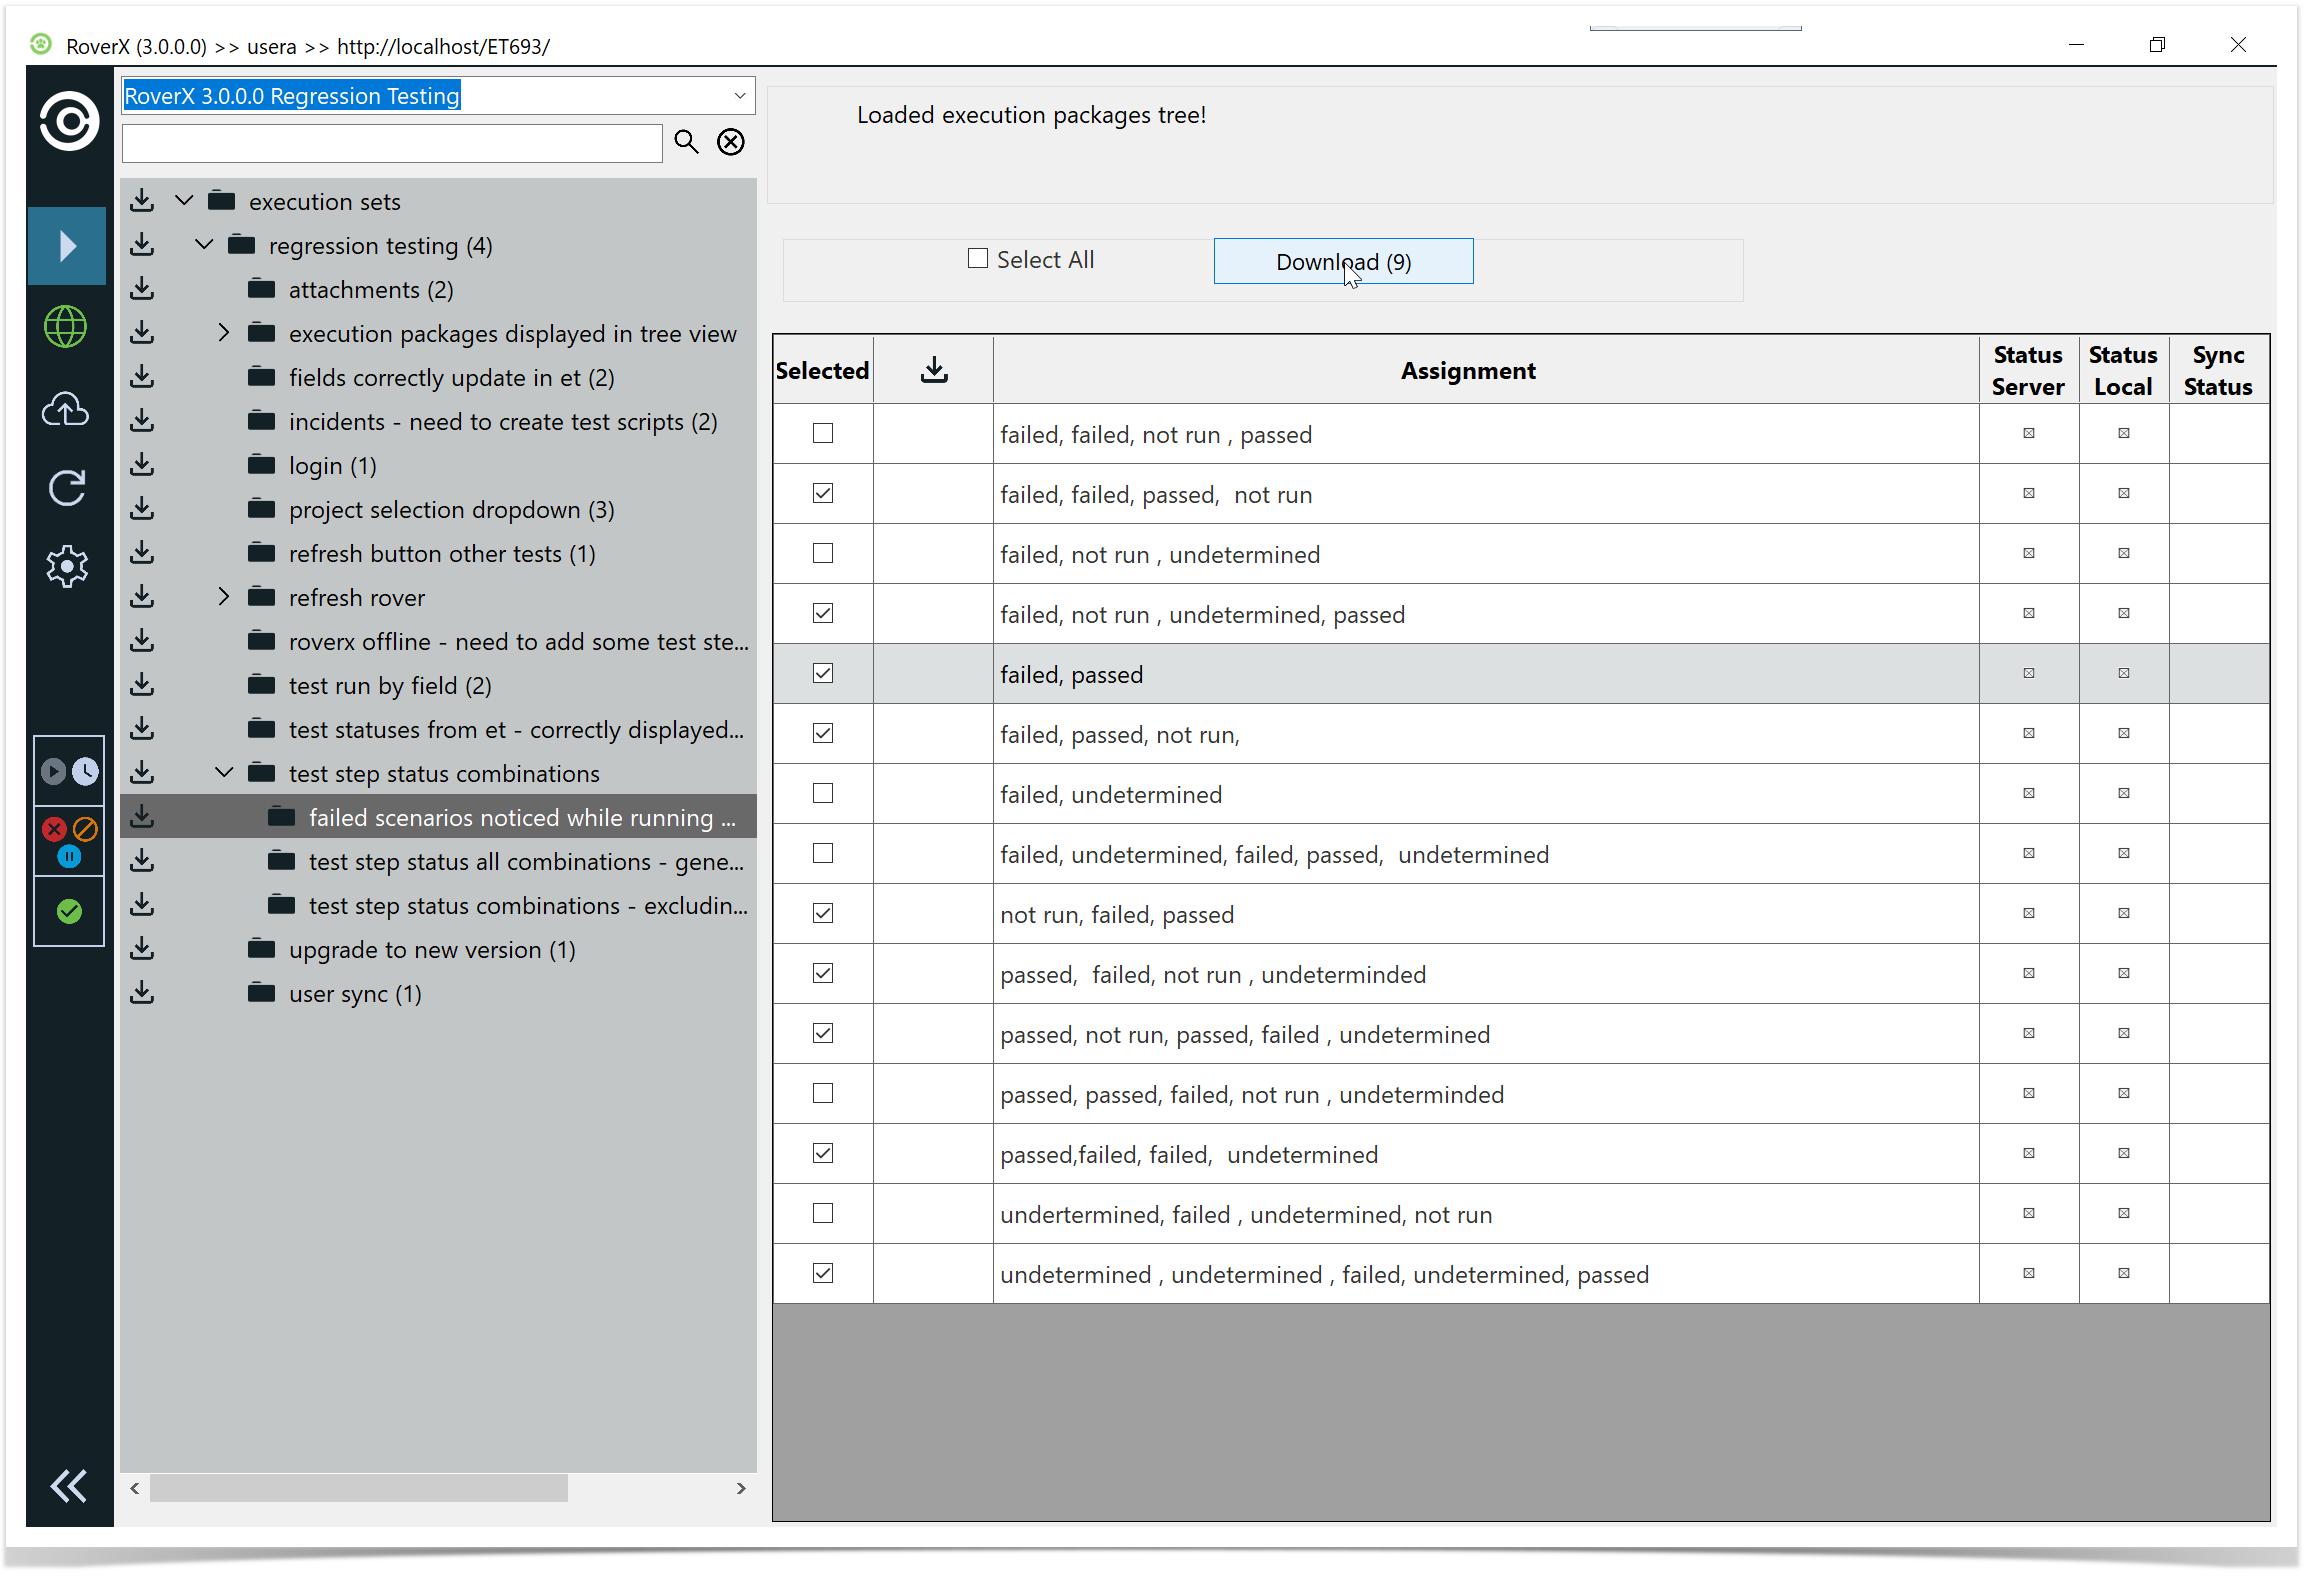
Select Download button. The selected test runs are downloaded.
Test Run Details
When viewing test run details in RoverX, they are displayed on the right-hand side of the screen. The following columns are included in the test run details:
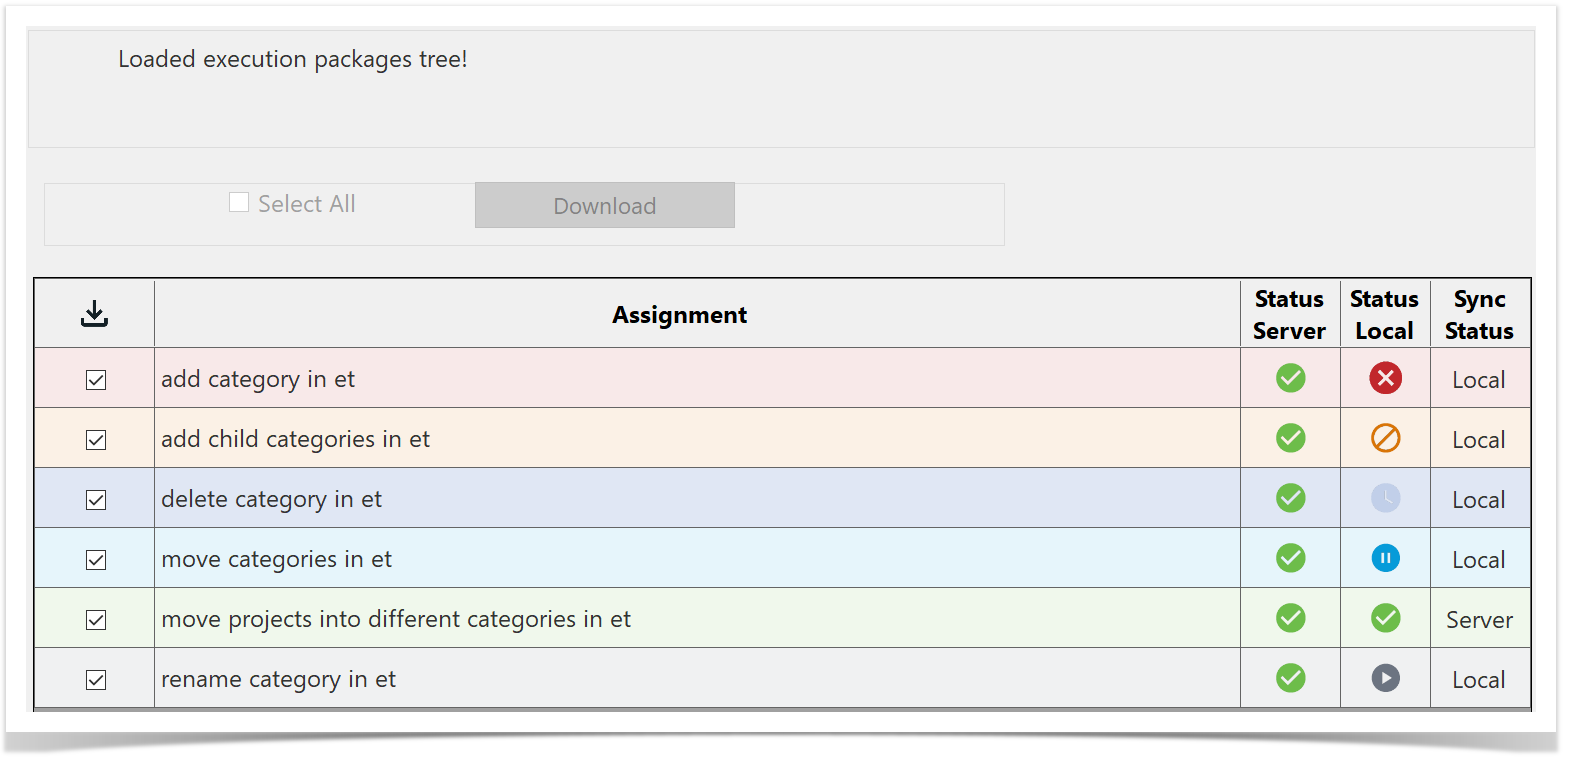
- Downloaded - Indicates whether the test run has been downloaded to your local machine or is still stored on the Enterprise Tester server.
- Assignment - The name or identifier of the test run.
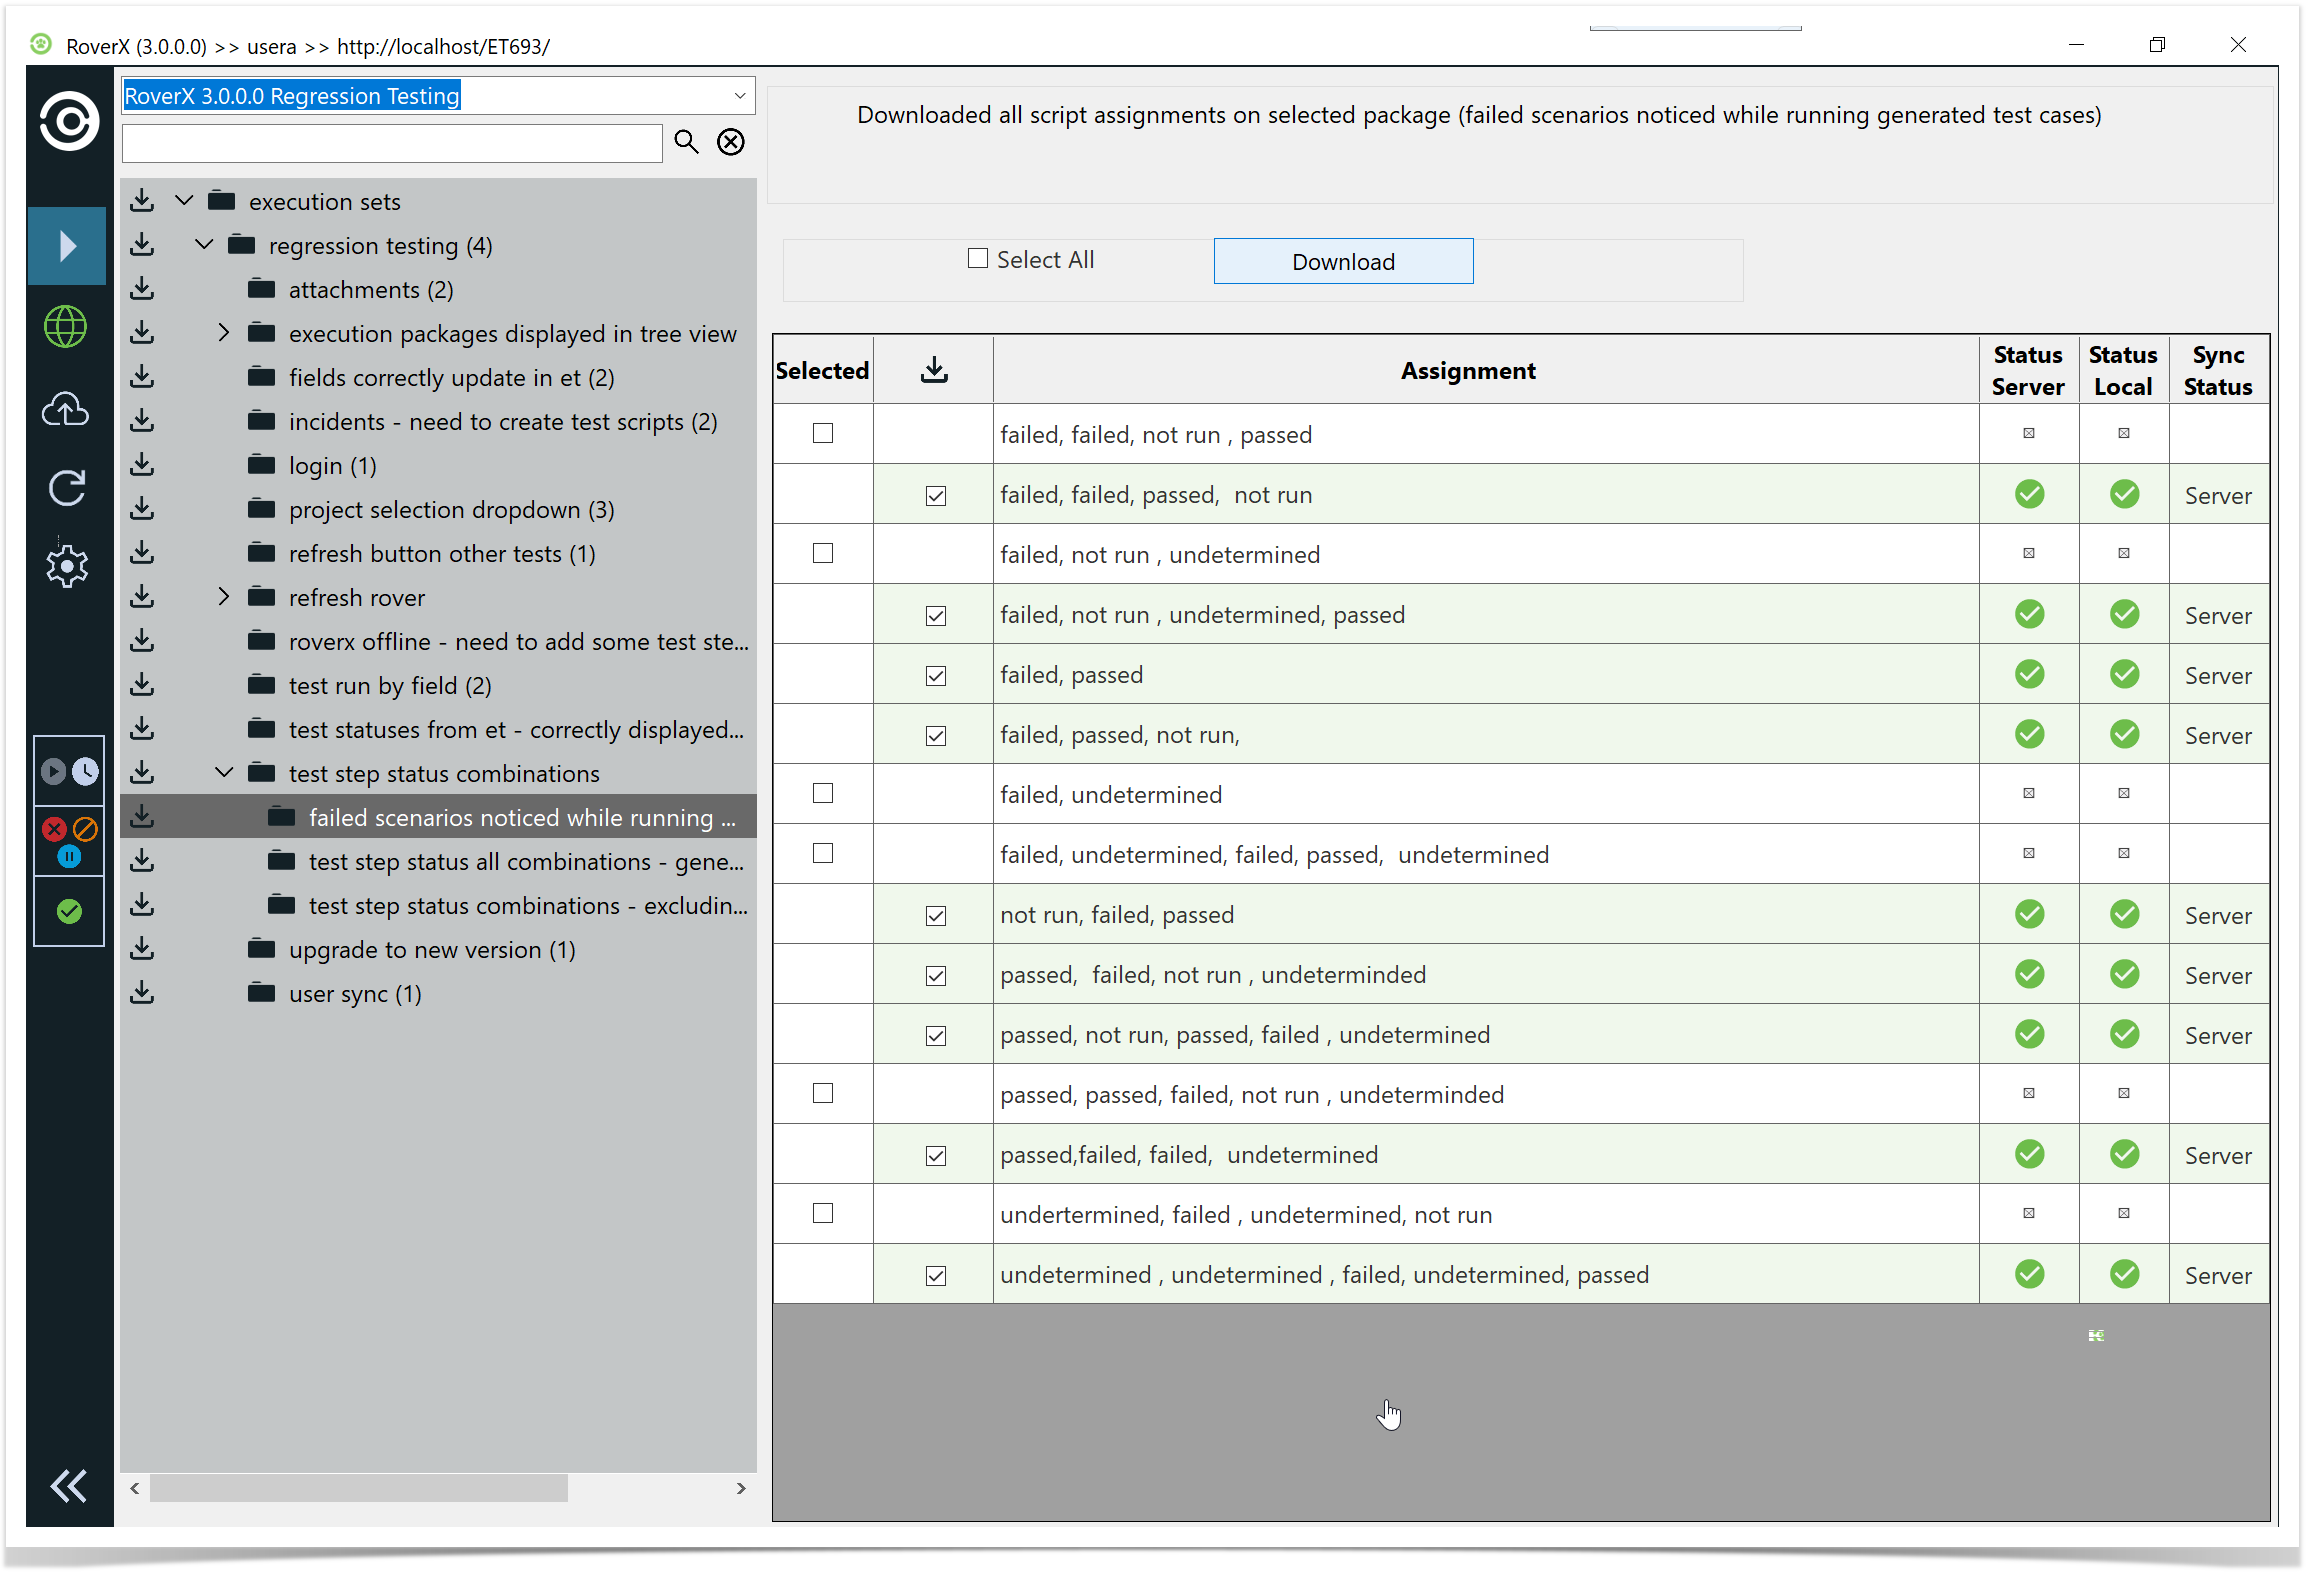
- Status Server - Displays the current status of the test run on the Enterprise Tester server.
- Status Local - Shows the current status of the test run on your local machine.
- Sync Status - Tells you whether the test run has been recorded on the server or if it only exists locally. If the status is "local," the test run will be uploaded to Enterprise Tester
server during the next synchronisation.
Viewing and Running Tests
Once you have downloaded your test runs, you can click or tap on the test run in the table, depending on the device you are using, to view or execute your script.
Displayed Fields
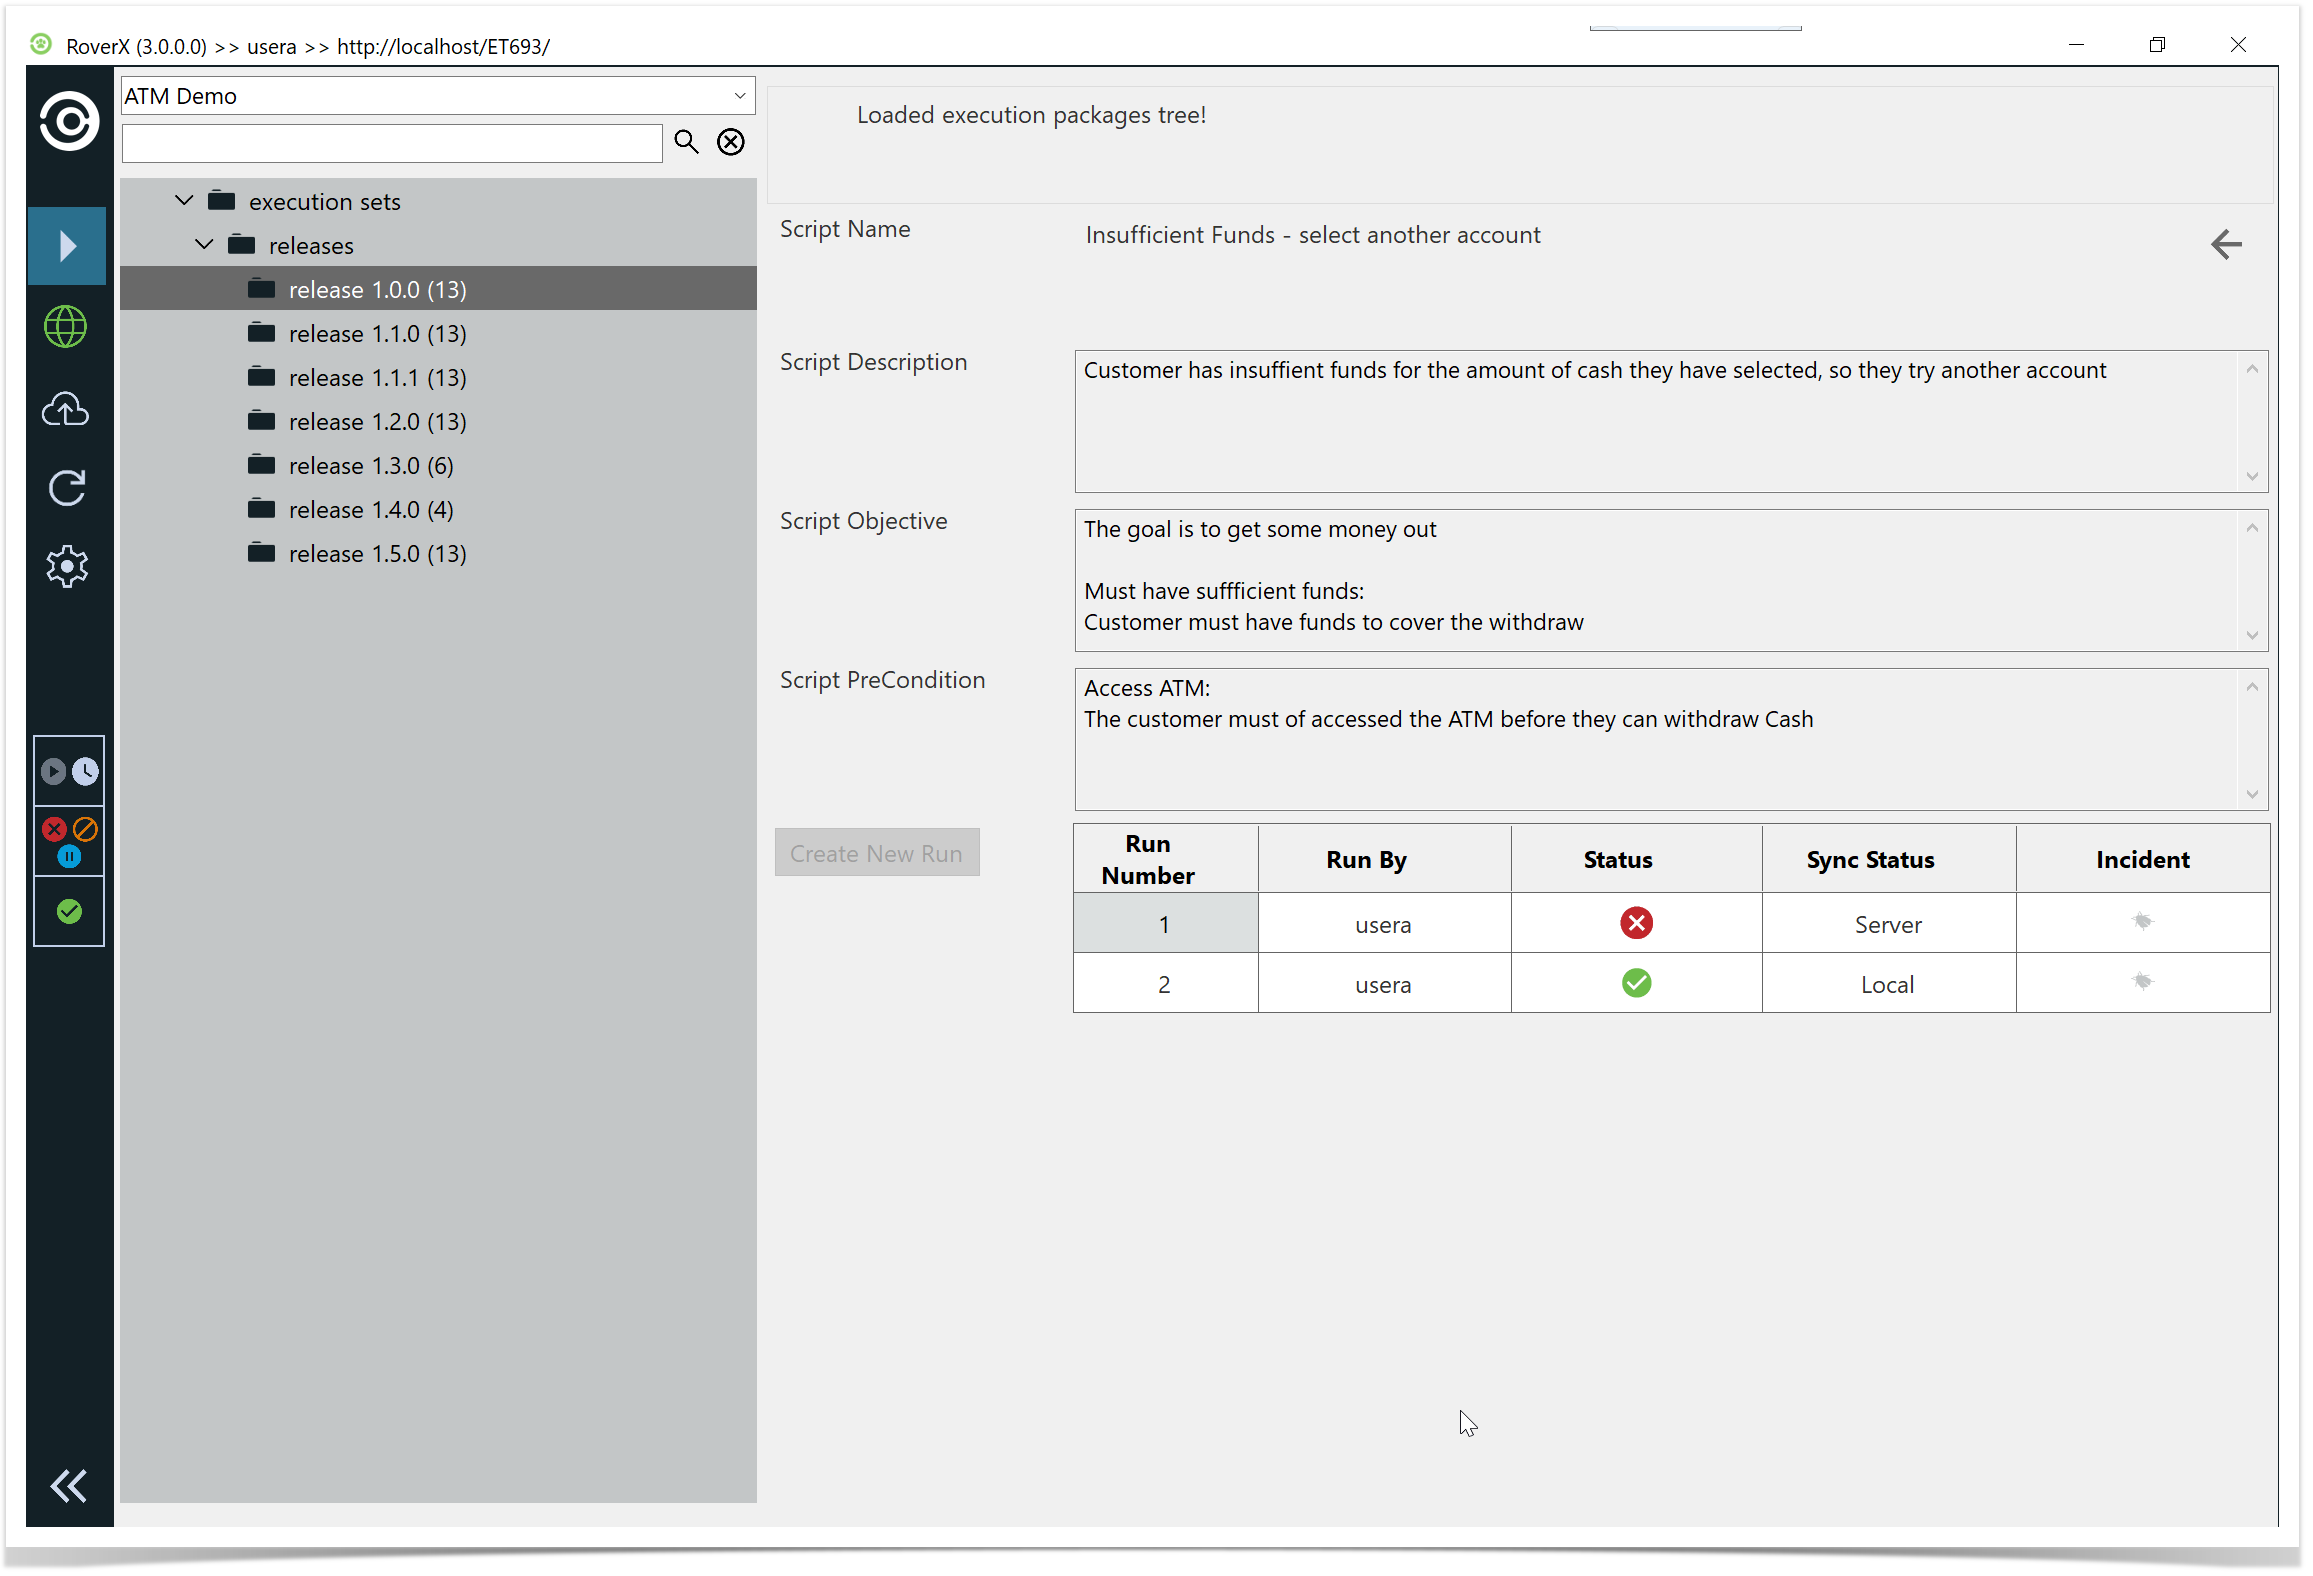
When you view a test run, the following fields will be displayed on the screen. Note that if any fields are blank in Enterprise Tester, they will not appear in RoverX.
- Script Description: A detailed description of the test script.
- Script Objective: The goal or purpose of the test script.
- Script Pre-Conditions: Any conditions that need to be met before executing the test script.
- Script Post Conditions: Conditions expected after the test script has been executed.
- Script Notes: Additional notes related to the test script.
- Run History: The last two test executions will be shown for reference.
 Run History
You can choose to view any of the previous runs on the run history grid. The run history grid provides some basic details, including:
- Run Number: The identifier for each test run.
- Run By: Details of who executed the run.
- Status: The status of each test run.
- Sync Status: Indicates whether the run has been recorded on the server or if it only resides locally.
- Incidents: Any incidents associated with the test run.
Starting a New Run or Completing an Existing Run
- Starting a New Run
You can start a new test run if the latest test run has been completed on the server or locally. To do this, simply select the Create New Run button located to the left of the run history grid.
- Completing an Existing Run
If the latest test run is incomplete (marked as "Not Run" or "In Progress"), you can continue with that test run and complete it instead of starting a new one.

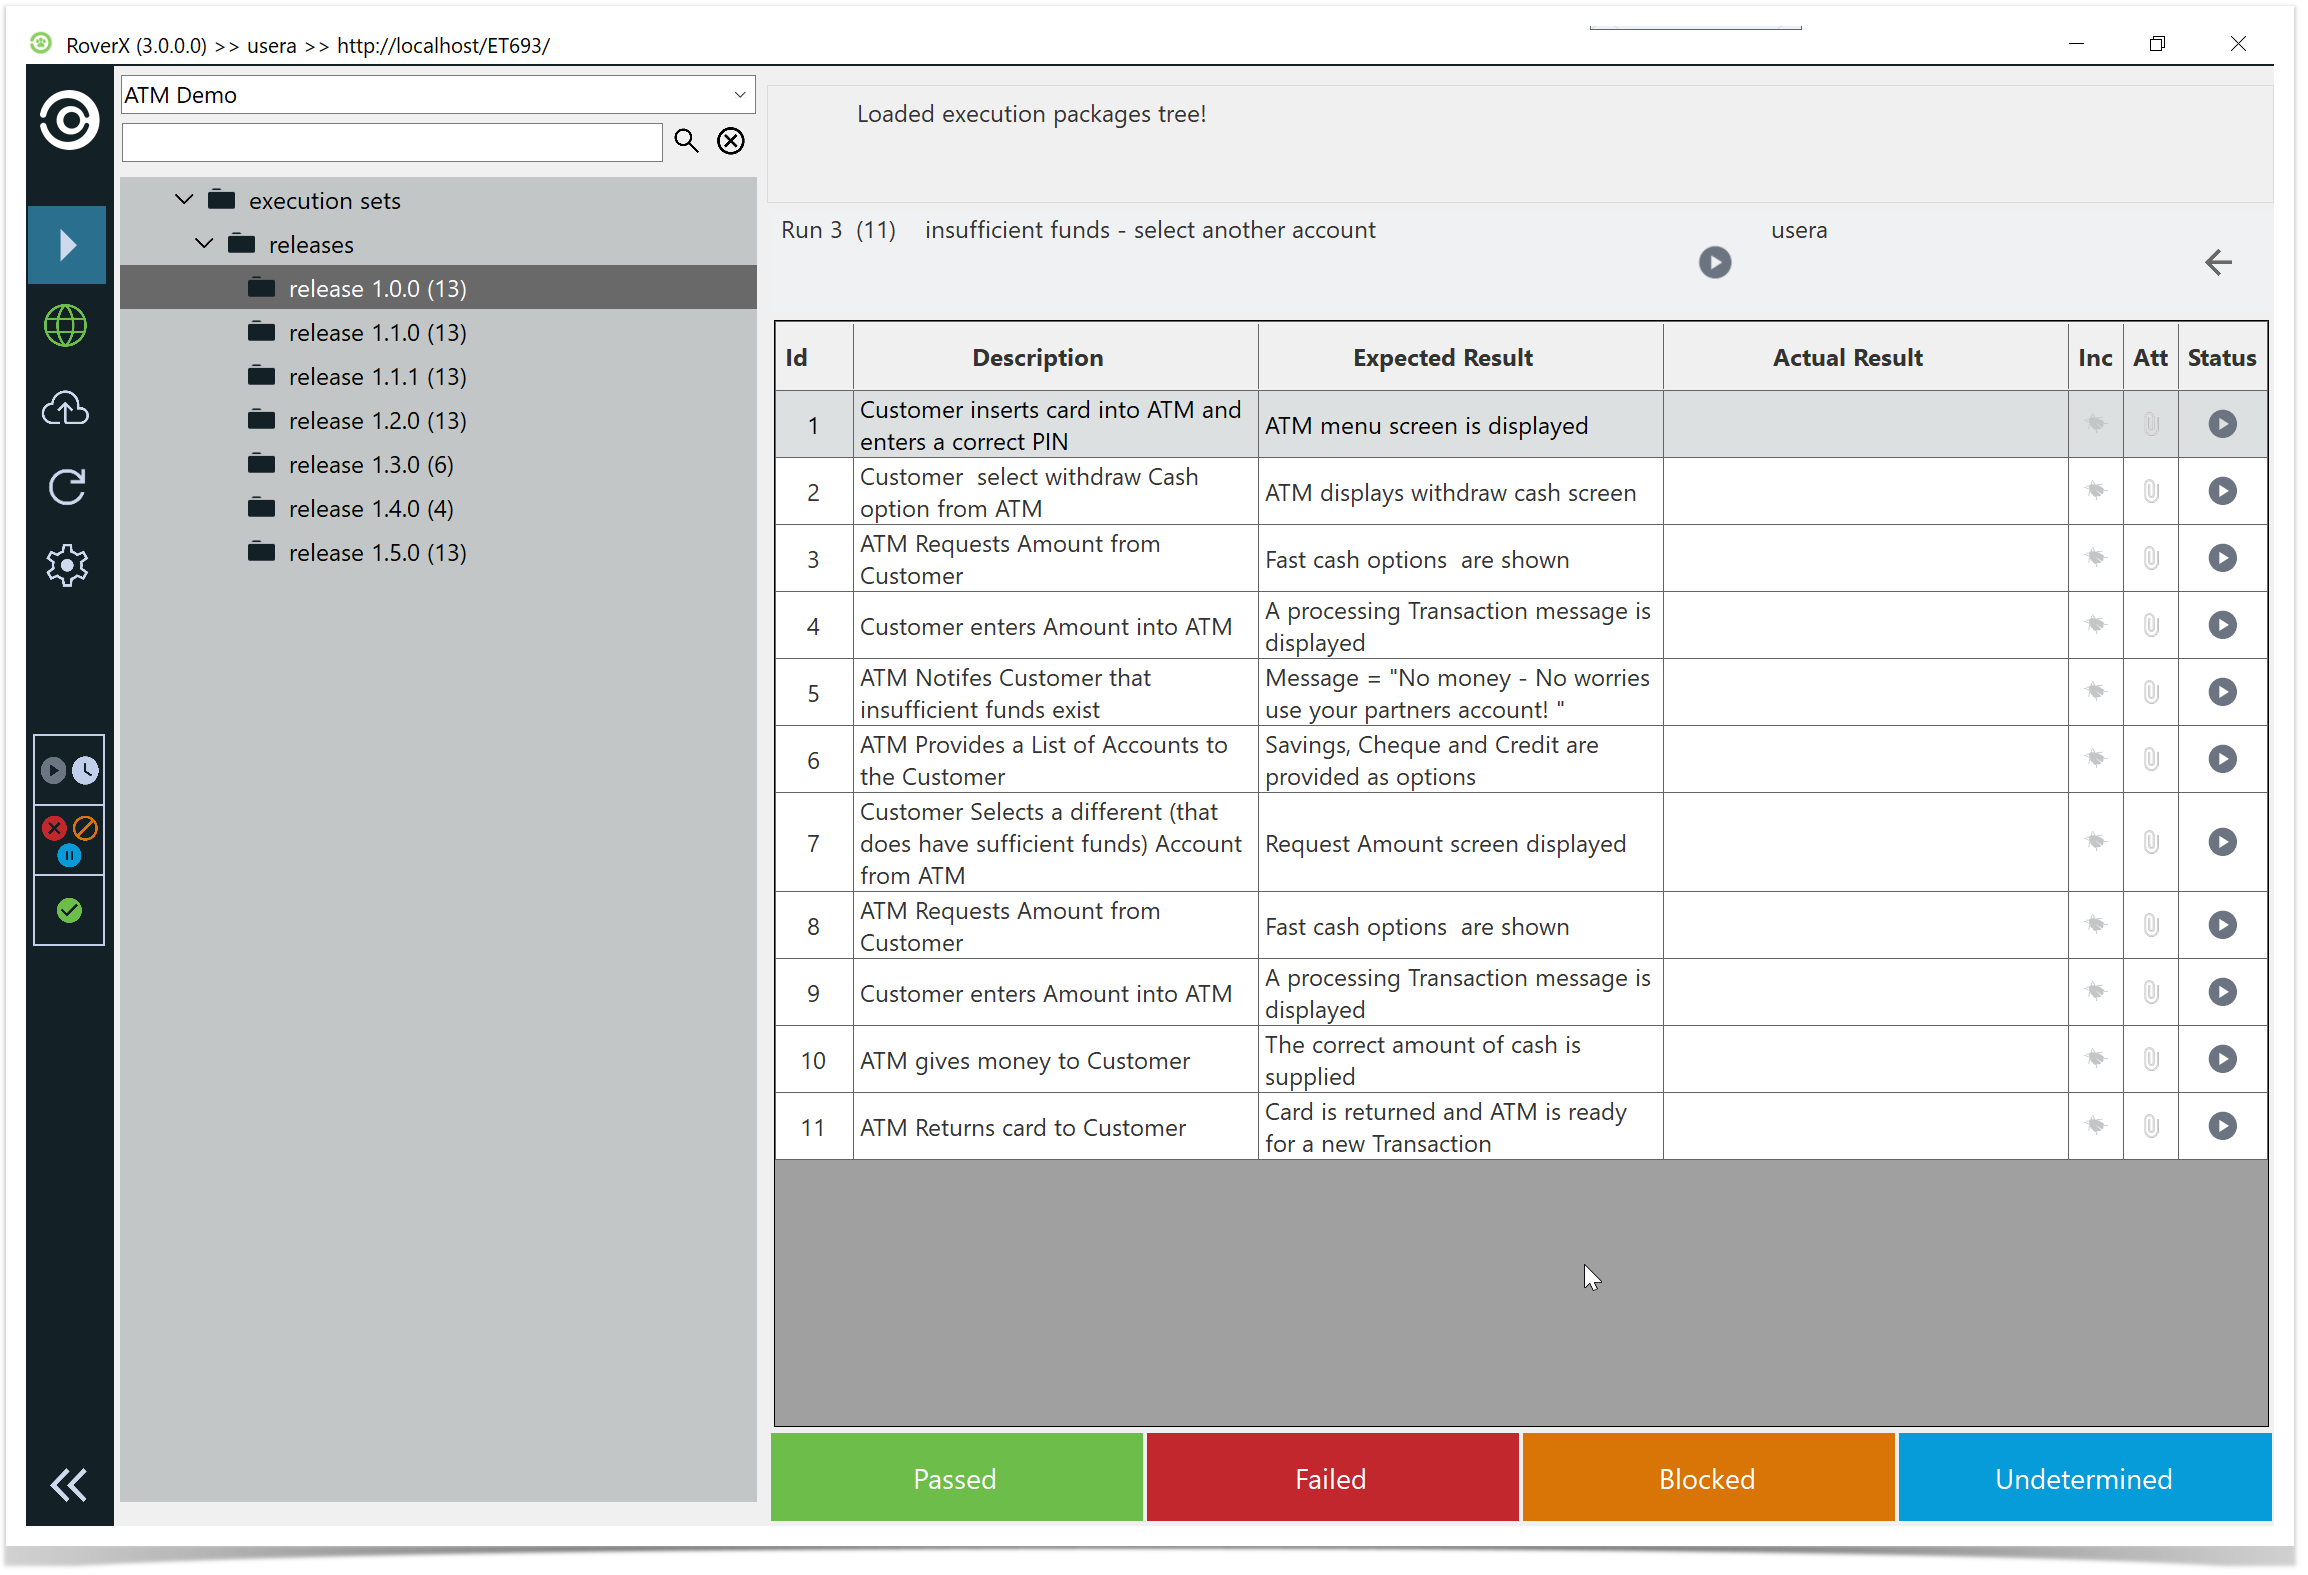
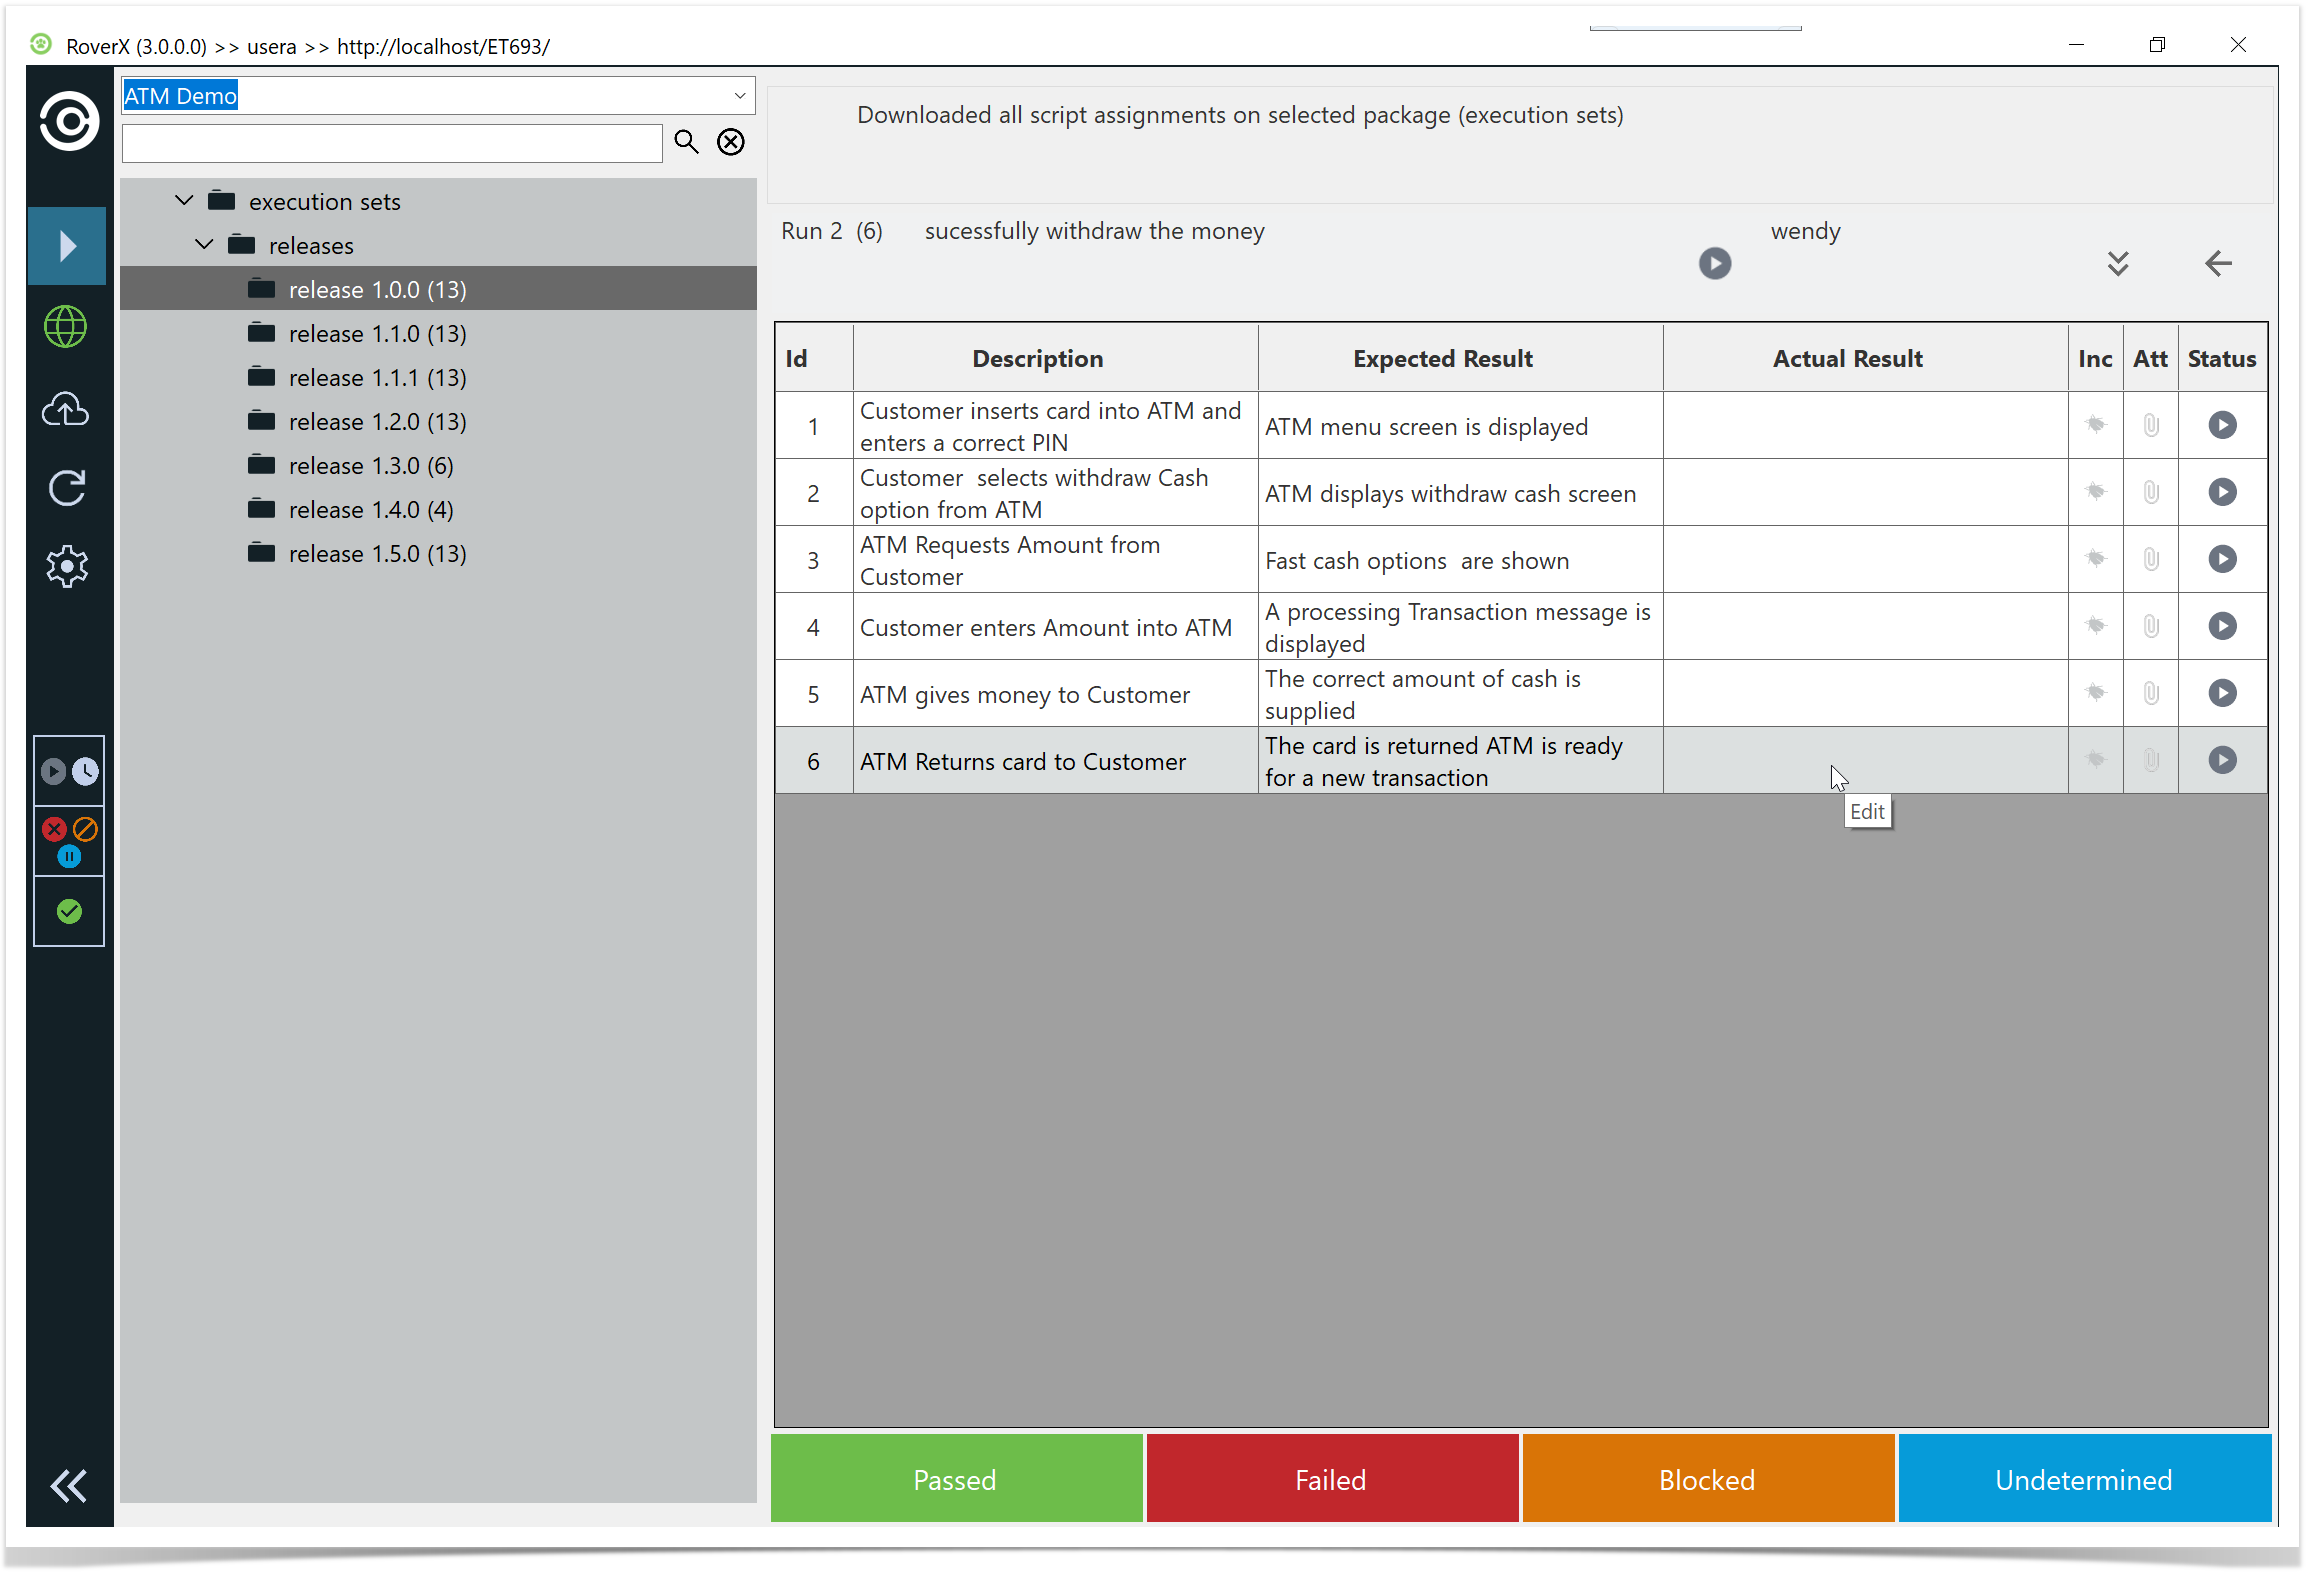
When you load the Test Execution screen, you will see the test steps displayed in a list view. This screen provides the following details:
- Run Number: The identifier for the current test run.
- Number of Steps: The total number of steps in the test run (displayed in brackets).
- Test Run Name: The name of the current test run.
- Test Run Status: The current status of the test run.
- Back Button: Allows you to navigate back to the previous screen.
- Step Result Menu: Located at the bottom of the screen, for selecting the results of each test step.
- Custom Field Icon: Appears if there are any custom fields associated with the test run.
Viewing and updating Custom fields
If your test run includes custom fields, you will see this button ![]() in the header. Clicking on this icon will close the Test Steps panel and display all the custom fields, allowing you to view and update them accordingly.
in the header. Clicking on this icon will close the Test Steps panel and display all the custom fields, allowing you to view and update them accordingly.
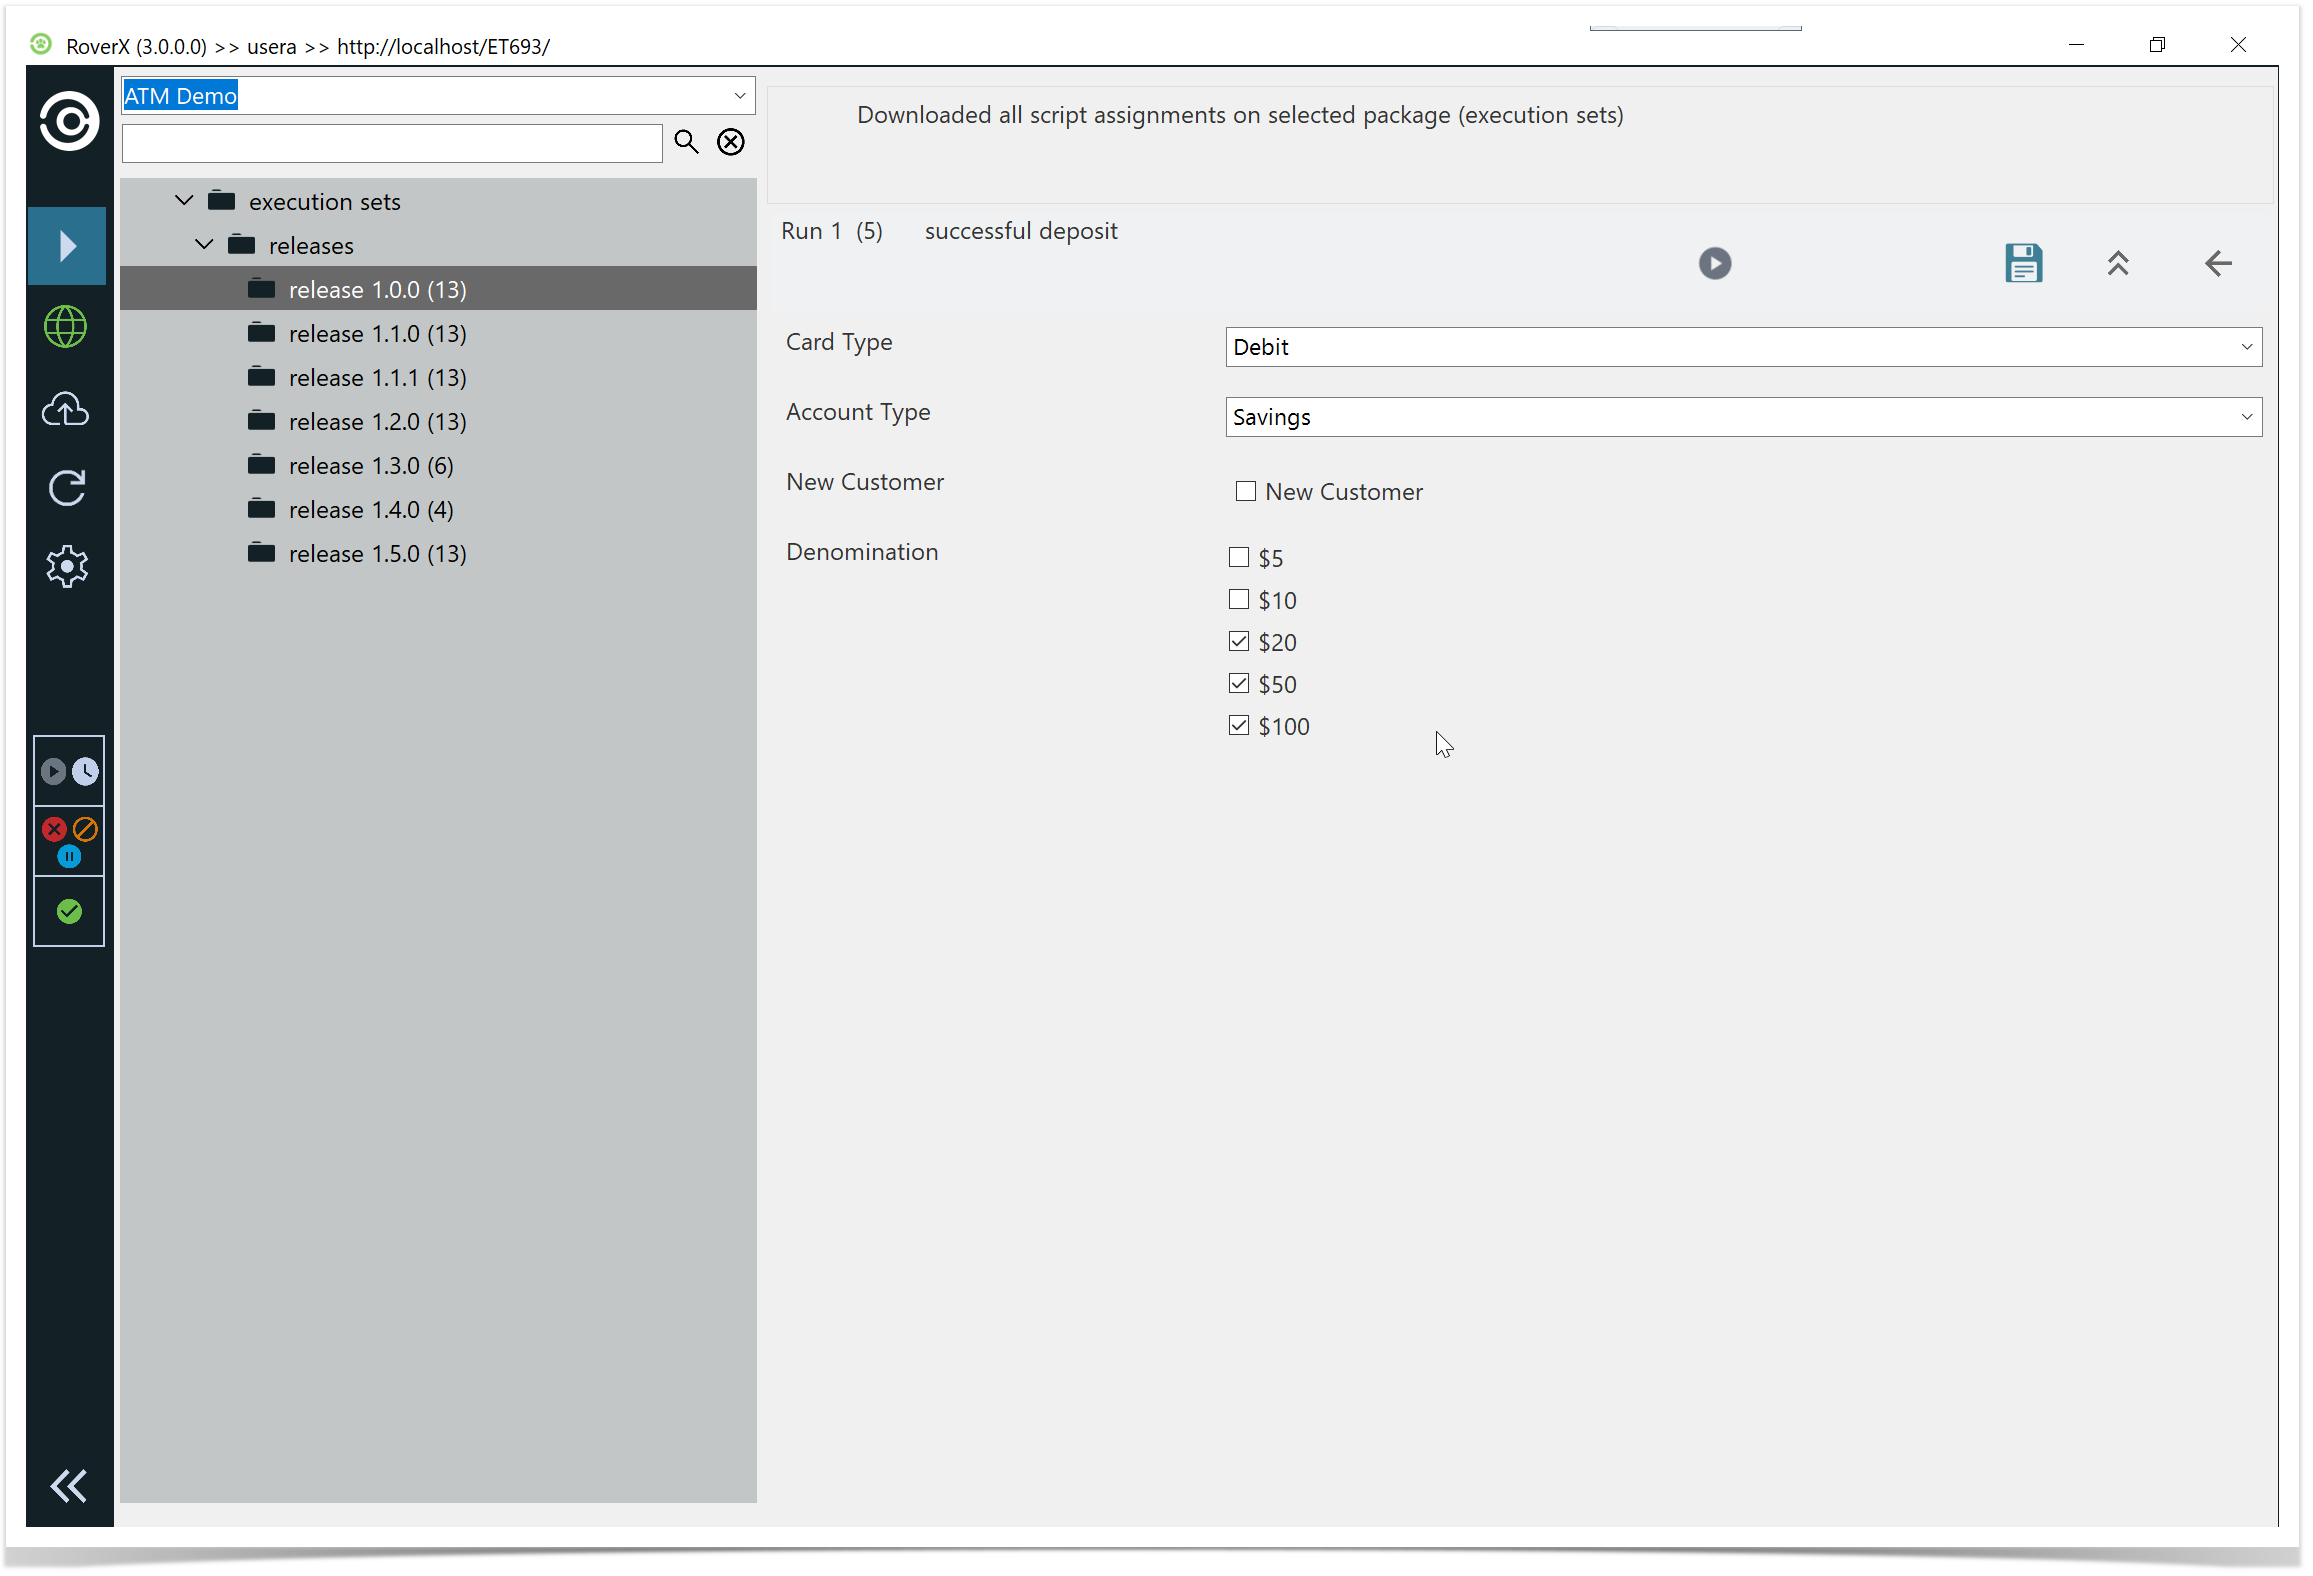
You can then update any of the custom fields and select the Save button. A confirmation message will be displayed to confirm that the data has been saved successfully.
Select OK button.
To close the Custom Fields panel and return to the Test Steps, select the ![]() button.
button.
Just like in Enterprise Tester, the Test Execution screen includes a text field for entering Actual Results for each test step.
While a step is active, you can select the Step Result option at the bottom of the screen to set the status for that specific step. Once you select a status for a test step, the screen will automatically move to the next step in the list.
Hyperlinks and local paths can be added in the Actual Result field.
Keyboard Shortcuts for Test Execution
To enhance efficiency while working with test steps, you can use the following keyboard shortcuts:
- Ctrl+P: Mark the current step as Passed.
- Ctrl+F: Mark the current step as Failed.
- Ctrl+B: Mark the current step as Blocked.
- Ctrl+U: Mark the current step as Undetermined.
These shortcuts allow you to quickly update the status of the current test step.
Using Shortcut Keys to Set Step Status
You can streamline your testing process by using shortcut keys to set statuses for multiple steps at once.
For example, if you want to mark all steps in the test run as Passed:
- Press <CTRL+A> to select all steps.
- Then press <CTRL+P> to mark all selected test steps as Passed.
This functionality allows you to quickly update the status of multiple steps without having to select each one individually.
Copying and Pasting Text
RoverX allows you to copy and paste text from external sources, such as Excel, directly into the Expected Result field. To do this:
- Copy the desired text from your source (e.g., Excel) using Ctrl+C.
- Navigate to the Expected Result field in Rover.
- Paste the copied text into the field by using Ctrl+V.
This feature helps streamline the process of entering expected results by enabling quick transfers of text data.
Copy Expected Result to Actual Result:
You can copy the Expected Result into the Actual Result field. To do this, highlight the test step you want to update, then click or tap inside the Actual Result field.
The Expected Result text will be copied automatically.
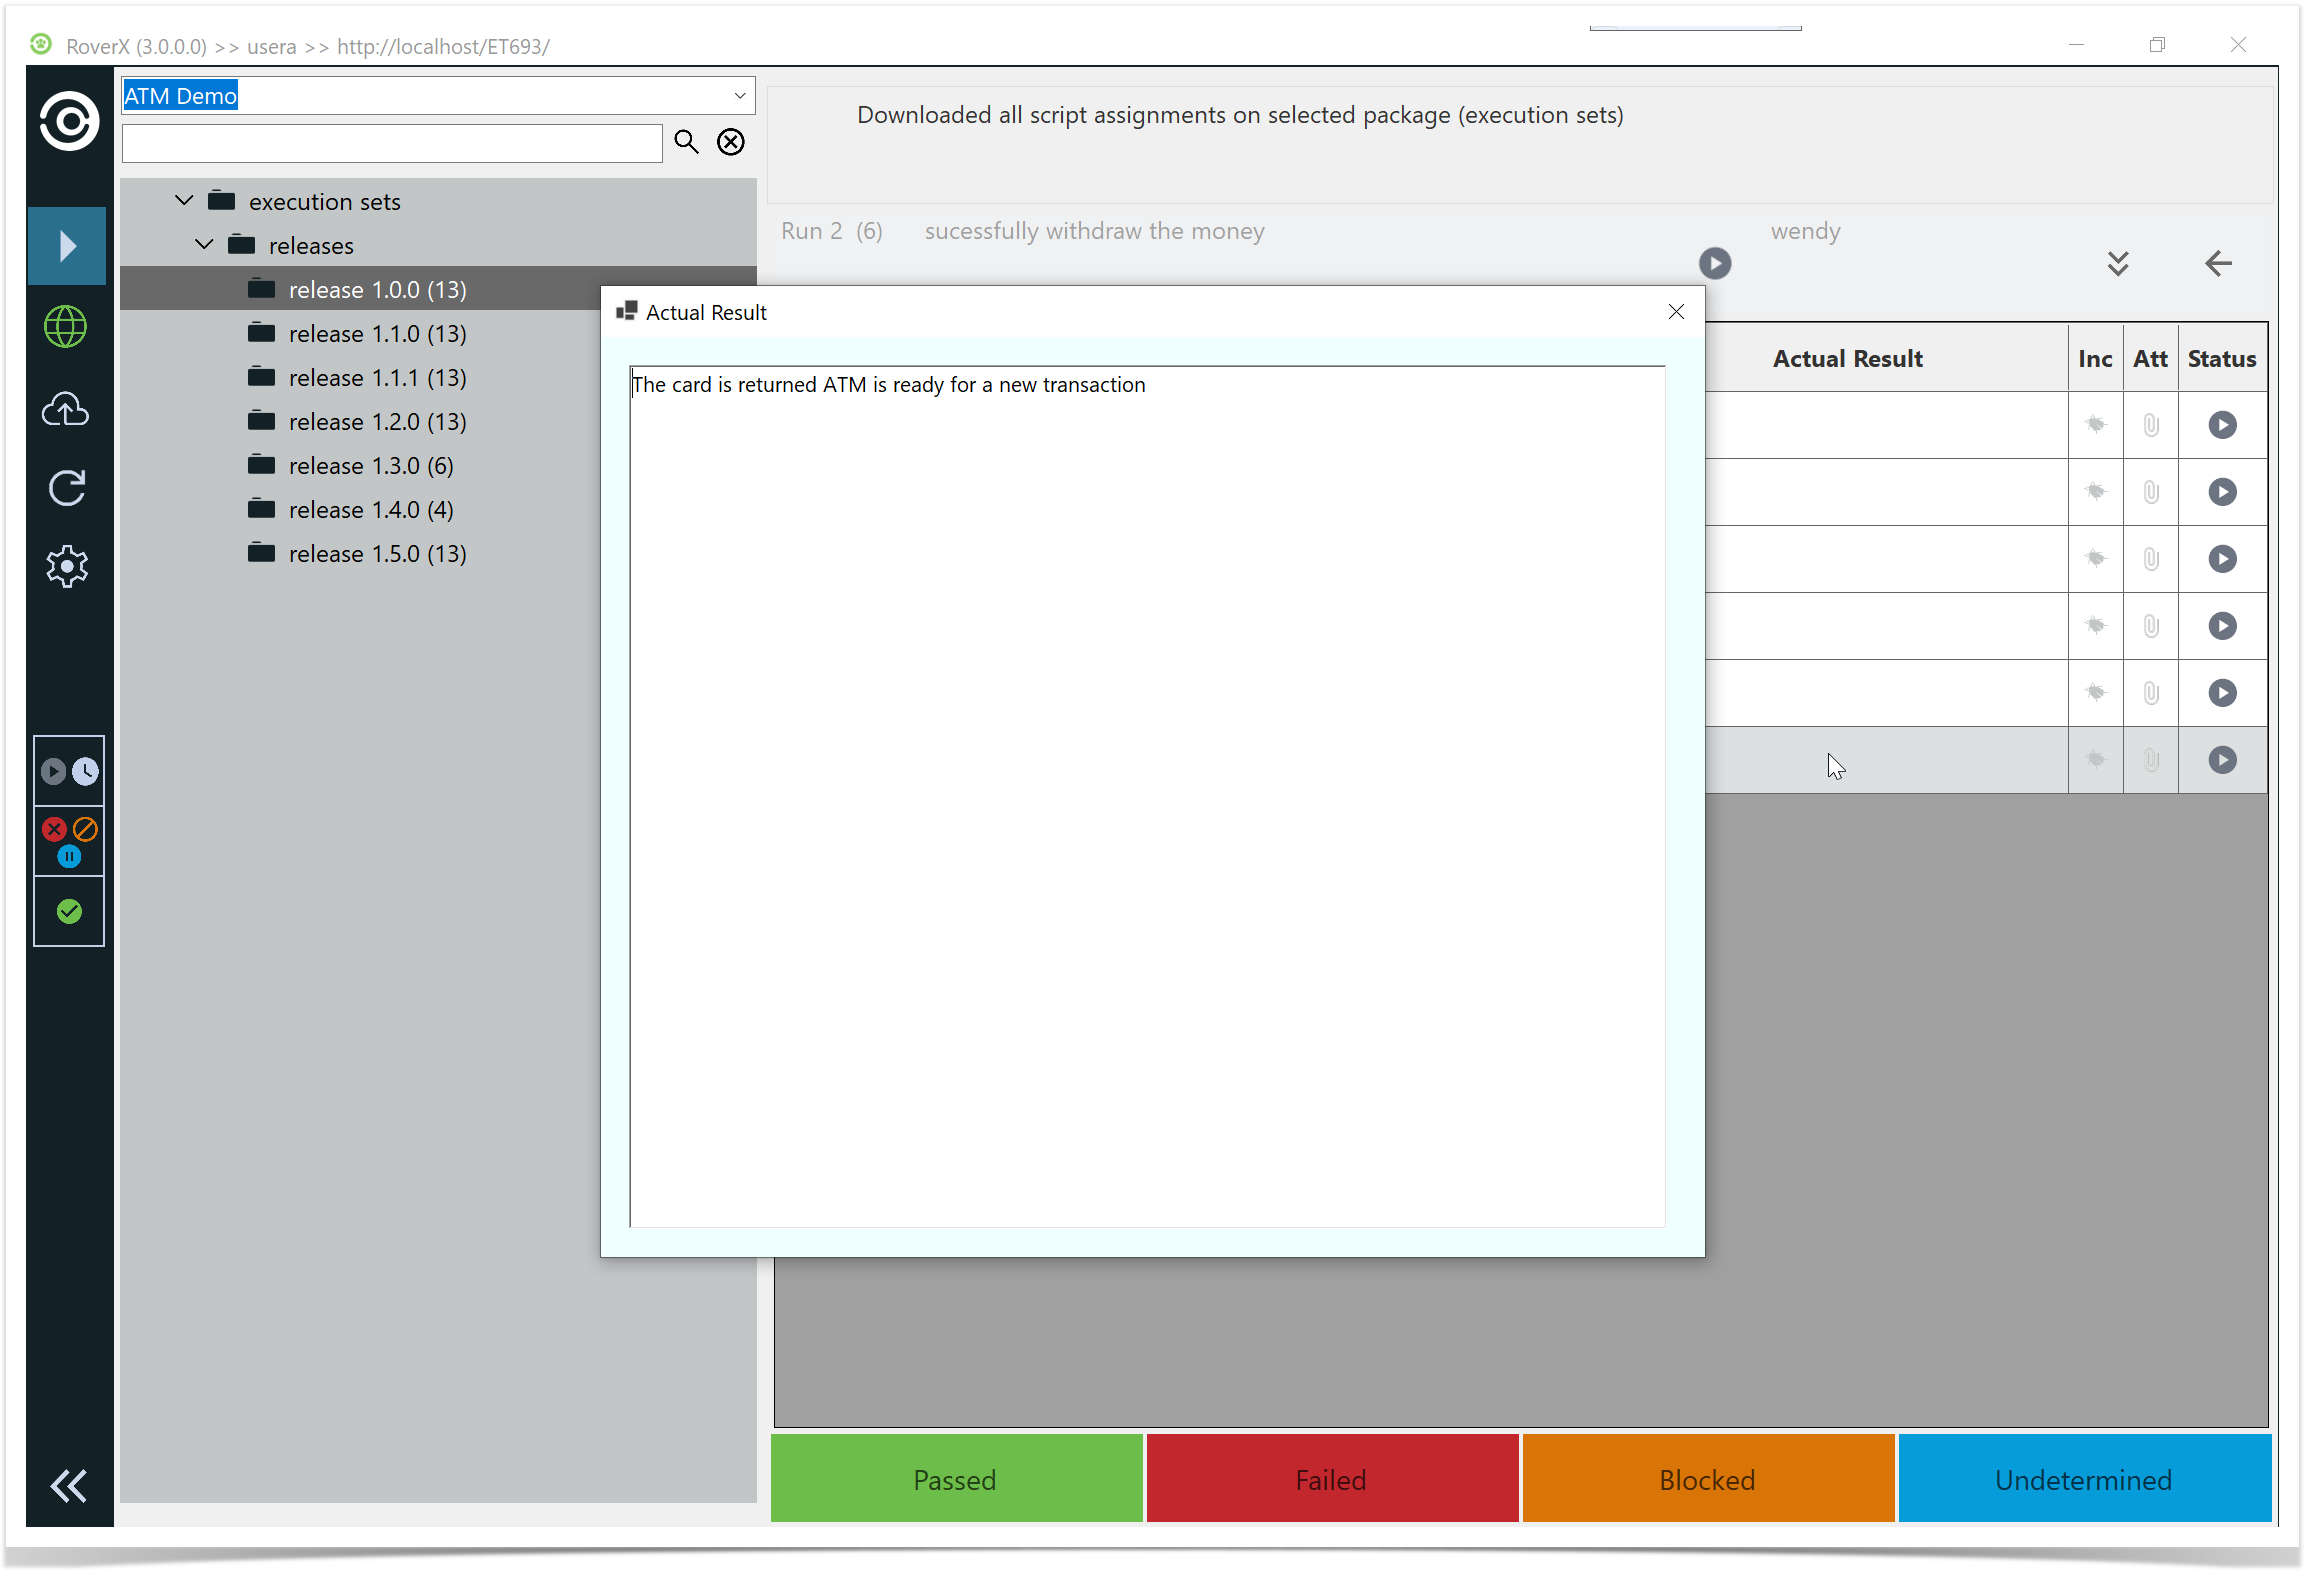
Then click on the X button to close the Actual Result pop up window.
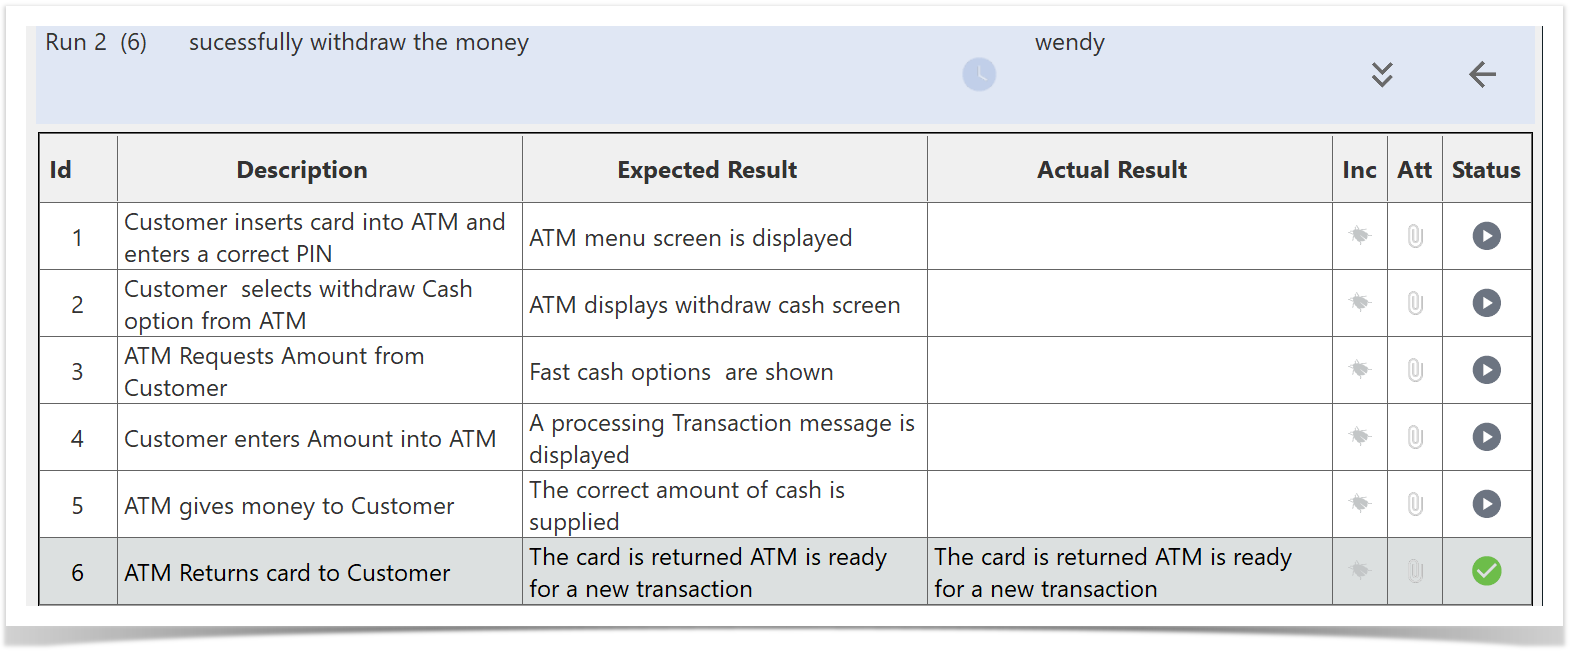
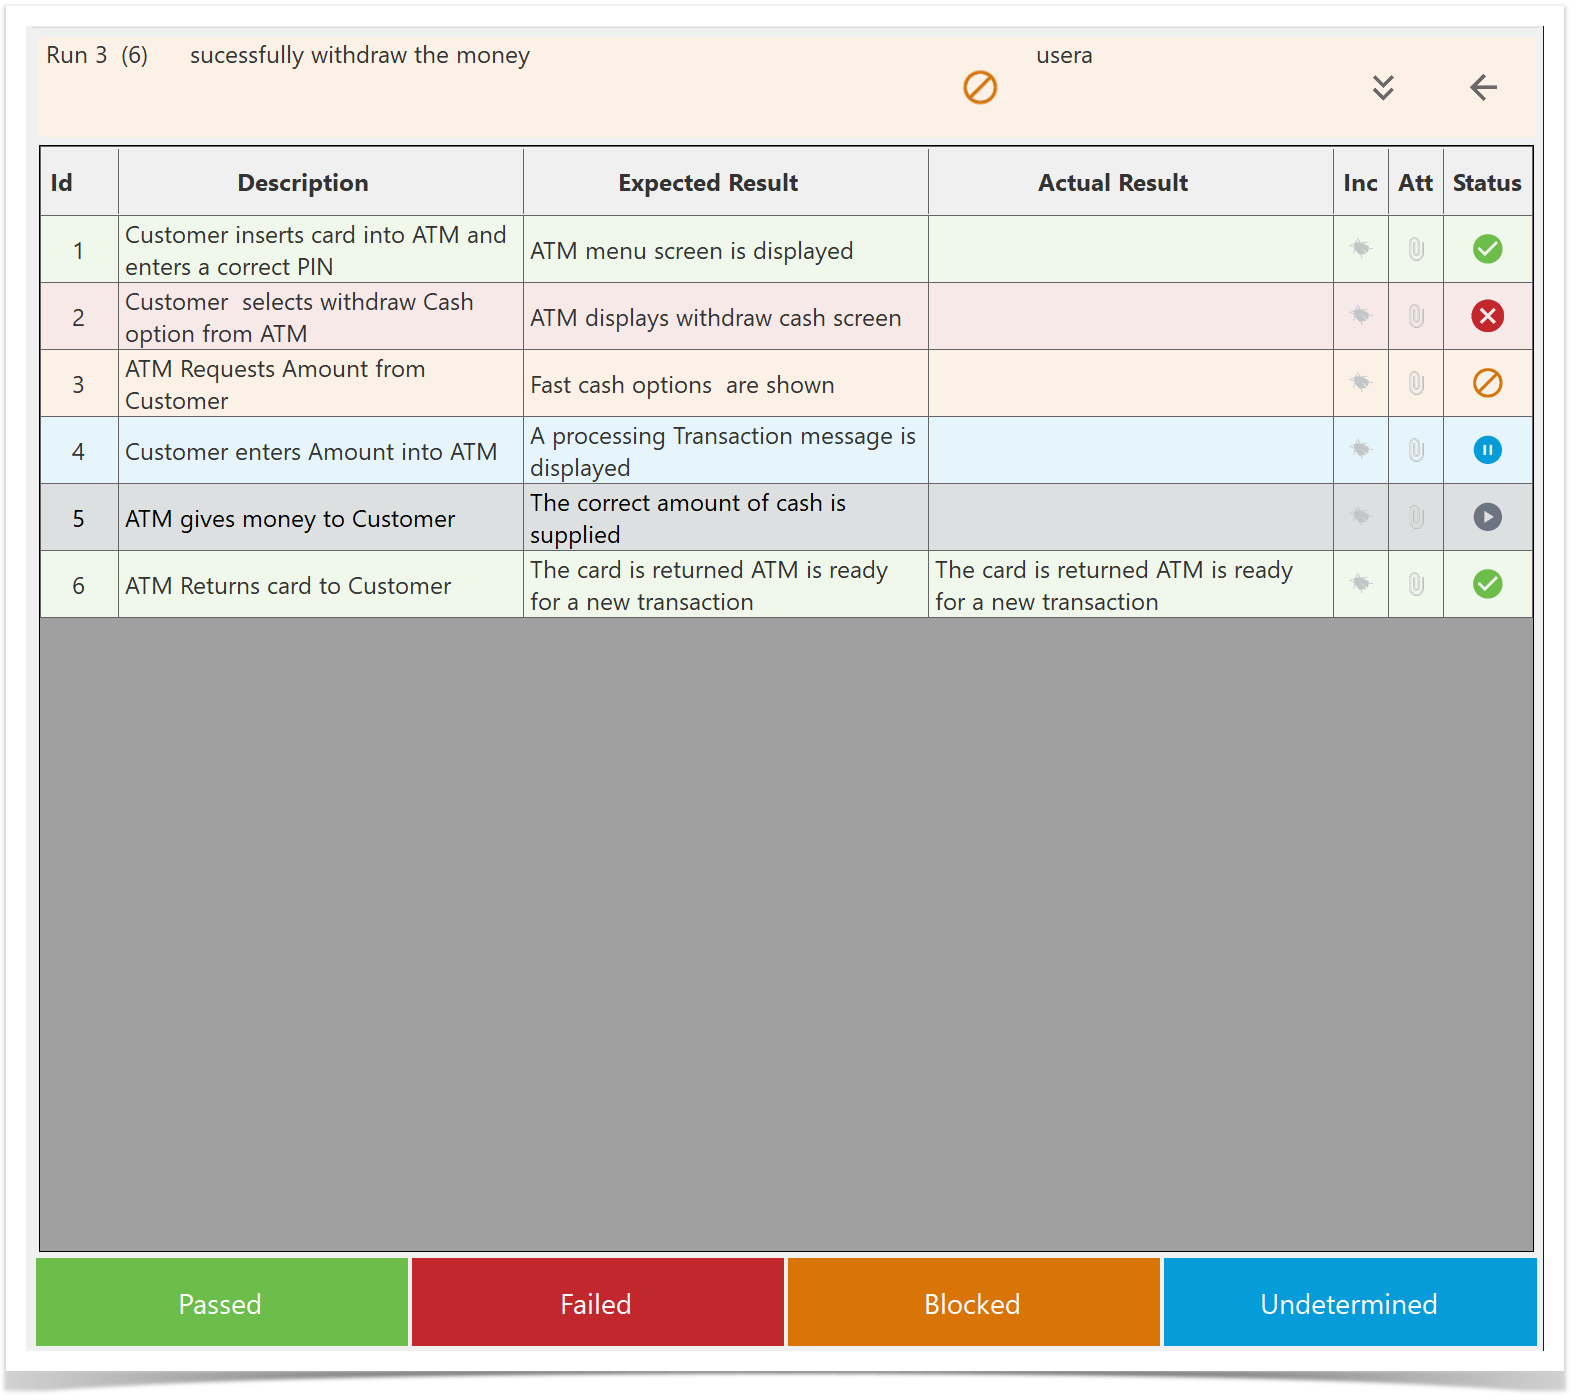
Test Step and Test Run Statuses
In RoverX, test step and test run statuses are consistent with those in Enterprise Tester.
Status Representation
- Icons and Color Coding: Statuses are represented by icons and the color of the test step row. Hover over an icon to view the detailed status.
- Test Run Statuses: In addition to the statuses used for individual test steps, test runs have an additional status: In Progress.
Overall Test Run Status
The overall status of a test run is automatically determined based on the statuses of its individual test steps.
![]() Passed
Passed
![]() Failed
Failed
![]() Blocked
Blocked
![]() Undetermined
Undetermined
![]() Not Run
Not Run
![]() In Progress
In Progress
Adding Attachments to Test Steps
You can attach one or more files, or take a photo directly, for a test step. This feature allows you to include relevant files and documents with each test step for better documentation and reference.
Select the Attachment Button ![]() : Click the button located in the Attachment column of the test step.
: Click the button located in the Attachment column of the test step.
This action will open the Manage Attachments popup, where you can upload and manage your attachments.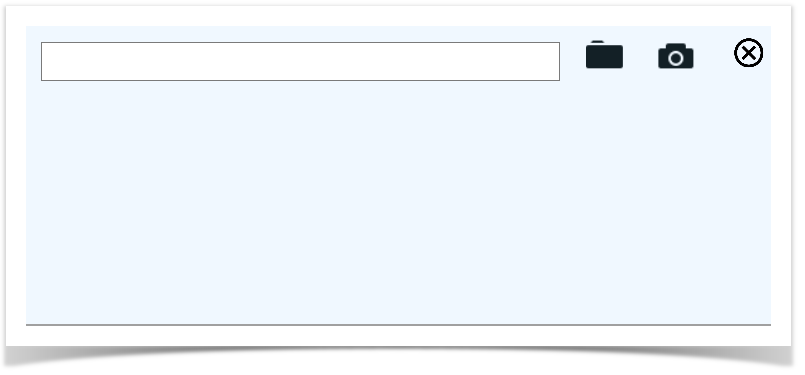
Upload Files
To upload files select the ![]() icon. The popup will open, allowing you to upload one or more files.
icon. The popup will open, allowing you to upload one or more files.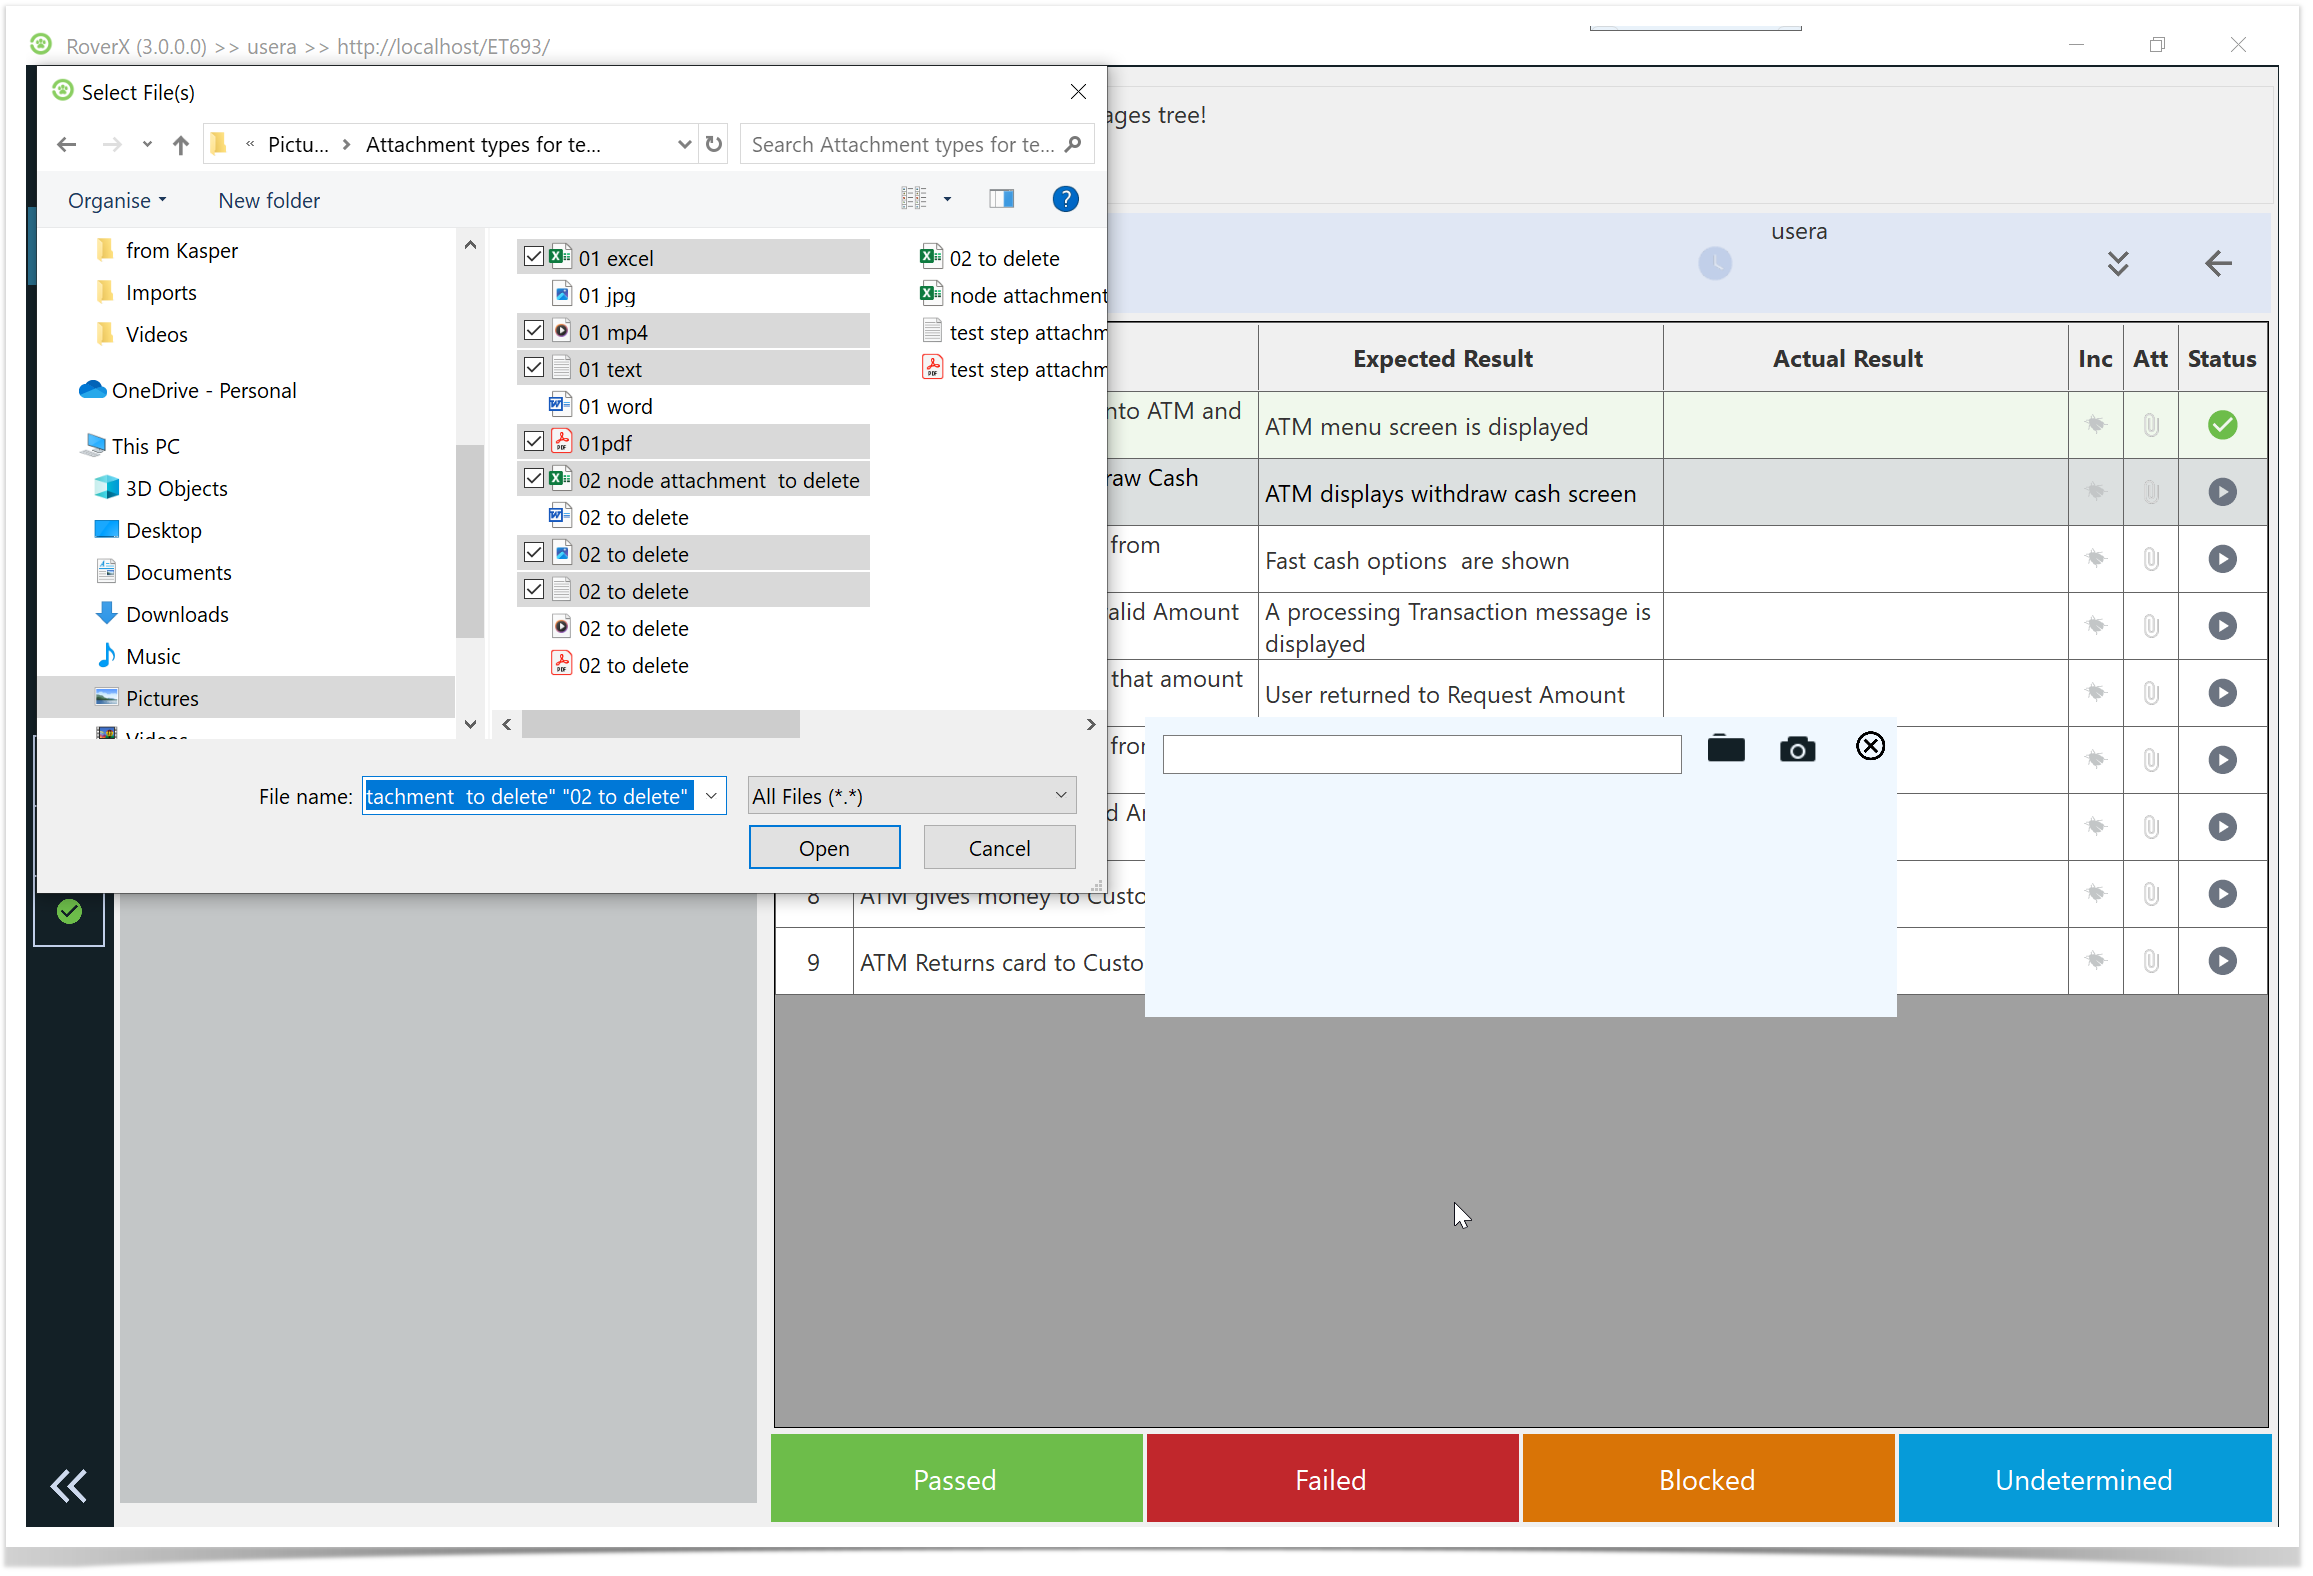
The selected files will be uploaded, and their paths or thumbnails will be displayed in the popup.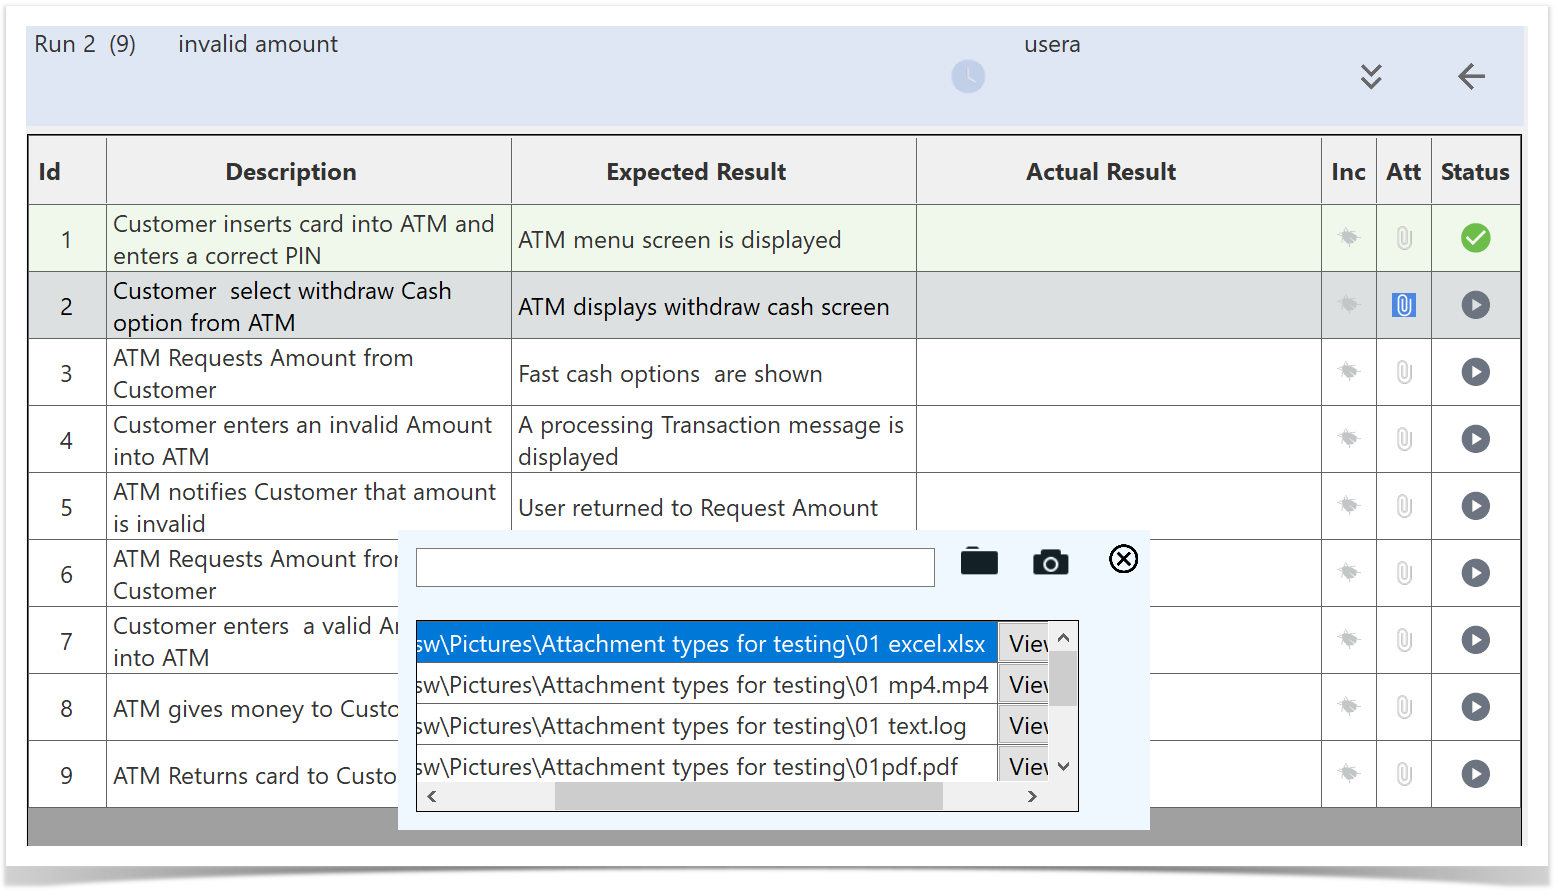
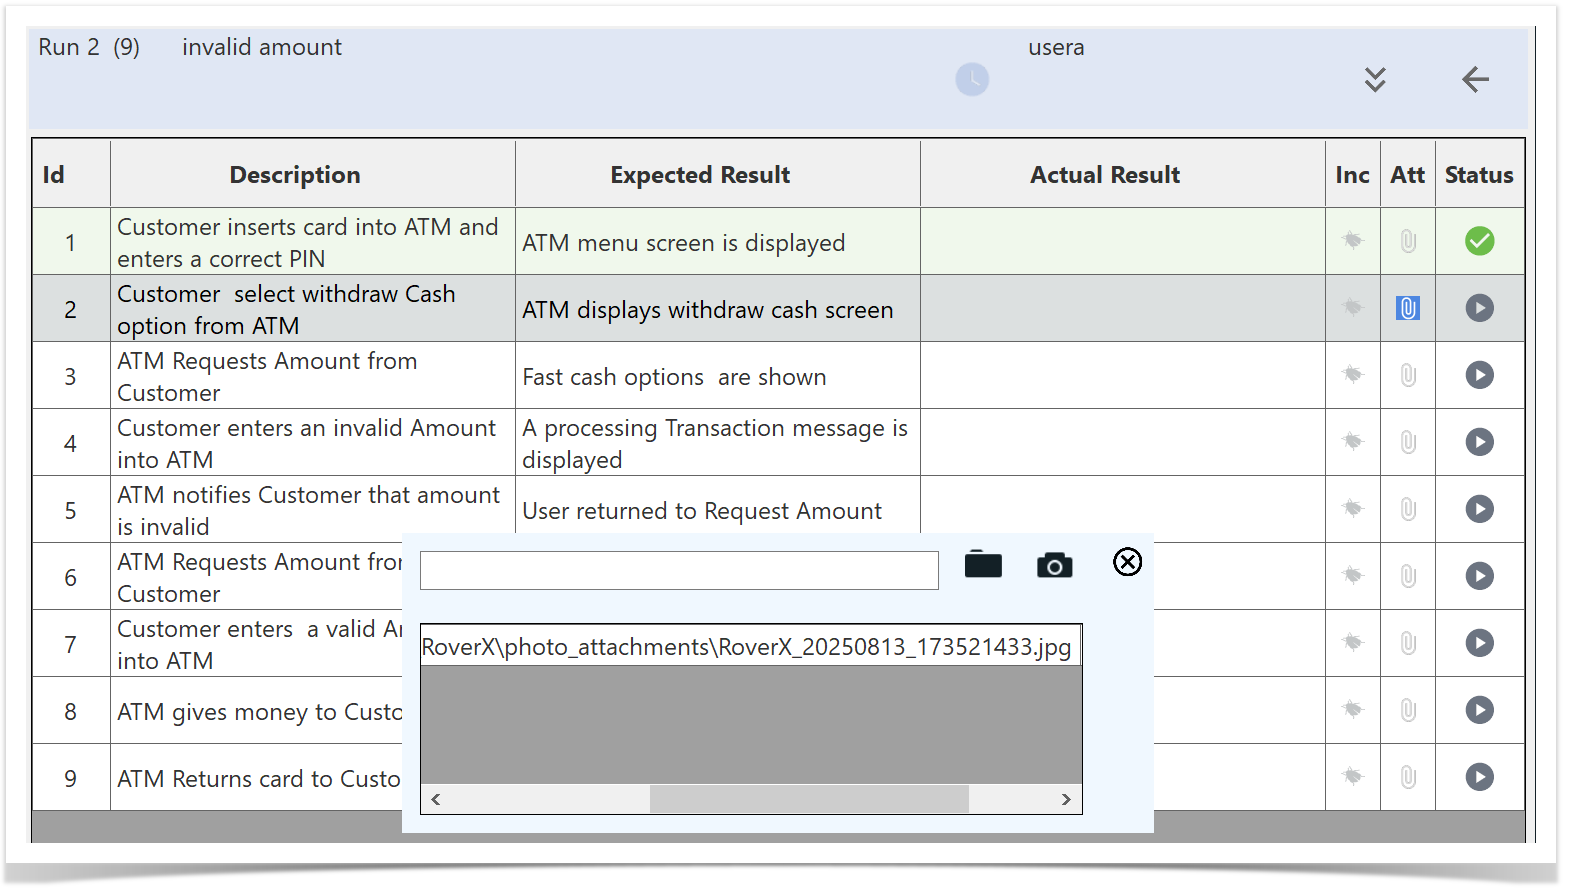
Capture Photos
- For photos: Select the
 .The camera interface will open.
If your device has more than one camera (e.g., front and back), you can select the default camera you want to use. RoverX will remember your choice the next time you open the camera interface.
2. Select the Capture button. The captured photo will be uploaded, and their paths or thumbnails will be displayed in the popup.
Photos captured through RoverX are stored locally on your computer in: C:\Users\<username>\AppData\Roaming\RoverX\photo_attachments.
If you delete the RoverX database, these photos will also be deleted. You can also choose to delete them manually from this folder if needed.
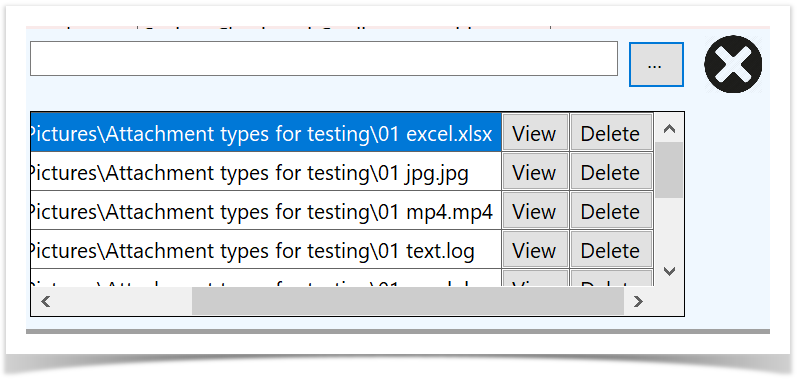
Managing Attachments
If you scroll to the right within the Manage Attachments popup, you have the following options for each attachment:
- View: Click to open and view the attached file.
- Delete: Click to remove the attachment from the test step.
These options allow you to easily manage the files associated with your test steps.
Select the X button to return to the Test Run.
Once you return to the Test Run screen, an icon will appear to indicate that there are attachments for the test step.
Hover over the ![]() icon to see the number of attachments associated with the test step.
icon to see the number of attachments associated with the test step.
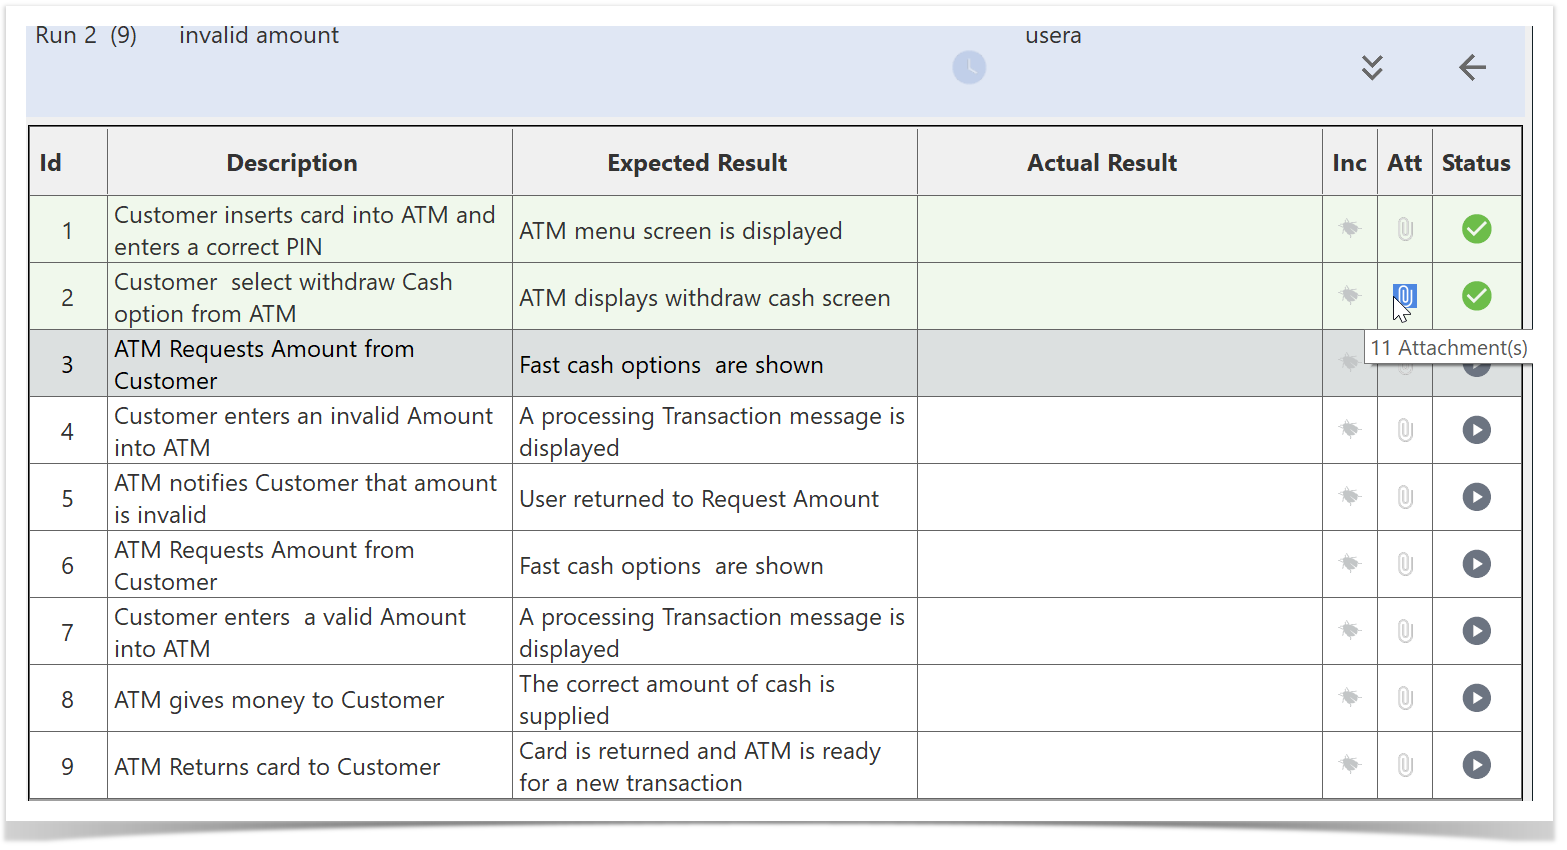
Clicking on the ![]() will open the Manage Attachments popup where you can view or delete existing attachments.
will open the Manage Attachments popup where you can view or delete existing attachments.