To allow integration a few minutes need to be spent configuring your server and project with JIRARally. Application Administration to JIRA Rally is required to configure the JIRA Rally Integration.
To add a connection to JIRA you Rally you first need to add an external system connection:
...
- Click on Extensions and double click External Systems on the navigator.
.
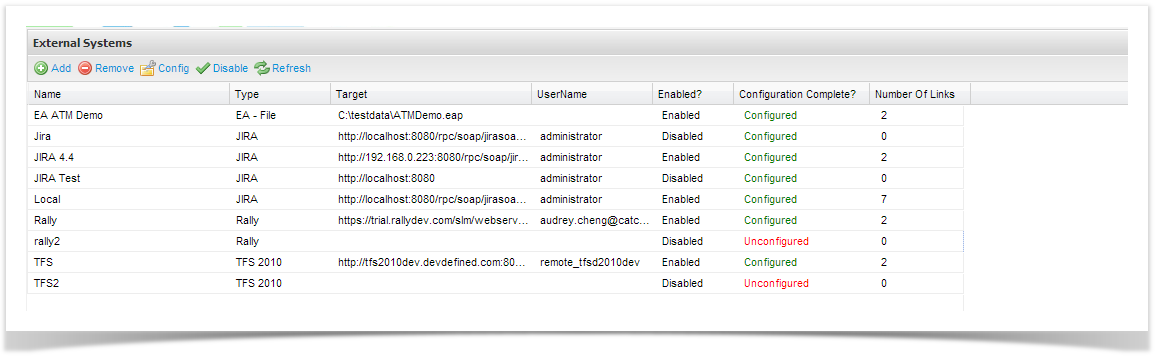
- From the External System summary screen, you can view all existing connections and view their enabled and configuration status. Click on add from the tool bar and add a Name for your external system connection and select the connection type "Rally".
...
| Field | Description |
|---|---|
| Type | Select the tracker type from the list of supported trackersexternal system. |
| Name | Enter a name for the tracker that will identify it within Enterprise Tester. |
| URL | Enter the URL path for the defect tracker. e.g. JIRA: http:///rpc/soap/jirasoapservice-v2?wsdlexternal system. |
| UserName | Enter a gateway* username for the defect trackerexternal system. |
| Password | Enter the password for the gateway username. |
| Enabled? | Check this box to enable the connection to the defect trackerexternal system. |
| Ignore Invalid Remote Certificates? | Check this box to ignore invalid remote certificates. |
We recommend that the Gateway Account has JIRA Rally administration access - with access to all Rally Workspaces. This will allow creation, and update of incidents across all projects and will hold sufficient privileges to support enhanced functionality when further integration features are implemented.
...
Enterprise Tester will automatically test the tracker and will save all details if the connection is validated.
Enterprise Tester will test the external system and will save all details if the connection is validated. The next step is to set up your Enterprise Tester project configuration to your JIRA project. Please refer to the topics Synchronizing Requirements with JIRA and Synchronizing Incidents with JIRA.
ET Requirement Links
A link to the ET requirement can be exposed within Rally by using the Web Link custom field type.
...
- Add "web link" field to Rally
- Add a new custom field to the workspace (within Rally, go to set-up -> workspaces and projects -> select workspace -> fields, select work item "User Story", then click "New Field".
- From this screen enter the Name and Display Name (we suggest "ETRequirement" and "ET Requirement").
- Set "Type" to "Web Link".
- Configure "URL" template for the Web link field to be "http://${id}" (or if ET is exposed via HTTPS/SSL, use use https://${id} instead).
- Leave "Display Preference" as "Display in new window".
- Click "Save & Close" to save the custom field.
- Configure mapping in ET
- Edit external system link for requirements between ET and Rally (if you have not created a link yet between your ET and Rally project, please follow these steps for information on how to do so).
- Click on "Mappings" tab.
- Click on "ET to External System" tab.
- Click on "Map Fields" step, then click "Configure" toolbar button.
- Click "Add" toolbar button to create a new field mapping.
- Select "Copy field" as the type of the new field mapping.
- Select "URL" as the From field.
- Select "Custom Field - ET Requirement" as the To field (if you gave the field a name other than "ET Requirement", you will need to select that field instead.
- Click OK.
- Close the configure mappings field.
...