To allow integration a few minutes need to be spent configuring your server and project with JIRA. Application Administration to JIRA is required to configure the JIRA Integration.
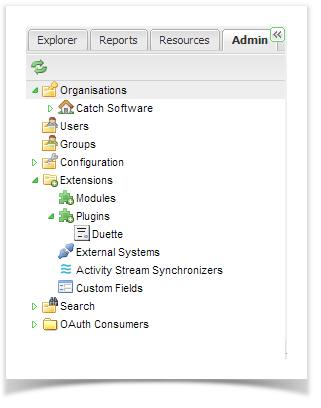
First, access the administration section find the Defect Tracker Folder in your navigator (as displayed below).
To add a connection to a defect tracking systemto JIRA you first need to add an external system connection:
- Open the ‘Admin’ tab of the tree view.
- Click on Organisations and expand your Organisation. Right click on ‘Defect Trackers’ and select ‘Add Tracker’.
- Click on Extensions and double click External Systems on the navigator.
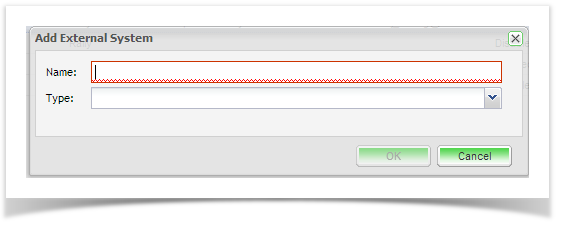
- From the External System summary screen, you can view all existing connections and view their enabled and configuration status. Click on add from the tool bar and add a Name for your external system connection and select a connection type: Enterprise Architect, JIRA, JIRA 5+ (BETA), Rally or TFS
- The configuration screen of the external system type you chose will appearEnter the Defect Tracker Details:
Field | Description |
|---|---|
| Type | Select the tracker type from the list of supported trackers. |
| Name | Enter a name for the tracker that will identify it within Enterprise Tester. |
| URL | Enter the URL path for the defect tracker. e.g. JIRA: http:///rpc/soap/jirasoapservice-v2?wsdl |
| UserName | Enter a gateway* username for the defect tracker. |
| Password | Enter the password for the gateway username. |
| Enabled? | Check this box to enable the connection to the defect tracker. |
| Ignore Invalid Remote Certificates? | Check this box to ignore invalid remote certificates. |
...
Enterprise Tester will automatically test the tracker and will save all details if the connection is validated.
Enterprise Tester will test the external system and will save all details if the connection worksis validated.The next step is to set up your Enterprise Tester project configuration to your JIRA project. Please refer to the topics Synchronizing Requirements and Synchronizing Incidents.


