Before installing Enterprise Tester, Internet Information Services and ASP.Net must be installed and configured.
Install IIS prerequisites automatically with Powershell
Below we have provided powershell commands to automatically install the Enterprise Tester IIS prerequisites. Each command should be a single line and run from an elevated command prompt. (These commands just automatically install the required packages which the screen shots show being installed below).
Windows Server 2008 R2
You may need to run the following command:
import-module servermanager
Add-WindowsFeature Web-App-Dev,Web-Asp-Net,Web-Basic-Auth,Web-Common-Http,Web-Default-Doc,Web-Dir-Browsing,Web-Dyn-Compression,Web-Filtering,Web-Health,Web-Http-Errors,Web-Http-Logging,Web-Http-Redirect,Web-Http-Tracing,Web-ISAPI-Ext,Web-ISAPI-Filter,Web-Metabase,Web-Mgmt-Console,Web-Mgmt-Service,Web-Mgmt-Tools,Web-Net-Ext,Web-Performance,Web-Request-Monitor,Web-Scripting-Tools,Web-Security,Web-Server,Web-Stat-Compression,Web-Static-Content,Web-WebServer,Web-Windows-Auth
Windows Server 2012 / 2012 R2
Add-WindowsFeature NET-Framework-45-Core,NET-Framework-45-ASPNET,Web-Default-Doc,Web-Dir-Browsing,Web-Http-Errors,Web-Static-Content,Web-Http-Redirect,Web-Http-Logging,Web-Http-Tracing,Web-Stat-Compression,Web-Dyn-Compression,Web-Filtering,Web-Net-Ext,Web-Net-Ext45,Web-AppInit,Web-Asp-Net,Web-Asp-Net45,Web-ISAPI-Ext,Web-ISAPI-Filter,Web-WebSockets,Web-Mgmt-Console,Web-Scripting-Tools,Web-Basic-Auth,Web-Windows-Auth
Windows Server 2008 - Manual Configuration
1. Click start -> Server Manage
Click roles
Click Add Roles
Click Web Server (IIS)

Click on ‘Next’.
If prompted for Add features required for Web Server (IIS) then click "Add required features".
Click ‘Role Services’.
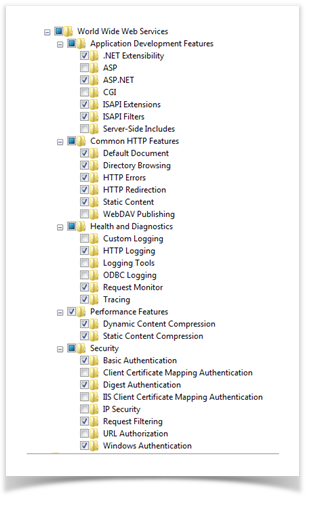
2. Enable the services as shown in the following two screen shots.
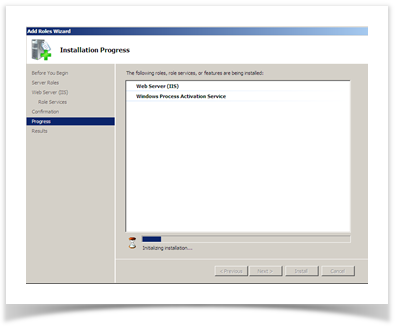
3. Once complete click ’Next’, installation will proceed - once the progress bar is complete IIS has been installed correctly.
4. Close the dialog and proceed with executing the installation for Enterprise Tester to install the other prerequisites.
Windows 7 - Manual Configuration
Configuring IIS on Windows 7 is similar the configuration for Windows Server 2008. Note that there is no server management console.
Review and Configure Window Features
- Go to Control Panel>Programs> Turn Windows Features On and Off.
- Expand Internet Information Services.
- Under Web Management Tools, check that IIS 6 Management Compatibility and IIS Management Console are selected
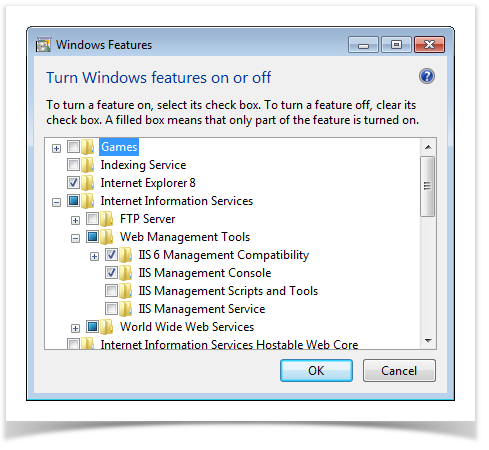
- Under World Wide Web Services, ensure that .Net Extensibility, Asp.Net are selected.
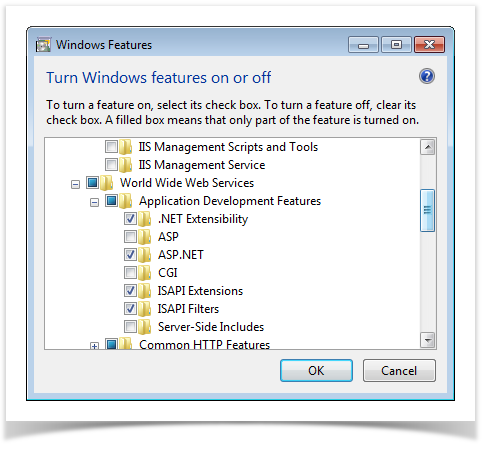
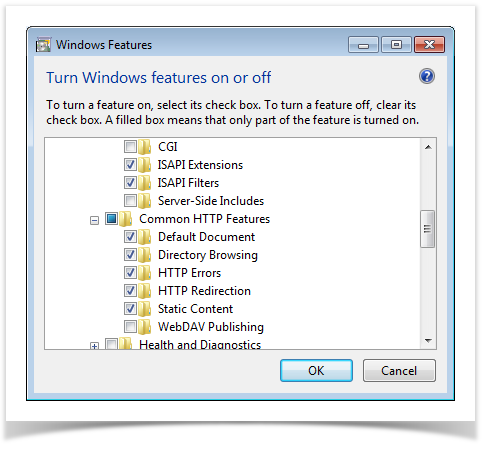
- Under Common HTTP Features, ensure that Default Document, Directory Browsing, HTTP Errors, HTTP Redirection and Static Content are selected. Ensure that WebDAV Publishing is not selected (this is a common cause of 504 errors).
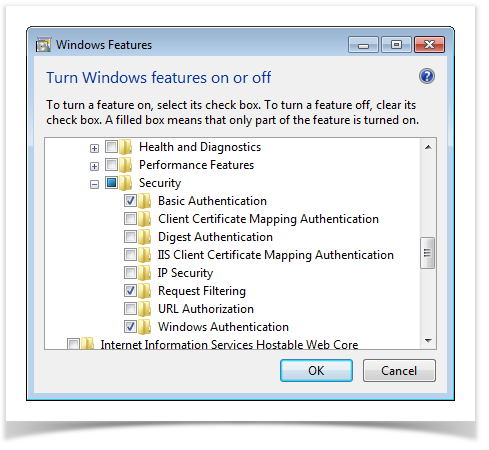
- Under Security Ensure that Basic Authentication and Windows Authentication are selected.
- Now navigate to Control Panel> Systems and Security>Administrative Tools>IIS Manager> Application pools.
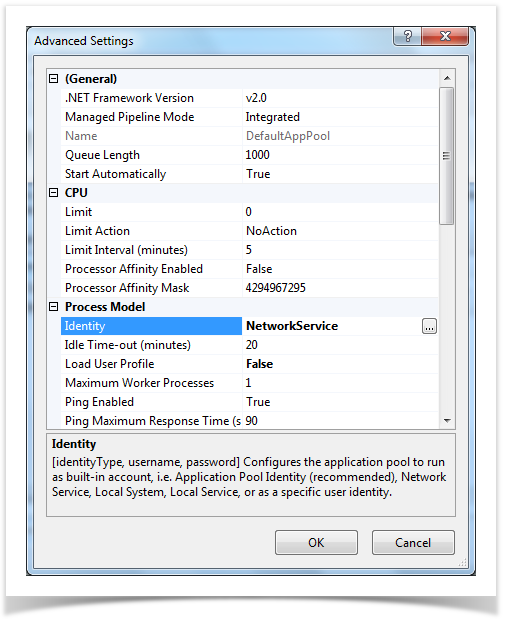
- Right click on the DefaultAppPool, and select "Advanced Settings." A Dialog will appear with settings for the application pool, scroll down until you find the Setting for "Identity", if it is not "Network Service" you will need to update the value to be "Network Service".
If you are installing to a 64 bit operating system, and you intend to integrate Enterprise Tester with SparxSystems Enterprise Architect, and wish to be able to import data from Enterprise Architect EAP files – then you will also need to enable support for 32bit applications in the application pool.
By default, Enterprise Tester uses Network Service as the identity of the application pool. We recommend that you run the application pool under another service account especially when making use of features such as EA integration or when using Duette to import automated test results for the file system. In addition, when using Windows authentication with SQL Server, you will need to configure the application pool to run under a specific windows account for this feature to work (and give that account access to the ET database within SQL server).
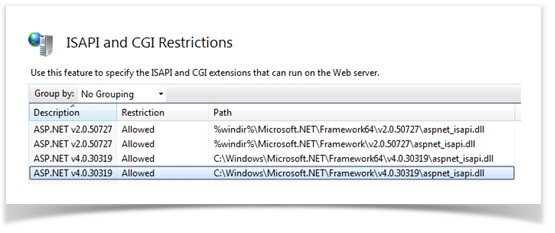
Check that ASP.Net is allowed.
Once the above steps are complete you are ready to install Enterprise Tester. See Application Installation for more details.