This guide walks through setting up Enterprise Tester in IIS 6 and IIS 7 to use an SSL Certificate (i.e. HTTPS). What the guide covers:
- Generating a Self-signed certificate.
- Using the Self-signed certificate.
What it does not cover:
- Getting a 3rd party certificate authority to generate a certificate.
- Installing a 3rd party certificate.
For details on installing an existing certificate see here:
- IIS6 - http://support.microsoft.com/kb/299875.
- IIS7 - http://learn.iis.net/page.aspx/144/how-to-setup-ssl-on-iis-70/
Installation
Overview
In both IIS6 and IIS7 the general steps are:
- Generating a self-signed certificate.
- Associating the certificate with the website.
- Optional - Enforcing use of secure channel (i.e. only allow https traffic).
IIS 6
Generate Self Signed Certificate
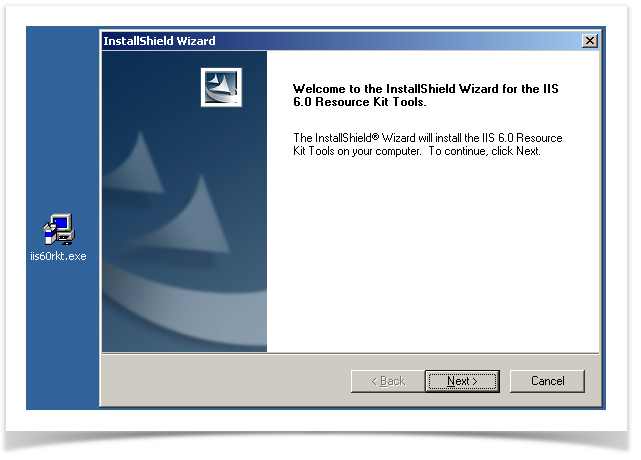
To create a self signed certificate on IIS you must install the IIS6 resource kit, which can be downloaded from here:
http://www.microsoft.com/downloads/details.aspx?FamilyID=56fc92ee-a71a-4c73-b628-ade629c89499&displaylang=en
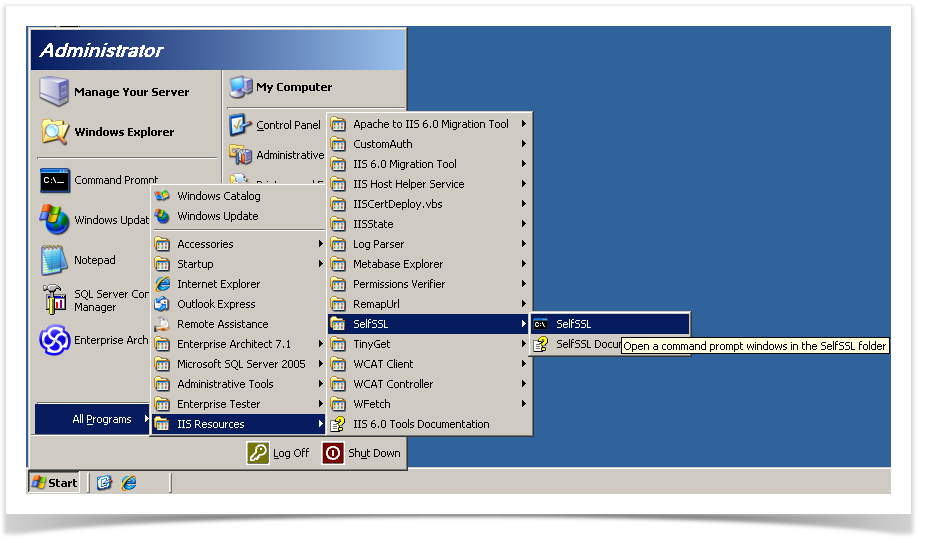
Once installed, launch the "SelfSsl" tool from Start -> All Programs -> IIS Resources -> SelfSSL -> SelfSSL.
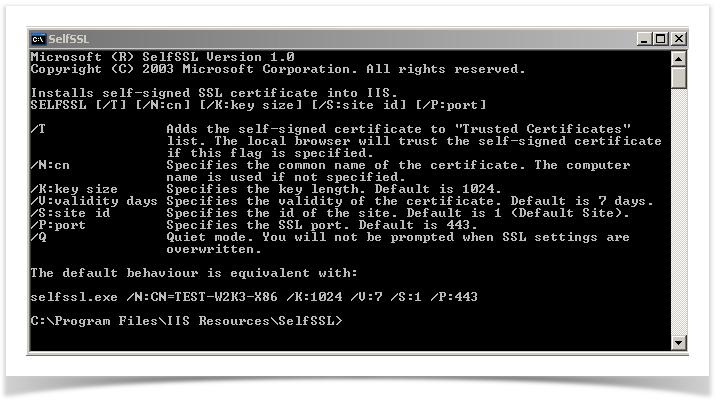
A command prompt window will appear. A self signed certificate can be generated from here. Enterprise Tester is normally associated with the default website, so in most cases a certificate can be generated by issuing the command:
SelfDDL.exe
Note that this will create a certificate which expires by default after 7 days. The certificate expiry can be changed to one year i.e. 365 days by using the following command line:
SelfSSL.exe /V:365
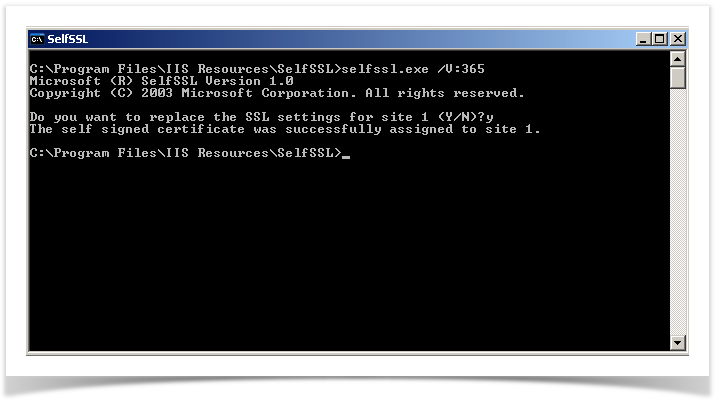
Press "Y" when prompted to set or replace the certificate. A self signed certificate should now be created.
Forcing use of HTTPS
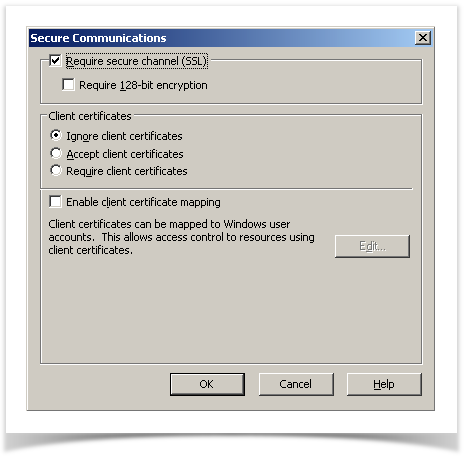
The use of a secure channel (i.e. disabling HTTP) can be enforced by changing the Directory Security options of the "EnterpriseTester" website in IIS.
Enforcing a secure channel is optional. To support both HTTP and HTTPS, omit the following steps:
- Launch IIS Manager (Control Panel -> Administrative Tools -> Internet Information Services (IIS) Manager.
- Locate the "EnterpriseTester" application (it should be under the "Default Website" site node).
- Right click and select "Properties..." from the context menu.Configuring-Et-For-Ssl V1.0
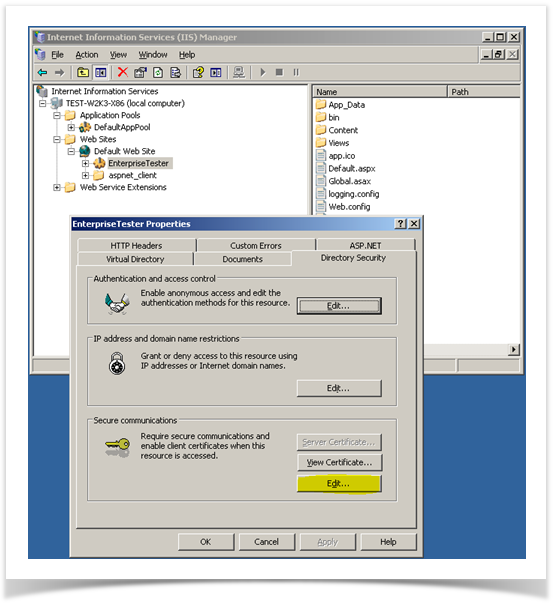
- Navigate to the "Directory Security" tab.
- Click on the "Edit..." button.
- Click the "Require secure channel" check box, then click "OK" to save the changes to these settings.
Testing
It is recommended that the secure channel is tested. Browse first to "http://localhost/EnterpriseTester/" i.e. the unsecured URL. Now using https i.e. https://localhost/EnterpriseTester/, should now provide access to Enterprise Tester.
For self-signed certificates a "certificate warning" message in the browser may be displayed. This is expected behavior for a self signed certificate. The best way to overcome this issue is use a 3rd party certificate from a trusted Certificate Authority (CA) such as Verisign.

Another side-effect of using a self-signed certificate is that browser's address bar may show up in red, as per the following screen shot:

You have now completed configuring IIS6 and Enterprise Tester to use HTTPS/SSL.
IIS 7
These instructions apply to both IIS7 and IIS7.5 (as feature in Windows Server 2008r2 & Windows 7)
Generate Self Signed certificate
Unlike IIS6, IIS7 features in-built support for generating Self Signed Certificates.
- Go to Control Panel -> System & Security -> Administrative Tools -> Internet Information Services (IIS) Manager.
- Click on the "server" node at the top of the tree on the left hand side.
- Click on the "Server Certificates" icon.
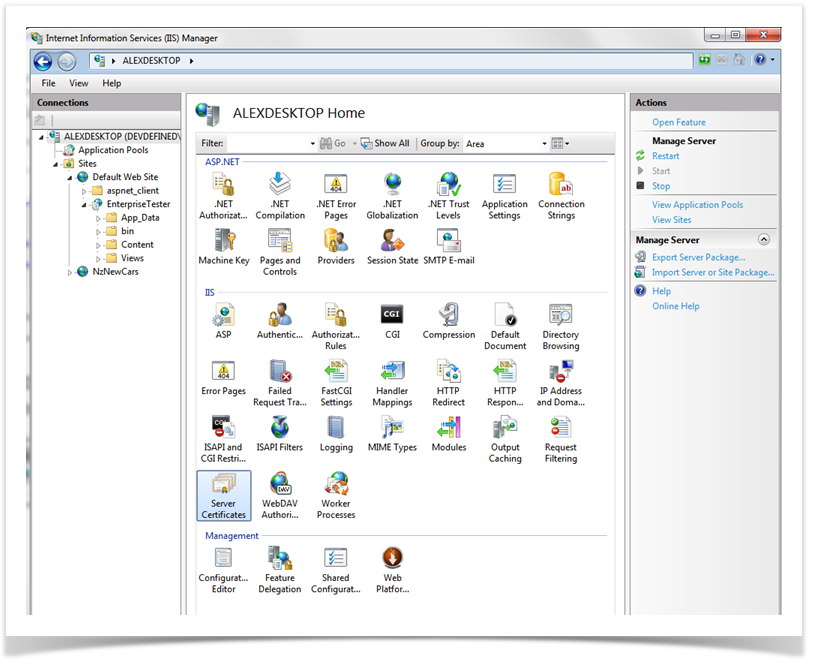
- In the right hand column click on the "Create self-signed certificate..." link.
- Enter a "friendly name" for the certificate i.e. "Enterprise Tester".
- Click "OK".
Binding the Certificate to the Default Website
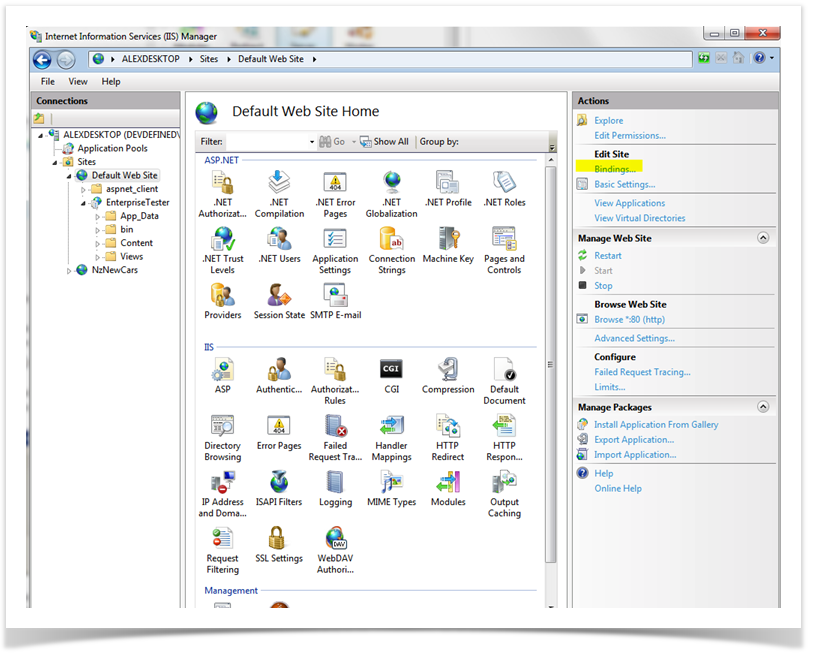
- Click the "Default Website" node in the left hand tree.
- Click on the "Bindings..." link on the right hand side.Configuring-Et-For-Ssl V1.0
- Once the bindings dialog has opened, click the "Add" button.
- In the "add" dialog, select "https", then select the self-signed certificate you created earlier.Configuring-Et-For-Ssl V1.0
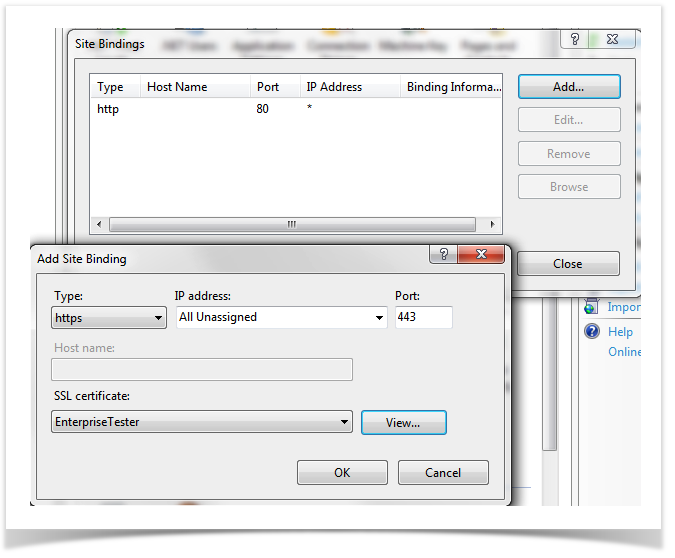
- Click "OK" to save your changes.
Forcing use of HTTPS
You now have HTTPS configured, but can still use unsecured HTTP connections. To disable HTTP for Enterprise Tester all together follow these steps:
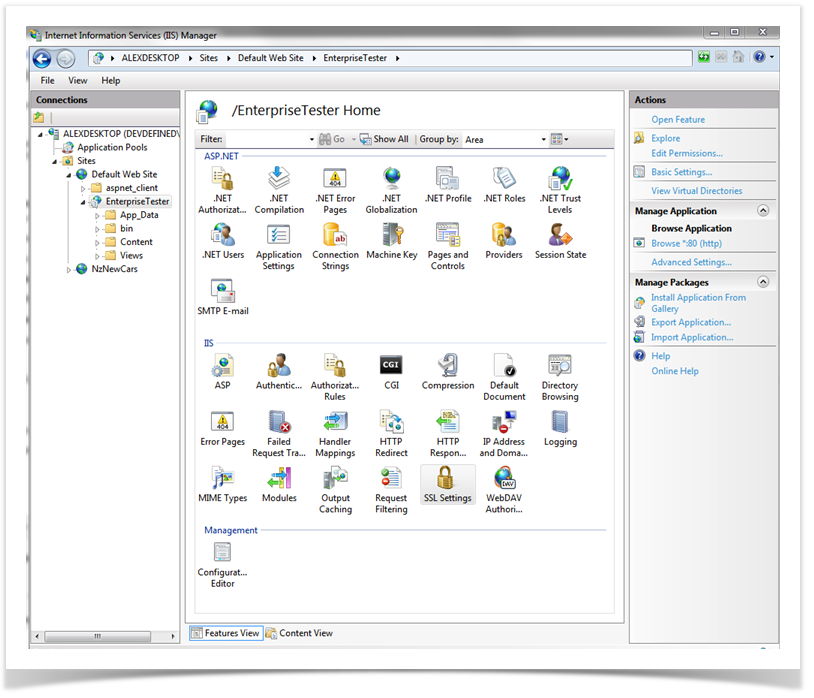
- Click on the "EnterpriseTester" application node under "Default Website" in the left hand tree.
- Click on the "SSL Settings" Icon.
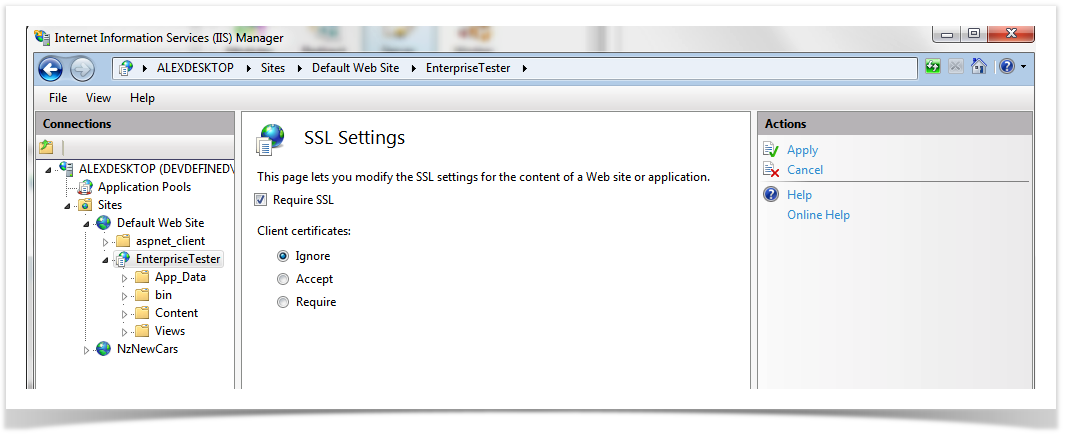
- The SSL Settings screen will be displayed.
- Click the "Require SSL" checkbox.
- Click the "Apply" link on the right hand side to save your changes.
Now, test the changes in the browser, first try browsing to "http://localhost/EnterpriseTester" -you should see an "Access denied" message, as below:

Try accessing Enterprise Tester using https i.e. https://localhost/EnterpriseTester. Access to Enterprise Tester should be success.
When using a self-signed certificate that most browsers will display a warning to the user - this is safe to ignore.

For self-signed certificates a "certificate warning" message may be displayed in the browser - this is expected behavior for a self signed certificate, the best way to overcome this issue is use a 3rd party certificate from a trusted Certificate Authority (CA) such as Verisign.