Users can be easily managed from the User Management screen in the Admin section. From here you can activate or deactivate users individually or in bulk, search for a user account and manage a user's profile, project access or permissions.
You must have the “Manage User and Group Security” permission to manage users.
To access the User Management screen, navigate to the Admin tab and double click on the Users folder.
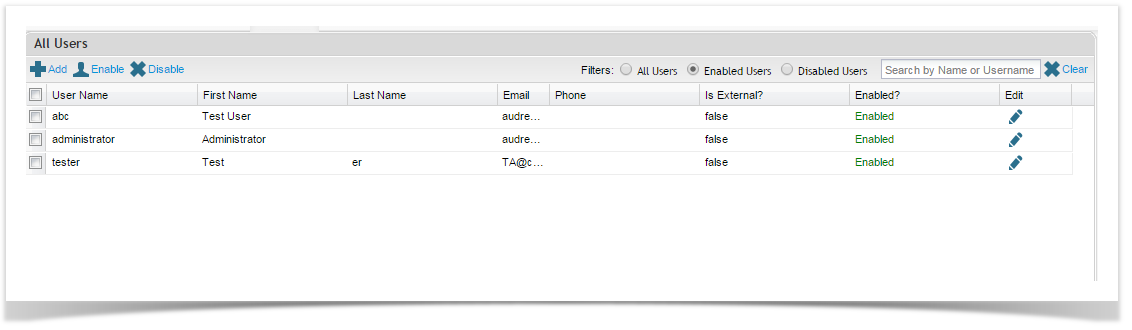
Key features from the Manage Users screen includes:
- Add new users
- Enable or disable users in bulk
- Filter by All, Enabled or Disabled users
- Quick user search
Adding Users
Users can be added to Enterprise Tester through the Administration section which can be accessed from the Admin tab. The number of users that can be added to Enterprise Tester depends on the license level.
A user can be added by selecting Add on the toolbar on the User Management screen (shown in the section above). To navigate to the Manage Users screen:
- Select the Admin tab.
- Double click the Users folder.
- Click the Add button to add a user.
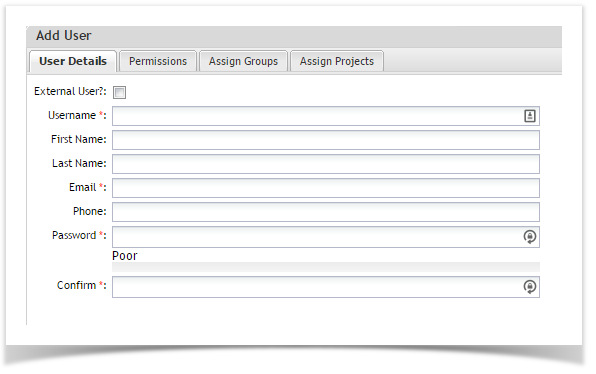
Supply the following details:
External User
This will be checked if the user was created by an external system (e.g. Active Directory)
Username
The login name for the user
First Name
User's first name
Last Name
User's last name
Email
The email address for the user
Phone
An optional phone number for the user
Password
The login password (only if the user is not being authenticated by an external system)
Confirm
Repeat the login password (only if the user is not being authenticated by an external system)
Click on Save to create the user.
If users are created through synchronization with an external system then the External option will be checked and the Password options will be hidden.
On the 'Permissions' tab you can grant the User Application wide permissions. See the help topic Permissions for more information.
On the ‘Assign Groups’ tab, you can assign the user to established groups. Note that the user will inherit the application wide permissions of the group.
On the ‘Assign Projects’ tab, you can allocate the user to existing projects.
On the 'Assigned Permissions' tab you can view what access the user actually has, this incorporates permissions allocated in both individual user and group permission sets.
Editing Users
To edit a user:
Select the Admin tab.
Double click the Users folder.
Search for the user to edit.
Click the Edit icon for the relevant user.
The Edit User screen will appear and can now be updated accordingly.
Deleting Users
Users can only be deleted in ET if there is no historical activity associated with the user account, this means that a user cannot be deleted if they are referenced in the history of any entity (requirement, script, run or incident). If a user does have associated historical activity, you can use the disable functionality described below.
To delete a user:
Select the Admin tab.
Double Click the Users folder.
Search for the user to delete.
Click the Edit icon for the relevant user.
Click Delete button at the bottom of the page.
Click on Yes for the prompt - the user will now be removed.
Enabling and Disabling User Accounts
When users no longer require access to ET, you can easily disable user accounts.
Disabling users maintains historical records, but removes access to the application. A disabled user does not count toward your license limit.
To disable users:
Select the Admin tab.
- Double Click the Users folder.
- Select one or more users by ticking the check box to the left of the user record.
- Click the Disable button on the toolbar.
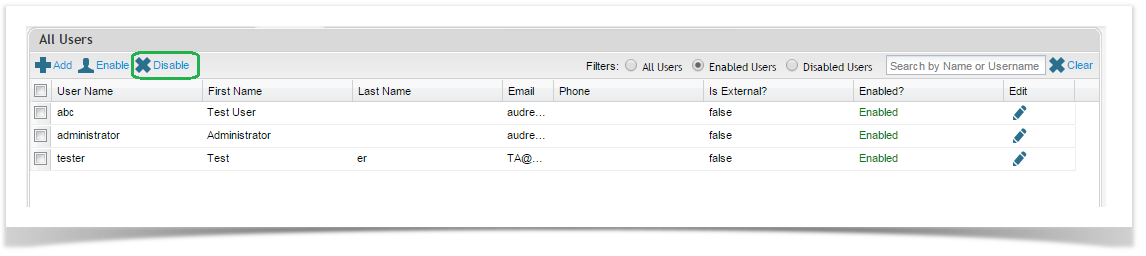
Once the user is disabled, you'll notice that the Enabled? column on the grid displays Disabled.
Similarly, you can enable users by selecting the user or users you wish to reactivate and then Clicking the Enable button on the toolbar.
You can easily view Enabled or Disabled users by selecting the filters on the toolbar.