Connecting to External Systems
The ability to interface with multiple external systems is a key feature of Enterprise Tester.
Requirements, Test Scripts or Incidents (depending on which tool you are integrating with) can be synchronized between Enterprise Tester and the external system.
Enterprise Tester interfaces with the following:
| External System | Requirements / User Stories | Test Cases / Use Cases | Incidents / Defects |
|---|---|---|---|
| Enterprise Architect (Sparx Systems) | Yes | Yes | No |
| JIRA (Atlassian) | Yes | No | Yes |
| Rally (Rally) | Yes | No | No |
| Team Foundation Server - TFS ( Microsoft) | Yes | No | Yes |
Once a Requirement or Incident is synchronized, Enterprise Tester adds a reference to the external ticket ID on the incident. This is visible as a hyperlink on the Entity or in the External Identifiers column of the grid.


Add an External System
To add a connection to an external system, you will need to have Administration permissions for Enterprise Tester.
- Open the Admin tab of the tree view.

- Click on Extensions and double click External Systems on the navigator.
.

- From the External Systems summary screen, you can view all existing connections and view their enabled and configuration status.
- Click on Add from the toolbar and add a name for your external system connection and select a connection type: Enterprise Architect, JIRA ( 4 - 5.1), JIRA, Rally or TFS

- The configuration screen of the external system type you chose will appear:
Enterprise Architect

Connection Type | Select the EA repository type from the drop down list. |
Connection String | The connection string details are dependent on the connection type. See the Enterprise Architect help topic for more information. |
| Disable Import Feature | This feature disables the ability to import from EA. It can be useful if you would like to enable the feature for an import and then disable them after the process is complete to limit other users from initiating the process. When disabled, the Import button is no longer available on the project link screen. |
| Disable Update EA Feature | This feature disables the ability to update EA with changes made in Enterprise Tester. As the update feature will update all values in EA regardless of which system holds the latest change, this feature can give you some control over when updates are made. When disabled the Update EA button is no longer available on the requirements type project link screen. Enterprise Tester does not support updating EA Use Cases so the use case type project link screen will be unaffected. |
JIRA and TFS

Name | Enter a name for the external system that will identify it within Enterprise Tester. |
Enabled | Check this box to enable the connection to the external system. |
| URL | Enter the URL path for the external system. The URL should take the following forms: JIRA: example https://jira.companyname.com/ TFS: example http://<ServerURL>/<Project Collection> |
UserName | Enter a Gateway Account* username for the external system. |
Password | Enter the password for the gateway username. |
Ignore Remote | Check this box to ignore invalid remote certificates. |
Important Information
* The Gateway Account should be set up as an administration account in JIRA/TFS. This will allow creation, and update of incidents across all projects and will hold sufficient privileges to support enhanced functionality when further integration features are implemented.
Gateway Account must be assigned to the JIRA Administrators, Developers and Users default groups in JIRA.
This will allow creation, and update of incidents across all projects and will hold sufficient privileges to support enhanced integration functionality.
Rally

Name | Enter a name for the external system that will identify it within Enterprise Tester. |
Enabled | Check this box to enable the connection to the external system. |
| URL | Enter the URL path for the external system. This can be left blank is you are working with a non-trial hosted instance of Rally. If you are using a trial hosted version of Rally. The URL is: |
UserName | Enter a gateway username for the external system. This user should have admin permissions and access to all relevant workspaces. |
Password | Enter the password for the gateway username. |
When you have completed all the details click on ‘Save’.
Enterprise Tester will test the external system and will save all details if the connection is validated.
The next step is to set up your links between Enterprise Tester and external systems at a project level - known as Project Links in Enterprise Tester.
Here are further details on how to set up Project Links for each external system:
Synchronizing Incidents with JIRA 5.2 and above
Synchronizing Requirements with Rally
Synchronizing Requirements with TFS
Synchronizing Incidents with TFS
Advanced Settings (JIRA and TFS Connections)
Advanced settings only apply to JIRA and TFS connections.
Advanced settings allow you to configure which custom fields will be synchronized with Enterprise Tester from your External System. By default, all the custom fields are selected.
To access the Advanced Settings screen, from the Edit External Systems screen select the Advanced Setting button on the bottom right corner of the screen.
The Advance Setting edit screen will appear. Here you can select the custom fields to synchronize. Note that if you chose to custom configure the custom fields to synchronize, you will need to manually select any additional custom fields that are added to your external system if you wish to synchronize them. By default, they will not be selected for synchronization. An Enterprise Tester system administrator will need to update this configuration to include the new custom fields for synchronization.
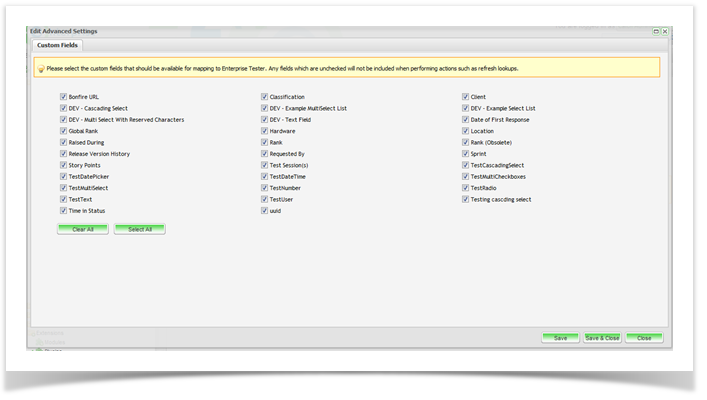
Once you have updated the custom field synchronization configuration click Save and Close. A refresh lookups will also need to be performed after adding custom fields to the synchronization configuration.
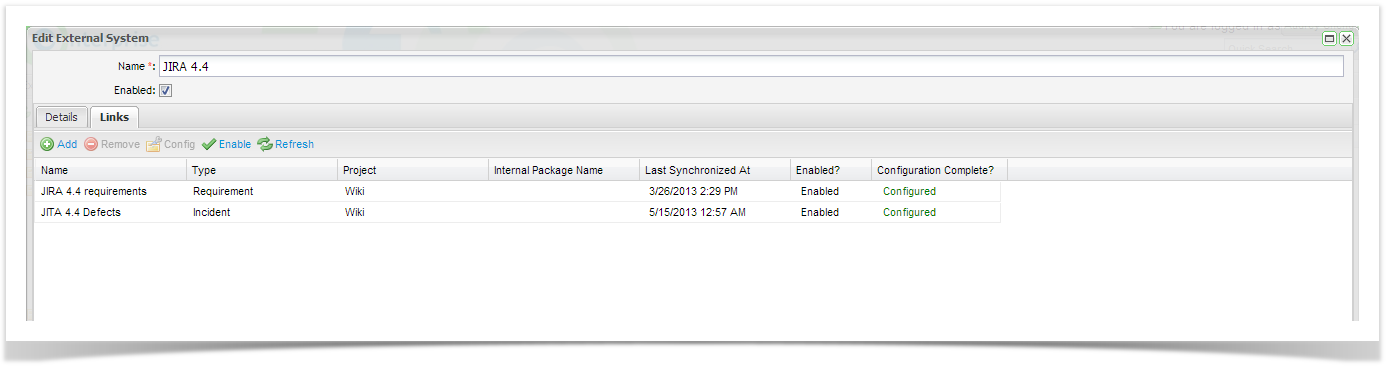
External System Links Tab
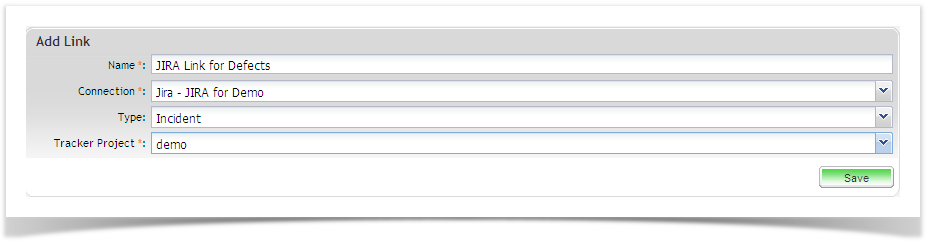
Once you have created your connection to the external system, click on the Links tab from the Edit External System screen. Click on Add from the tool bar.
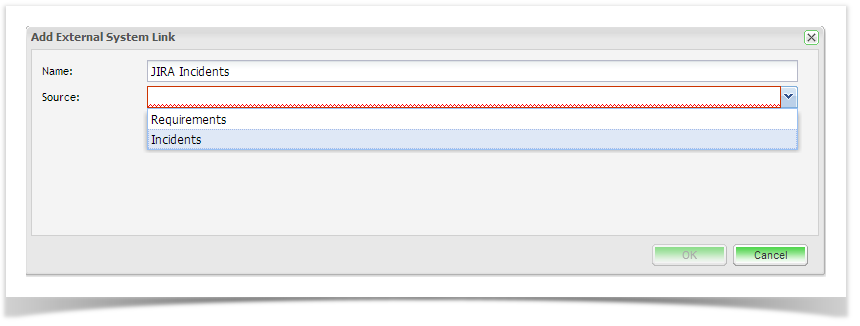
The Add External System Link screen will appear. Complete the name and select the Link Source. This is the entity type you wish to synchronize only the entity types that are available to your external system type (EA, JIRA, Rally, TFS) will be available for selection.
Once you have selected the Source, additional fields to configure the ET project and the project will appear.
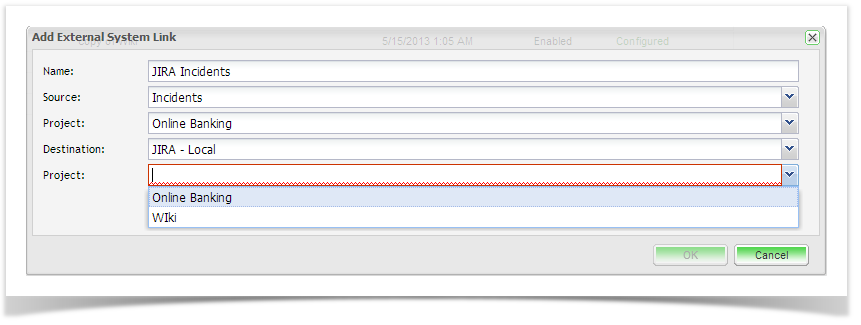
Once you have completed the screen click on OK. The External Links Details screen will appear. Now you will need to complete the field configuration. Please see the help topics for the tool you are integrating with. See the end of the page for a list of topic links.
Resources Tab
From the Resources tab, click to expand Project Links. To view all configured links for your project, double click on your project.
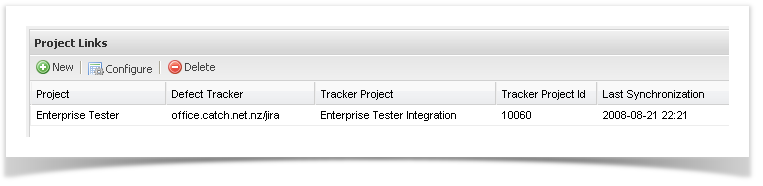
To create a new project link select "New" from the toolbar or from the navigator you can right click on your project and select Add New Project Link from the menu or from the navigator you can right click on your project. Complete the details selecting the JIRA connection that you created in the steps outlined in the above section and your JIRA project to link to. Now click on Save.
Once the project link to JIRA has been created, Enterprise Tester will initiate a refresh of all the metadata. This may take a few minutes.
Once the refresh look up completes, the next step is to complete the field configurations. Please see the help topics for the tool you are integrating with in the section below.