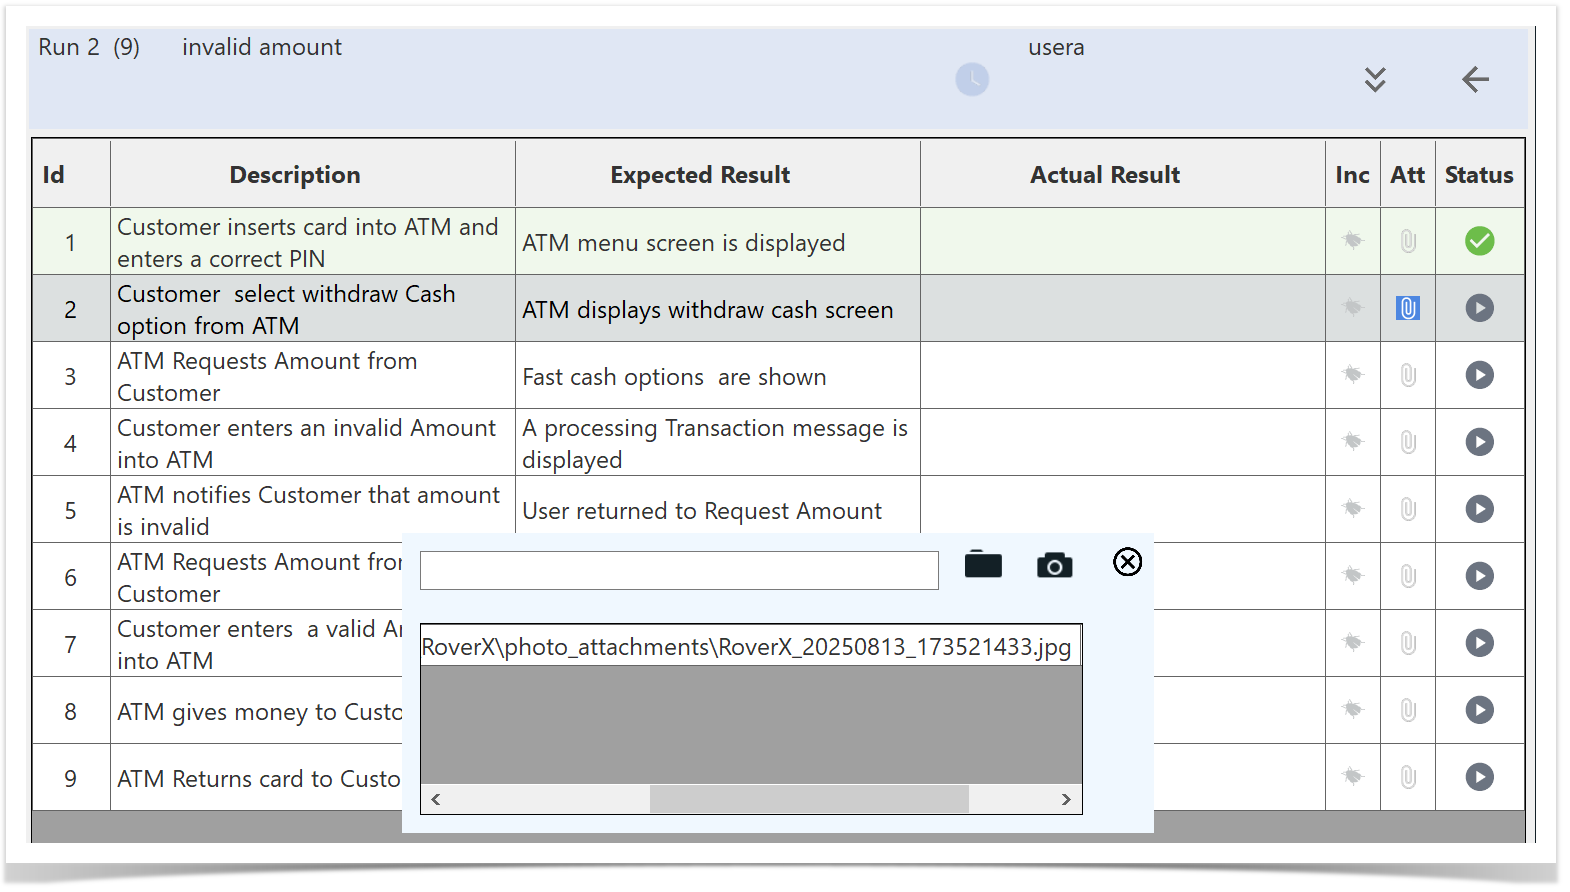
Adding Attachments to Test Steps
You can attach one or more files, or take a photo directly, for a test step. This feature allows you to include relevant files and documents with each test step for better documentation and reference.
Select the Attachment Button ![]() : Click the button located in the Attachment column of the test step.
: Click the button located in the Attachment column of the test step.
This action will open the Manage Attachments popup, where you can upload and manage your attachments.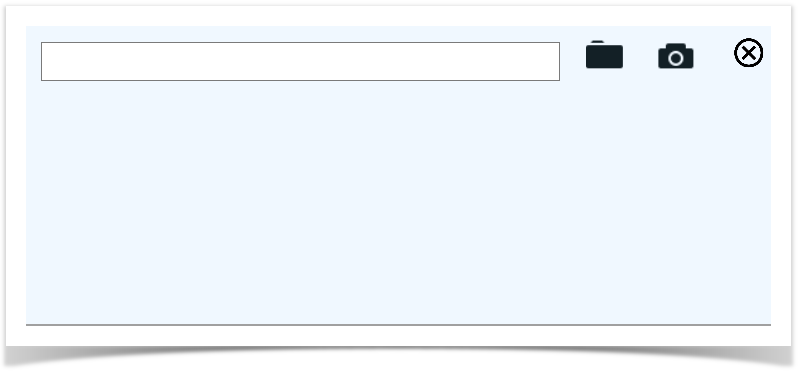
Upload Files
To upload files select the ![]() icon. The popup will open, allowing you to upload one or more files.
icon. The popup will open, allowing you to upload one or more files.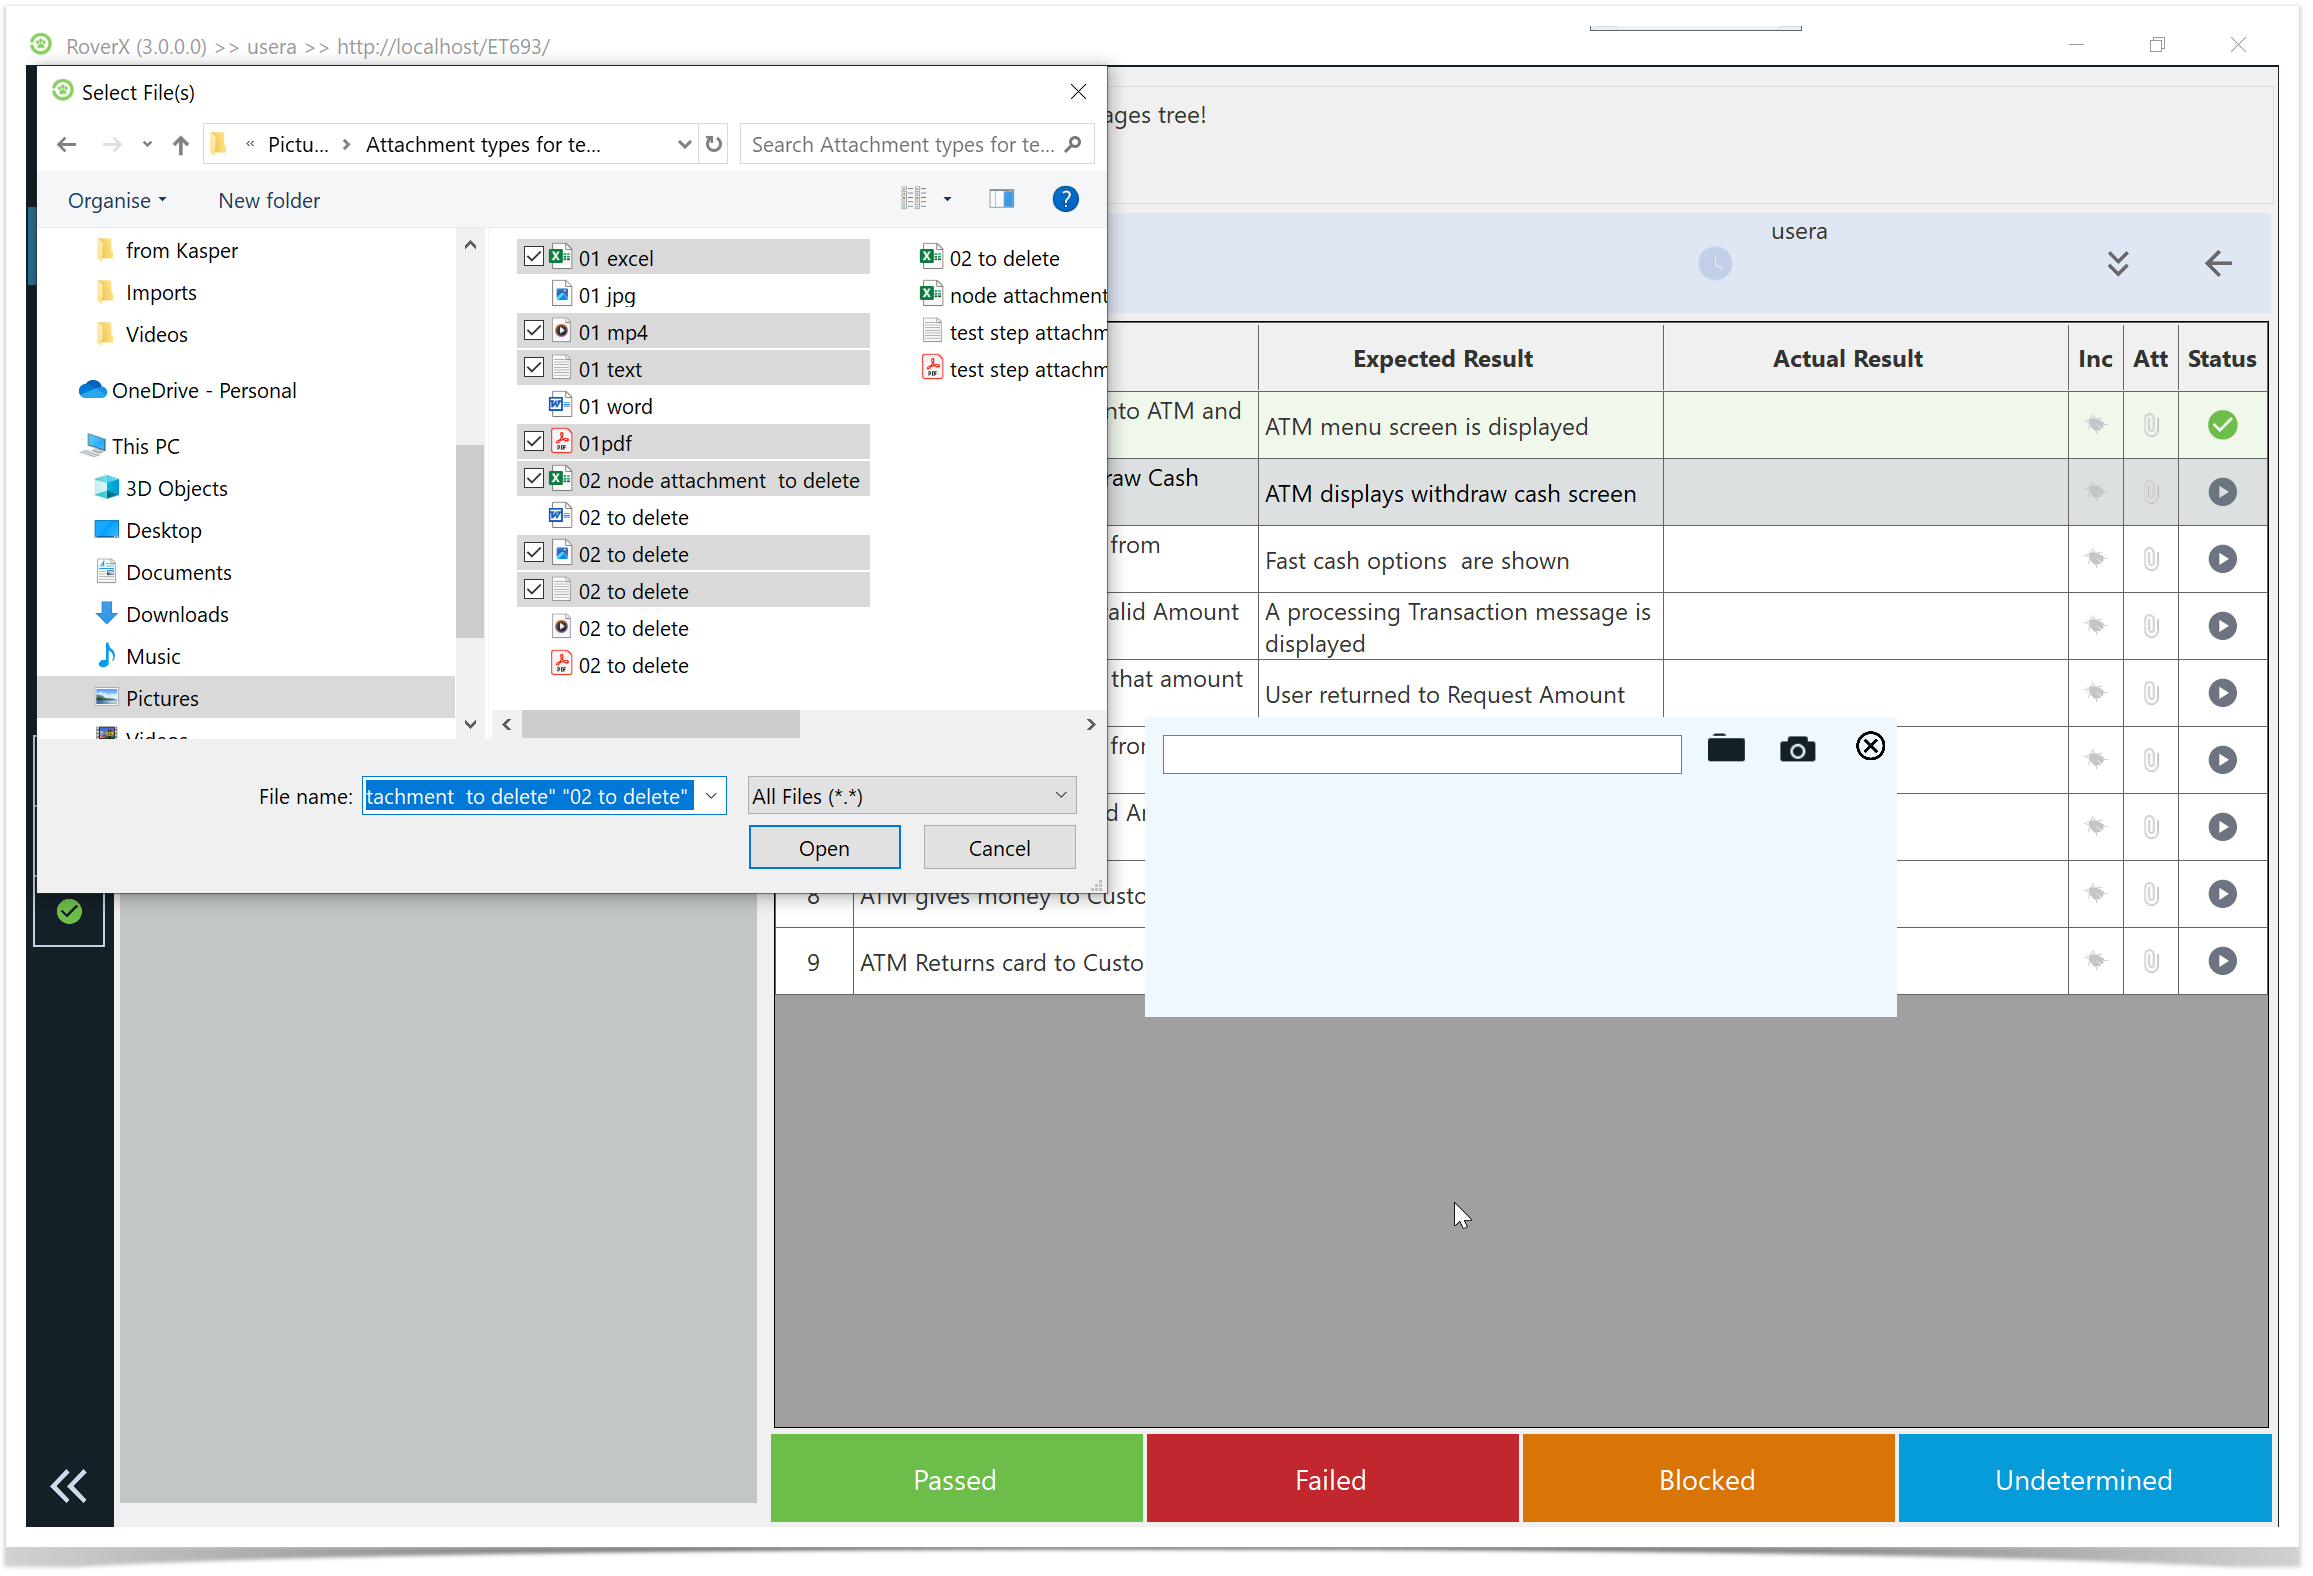
The selected files will be uploaded, and their paths or thumbnails will be displayed in the popup.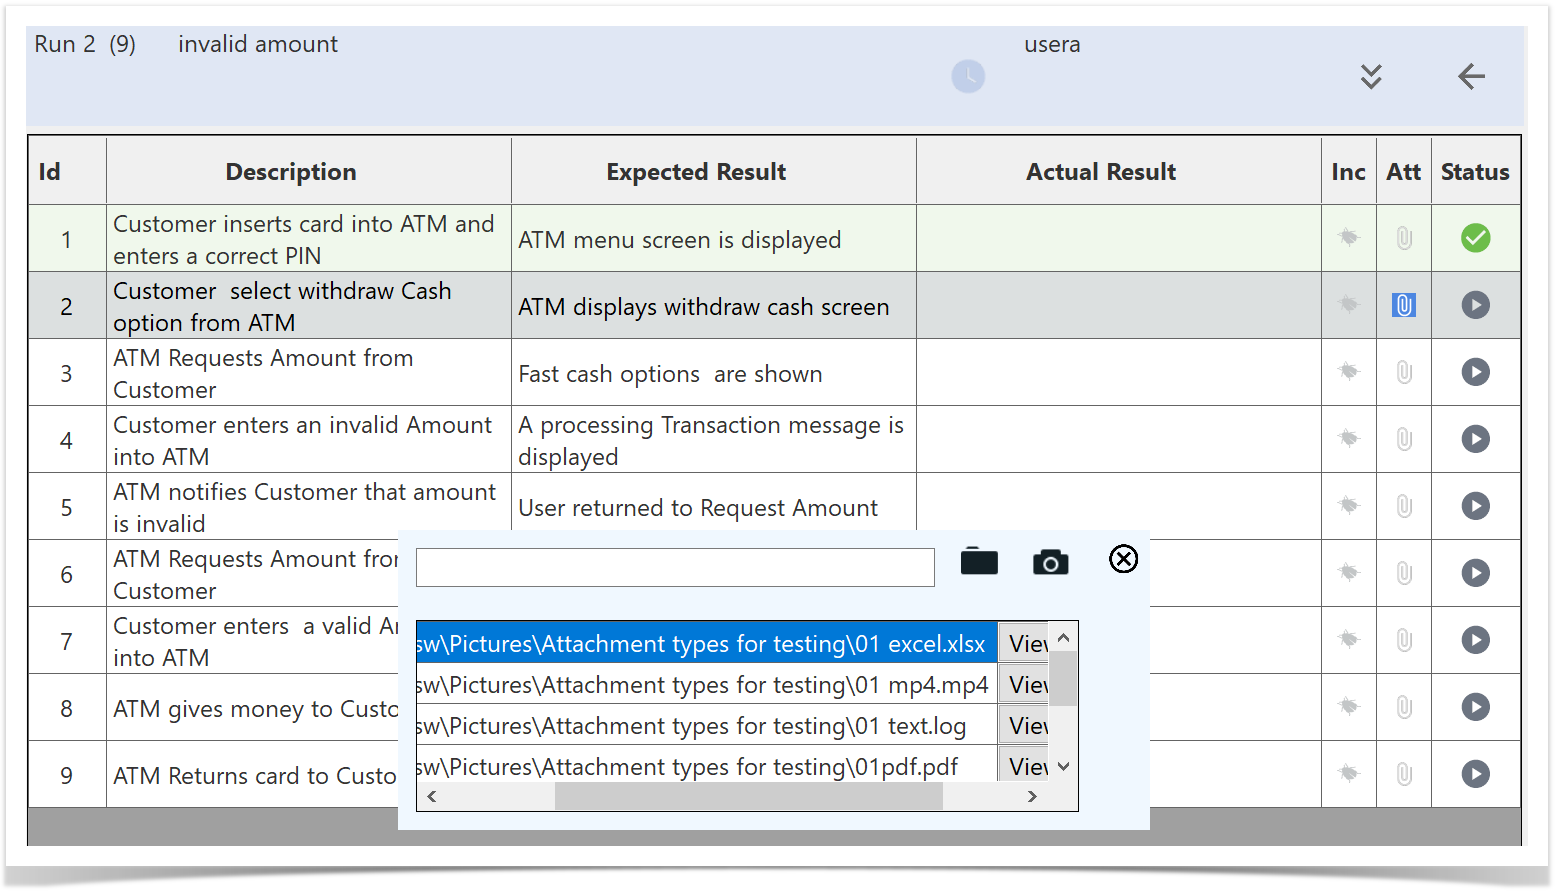
Capture Photos
- For photos: Select the
 .The camera interface will open.
If your device has more than one camera (e.g., front and back), you can select the default camera you want to use. RoverX will remember your choice the next time you open the camera interface.
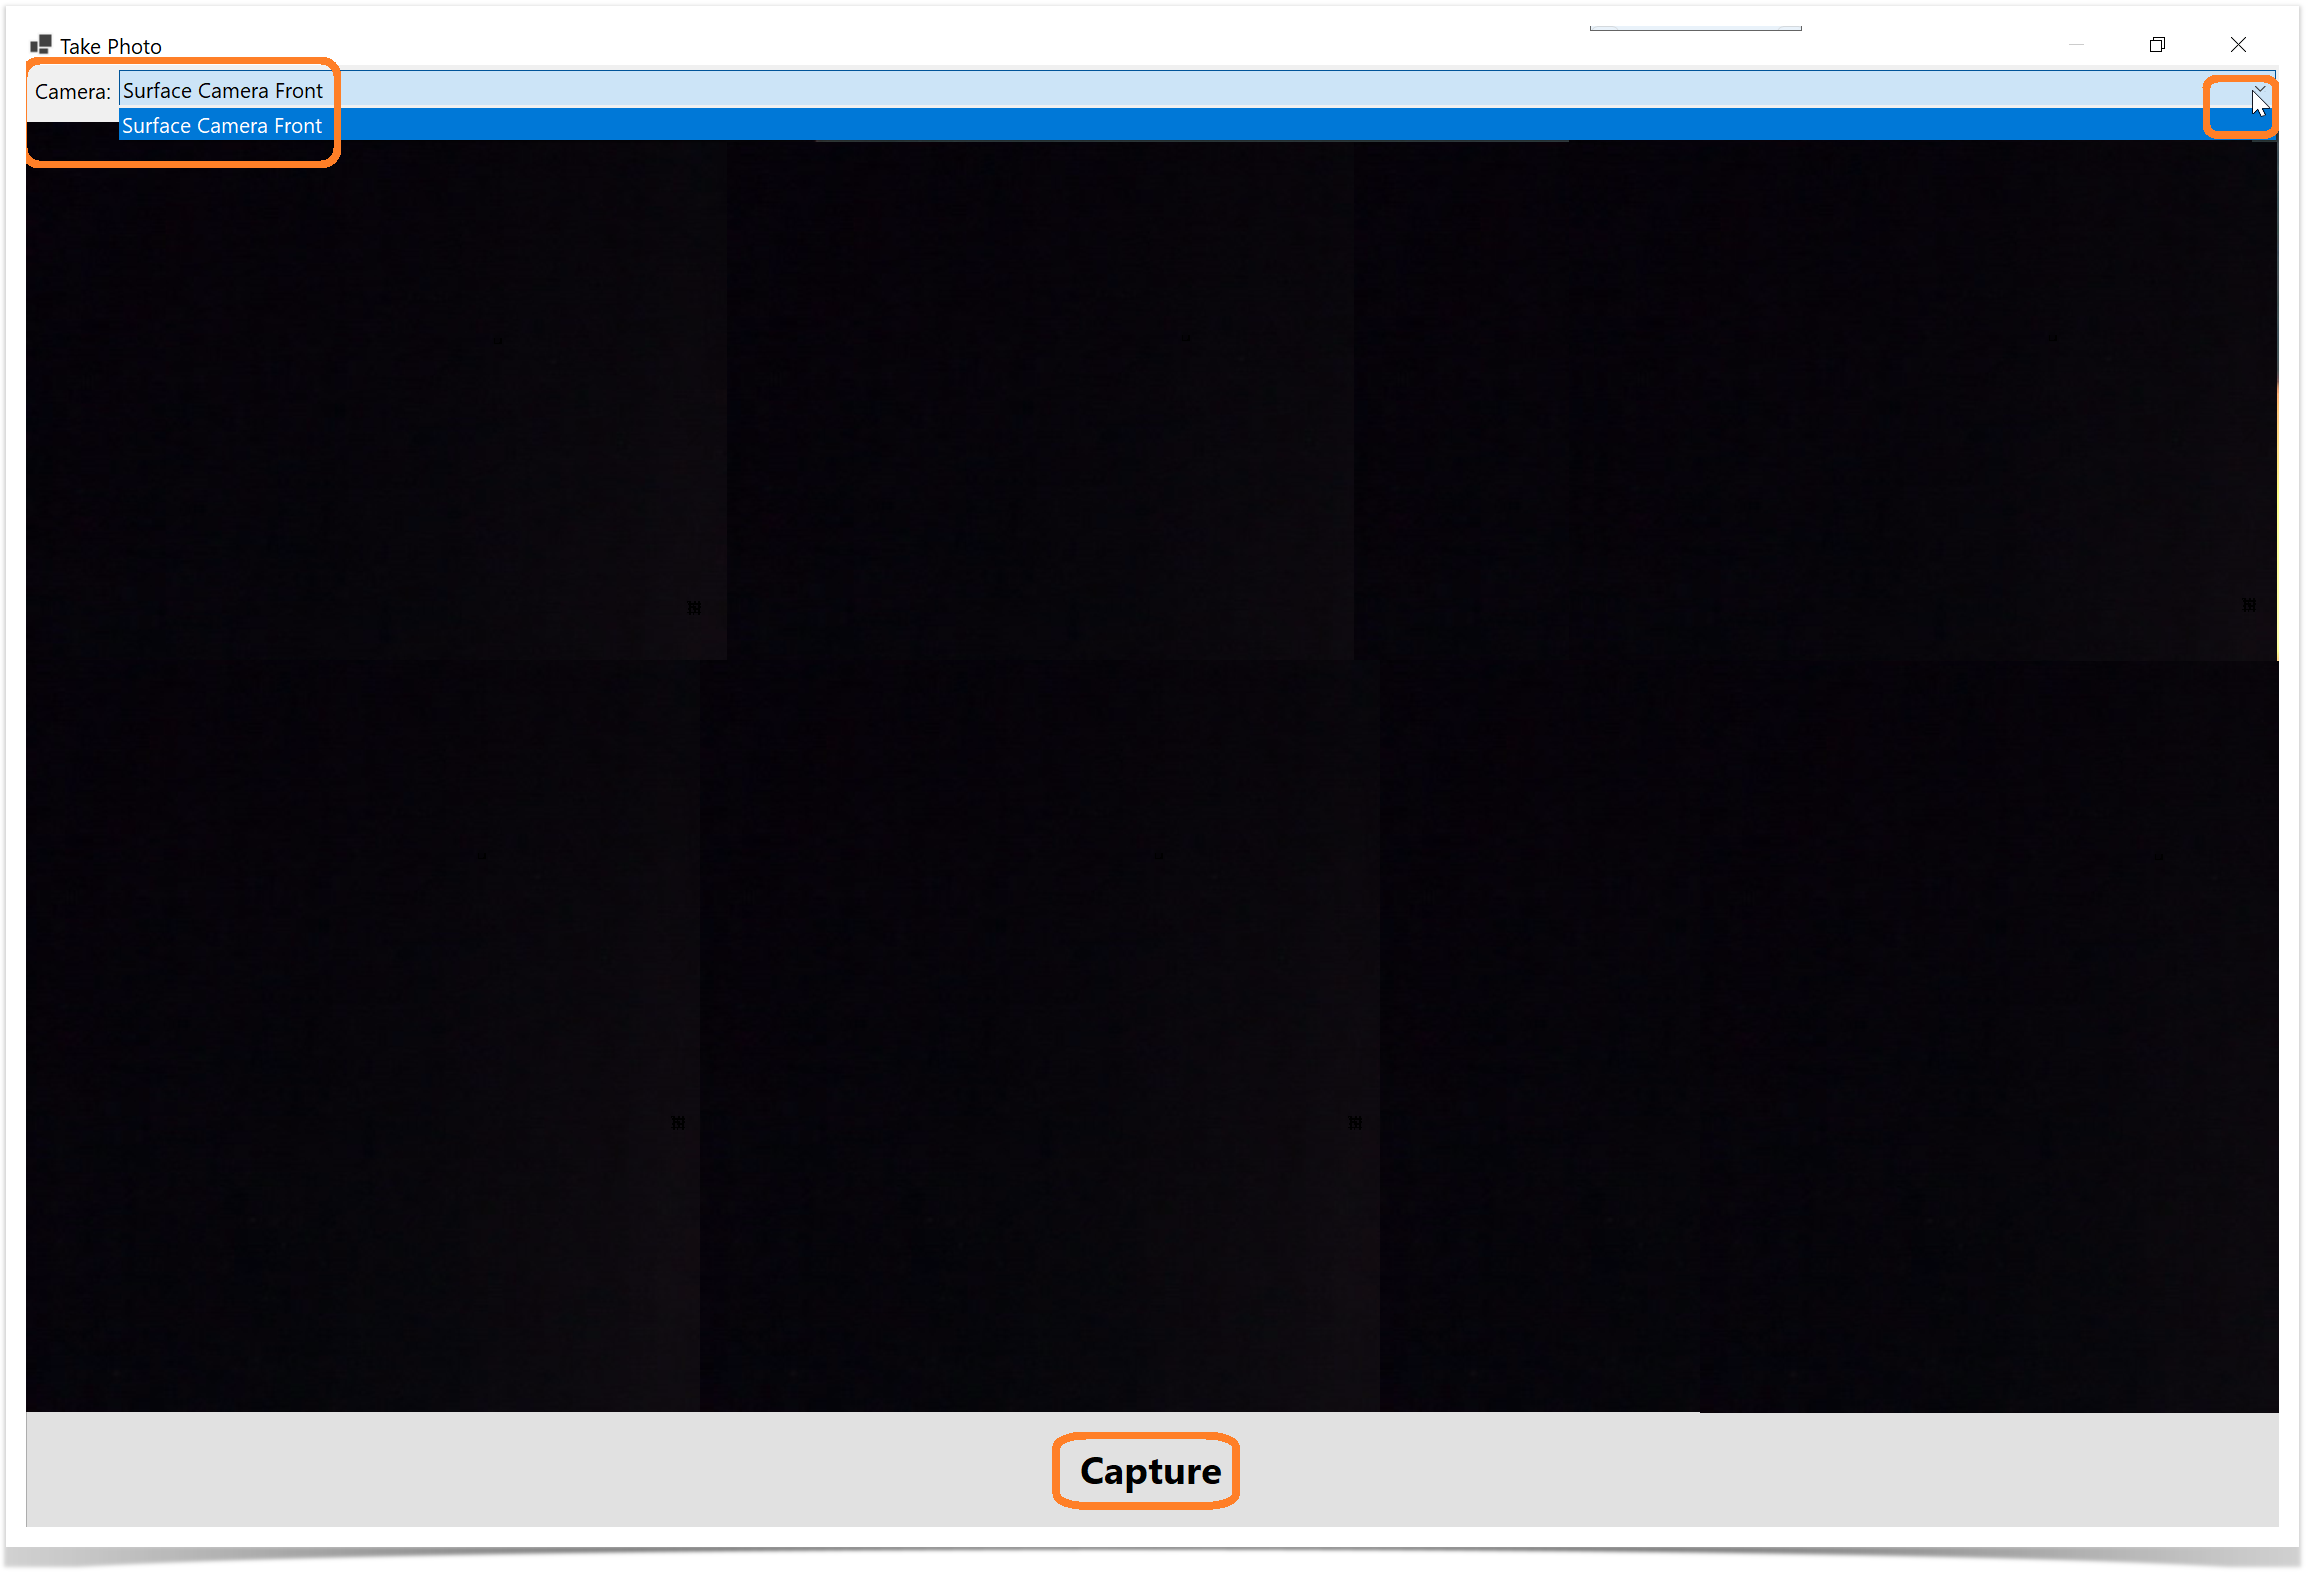
2. Select the Capture button. The captured photo will be uploaded, and their paths or thumbnails will be displayed in the popup.
Photos captured through RoverX are stored locally on your computer in: C:\Users\<username>\AppData\Roaming\RoverX\photo_attachments.
If you delete the RoverX database, these photos will also be deleted. You can also choose to delete them manually from this folder if needed.
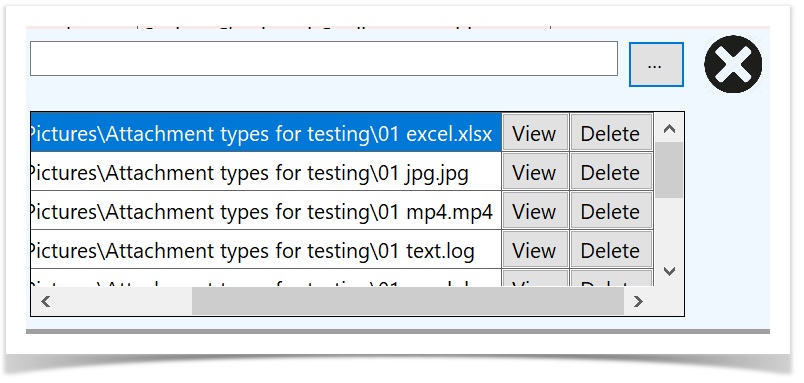
Managing Attachments
If you scroll to the right within the Manage Attachments popup, you have the following options for each attachment:
- View: Click to open and view the attached file.
- Delete: Click to remove the attachment from the test step.
These options allow you to easily manage the files associated with your test steps.
Select the X button to return to the Test Run.
Once you return to the Test Run screen, an icon will appear to indicate that there are attachments for the test step.
Hover over the ![]() icon to see the number of attachments associated with the test step.
icon to see the number of attachments associated with the test step.
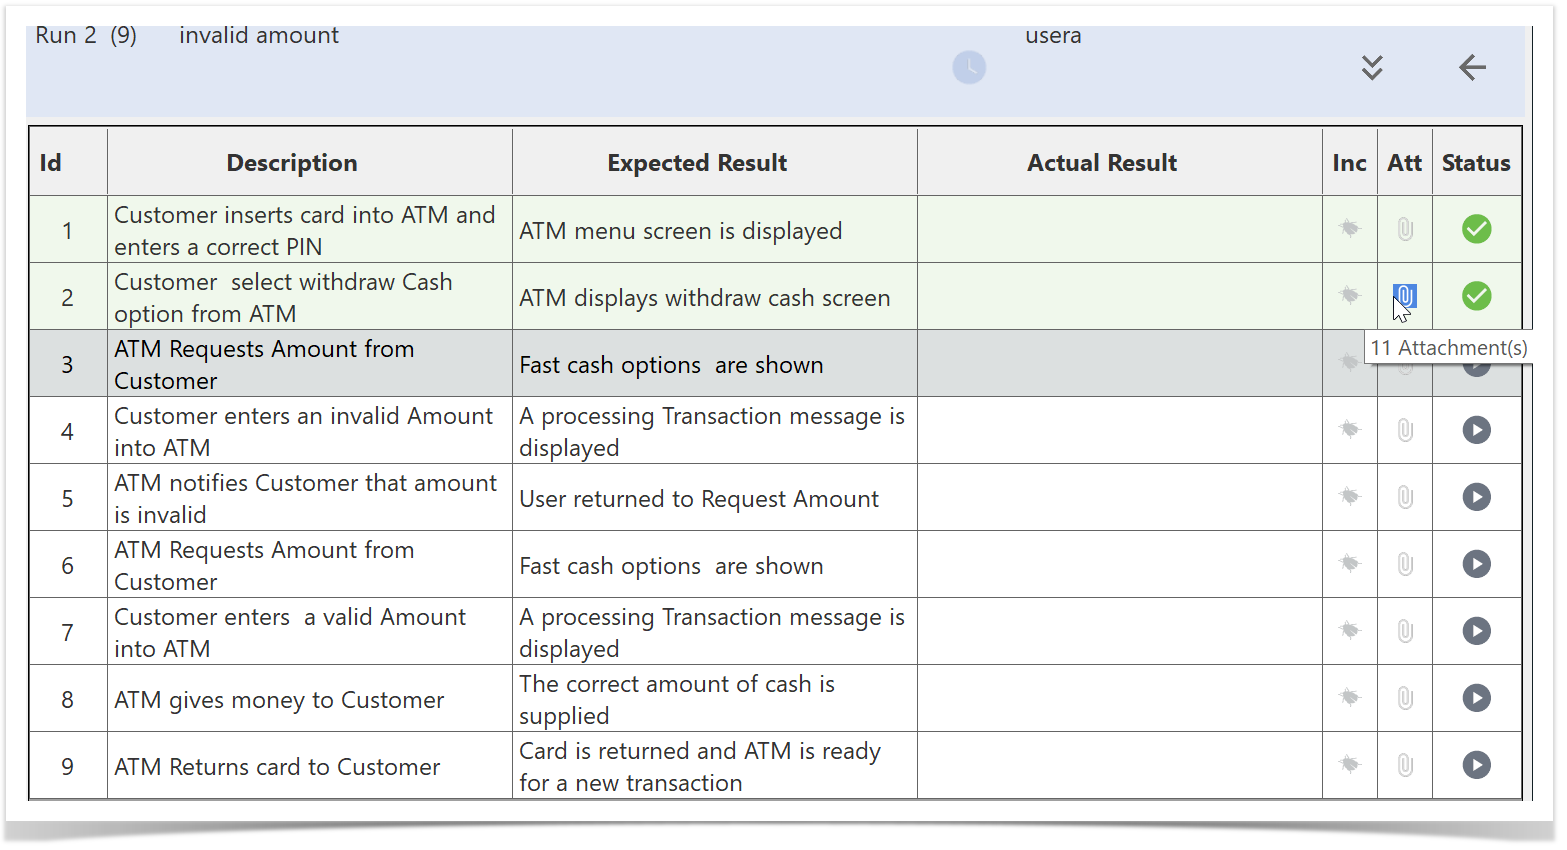
Clicking on the ![]() will open the Manage Attachments popup where you can view or delete existing attachments.
will open the Manage Attachments popup where you can view or delete existing attachments.