Synchronizing Requirements
If you are using Team Foundation Server (TFS 2010) for both requirements capture and defect management, Enterprise Tester is fully integrated to support the synchronization of both requirements and issues. Enterprise Tester supports full bi-directional synchronization of requirements/work item with TFS. Key Features include:
- Configurable import filtering by: Type, Status, and Priorities;
- Configurable Synchronization Schedules - Adhoc (manual), Periodic (set time interval) and Daily; and
- TFS work Item ID on the requirement in ET.
Creating your Project Link
Once the TFS connection has been created (see External Systems), you can begin associating projects in the defect tracker with projects in Enterprise Tester. Project links can be created and managed either from the Resources tab on your tree view navigator or on the External System Links tab.
External System Links Tab
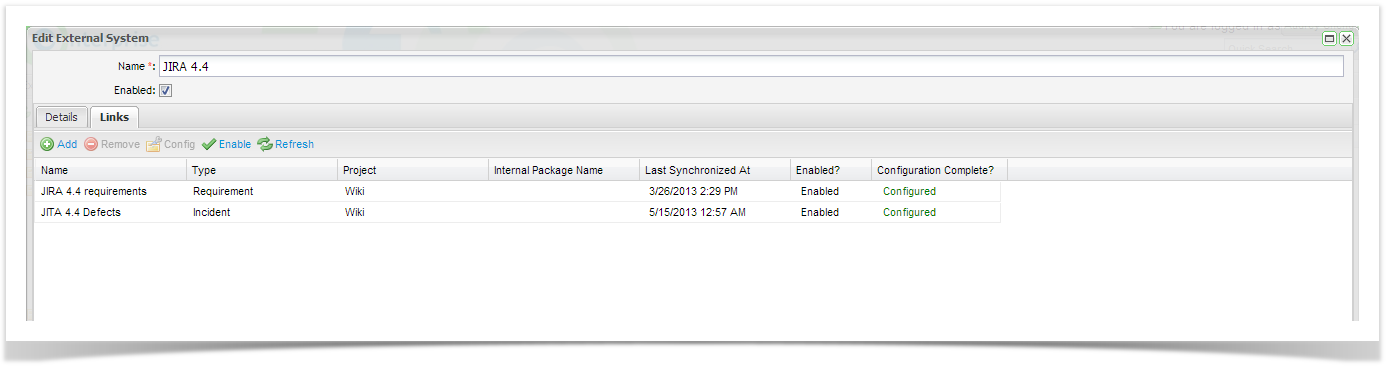
From the Admin tab, Expand Extensions and double click on External Systems. From the External Systems summary grid, double click the External System you wish to create a link for. Then navigate to the Links tab. Click on Add from the tool bar.
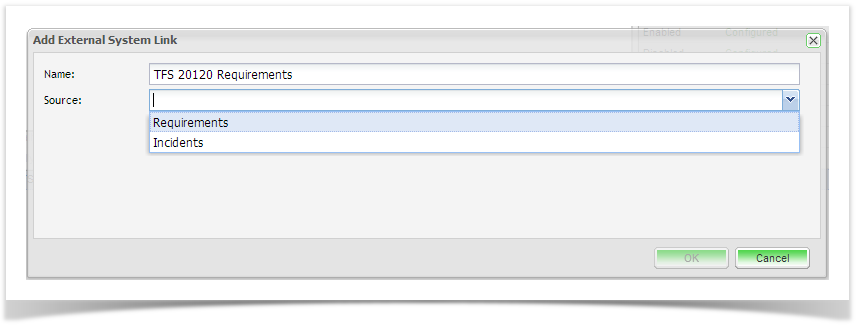
The Add External System Link screen will appear. Complete the name and select the Link Source, Requirements. This is the entity type you wish to synchronize.
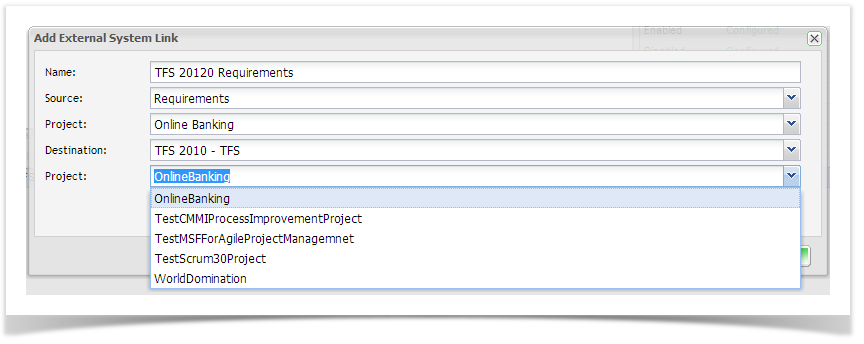
Once you have selected the Source additional fields to configure the ET project and the TFS project will appear.
Once you have completed the screen click on OK. The External Links Details screen will appear. No you will need to complete the Field Configuration and set up the synchronization schedule. See the Configure the Requirement Link section below.
Resources Tab
From the Resources Tab in the navigation pane, click to expand "Project Links". To view all configured links for your project, double click on your project.
- Click on the ‘Resources’ tab in your tree navigator and click to expand ‘Project Link’.
- Right click on your project and select ‘Add New Project Link’, the Add Link screen will appear.
Enter in the Name for the link, and select from the dropdowns:
- Source is the entity type you wish to synchronize. Select Requirements
- The ET Project will be pre-selected
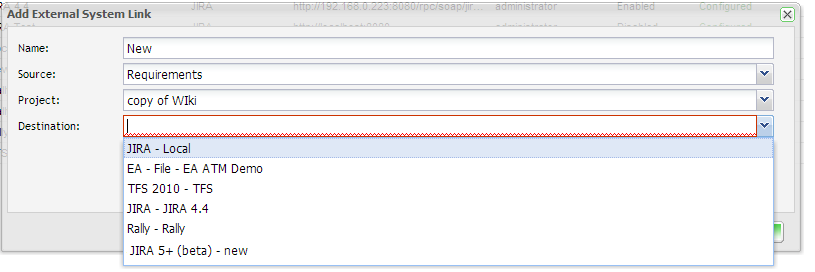
- Destination is the configured external system to use for this link. Select your TFS external system
- Select the TFS Project to synchronize with.
Configure the Requirement Link
Once the project requirement link is set up, you will be displayed the screen below and will need to perform additional configuration.
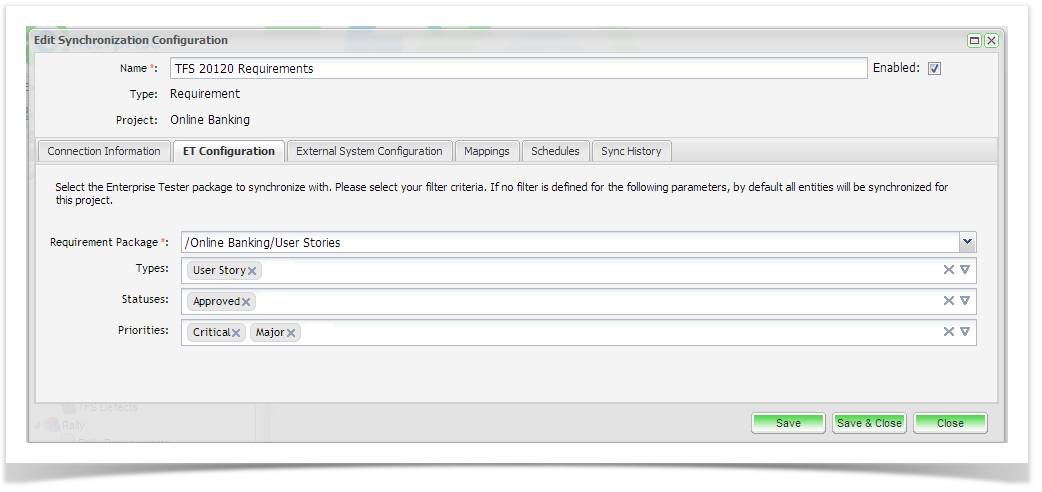
From the Edit Synchronization Configuration screen, click on the ET Configuration tab. Select the ET requirements package you wish to synchronize with. Here you can also select the filter criteria when synchronizing from ET to TFS. You can filter on Types, Statuses and Priorities. Once you have completed your configuration, click ‘Save’.
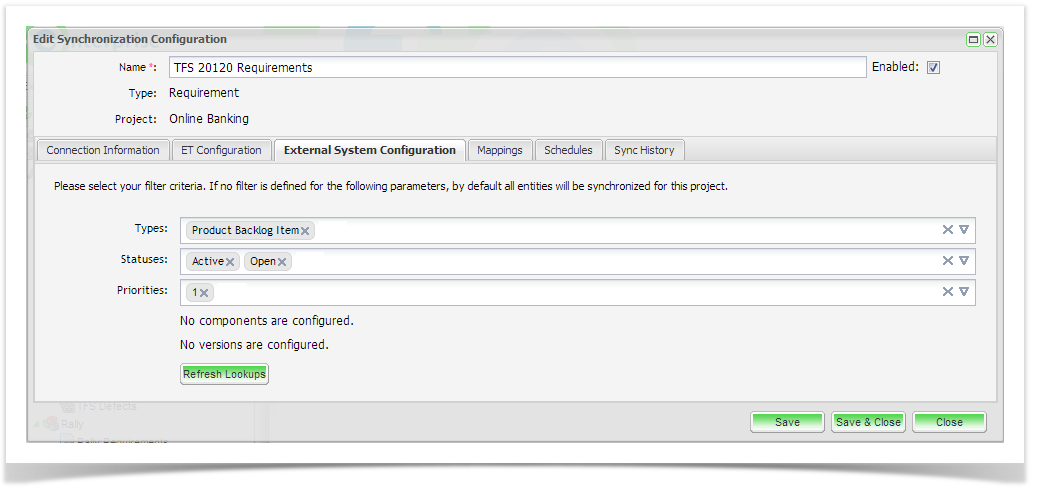
Next, click on the External System Configuration. Select the entity type(s) (requirement, stories, epics etc.) to synchronize with Enterprise Tester and click ‘Save’.
Here you can also select additional criteria including Statuses, Priorities, Components, Affected and Fixed Versions.
Note that by default all entities will be synchronized if you do not apply a filter. If the TFS field values do not appear in the field drop down list, you may need to initiate a refresh lookups which will refresh the TFS metadata.
Next, click on the Mapping tab.
This screen displays two tabs for outlining and configuring the steps undertaken when synchronization is initiated.
• One tab for mapping fields from Enterprise Tester to the defect tracker.
• One tab for mapping fields from the defect tracker to Enterprise Tester
Task | Configurable | Description |
|---|---|---|
Map Fields | Yes | Allows a set of mappings to be configured to transfer information between the source and destination system. |
Map Attachments | No | Synchronizes the set of attachments between Enterprise Tester and External System (e.g. JIRA). This will add new attachments that have not been synchronized previously, and remove previously synchronized attachments that have since been removed. |
Create Trackback Comment | No | Adds a comment to the synchronized requirement with the following text: Linked to Enterprise Tester requirement - Requirement: http://server/EnterpriseTester/#/requirement/edit/04e7f9e5-5784-4e94-a863-9ef600f0a935 (Name: ) If a comment already exists with the same value, then the comment is not added. |
Next, set your field mappings in the direction of Enterprise Tester to the defect tracker - you will notice on the screen below that the Field Mapping is not currently configured. Please note that Enterprise Tester will prompt the administrator when a refresh lookups is either in progress or is required. This must be completed before configuring your field values. Refresh lookups will ensure that all the custom fields from your defect tracker and associated field values are up-to-date during field mapping.
You do not need to edit the mappings from the defect tracker to Enterprise Tester as they are already complete, however you can edit them if required.
Click to highlight and select ‘Map Fields’ and click on ‘Configure’ from the toolbar. Please note that Enterprise Tester may need to Refresh Lookups before you can proceed with your field configuration.
From the Configure Fields mapping screen, several configurations are automatically created consisting of Copy Field type mappings and direct Map field type mappings.
The Copy Field type mappings are already configured and the value will be copied from Enterprise Tester to TFS on Synchronization:
Copy Field – Copy from ET: Name (field) to External System: Summary (field)
Copy Field – Copy from ET: Description to External System: Description (field)
Copy Field – Copy from ET: Created By (field) to External System: Reporter (field)
Copy Field – Copy from ET: Assigned To (field) to External System: Assignee (field)
The Map field type mappings require the field values to be mapped. You can see under the column “Configured = False” that the value for these fields has not yet been mapped:
Map Field – Map from ET: Type to External System: Type
Map Field – Map from ET: Priority to External System: Priority
- To complete the field mappings, click on the “Type” Map field and select ‘Edit’ from the tool bar.
- Complete mapping Enterprise Tester field values to TFS field values.
- Click “save”.
- Complete mapping field values for “Priority”.
Scheduling Requirement Synchronization
Now that your configuration and field mappings are complete you are ready to synchronize. The synchronization frequency can also be configured from the Schedules tab. There are 3 options that can be configured:
- Adhoc
- Periodic
- Daily
Type | Scope | Direction | Period | Time |
|---|---|---|---|---|
Adhoc | You can choose to only update entities since the last synchronization or synchronize all. | Four options: • To External System ( From ET) • From External System ( To ET) • Bi-Directional ( External System changes will synch first) • Bi-Directional (ET changes will synch first). | N/A | N/A |
Periodic | You can choose to only update entities since the last synchronization or synchronize all. | Four options: • To External System ( From ET) • From External System ( To ET) • Bi-Directional ( External System changes will synch first) • Bi-Directional (ET changes will synch first). | Specify the synchronization frequency in minutes. | N/A |
Daily | You can choose to only update entities since the last synchronization or synchronize all. | Four options: • To External System ( From ET) • From External System ( To ET) • Bi-Directional ( External System changes will synch first) • Bi-Directional (ET changes will synch first). | N/A | Specify the time using the (24hr clock) when the synchronization will occur daily. |
Once you have configured your synchronization frequency, a summary of the configured synchronization schedules is available. You can see the time of the Last Run, the Next Run (if applicable), whether the schedule is enabled or not and the current Synchronization Status.
You can use the tool bar to add a new scheduled synchronization, delete an existing configuration, enable or disable an existing schedule, configure an existing schedule or manually initiate a synchronization.
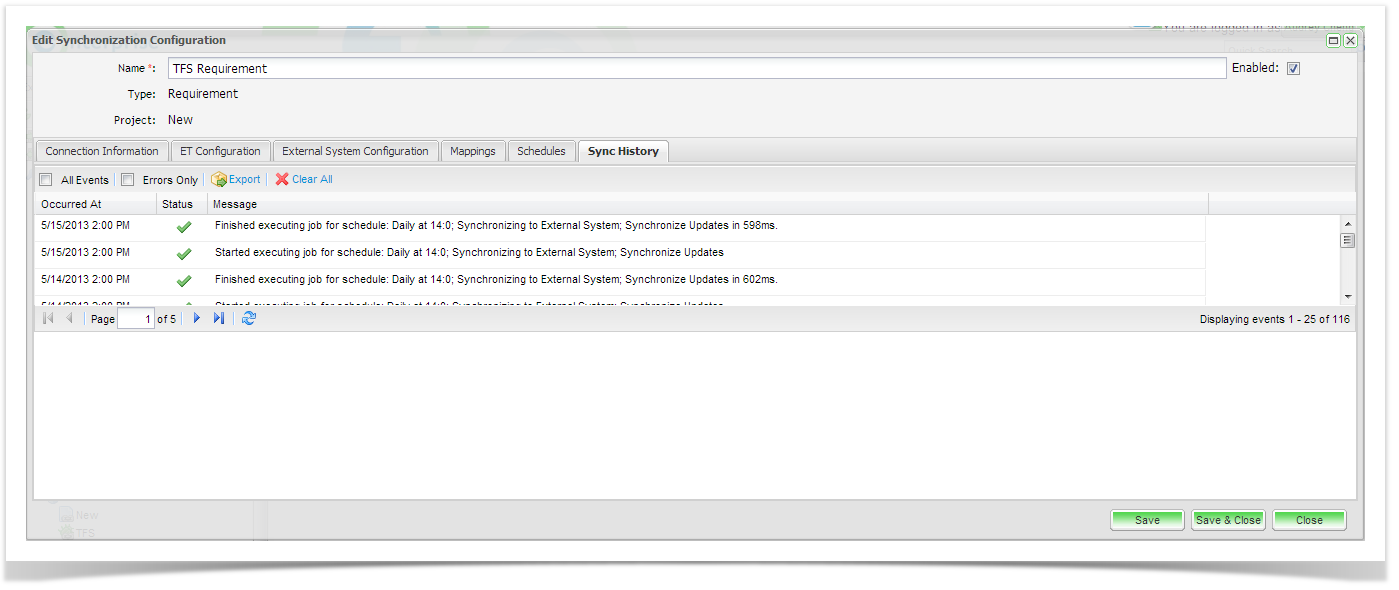
Synchronization History
You can view the Synchronization history from both the synchronization configuration screen and the individual synchronized entities. From the configuration screen you can view all synchronization events, select to only view errors, export the synchronization events to a csv file or clear the history.
Deleting Requirement Project Links
Deleting requirement project links will stop the synchronization between Enterprise Tester and your external system. When deleting the link you will have the option to delete the link and remove all external link references or to retain these references. These include the trackback comments and the defect issue link placed in Enterprise Tester. Note that if you chose to delete the references. This will only affect Enterprise Tester. References to Enterprise Tester in your external system cannot be removed, but all references in Enterprise Tester to your external system will be removed.

Limitations
- Currently synchronization will halt after an error occurs (so it won't continue processing the remaining entities).
- Auto-map in the TFS -> ET direction is fine, but auto-mapping in the other direction, even for custom fields, is not currently implemented.