Create an Incident Link
This User Guide has been created to show how to create and setup synchronisation between JIRA and Enterprise Tester for Incidents
Add New Project Link
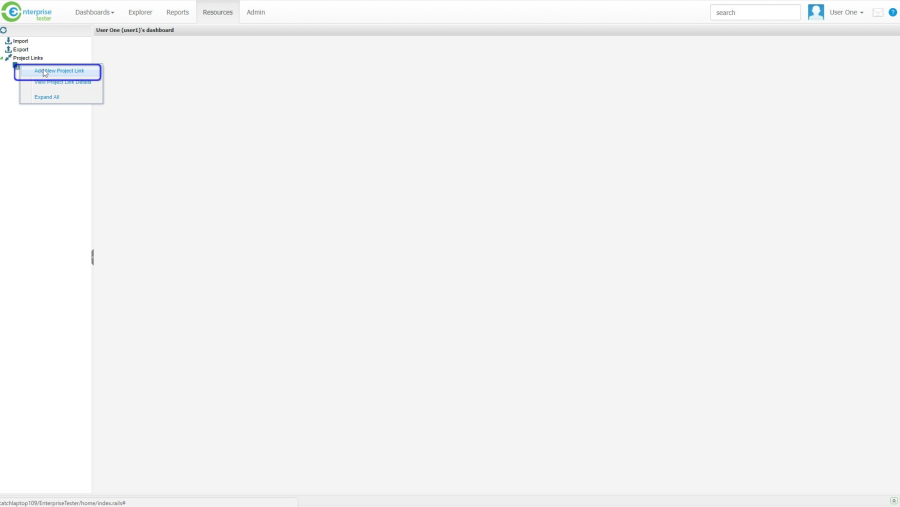
1) Go to Resources tab in the menu
1) Double click on Project Links
2) Find the Project that you want to be able to synchronise Incidents to JIRA
3) Expand the Project
4) Right click and select Add New Project Link
Add External System Link
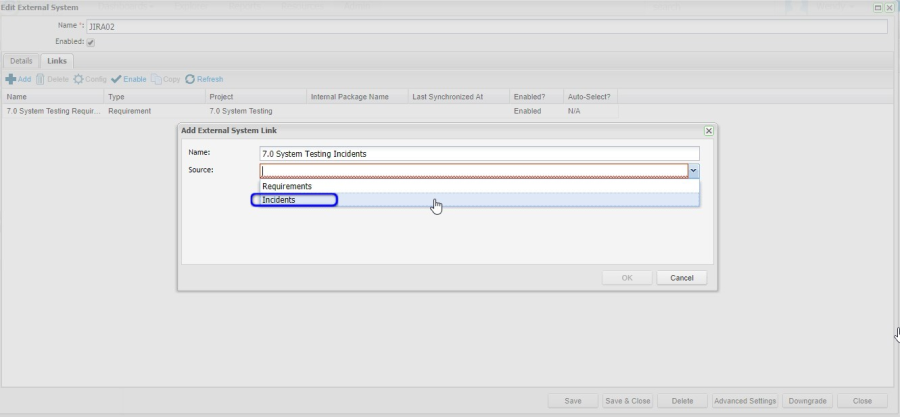
1) Enter a name for the External System Link
2) Select Incidents from the Source drop down list. This is the entity type you wish to synchronize.
External Link Details
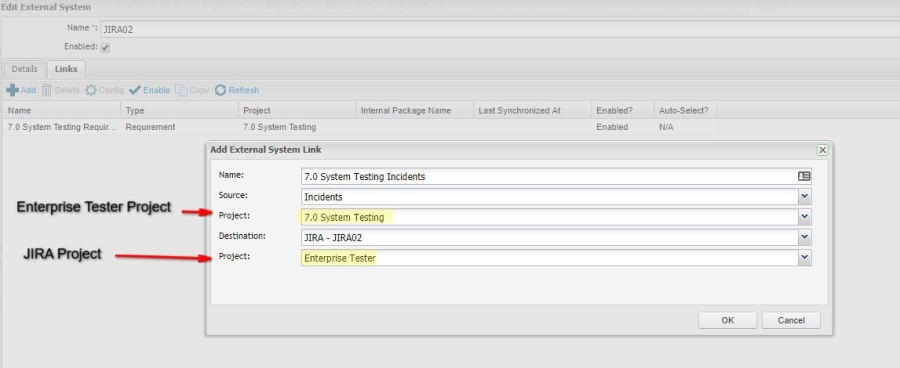
1) Select Incidents in the Source drop down list
2) Select the Enterprise Tester Project you want the Incidents to be synchronised from in the Project drop down list under Source field.
3) Select the External JIRA System to synchronise to in the Destinations drop down list
4) Select the Project in JIRA that you want to synchronise the Incidents to in the Project drop down list under the Destination field.
ET Configuration tab
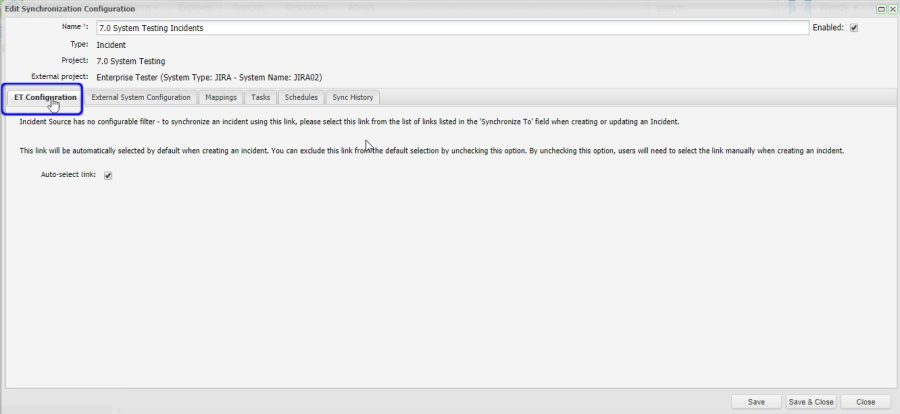
- There are no options in this section for incident synchronisation links because Enterprise Tester will synchronise all incidents created in Enterprise Tester for this project with the JIRA project configured.
- If you have more than one JIRA project configured to synchronise with this project, you can select which project you wish to synchronise with on the incident screen.
- You can also choose to synchronise Enterprise Tester incidents with more than one JIRA project provided that you have set up multiple project links.
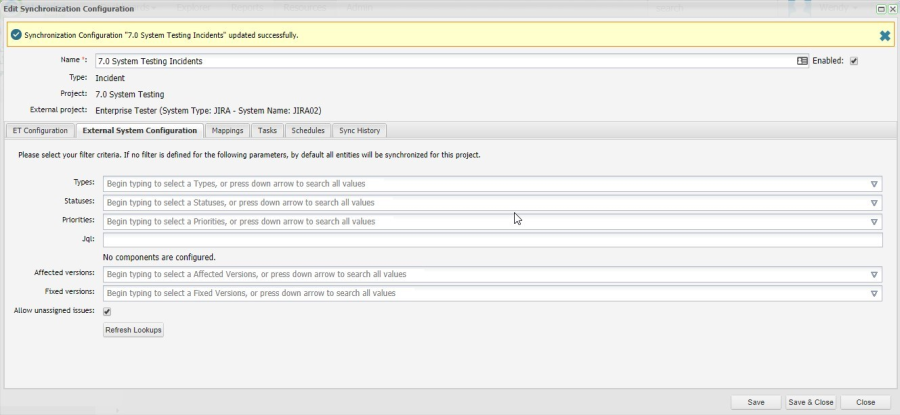
External System Configuration tab
You may also want to synchronise Incidents from JIRA to Enterprise Tester. This is so that any incidents logged in JIRA by users that do not have access to Enterprise Tester, i.e. developers, will be synchronised to Enterprise Tester.
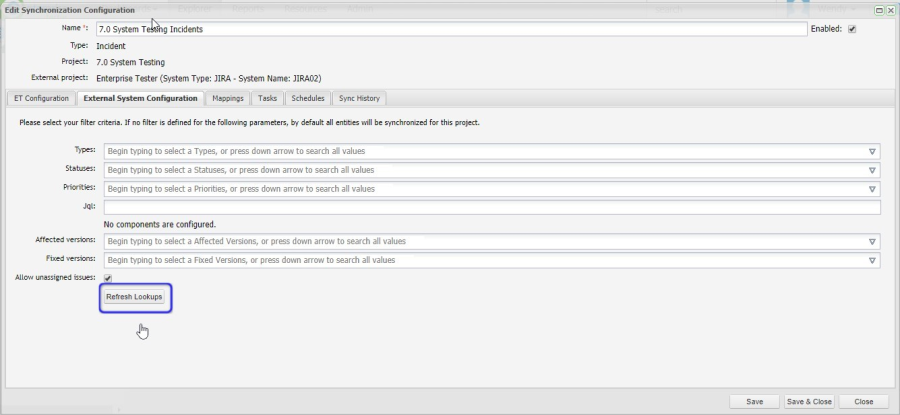
The first thing you need to do is click on Refresh Lookups button.
Refresh Lookups allows Enterprise Tester to pull in static information from JIRA. Static information can consist of items like Custom Field values or Workflow configurations.
Refresh Lookups
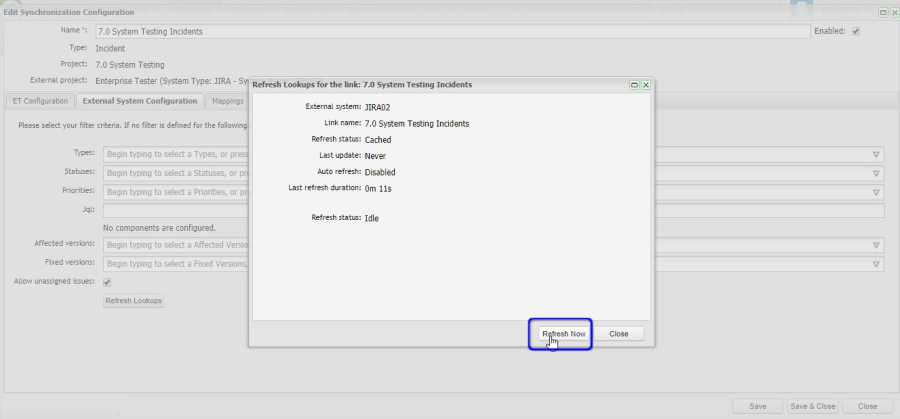
Click on the Refresh Now button
Refresh Status
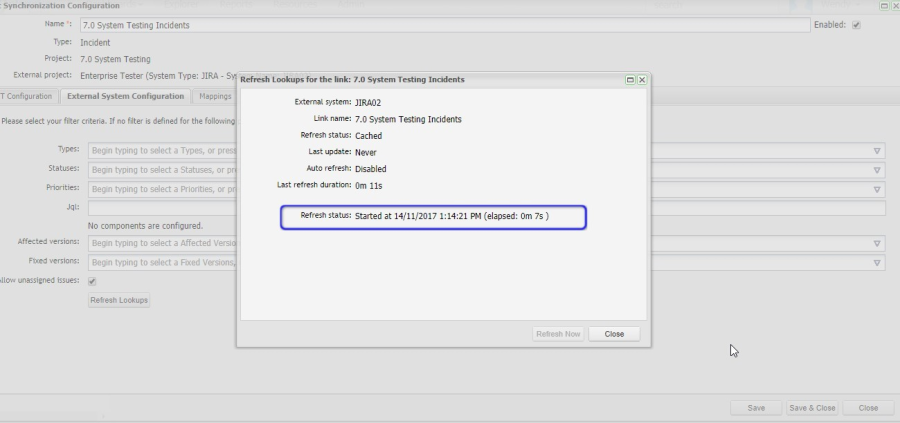
Once you have clicked on the Refresh Now button you will see the Refresh Status now has an elapsed time.
The time progresses until the Refresh Lookups is complete.
Refresh Lookups Completed
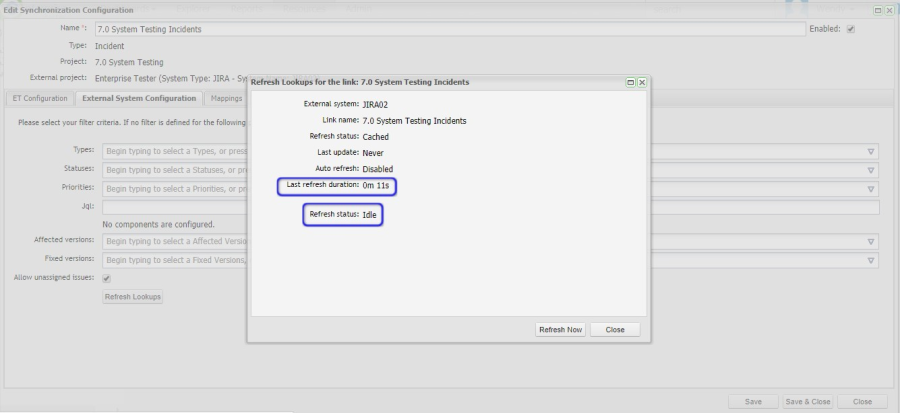
Once the Refresh Status changes back to Idle the Refresh Lookups is completed.
Last refresh duration: will have how long the Refresh Lookups took.
Select the Close button.
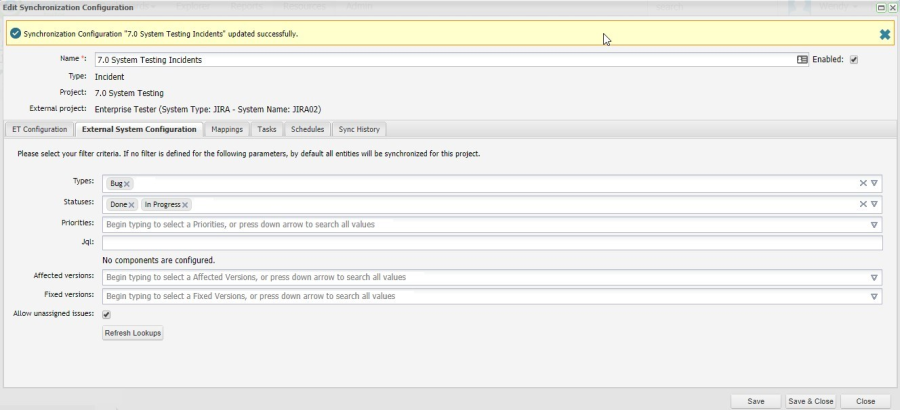
Save External System Configuration
Once the Refresh Lookups is completed and closed the External Configuration tab is displayed.Click on the Save button
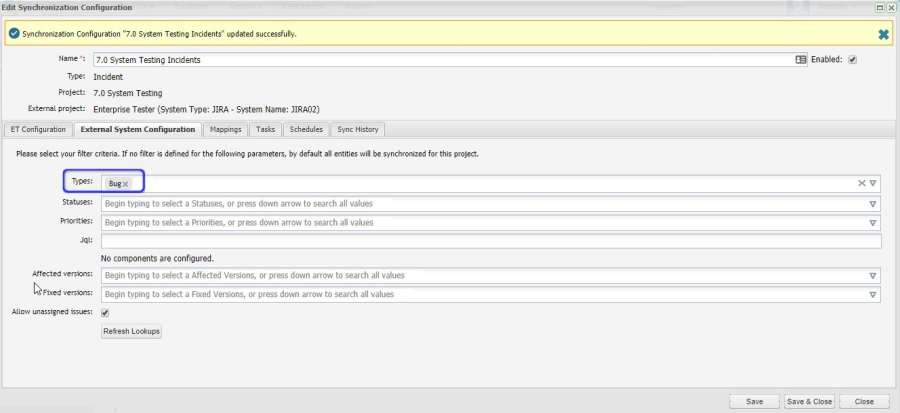
Incident Types
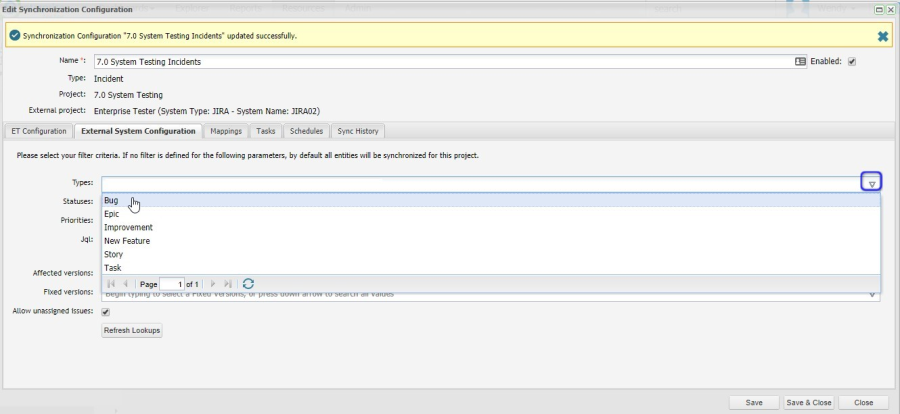
You can select the Incident Types you want to synchronise from JIRA to Enterprise Tester by selecting the Types drop down list.
Note: This will usually be Bug, but you may have some other user defined Types in JIRA.
- This will show all the available Incident Types in JIRA.
- You can select multiple Incident Types.
- If Types are not filtered all Incident Types will be synchronised from JIRA to Enterprise Tester
Incident Statuses
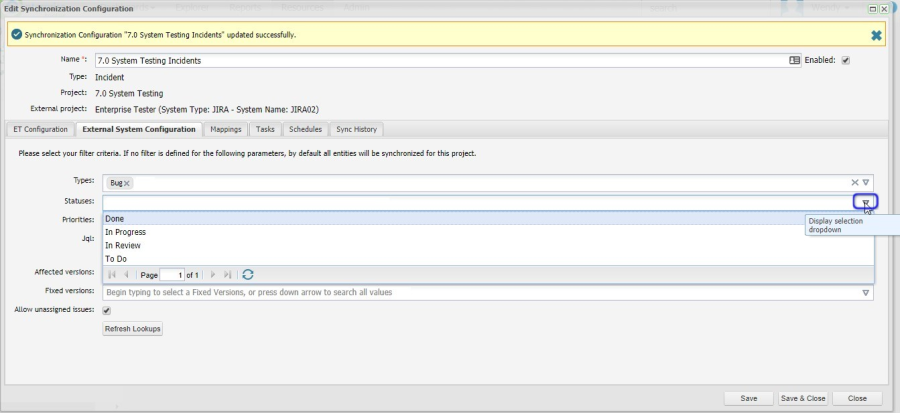
- You can select the Incident Statuses you want to synchronise from JIRA to Enterprise Tester by selecting the Statuses drop down list.
- This will show all the available Incident Statuses in JIRA.
- You can select multiple Incident Statuses.
- If Statuses are not filtered all Incident Statuses will be synchronised from JIRA to Enterprise Tester
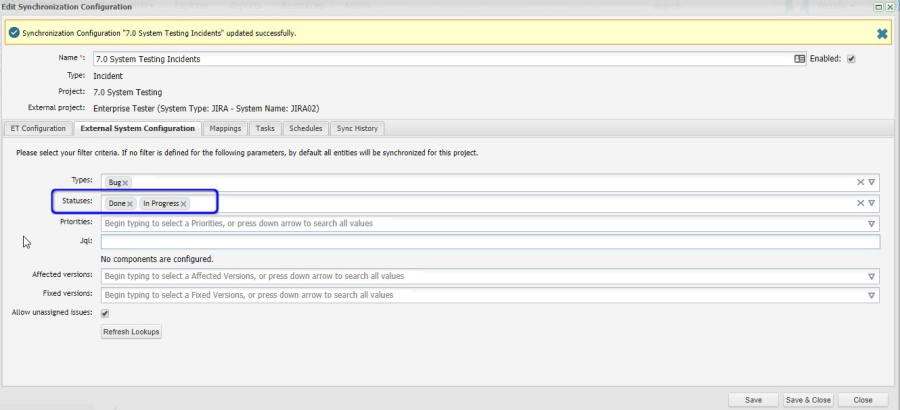
Incident Priorities
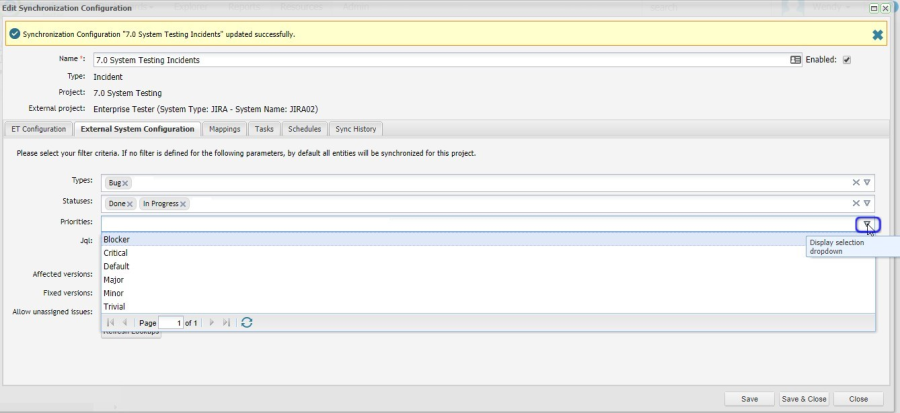
- You can select the Incident Priorities you want to synchronise from JIRA to Enterprise Tester by selecting the Priorities drop down list.
- This will show all the available Incident Priorities in JIRA.
- You can select multiple Incident Priorities.
- If Prioritiesare not filtered all Incident Prioritieswill be synchronised from JIRA to Enterprise Tester
All Incident Priorities will be synchronised, as there is no filter.
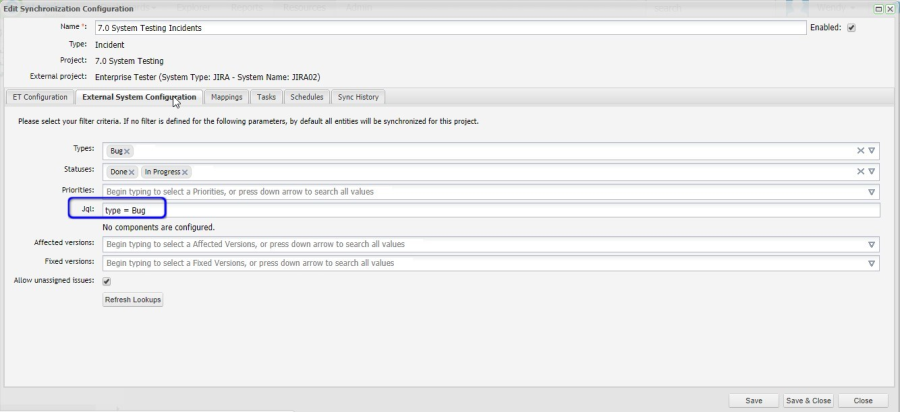
JQL Queries
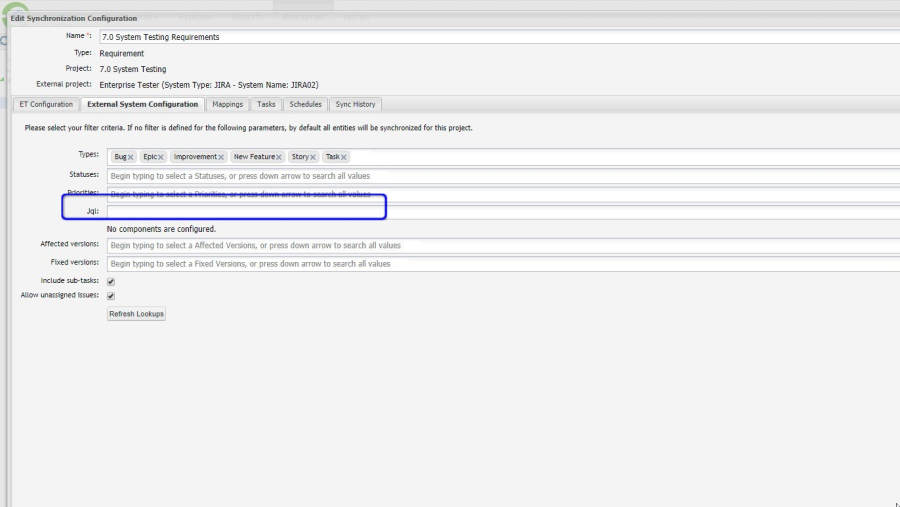
You can use a JQL query from JIRA to filter what Incidents are synchronized from JIRA to Enterprise Tester.
Note: It is recommended that you run the JQL query in JIRA first to ensure the filter returns the results you are expecting.
JIRA Project
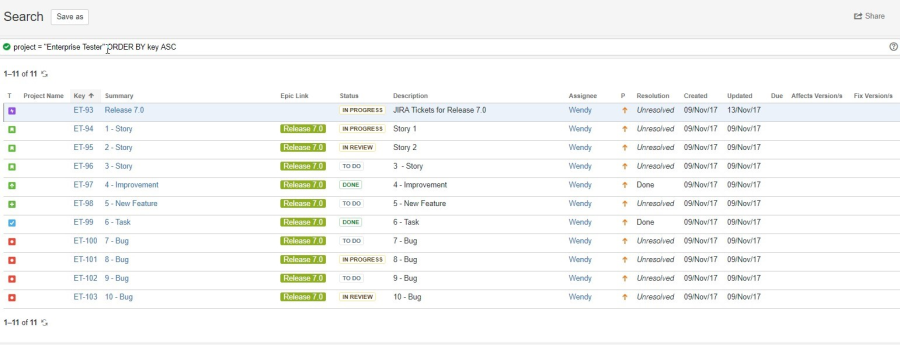
Displayed is the project that will be synchronised with Enterprise Tester.
For this example it is showing all requirements and bugs that will be in Release 7.0.
To pull Bugs only into Enterprise Tester you could use the following JQL:
Type = Bug
Once you have checked your JQL in JIRA and are satisfied with the results returned, copy the JQL to Enterprise Tester
You do not have to add the Project Name in the JQL as it is already connecting to the JIRA Project
Versions and Components
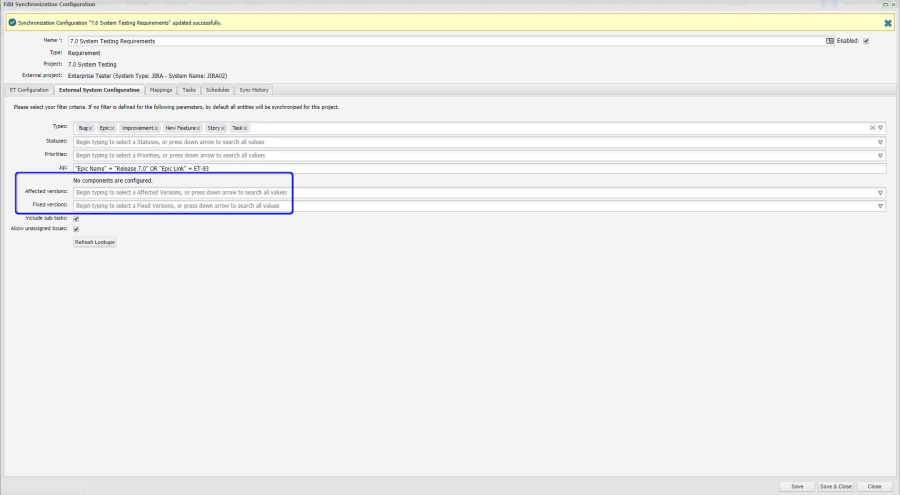
You can also filter on Affected Versions, Fixed Versions and Components.
See Enterprise Tester Knowledge Base Article for more information on setting up these tasks.
Allow Unassigned Issues
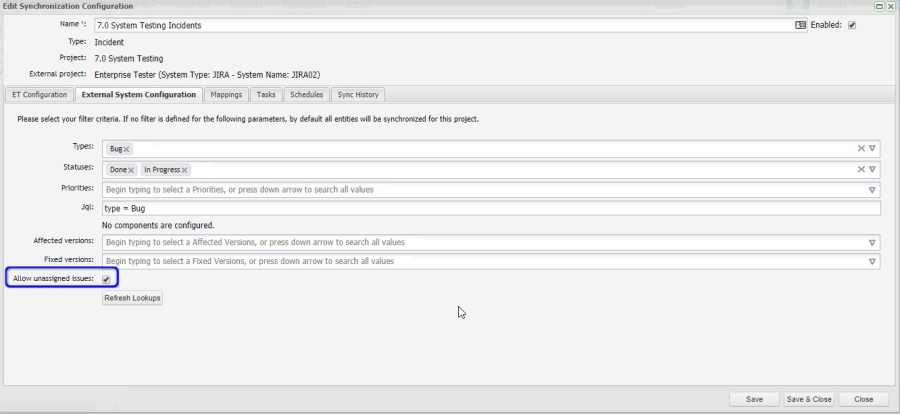
You can synchronise Incidents from JIRA where there is no assignee.
Your JIRA project must be configured to allow "unassigned" issues.
You need to edit the field configuration in Enterprise Tester and set the AssignedTo field as optional. See Enterprise Tester Knowledge Base on how to do this
Mappings
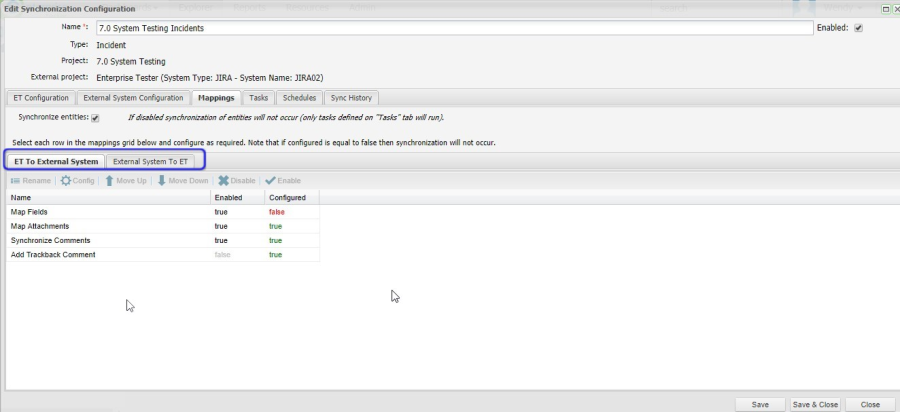
This screen displays two tabs for outlining and configuring the steps undertaken when synchronisation is initiated.
• One tab for mapping fields from Enterprise Tester to the external system (JIRA).
• One tab for mapping fields from the external system (JIRA) to Enterprise Tester
It defaults to ET to External System tab.
Map Fields (ET to External System)
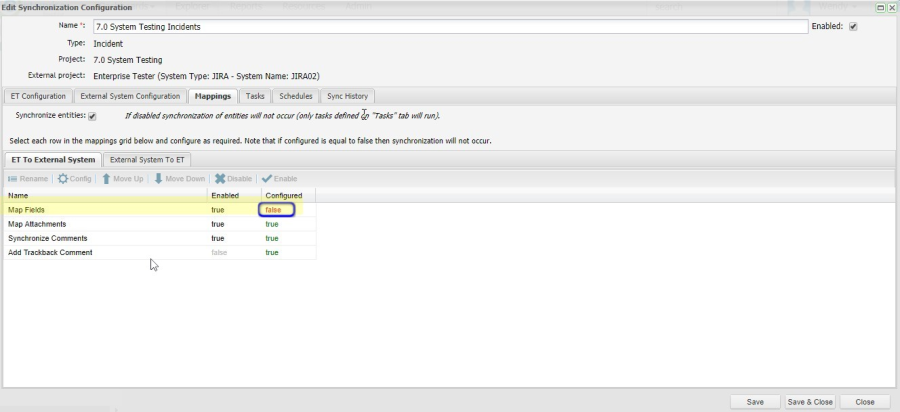
The Configured column for Map Fields is set to False.
Double click on the Map Fields row
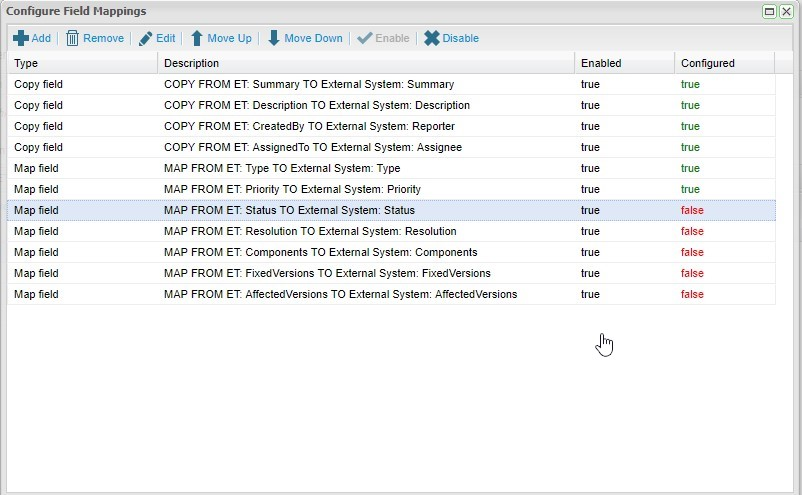
Configure Field Mappings
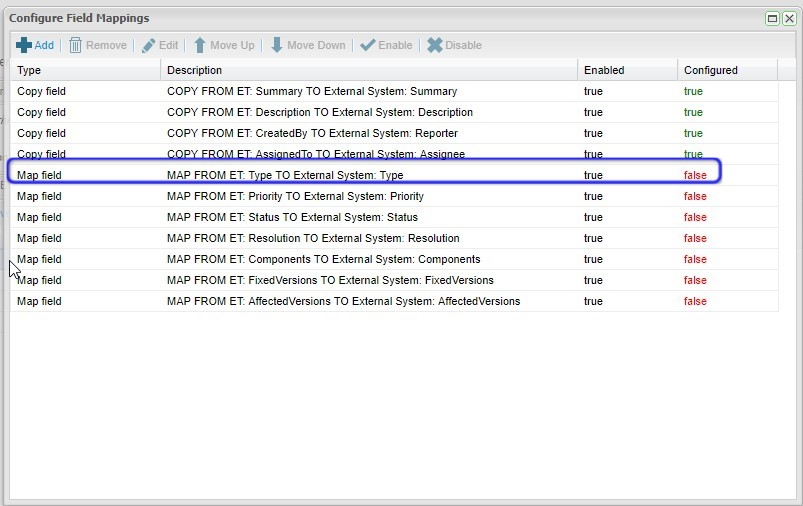
- From the Configure Fields Mappings screen, several configurations are automatically created consisting of Copy Field type mappings and direct Map field type mappings.
- The Copy Field type mappings are already configured and the value will be copied from Enterprise Tester to JIRA on Synchronisation.
- The Map field type mappings require the field values to be mapped. You can see under the column Configured = False that the value for these fields have not yet been mapped.
The fields that you are required to Map are the following:
Map Field — Map from ET: Type to External System: Type
Map Field — Map from ET: Priority to External System: Priority
Map Field — Map from ET: Status to External System: Status
Map Field — Map from ET: Resolution to External System: Resolution
The other Map fields are optional
Double click on Map Field — Map from ET: Type to External System: Type row
Map field values for Type
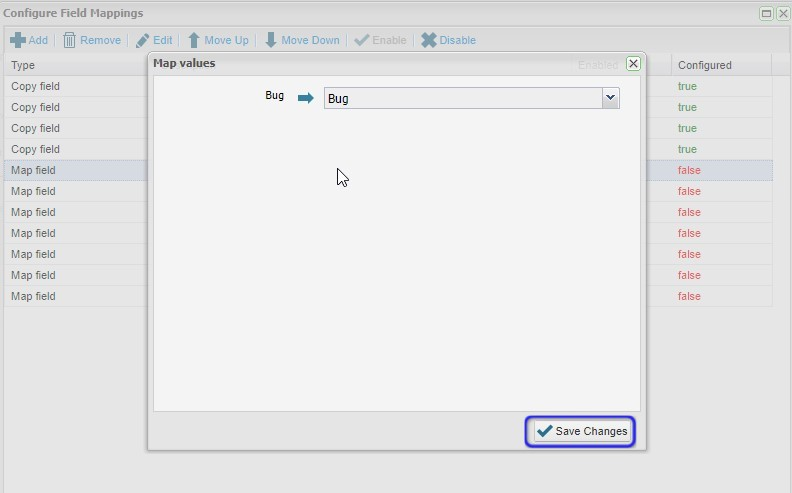
Map values pop up screen is displayed.
The values on the left hand side are Enterprise Tester fields and the values on the right hand side with drop down lists are JIRA values.
Map the values you want for Type and select Save Changes button.
For Incidents the type will generally be Bug.
Configure field mappings

Configured status for Map Field — Map from ET: Type to External System: Type row is now true
Double click on Map Field — Map from ET: Priority to External System: Priority row
Map field values for Priority
Map values pop up screen is displayed.
The values on the left hand side are Enterprise Tester fields and the values on the right hand side with drop down lists are JIRA values.
Map the values you want for Priority and select Save Changes button
Configured status for Map Field — Map from ET: Priority to External System: Priority row is now true.
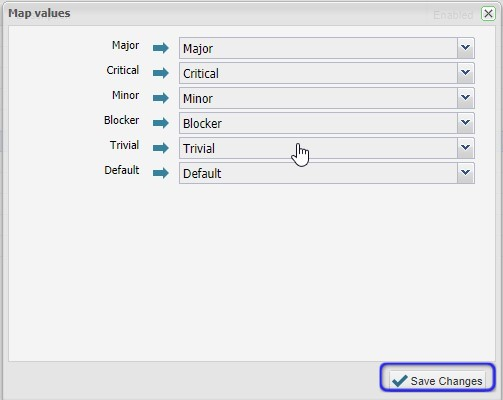
Double click on Map Field — Map from ET: Status to External System: Status row
Map Status values
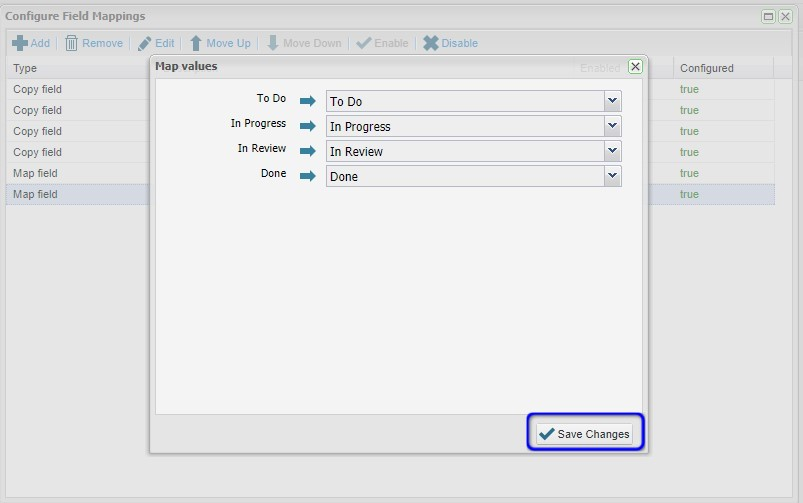
The values on the left hand side are Enterprise Tester fields and the values on the right hand side with drop down lists are JIRA values.
Map the values you want for Status and select Save Changes button
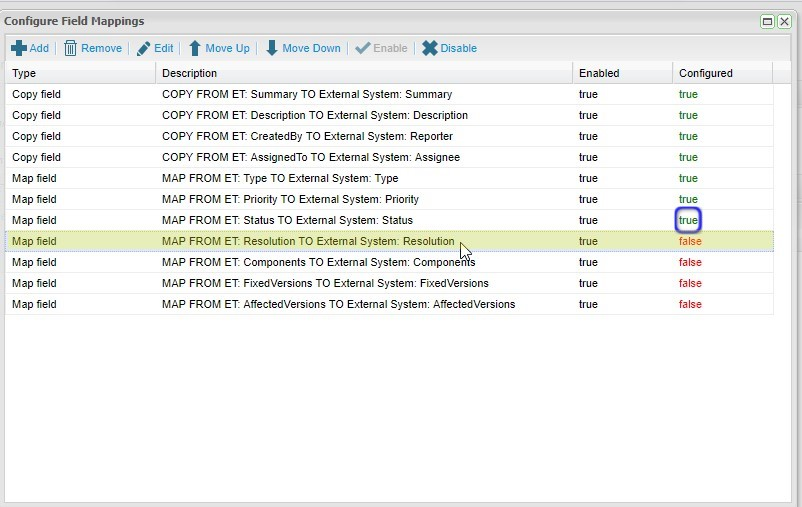
Configured status for Map Field — Map from ET: Status to External System: Status row is now true.
Double click on Map Field — Map from ET: Resolution to External System: Resolution row
Map Resolution values
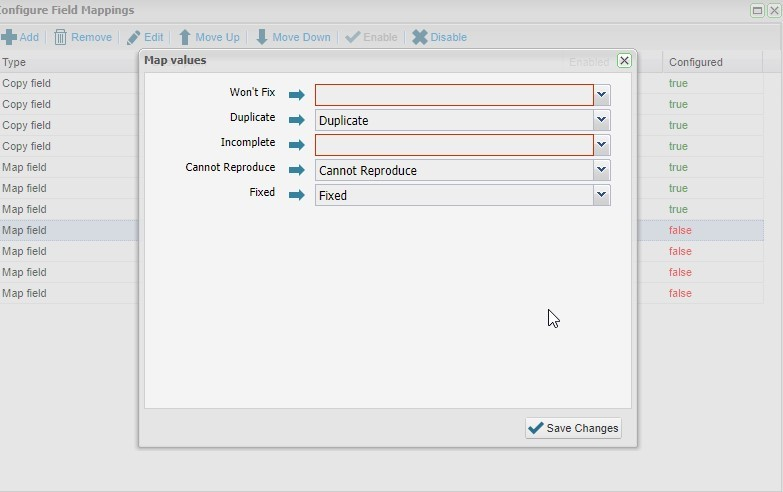
The values on the left hand side are Enterprise Tester fields and the values on the right hand side with drop down lists are JIRA values.
Map the values you want for Status and select Save Changes button
Field Mappings Completed
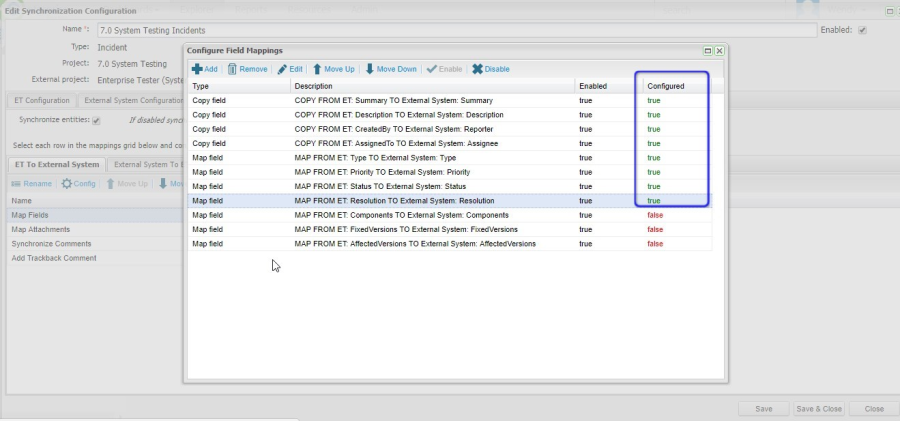
All the required field mappings are now configured in ET to External System tab.
The required field mapping have a status of true.
External System to ET tab
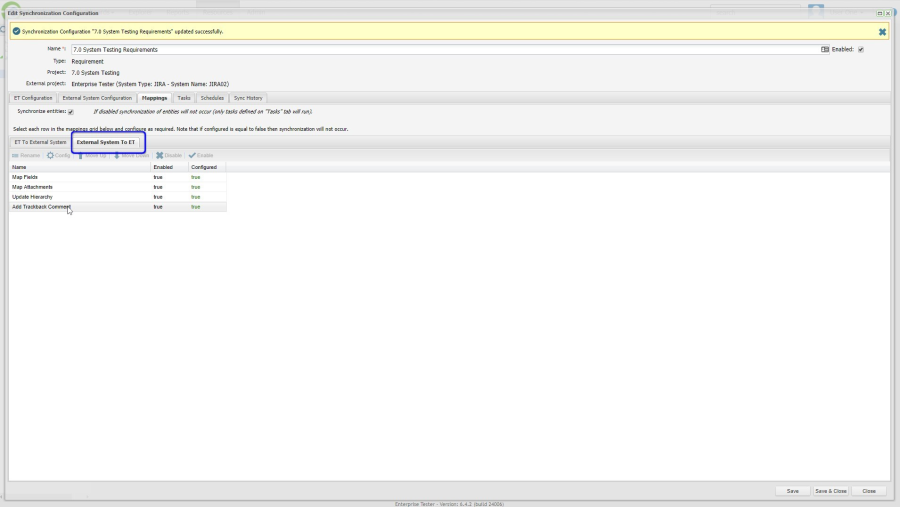
Select External System to ET tab
Field Mappings from External System to ET
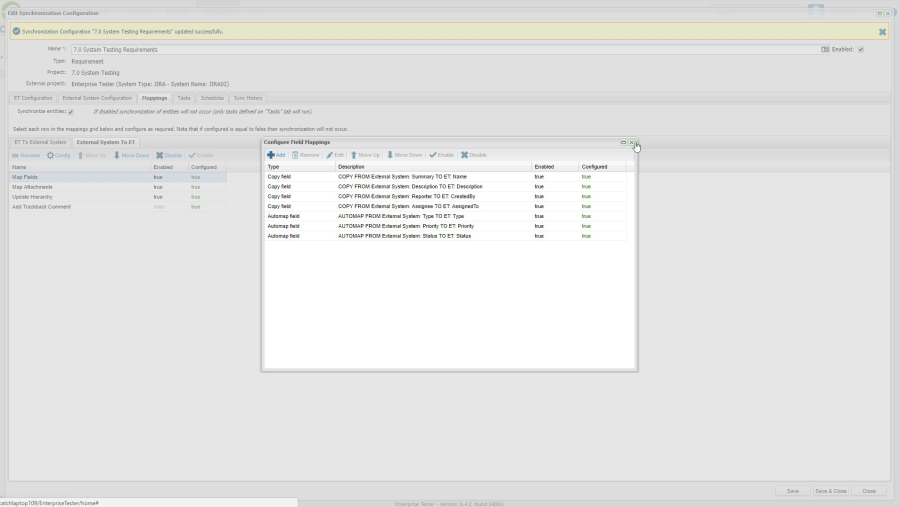
You do not need to edit the mappings from JIRA to Enterprise Tester as they are already complete, however you can edit them if required.
You can also add Custom fields to synchronise. See Enterprise Tester Knowledge Base Article for more information on setting up these fields.
Scheduling Requirement Synchronisation
Now that your configuration and field mappings are complete you are ready to synchronize.
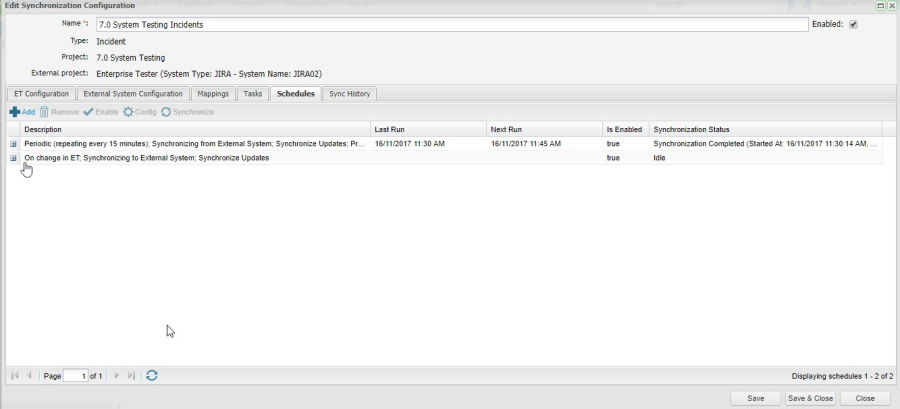
By default, for incidents, the following schedules are pre-configured.
- Periodic schedule occurring every 15 minutes, from JIRA which will update all incidents that have been updated since the last synchronisation. This is conditional on having been previously synchronised.
- On change synchronisation is in the direction of Enterprise Tester to JIRA. A sychronisation of all incidents added or updated in Enterprise Tester since last synchronized will be initiated at the time a change occurs to an incident in Enterprise Tester. This synchronization only updates JIRA with the changes made in Enterprise Tester.
For a list of all other Schedules see Enterprise Tester Knowledge Base
Add a New Schedule
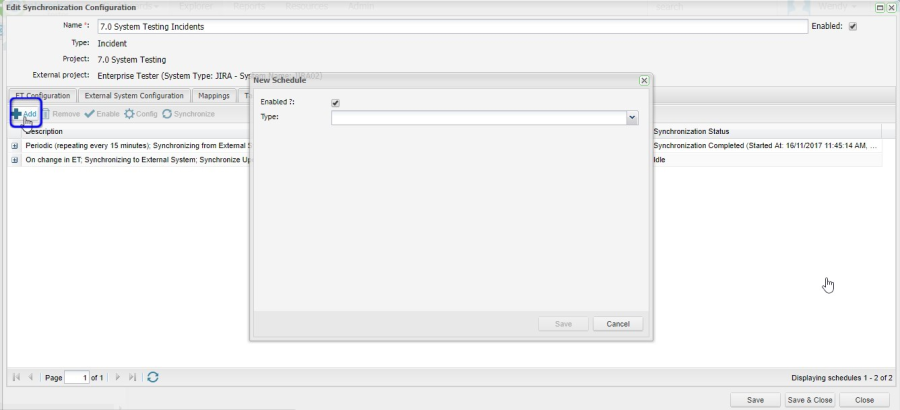
Click on the Add icon in the tool bar
New Schedule pop up will be displayed
Select Type of Synchronisation
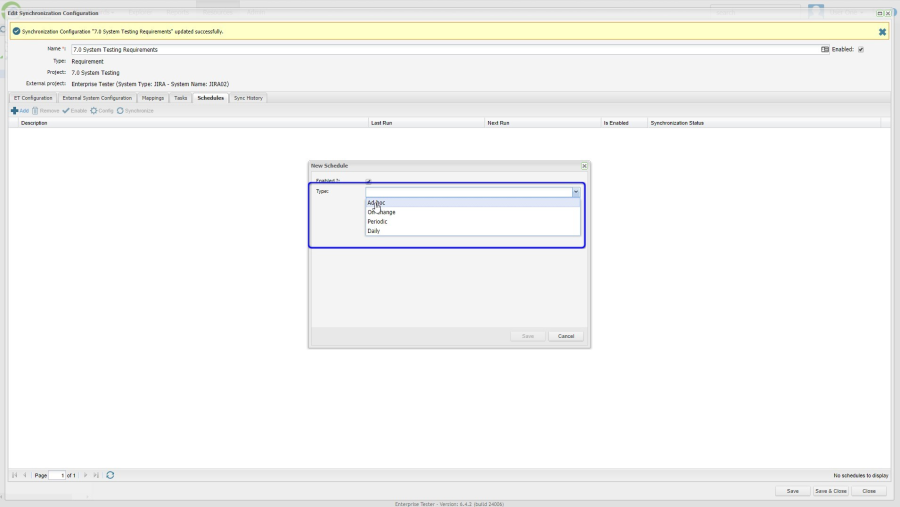
Select the schedule you want to add from the Type drop down list
If this is the first synchronisation for the projects between JIRA and Enterprise Tester select Ad-hoc
Enter Schedule Type Details
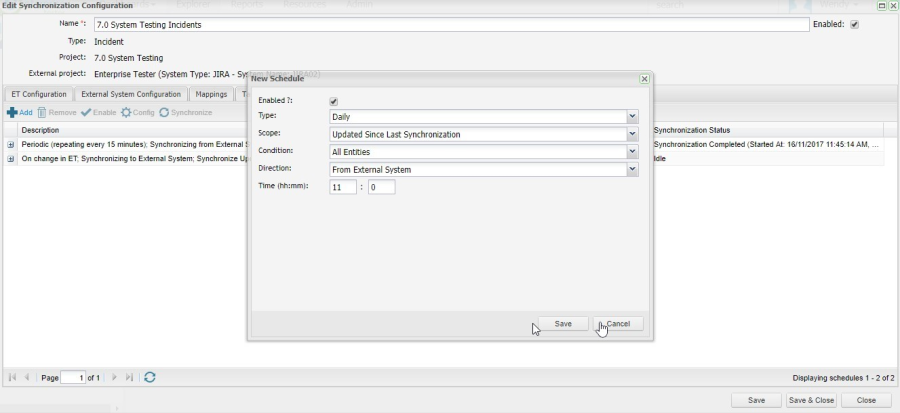
Enter the details for the Schedule type selected.
Select the Save button
Schedules
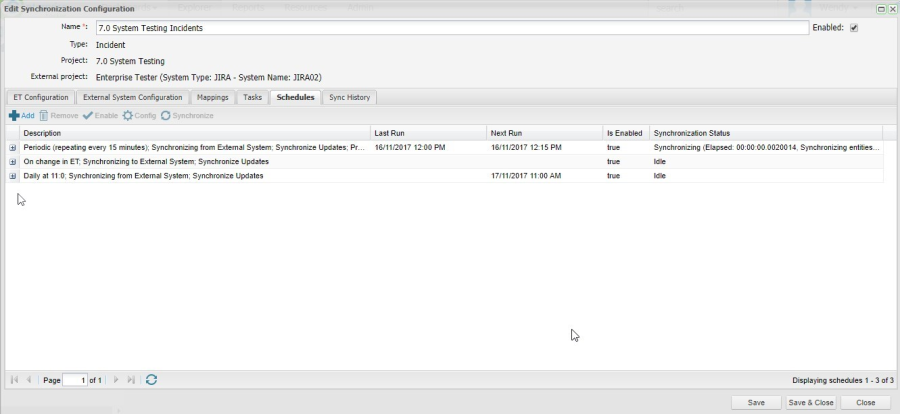
Once you have configured your synchronisation frequency, a summary of the configured synchronisation schedules is available.
You can see the time of the Last Run, the Next Run (if applicable), whether the schedule is enabled or not and the current Synchronisation Status.
You can use the tool bar to add a new scheduled synchronisation, delete an existing configuration, enable or disable an existing schedule, configure an existing schedule or manually initiate a synchronisation.