- Starting a New Run
You can start a new test run if the latest test run has been completed on the server. To do this, simply select the Create New Run button located to the left of the run history grid. - Completing an Existing Run
If the latest test run is incomplete (marked as "Not Run" or "In Progress"), you can continue with that test run and complete it instead of starting a new one.

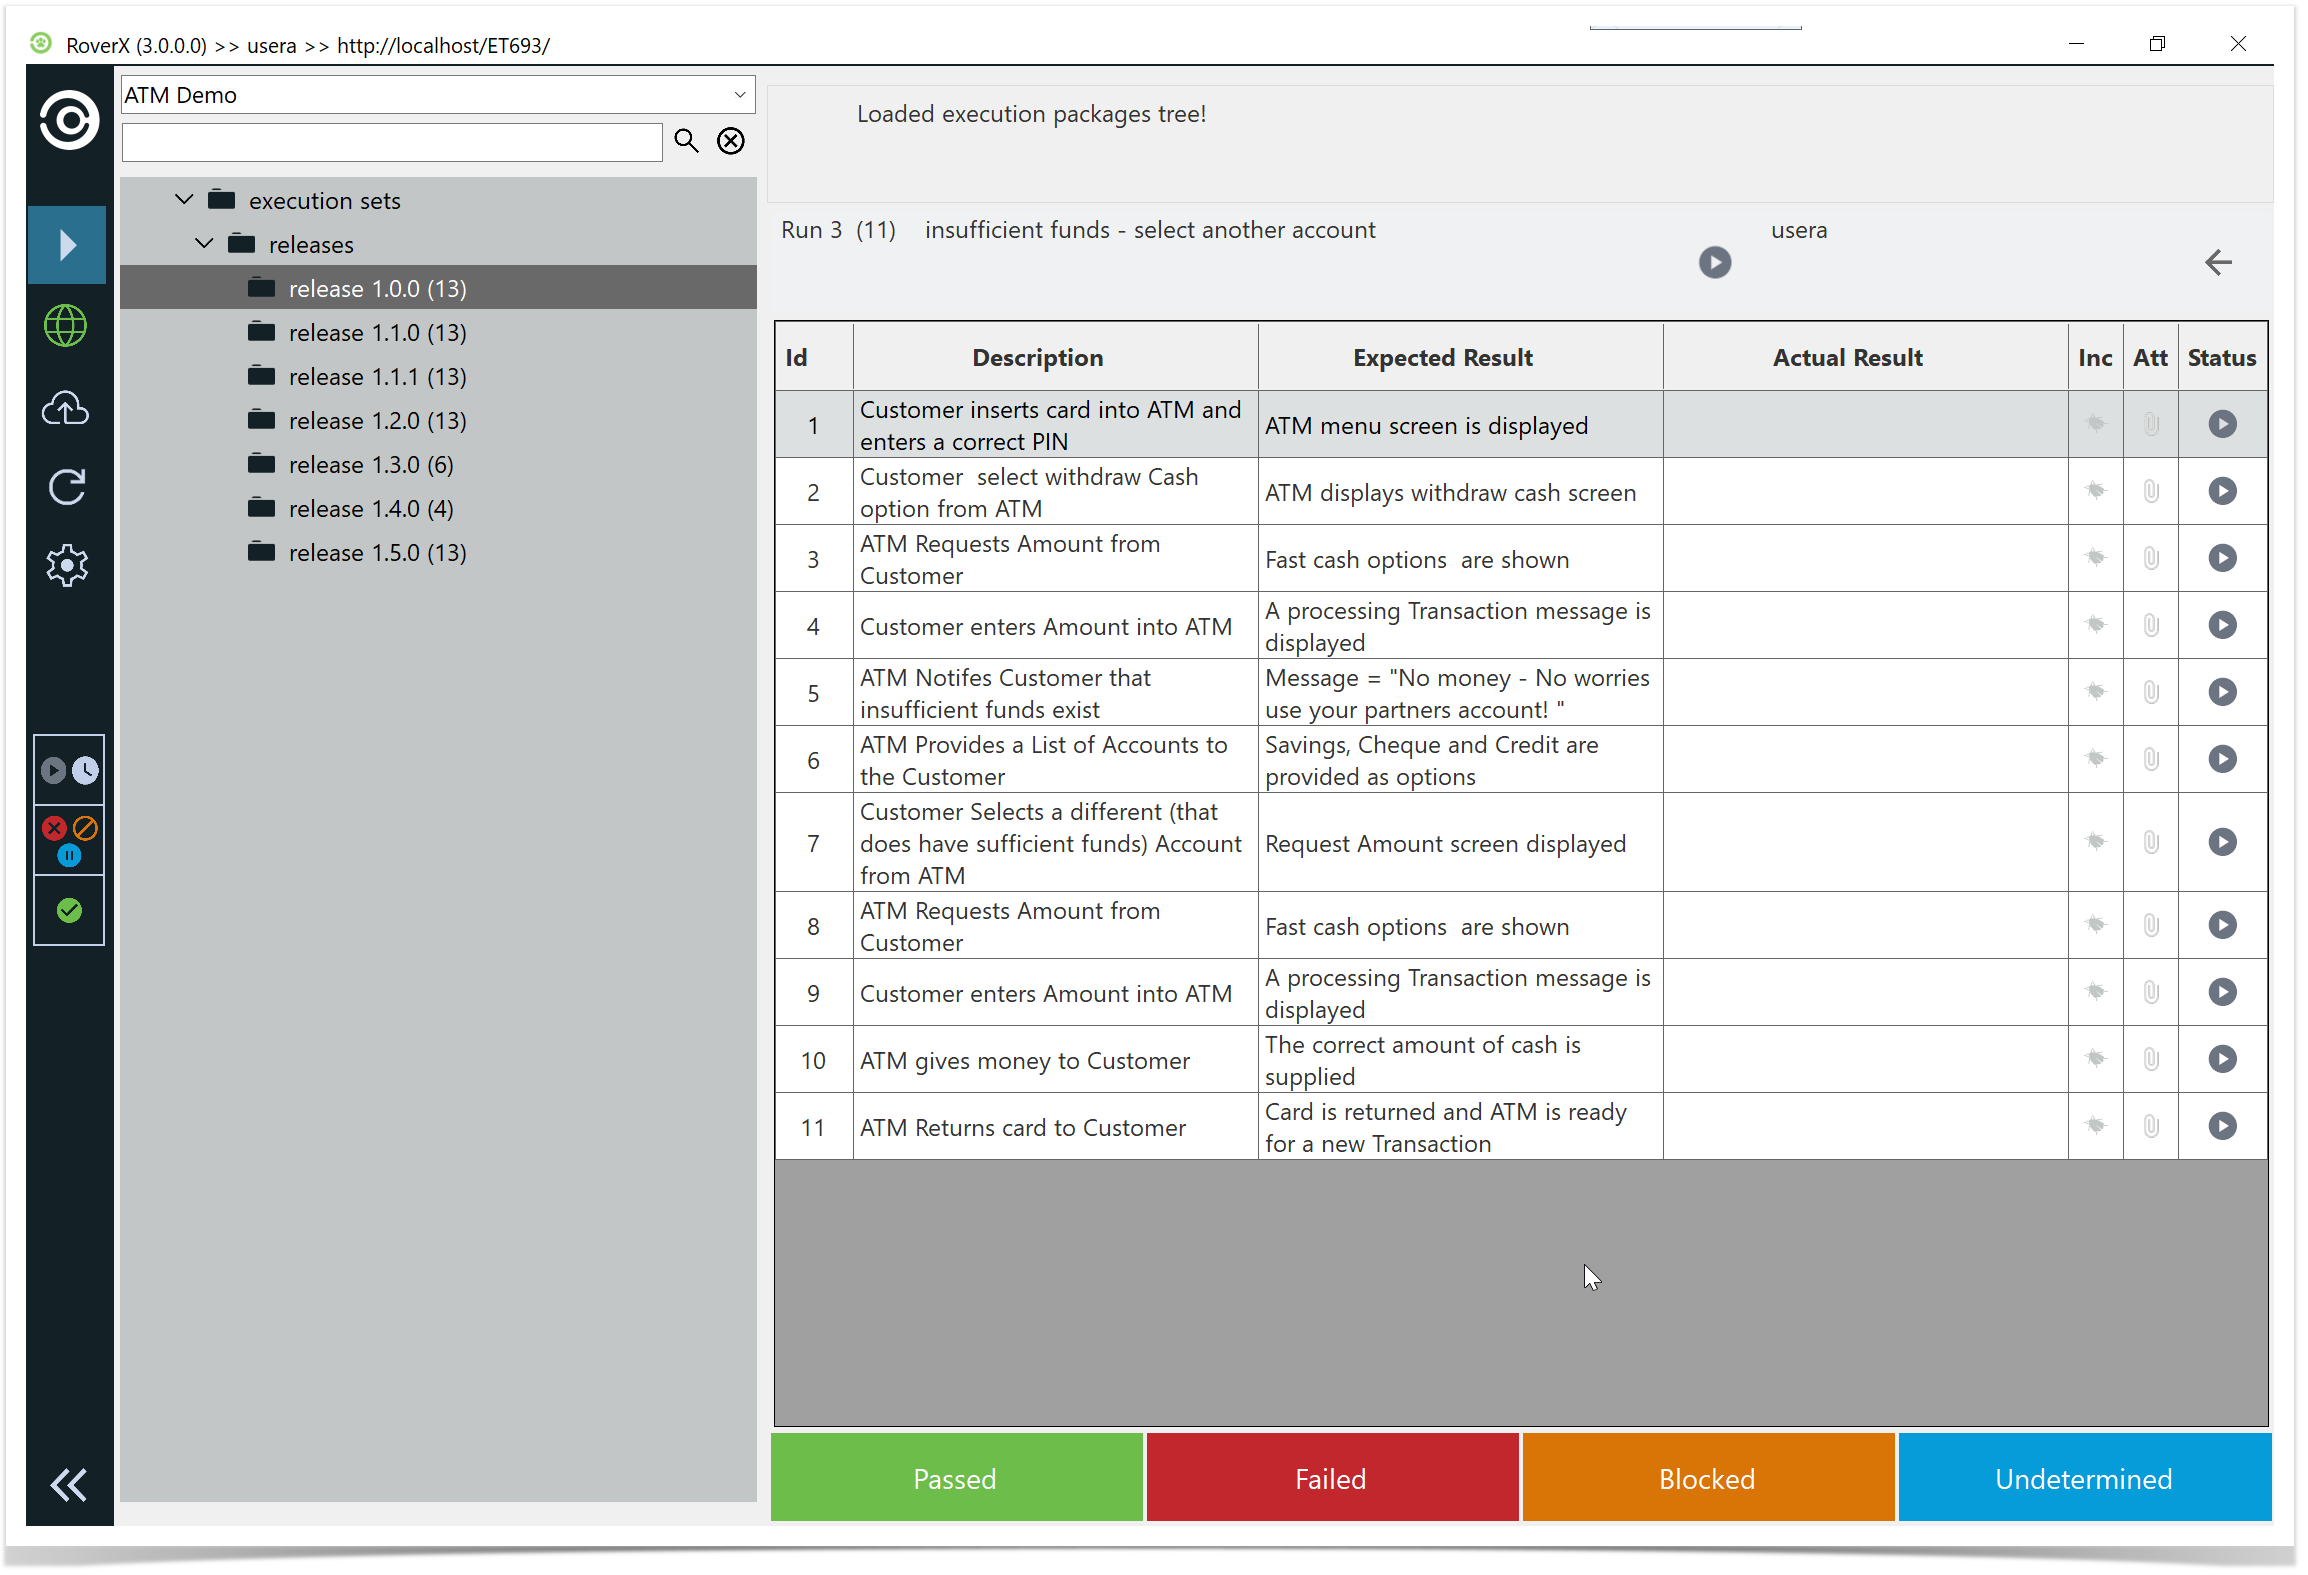
When you load the Test Execution screen, you will see the test steps displayed in a list view. This screen provides the following details:
- Run Number: The identifier for the current test run.
- Number of Steps: The total number of steps in the test run (displayed in brackets).
- Test Run Name: The name of the current test run.
- Test Run Status: The current status of the test run.
- Back Button: Allows you to navigate back to the previous screen.
- Step Result Menu: Located at the bottom of the screen, for selecting the results of each test step.
- Custom Field Icon: Appears if there are any custom fields associated with the test run.
Viewing and updating Custom fields
If your test run includes custom fields, you will see this button ![]() in the header. Clicking on this icon will close the Test Steps panel and display all the custom fields, allowing you to view and update them accordingly.
in the header. Clicking on this icon will close the Test Steps panel and display all the custom fields, allowing you to view and update them accordingly.
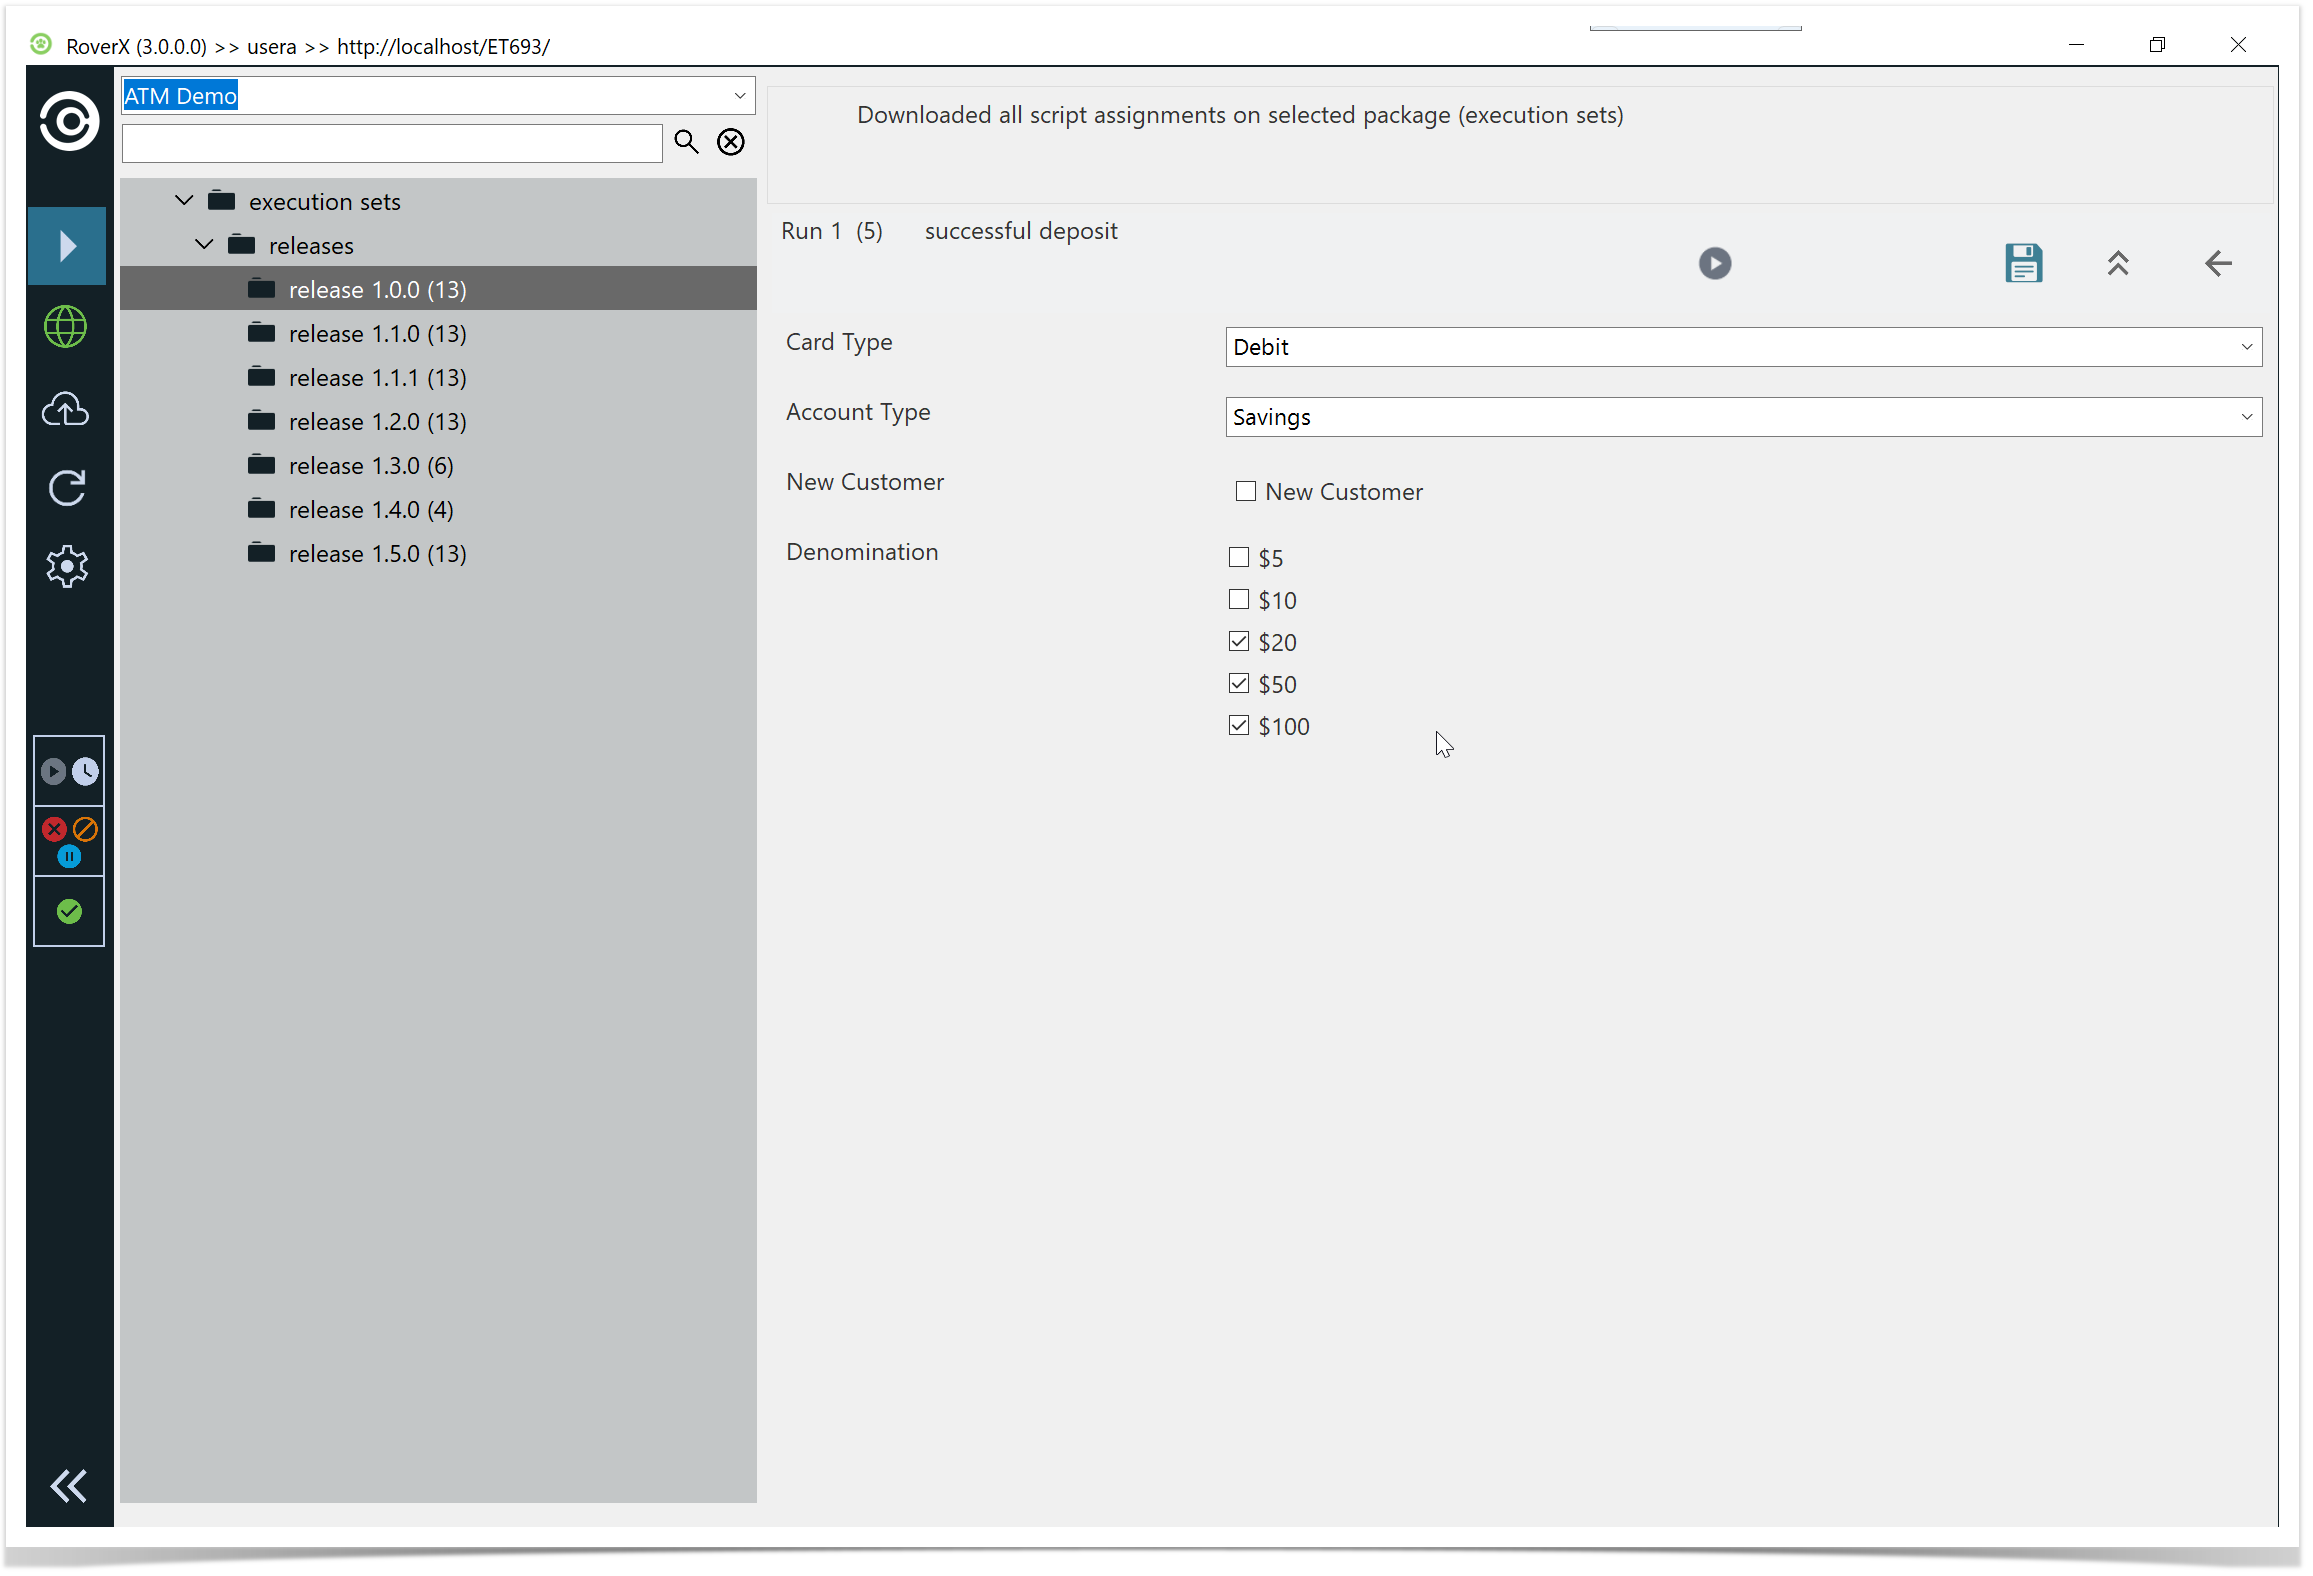
You can then update any of the custom fields and select the Save button. A confirmation message will be displayed to confirm that the data has been saved successfully.
Select OK button.
To close the Custom Fields panel and return to the Test Steps, select the ![]() button.
button.
Just like in Enterprise Tester, the Test Execution screen includes a text field for entering Actual Results for each test step.
While a step is active, you can select the Step Result option at the bottom of the screen to set the status for that specific step. Once you select a status for a test step, the screen will automatically move to the next step in the list.
Hyperlinks and local paths can be added in the Actual Result field.