Groups allow you to create predefined security profiles for users within an organization. This is a fast and efficient way of managing users’ permissions. By assigning a user to a group, they will then be granted the permission that the group has been assigned.
You can also make a user a member of several groups in which case they will be granted the combined permissions assigned to the groups.
You must have “Manage User and Group Security” permission to manage groups.
Adding Groups
To add a group:
- Select the ‘Admin’ Tab in the tree view.
- Click on the Groups Folder.
- Click on the 'New' on the toolbar of the All Groups page.
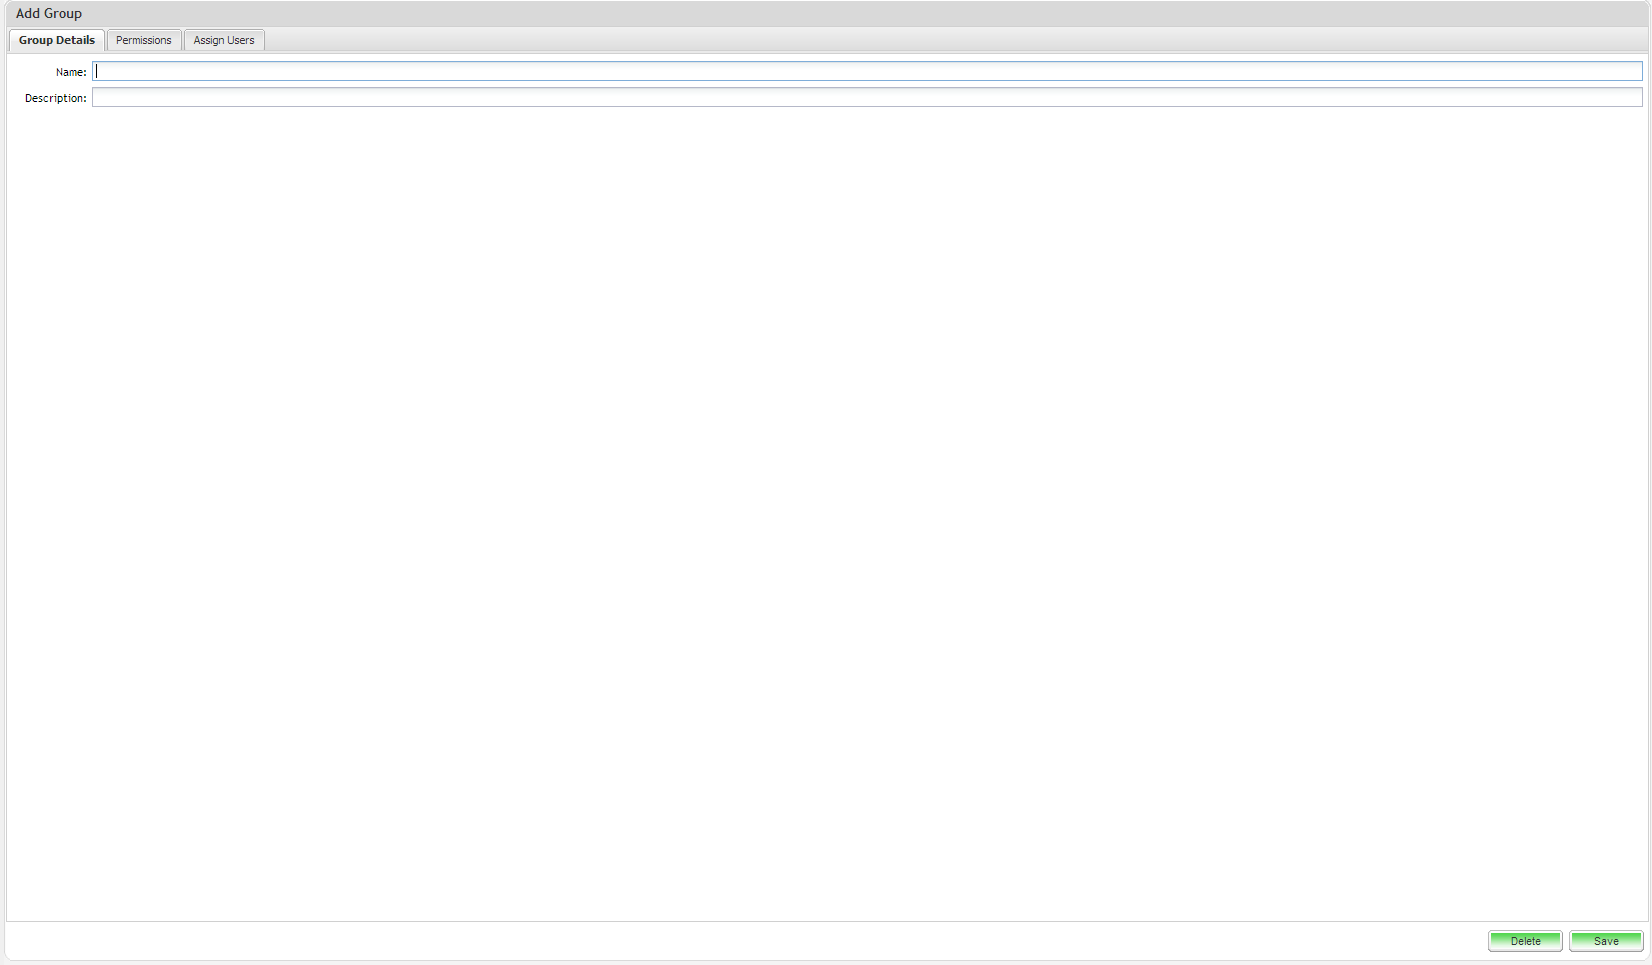
- Supply a name and description of the Group.
- Select the 'Permissions' tab.
- Click ‘Save'.
The group will have been saved and you can now assign users to it.
Editing Groups
To edit an existing group:
- Select the ‘Admin’ Tab in the tree view.
- Click on the Groups Folder.
- Click on the group that you wish to edit on the All Groups page.
- Update details.
- Click on ‘Save’ to update.
Deleting Groups
To delete a group:
- Select the ‘Admin’ tab in the tree view.
- Click on the Groups Folder.
- Double click on a group to edit them..
- Click ‘Delete’.
- Click on ‘Yes’ to the prompt - the group will now be removed.
Assigning Users to Groups
Assigning Group membership to a user is a more effective way of controlling access to the application as it uses predefined security profiles.
Assigning a user to a group can be done in a number of ways, either within Edit Group, Edit User of by dragging and dropping a user onto a group:
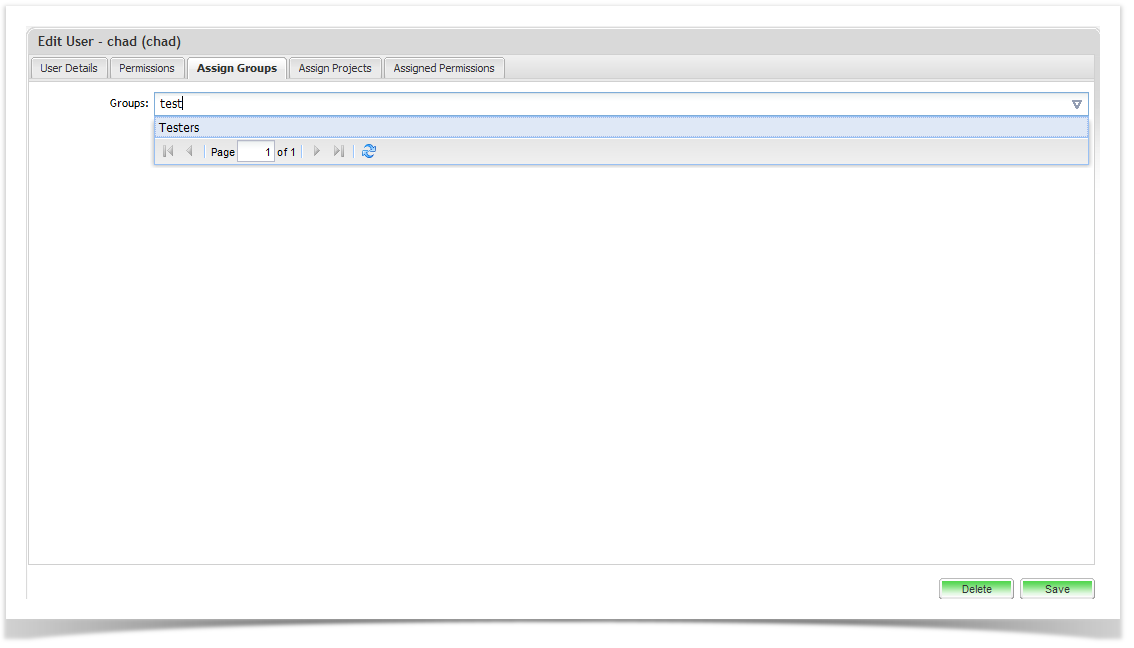
To add a user to a group from Edit User:
- From the All User view, double click on the user and select the ‘Assign Groups’ tab.
- Add groups in the Groups field by typing in the group names or selecting groups from the auto search filter results.
To add a user from the Edit Group screen:
- From the All Groups view, double click on the group whose membership you would like to edit.
- Click on ‘Assign Users’ tab.
- Add users in the Users field by either typing in the user names or select the users from the auto search filter results.
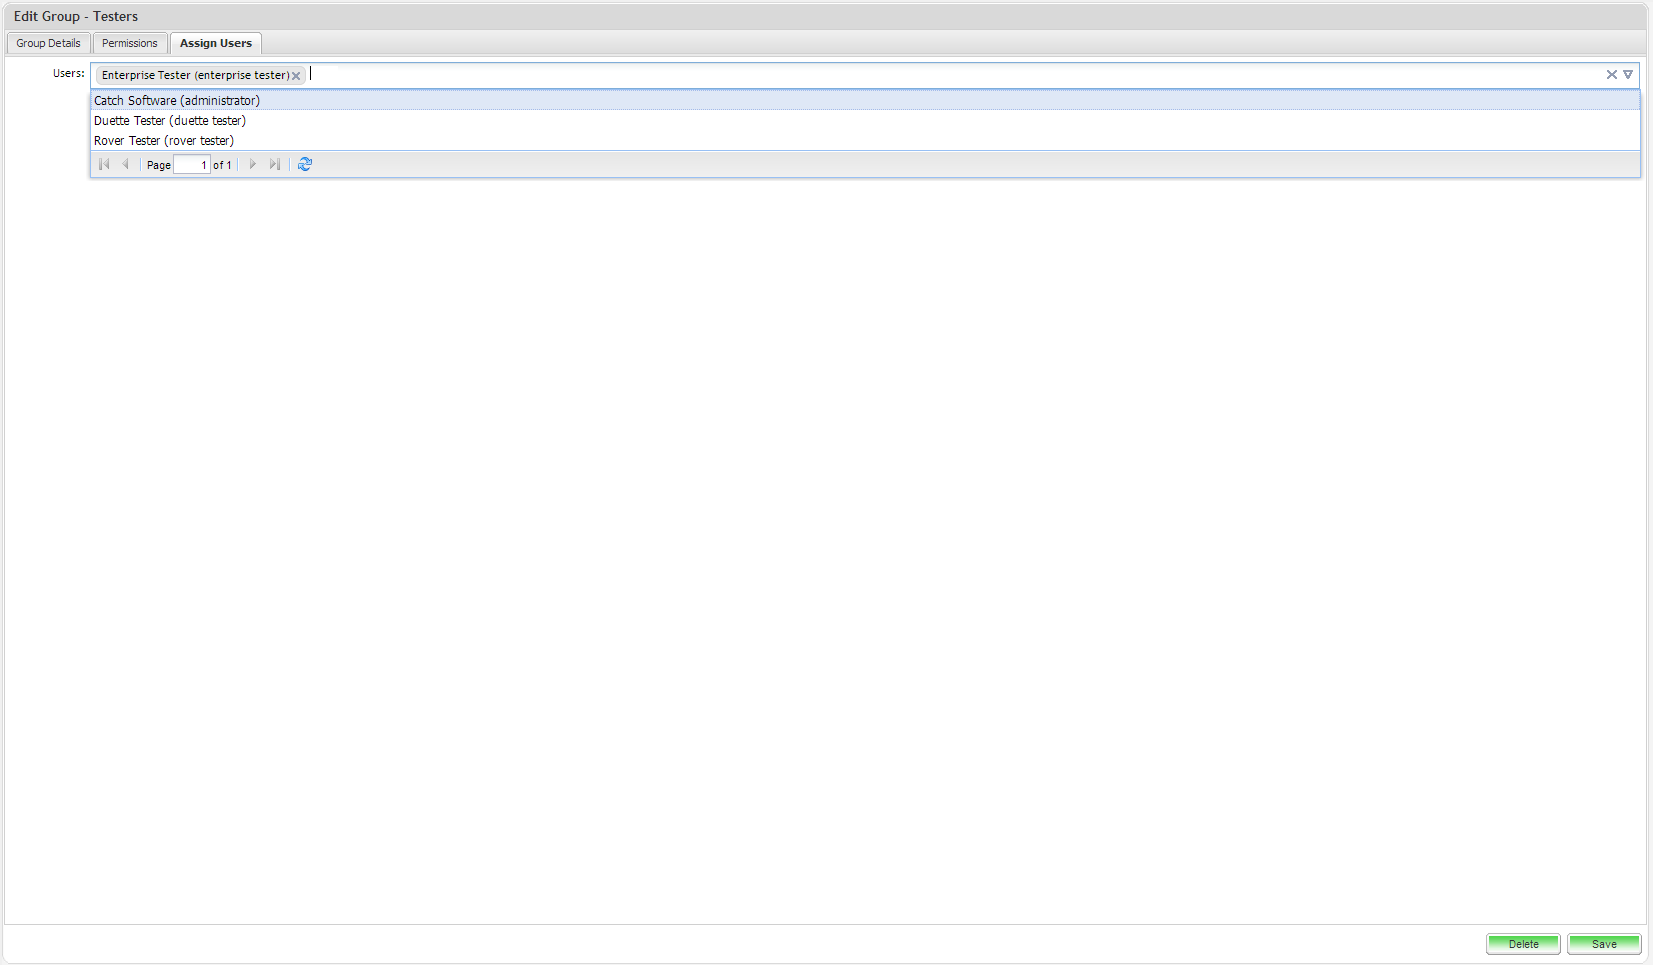
To remove a user from a group:
- From the All Groups view, double click on the group whose membership you would like to edit.
- Click on ‘Assign Users’ tab.
- Click on the 'x' beside the user name to remove them form the list.