To allow integration a few minutes need to be spent configuring your server and project with JIRA. Application Administration to JIRA is required to configure the JIRA Integration. Note: When using JIRA 5.1 and earlier, some features are not supported including sub-task synchronization of requirements/user story. Please refer to Configuring Enterprise Tester for JIRA 4 - 5.1 . Remote issues links and adding ET activities to the JIRA dashboard are only supported with JIRA 5 and above.To add a connection to JIRA, you will need to configure an external system connection. If you have an existing JIRA 4 - 5.1 external system connection, you can upgrade to use the new JIRA Plugin.Enterprise Tester can be configured to integrate with JIRA to allow the synchronization of incidents and requirements with Issues and/or Requirements in JIRA.
Enterprise Tester report charts can also be added to your JIRA Dashboard. Integration promotes the collaboration between teams by having real time information available across your project team.
The JIRA Plugin has been introduced with the release of V4.8. It solely used the JIRA REST API for integration and provides a more feature rich integration with JIRA. This included sub-task synchronization support, smoother workflow integration, no limitation on the number of entities that can be synchronized between ET and JIRA and project specific pick list values. This plugin supports JIRA 5.2 and above.
To allow integration, you must configure the connection between Enterprise Tester and JIRA.
To add a connection to JIRA, you will need to have Administration permissions for Enterprise Tester - External Systems configuration. You will also need to have access to a JIRA Systems administrator and Application Administration permissions for JIRASome configuration is required to establish this connection. See Configuring ET for JIRA 5.2 and Above . A user with Administrator privileges will have access to complete this configuration.
Creating a New Connection
...
- Open the ‘Admin’ tab of the tree view .and navigate to External Systems

- Click on Extensions and double Double click External Systems on the navigator.Systems
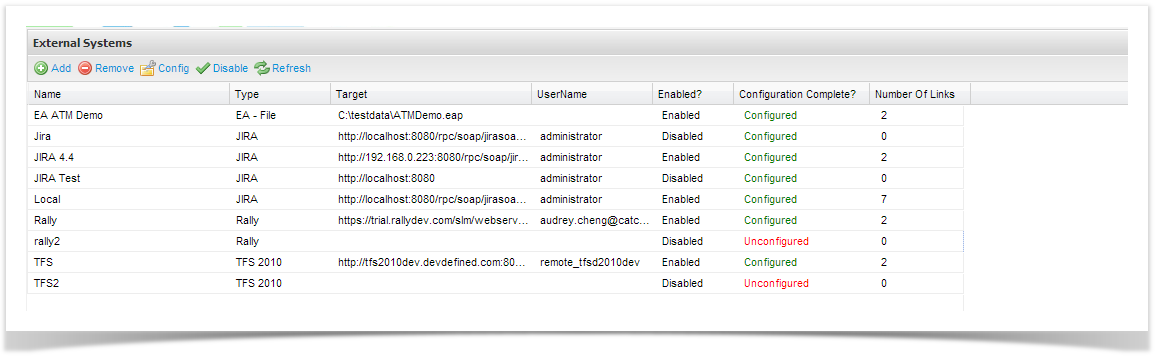
- From the External System summary screen, you can view all existing connections and view their enabled and configuration status. Click on add
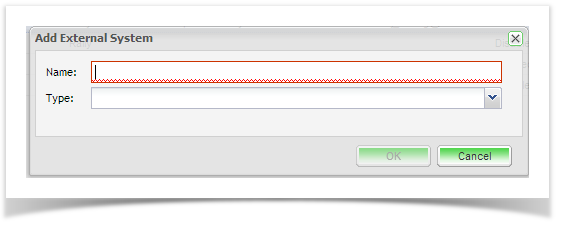
- To add an external system click on Add from the tool bar and add type a Name for your external system connection and the connection type drop down will provide the following options: Enterprise Architect, JIRA 4 - 5.1, JIRA, Rally and TFS. Select JIRA.name for your External System
- The configuration screen of the external system type you chose will appear:
...
| Field | Description |
|---|---|
| Enabled? | Check this box to enable the connection to the defect tracker. |
| URL | Enter the URL path for the defect tracker. e.g. JIRA: http://yourjiraserver |
| UserName | Enter a gateway* username for the defect tracker. |
| Password | Enter the password for the gateway username. |
| Ignore Invalid Remote Certificates? | Check this box to ignore invalid remote certificates. |
...
| Info | ||
|---|---|---|
| ||
*The Gateway Account must be assigned to the JIRA Administrators, Developers and Users default groups in JIRA. This will allow creation, and update of incidents across all projects and will hold sufficient privileges to support enhanced functionality when further integration features are implemented. |
When you have completed all the details click on ‘Save’.
Enterprise Tester will automatically test the tracker and will save all details if the connection is validated. The next step is to set up your Enterprise Tester project configuration to your JIRA project. Please refer to the topics Synchronizing Requirements with JIRA and Synchronizing Incidents with JIRA.
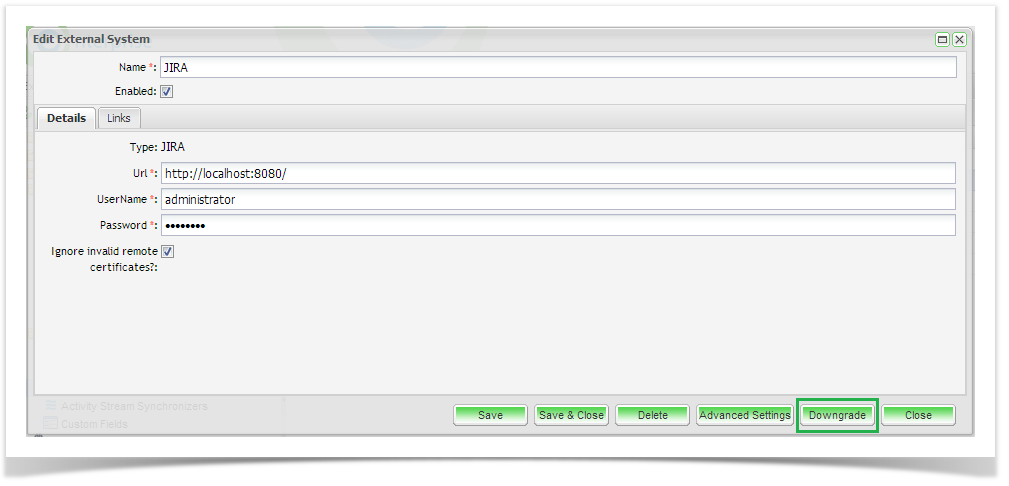
Upgrading from an Existing JIRA 4 - 5.1 External System Configuration
Upgrading from an existing JIRA configuration that uses the JIRA 4 - 5.1 plugin to use the JIRA plugin (which supports JIRA 5.2 and above) is easy. Provided that you are using JIRA 5.2 or above, you can simply click on the "Upgrade" button on the Edit External System.
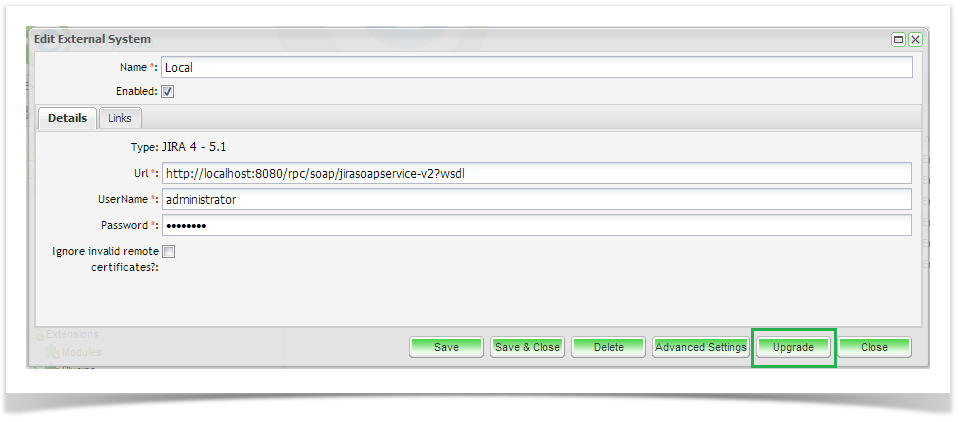
This change is reversible. After upgrading, if you decide to move back to the JIRA 4 - 5.1 plugin, you can simply click on the "Downgrade" button:
All of your project links will automatically be upgraded to use the JIRA plugin.