...
- Right click on your script package and select Add Automated Test.
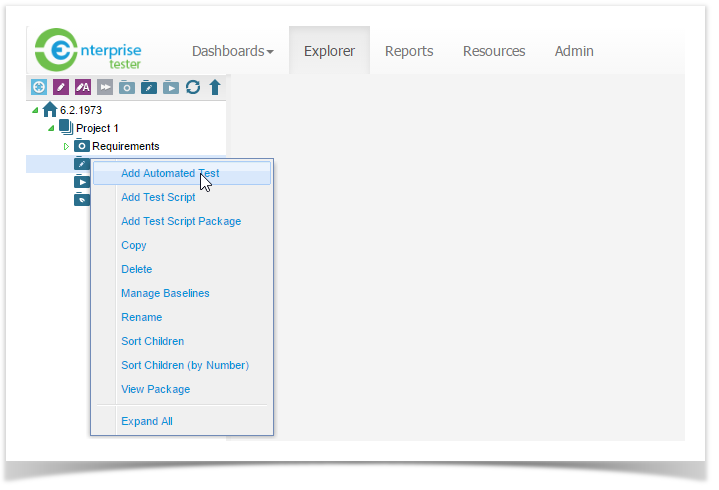
- You can also simply click on the automated test icon on the navigator tool bar.

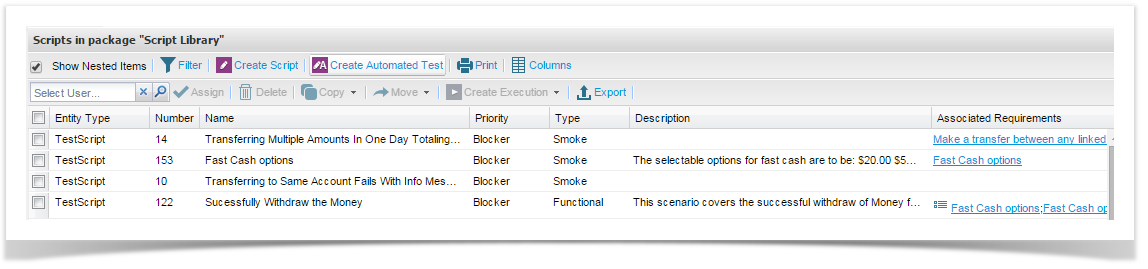
- You can also create a script for the automated test from the Script Library summary screens:
- The Edit Automated Test Screen will open. Here you can add the Name of the script, assign it to a user and select the type of automated test. Once these fields are completed, the Default Path field will open. In this field the path to the automated test tool results in your file system can be specified.
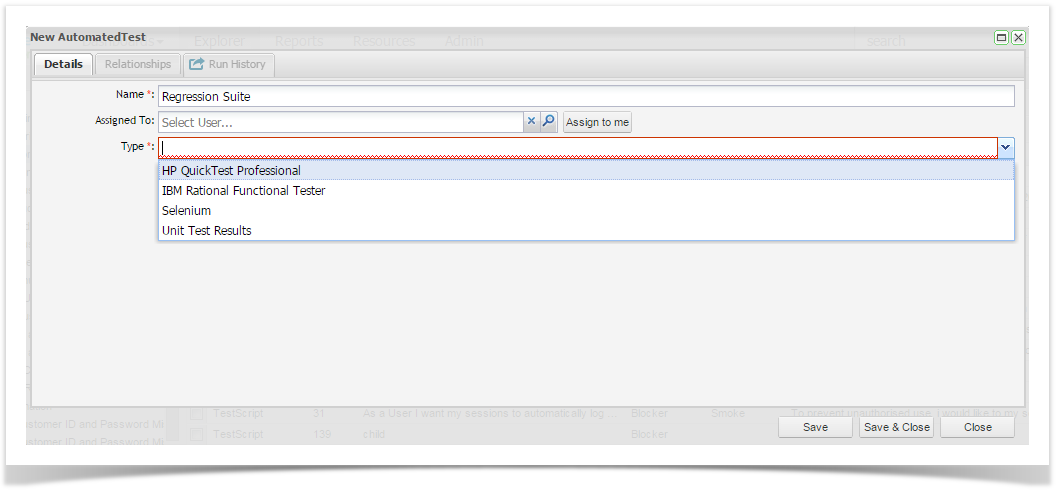
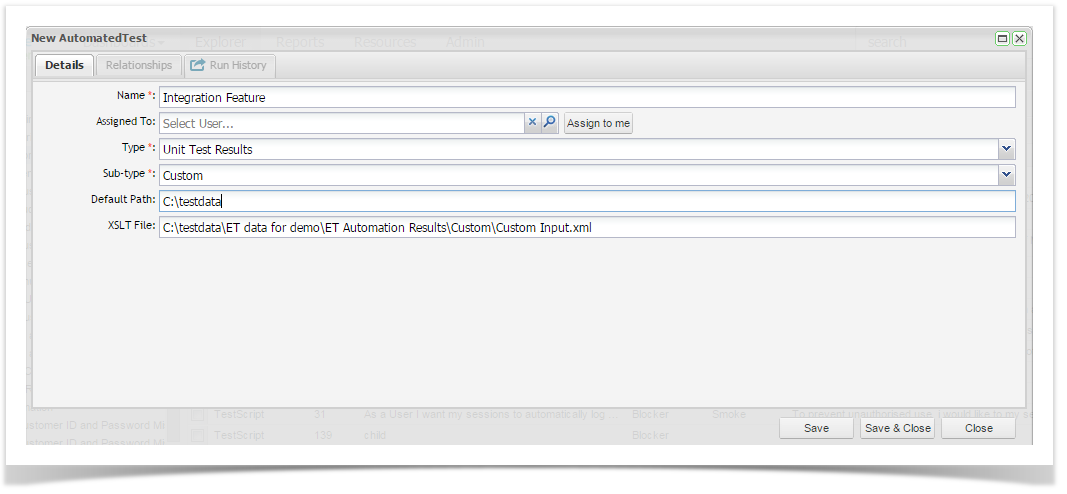
- Additionally, if you select Unit Test Results, a Sub-Type field will be displayed where you can select the type of Unit Tests required to be imported. If you select a Custom Sub-Type you must provide the path to a valid XSLT file.
- Similarly to manual test scripts, you can view all relationships associated to the script from the Relationships tab which displays all associated requirements and execution sets.
- When all details have been completed, click Save and Close.
The Automated Test Script will now be listed in the Script Library.