Custom Fields provide flexibility to capture additional data within the application. Specifically, custom fields can be added to requirements, test cases, test cases in your execution sets and incidents. This feature allows you to add additional fields according to your needs in order to record additional information against these entities. A wide selection of field types can be created including:
Text box | Single line free text field |
Combo box | Single choice, multiple option drop down box |
Multi Select | Multiple select, drop down box |
Text Area | multiple line free text field |
Check Box | Either/or option |
Date | Free text date field |
Radio Box Group | Single selection, multiple option |
Check Box Group | Multiple selection, multiple option |
Number | Free text number field |
Time Span | Free text time span field ( e.g. 4d,2h) |
Rich Text | Multiple line, free text field with formatting |
Multi-Cascade Select* | Two level and multi-level drop down boxes |
*When using the Multi-Cascade Select field for multi-level cascading select (>2 levels), picklists are not configurable within Enterprise Tester. Values will be pulled from a configured defect tracker e.g. JIRA. You must have a defect tracker configured in order to use this custom field.
Creating Custom Fields
To creating custom fields complete the following steps:
- Click on the ‘Admin’ tab.
- Click to expand ‘Extensions’ from your tree view.
- Click on ‘Custom Fields’.
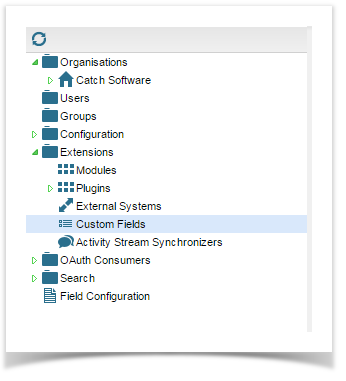
- The Configure Custom Fields list view will display.
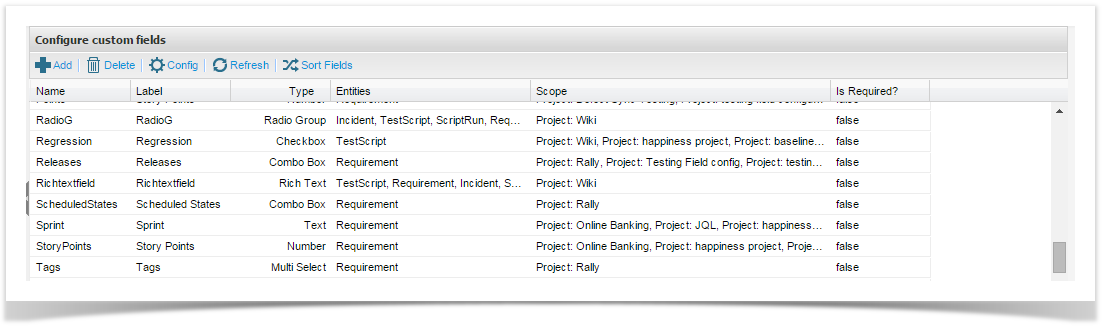
- Click on ‘Add’ from the window toolbar.
- The ‘Field Configuration’ screen will open.
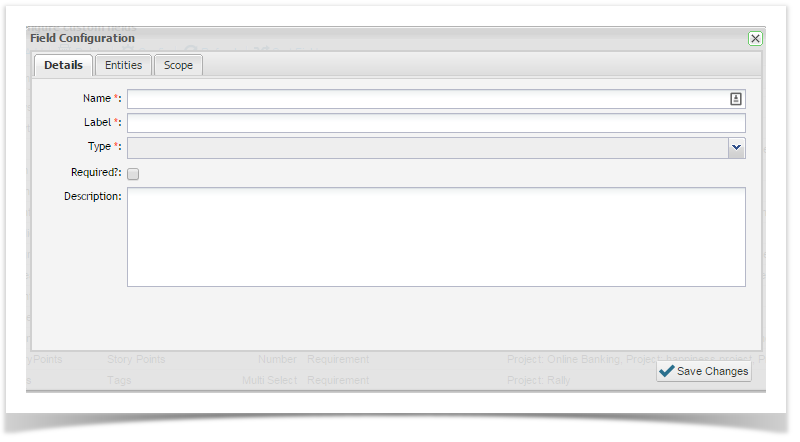
- On the ‘Details’ tab, enter a name for your field.
- In the Label field, enter the name of the field as you would like it to appear on screen to users. For configuration details for the Multi Level Cascade Select field, please refer to Section 5.1.1.
- Click the drop down button on the ‘Type’ field to select the type of field you would like to create.
- If the field is mandatory to complete, click the ‘Required?’ field, otherwise leave it blank.
- Include a brief description in the Description field.
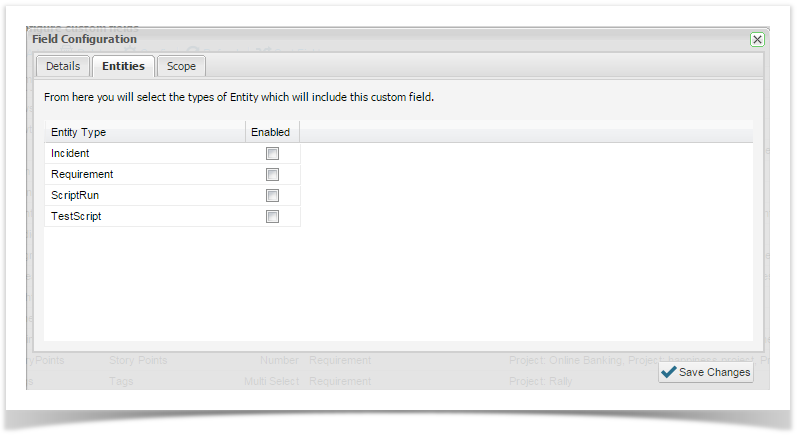
- Click on the ‘Entities’ tab to select the types of entities (Incident, Requirement, Script Run and Test Script) which will include the custom field. Note that you can use the same custom field across multiple entities.
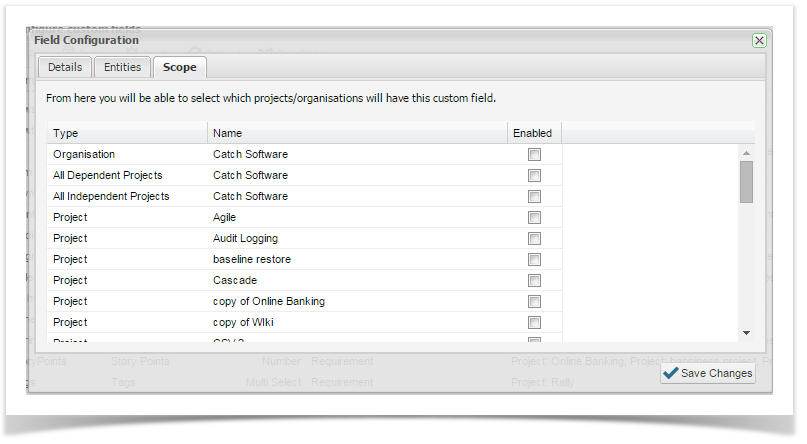
- Click on the ‘Scope’ tab. Here you can select the organization(s) and/or project(s) that will include the custom field.
- By adding scope for an organization, all projects for that organization will use the custom field for the entity selected. You can add specific custom fields for specific projects by including them here. When you specify the scope, entities will be updated to include the new field i.e. requirements, scripts and incidents that have previously been created will be updated to include the new custom field. If the field is mandatory, the user will be prompted to add this additional detail before saving.
- Click ‘Save Changes’ at the bottom right hand corner.
- The Configure Custom Fields list view will display.
- Click on ‘Add’ from the window toolbar.
- The ‘Field Configuration’ screen will open.
- On the ‘Details’ tab, enter a name for your field.
- In the Label field, enter the name of the field as you would like it to appear on screen to users.
- Click the dropdown button on the ‘Type’ field to select the type of field you would like to create.
- If the field is mandatory to complete, click the ‘Required?’ field, otherwise leave it blank.
- Include a brief description in the Description field.
- Click on the ‘Entities’ tab to select the types of entities (Incident, Requirement, Test Scripts) which will include the custom field. Note that you can use the same custom field across multiple entities.
- Click on the ‘Scope’ tab. Here you can select the organization(s) and/or project(s) that will include the custom field. Here you can also apply the custom field to all dependent projects or only to independent project. Apply the custom field to all dependent projects the custom field will be apply to all projects that are not marked as Independent n the project configuration screen. Please refer to the Managing Project help topic.
- By adding scope for an organization, all projects for that organization will use the custom field for the entity selected. You can add specific custom fields for specific projects by including them here. When you specify the scope, entities will be updated to include the new field i.e. requirements, scripts and incidents that have previously been created will be updated to include the new custom field. If the field is mandatory, the user will be prompted to add this additional detail before saving.
- Click ‘Save Changes’ at the bottom right hand corner.
Creating a Multi Cascade Select Custom Field
Creating a multi-cascade select custom field is similar to creating any other custom field with in Enterprise Tester. The values used to populate the picklist values for the multi-cascade select field are pulled from the defect tracker e.g. JIRA. A defect tracker must be configured to create this custom field successfully.
| Note |
|---|
Enterprise Tester may need to perform a “Refresh Lookup” before new custom fields in your defect tracker are available within Enterprise Tester. Please refer to the Refresh Lookups topic. |
| Expand |
|---|
To create a multi-cascade select custom field:
When you view the screen you have applied your custom field to, it will display the field with the values from JIRA: |
Configuring Pick Lists
When Combo Boxes, Multi Select boxes, Radio groups or Checkbox groups are created you will need to configure the selection lists. These can be configured in the same way as other non – user defined drop down fields. Please refer to the Managing Picklist Values article.
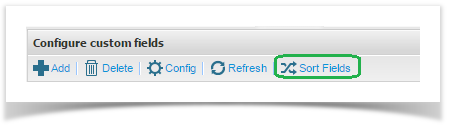
Sorting Custom Fields
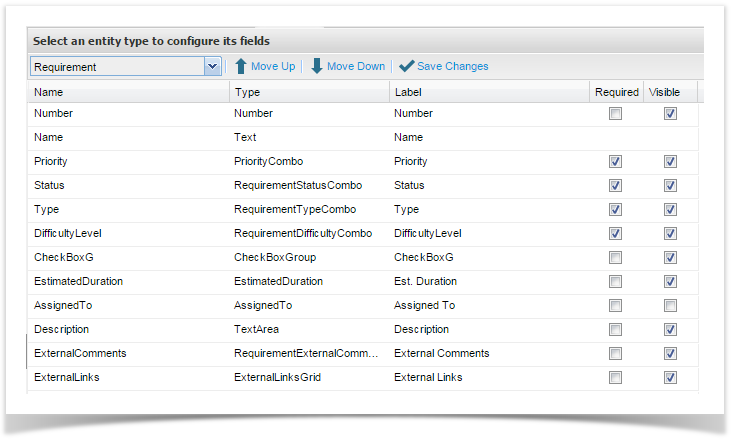
Custom Fields can be sorted by entity. This allows you to specify the order that the fields will appear on your requirement, test script or incident. From the Configure Custom Fields screen:
| Expand |
|---|
|