...
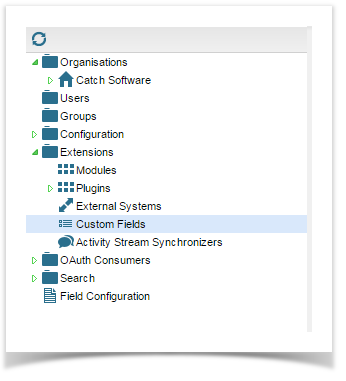
- Click on the ‘Admin’ tab.
- Click to expand ‘Extensions’ from your tree view.
- Click on ‘Custom Fields’.
- The Configure Custom Fields list view will display.
- Click on ‘Add’ from the window toolbar.
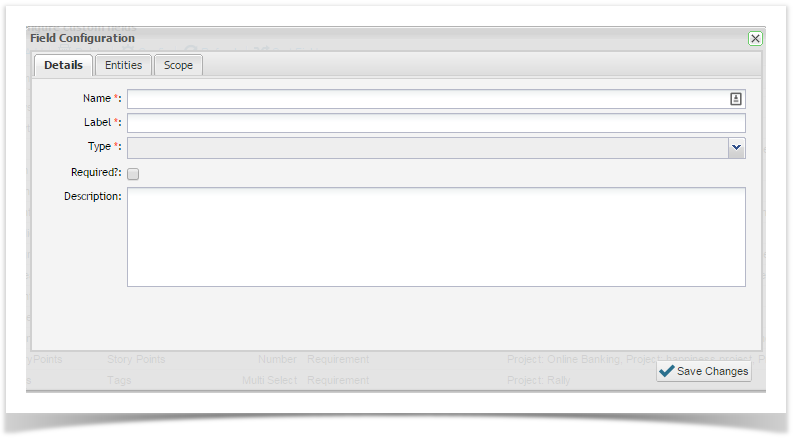
- The ‘Field Configuration’ screen will open.
- On the ‘Details’ tab, enter a name for your field.
- In the Label field, enter the name of the field as you would like it to appear on screen to users. For configuration details for the Multi Level Cascade Select field, please refer to Section 5.1.1.
- Click the drop down button on the ‘Type’ field to select the type of field you would like to create.
- If the field is mandatory to complete, click the ‘Required?’ field, otherwise leave it blank.
- Include a brief description in the Description field.
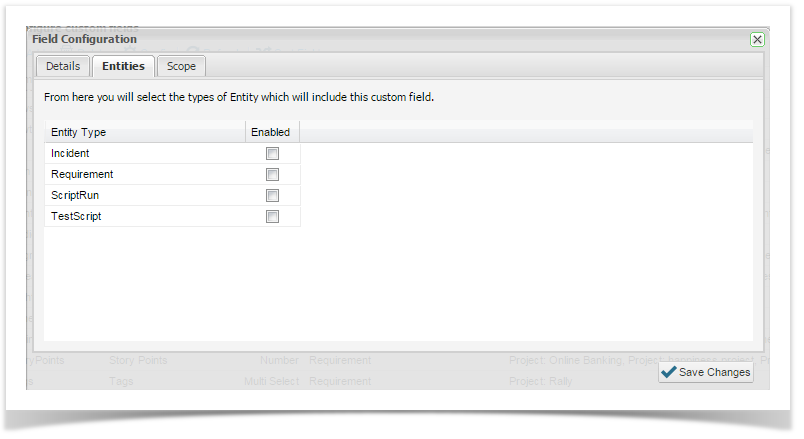
- Click on the ‘Entities’ tab to select the types of entities (Incident, Requirement, Script Run and Test Script) which will include the custom field. Note that you can use the same custom field across multiple entities.
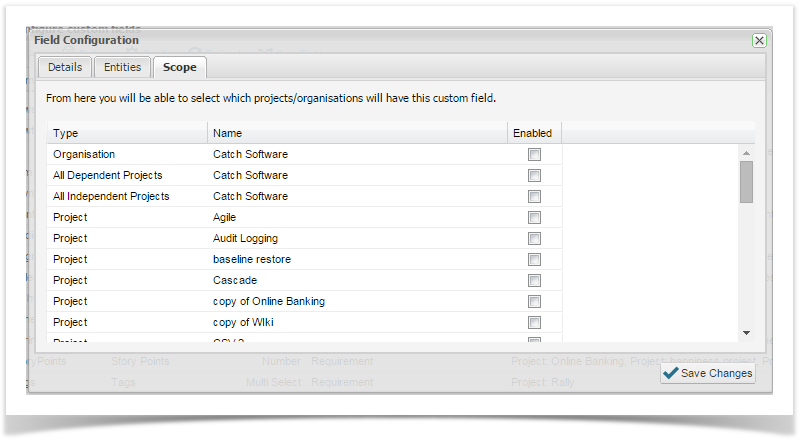
- Click on the ‘Scope’ tab. Here you can select the organization(s) and/or project(s) that will include the custom field.
- By adding scope for an organization, all projects for that organization will use the custom field for the entity selected. You can add specific custom fields for specific projects by including them here. When you specify the scope, entities will be updated to include the new field i.e. requirements, scripts and incidents that have previously been created will be updated to include the new custom field. If the field is mandatory, the user will be prompted to add this additional detail before saving.
- Click ‘Save Changes’ at the bottom right hand corner.
- The Configure Custom Fields list view will display.
- Click on ‘Add’ from the window toolbar.
- The ‘Field Configuration’ screen will open.
- On the ‘Details’ tab, enter a name for your field.
- In the Label field, enter the name of the field as you would like it to appear on screen to users.
- Click the dropdown button on the ‘Type’ field to select the type of field you would like to create.
- If the field is mandatory to complete, click the ‘Required?’ field, otherwise leave it blank.
- Include a brief description in the Description field.
- Click on the ‘Entities’ tab to select the types of entities (Incident, Requirement, Test Scripts) which will include the custom field. Note that you can use the same custom field across multiple entities.
- Click on the ‘Scope’ tab. Here you can select the organization(s) and/or project(s) that will include the custom field. Here you can also apply the custom field to all dependent projects or only to independent project. Apply the custom field to all dependent projects the custom field will be apply to all projects that are not marked as Independent n the project configuration screen. Please refer to the Managing Project help topic.
...
- By adding scope for an organization, all projects for that organization will use the custom field for the entity selected. You can add specific custom fields for specific projects by including them here. When you specify the scope, entities will be updated to include the new field i.e. requirements, scripts and incidents that have previously been created will be updated to include the new custom field. If the field is mandatory, the user will be prompted to add this additional detail before saving.
- Click ‘Save Changes’ at the bottom right hand corner.
...
| Expand |
|---|
|
