...
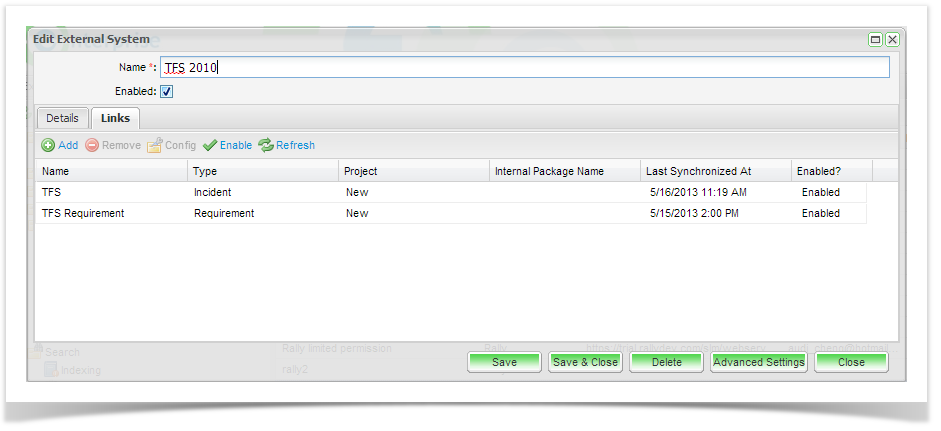
From the Admin tab, Expand Extensions and double click on External Systems. From the External Systems summary grid, double click the External System you wish to create a link for. Then navigate to the Links tab. Click on Add from the tool bar.
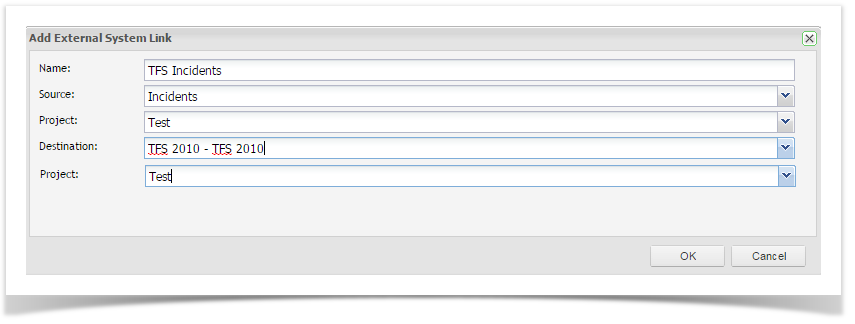
The Add External System Link screen will appear. Complete the name and select the Link Source. This is the entity type you wish to synchronize.
...
Once you have completed the screen click on OK. The External Links Details screen will appear. See the Field Configuration section below.
Resources Tab
From the Resources Tab tab, click to expand "Project Links". To view all configured links for your project, double click on your project.


To create a new project link select "New" from the toolbar or from the navigator you can right click on your project and select "Add New Project Link" from from the menu or from the navigator you can right click on your project. Complete the details selecting the TFS connection that you created in the steps outlined in the above section, and your TFS project to link to. Now click on 'Save' OK.

Once the project link to TFS has been created, Enterprise Tester will initiate a refresh of all the metadata. This may take a few minutes.
...
The Map Fields activity is the only configuration you will need to complete on this screen. Note that it is the only activity that displays false in the Configured column. To configure the field mappings, click to select Map Field and click Config from the toolbar.
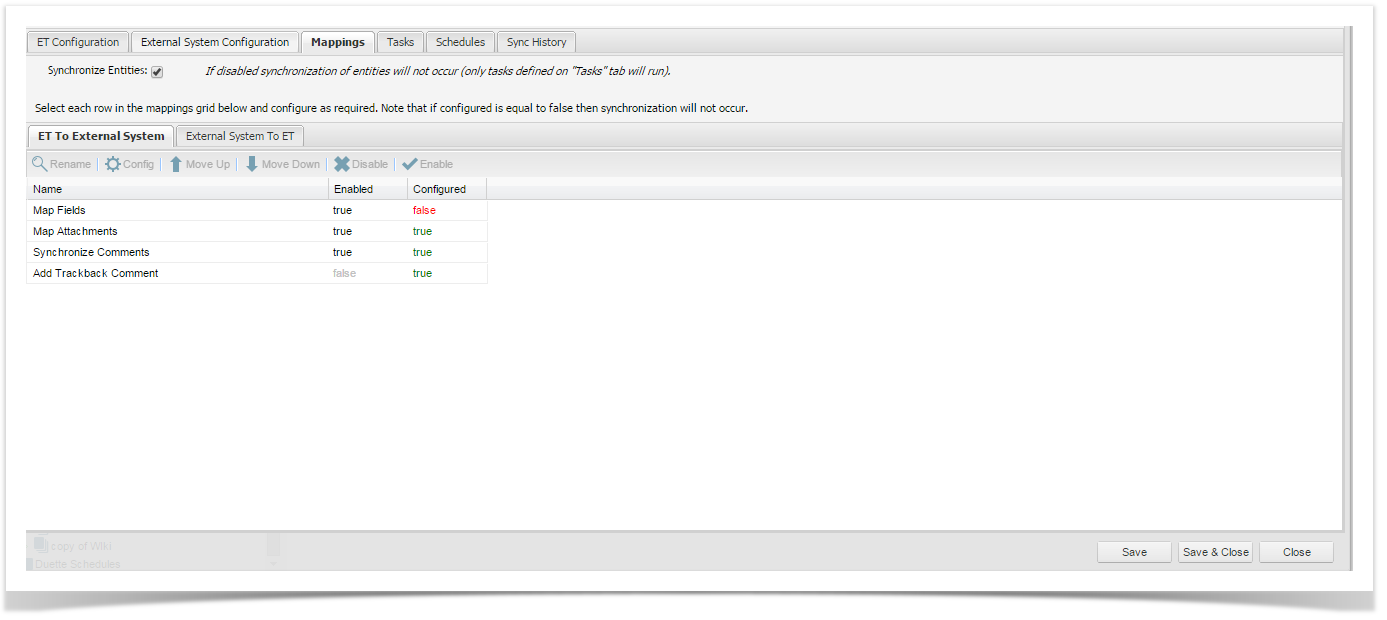
The Configure Field Mappings screen will appear and all ET inbuilt fields have pre-set mapping to TFS inbuilt fields.
Some fields will require mapping or confirmation of the pre-configured mappings. These will be marked as false in the Configured column.
Several configurations are automatically created consisting of Copy Field type mappings and direct Map field type mappings.
...
- To complete the field mappings, click on the field row and select Edit from the tool bar.
- Complete mapping Enterprise Tester field values to TFS field values. Where picklist values in ET and TFS are exact matches, the mappings will be automatically configured.
- Click Save Changes.
- Complete mapping field values for all fields following steps 1-3.
TFS to Enterprise Tester Mappings
...
Task | Configurable | Description |
|---|---|---|
Map Fields | Yes | Allows a set of mappings to be configured to transfer information between the TFS and ET. |
Map Attachments | No | Synchronizes the set of attachments between from TFS to ET. This will add new attachments that have not been synchronized previously, and remove previously synchronized attachments that have since been removed. |
Synchronize Comments | Yes | Synchronizes all comments added in TFS to ET. |
Add Trackback Comment | Yes | Adds a comment to the synchronized TFS bug work item with a trackback link to the ET incident: Linked to Enterprise Tester incident - e.g. Incident: http://server/EnterpriseTester/#/incident/edit/04e7f9e5-5784-4e94-a863-9ef600f0a935 (Name: ) If a comment already exists with the same value, then the comment is not added. |
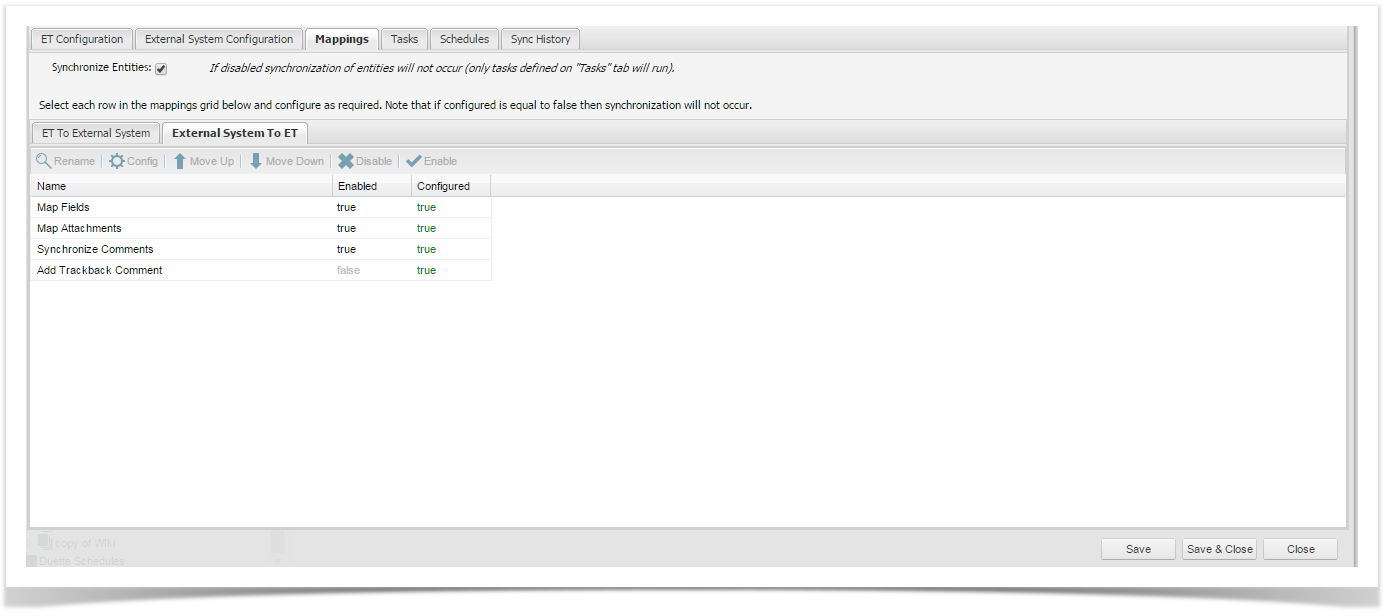
Note that all activities are pre-configured including the Map Fields activity. To view the fields that are pre-configured to synchronize, click on Map Field and then click Config from the toolbar.
The Configure Field Mappings screen will appear and a number of TFS inbuilt fields have pre-set mapping to ET inbuilt fields. These are configured as either Copy Field or Automap field type mappings.
...
When configuring a Copy Field Type field, you will only need to select the TFS and ET fields that you are mapping. The text or value from the source incident will be copied to the incident in the other system.
Set Field to Value
On synchronization you can set a value for a field to a specified value. You only need to specify the field in ET and the the value you would like to set.
Set Field Value to ( if null or empty)
If the field value is null or empty can you set the field to be set to a specified value. For this configuration select the field and the value to set.
Map
When using the map field configuration, you will be required to manually map the field values. This is useful when the values in ET and TFS are different or if you have more that one value that will map to the same value in the other system.
To complete this configuration, you will need to choose ET and TFS fields whose values will be synchronized and then you will need to complete mapping any values that do not exist in the system that you are synchronizing to. All values that have exact matches in both systems will automatically be mapped.
| Anchor | ||||
|---|---|---|---|---|
|
...
Click on Add from the toolbar and enter in a name for your task and click OK.
Next, select your TFS Field and your ET Field and click on Save.
The task is then created, and is displayed in the tasks grid.
From the grid you can see that you are able to configure or disable/enable each task.
...
- Periodic schedule occurring every 1 minute, from the external system which will update all incidents that have been updated since the last synchronization. This is conditional on having been previously synchronized.
- Synchronize on change in ET in the direction of ET to TFS. A synchronization of all incidents added or updated in ET since last synchronized will be initiated at the time a change occurs to an incident. This synchronization only updates TFS with the changes made in ET.
The synchronization frequency can also be configured from the Schedules tab. There are 3 options that can be configured:
...
You can use the tool bar to add a new scheduled synchronization, delete an existing configuration, enable or disable an existing schedule, configure an existing schedule or manually initiate a synchronization.
Synchronization History
You can view the synchronization history from both the synchronization configuration screen and the individual synchronized entities. From the configuration screen you can view all synchronization events, select to only view errors, export the synchronization events to a .CSV file or clear the history.
Deleting Project Links
...
| Note |
|---|
Even if you chose to remove references, this will only apply to Enterprise Tester, JIRA issues / TFS work items will still contain trackback links and remote links referring the Enterprise Tester entity they were synchronized with. This information must be removed manually. |
Limitations
...