...
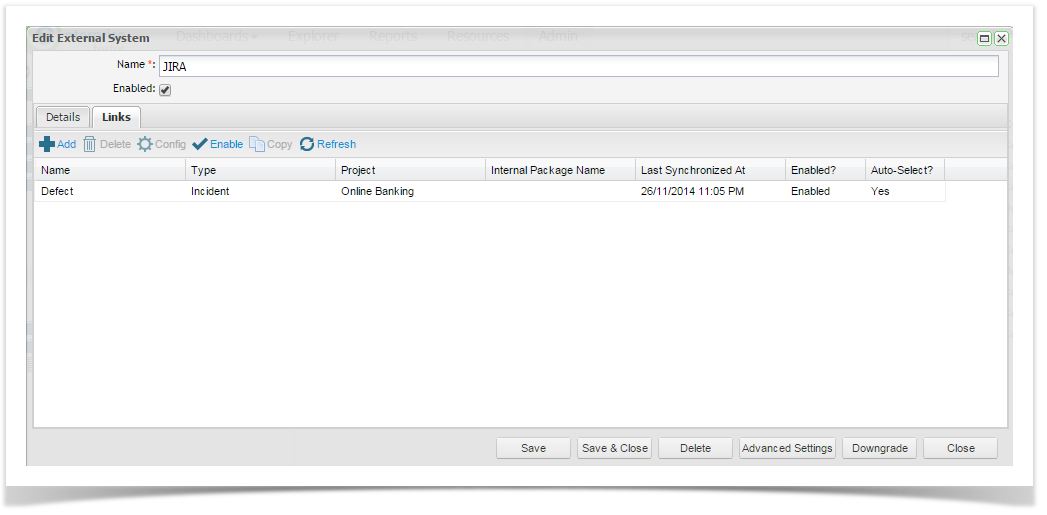
Once the JIRA connection has been created (see Configuring Enterprise Tester for JIRA 5.2 and Above), you can begin associating projects in the defect tracker with projects in Enterprise Tester. Project links can be created and managed either from either External Systems in the Admin area or from the Resources tab.
External System Links
From the Admin tab, expand Extensions and double click on External Systems. From the External Systems summary grid, double click the External System you wish to create a link for. Then navigate to the Links tab. Click on Add from the tool bar.
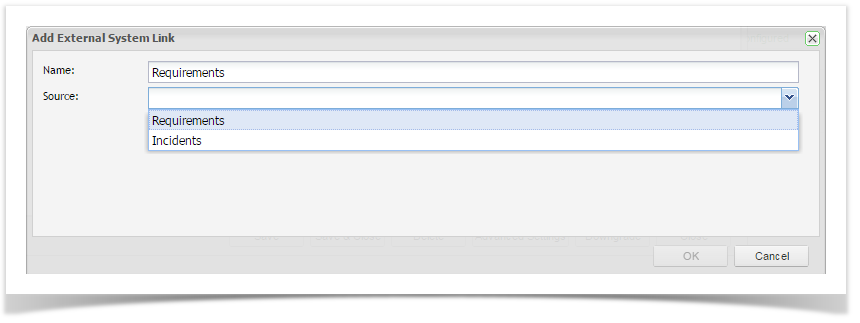
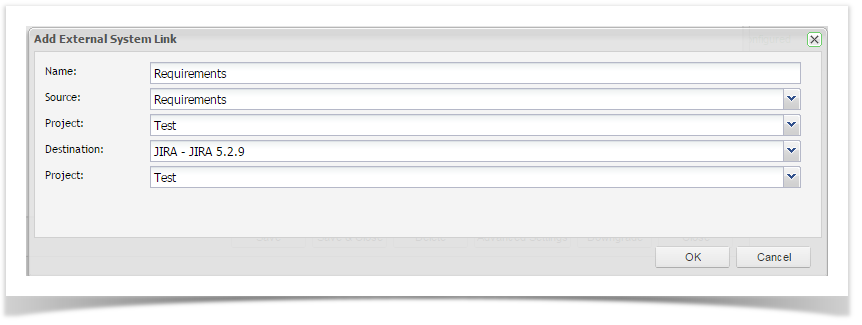
The Add External System Link screen will appear. Complete the name Name and select the Link Source, Requirements. This is the entity type you wish to synchronize.
Once you have selected the Source additional fields to configure the ET project and the JIRA project will appear.
Once you have completed the screen click on OK. The External Links Details screen will appear. Now you will need to complete the Field Configuration field configuration and set up the synchronization schedule. See the Configure the Requirement Link section below.
Resources Tab
| Anchor | ||||
|---|---|---|---|---|
|
From the Resources Tab tab in the navigation pane, click to expand "Project Links". To view all configured links for your project, double click on your project.
- Click on the ‘Resources’ Resources tab in your tree navigator and click to expand ‘Project Link’ Project Link.
- Right click on your project and select ‘Add select Add New Project Link’, the Add Link screen Link and the Add External System Link dialogue will appear.

Or double click on the project to view all project links. From the Project External Links summary screen you can select Add from the tool bar to add a new project link.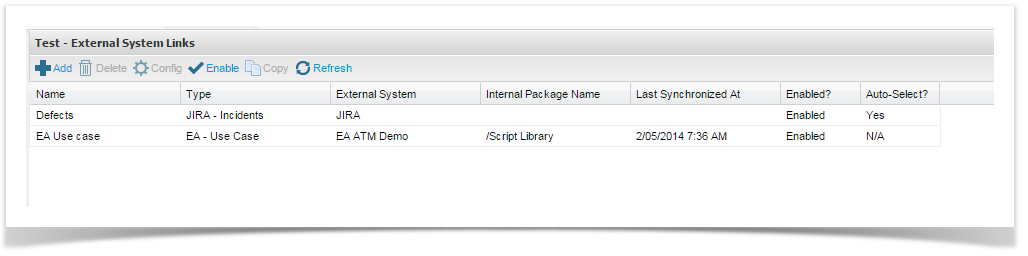
From the Add External System Link dialogue, enter Enter in the Name for the link, and select from the dropdowns:
- Source is the entity type you wish to synchronize. Select Requirements
- The ET Project will be pre-selected
- Destination is the configured external system to use for this link. Select your JIRA external system
- Select the JIRA Project to synchronize with.
...
Once the project requirement link is set up, you will be displayed the screen below and will need to perform additional configuration.
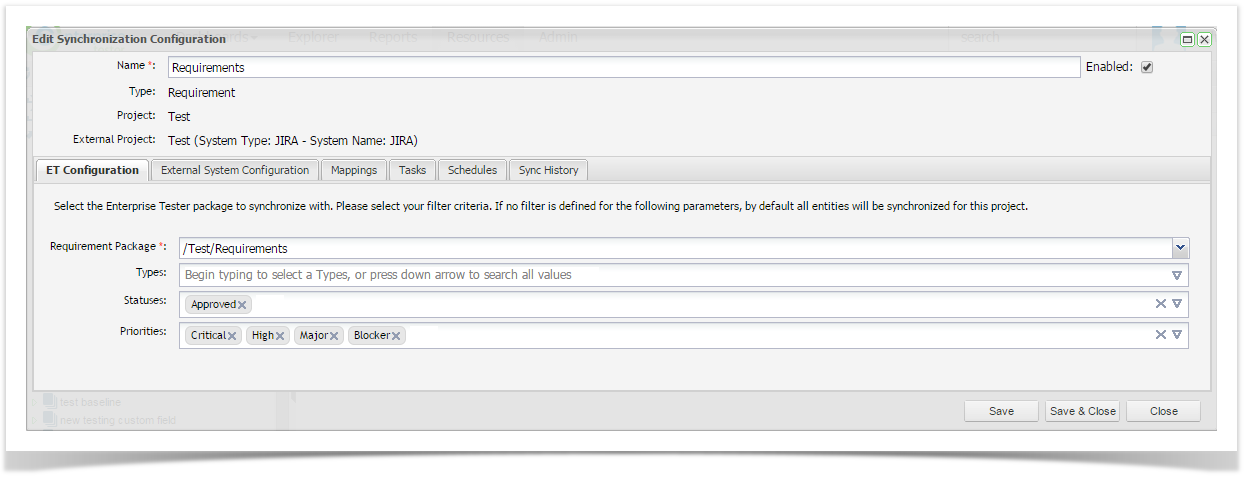
From the Edit Synchronization Configuration screen, click on the ET Configuration tab. Select the ET requirements package you wish to synchronize with. Here you can also select the filter criteria when synchronizing from ET to JIRA. You can filter on Types, Statuses and Priorities. Once you have completed your configuration, click ‘Save’ Save.

Next, click on the External System Configuration. Select the entity type(s) (requirement, stories etc.) to synchronize with Enterprise Tester. Here you can also select additional criteria including Statuses, Priorities, Components, JQL fragments, Affected and Fixed Versions. You can also select to synchronize sub-tasks related to the entities that meet your selection criteria. Note that the filter values only apply to the parent requirement/ user story. All sub-tasks associate to these entities will also be synchronized when you select this option.
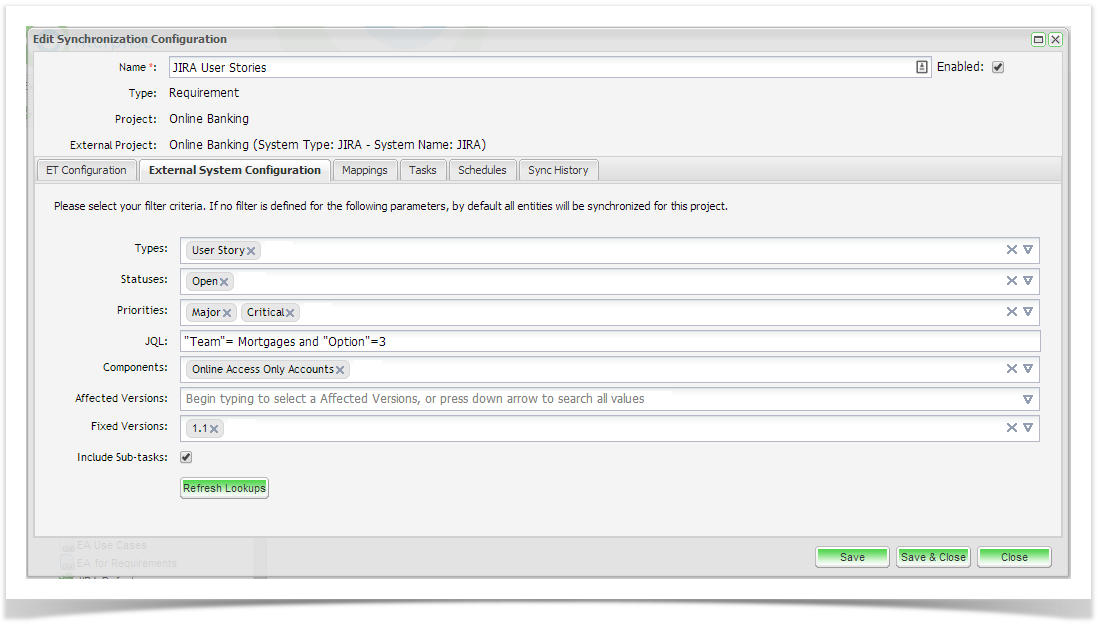
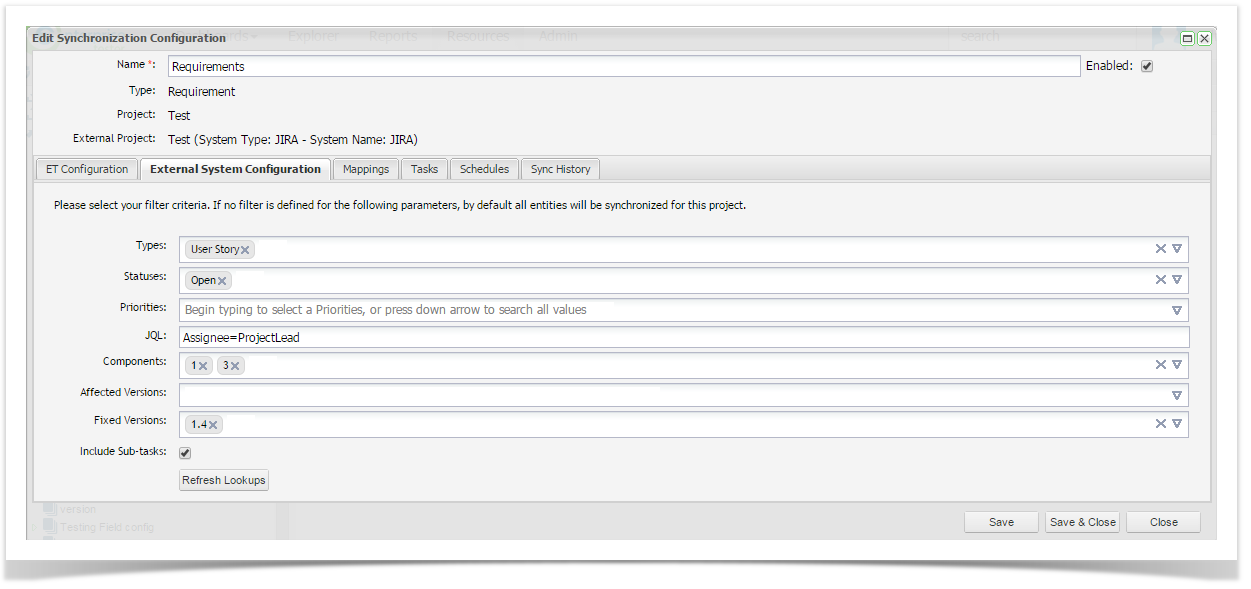
Note that by default all entities will be synchronized if you do not apply a filter. If the JIRA field values do not appear in the field drop down list, you may need to initiate a refresh lookups which will refresh the JIRA metadata.
Field Mapping
Next, click on the Mapping tab.
This screen displays two tabs for outlining and configuring the steps undertaken when synchronization is initiated.
• One tab for mapping fields from Enterprise Tester to the external system (JIRA).
• One tab for mapping fields from the the external system (JIRA) to Enterprise Tester
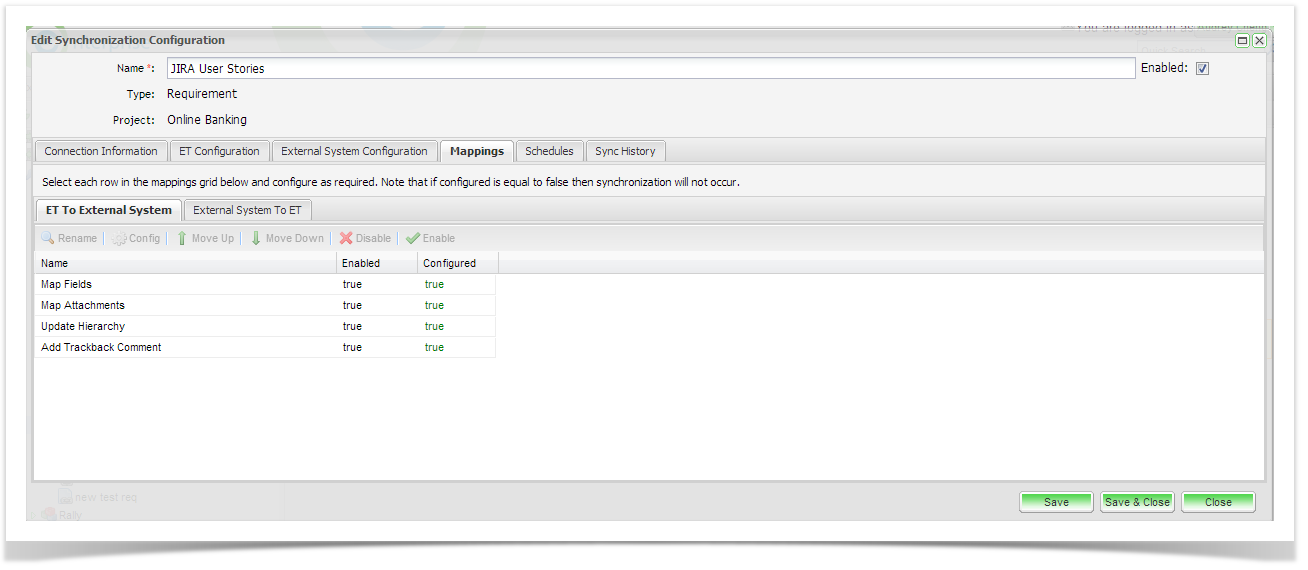
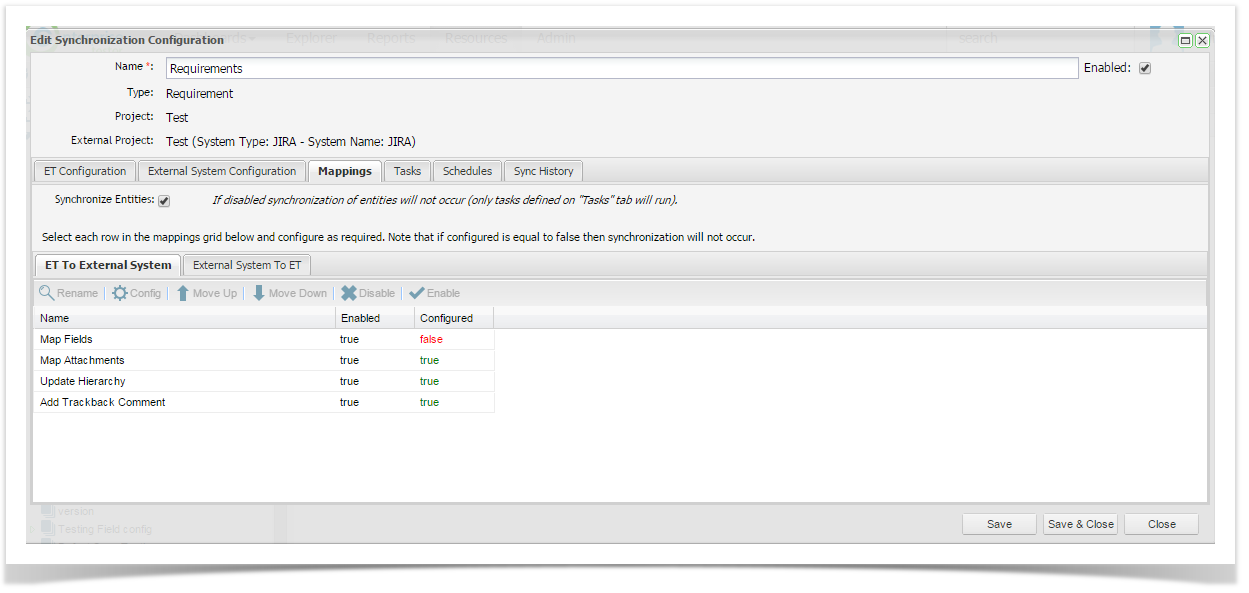
Task | Configurable | Description |
|---|---|---|
Map Fields | Yes | Allows a set of mappings to be configured to transfer information between Enterprise Tester and the External System (JIRA) |
Map Attachments | No | Synchronizes the set of attachments between Enterprise Tester and External System (JIRA). This will add new attachments that have not been synchronized previously, and remove previously synchronized attachments that have since been removed. |
Create Trackback Comment | No | Adds a comment to the synchronized JIRA requirement with the following text: Linked to Enterprise Tester requirement - e.g. Requirement: http://server/EnterpriseTester/#/requirement/edit/04e7f9e5-5784-4e94-a863-9ef600f0a935 (Name: ) If a comment already exists with the same value, then the comment is not added. |
...
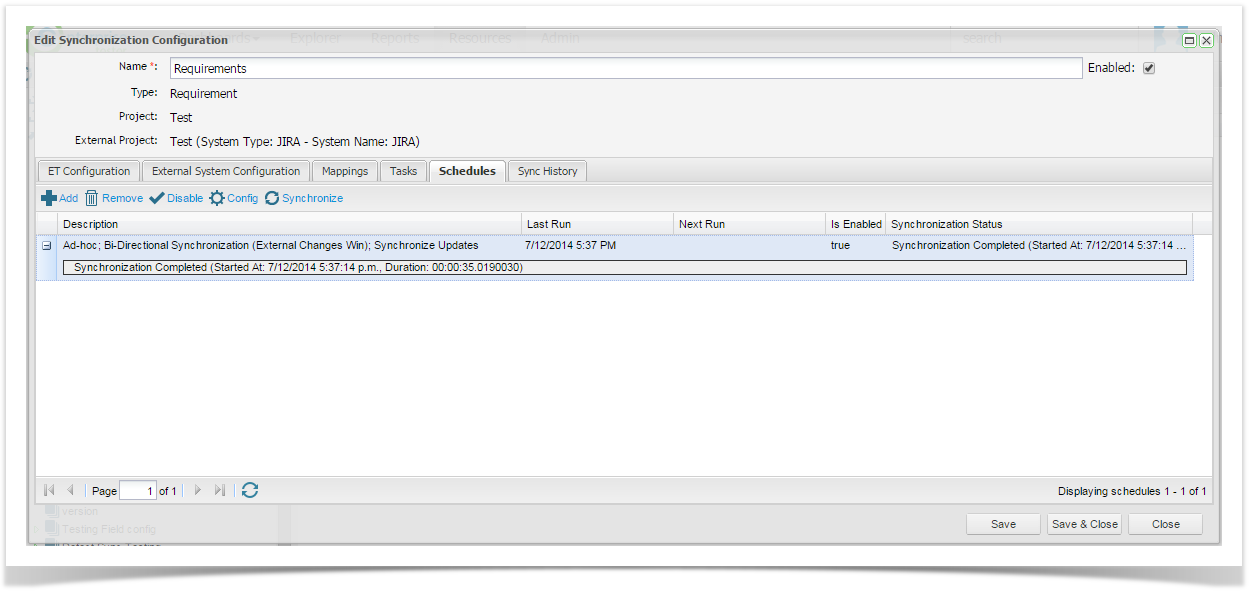
You can use the tool bar to add a new scheduled synchronization, delete an existing configuration, enable or disable an existing schedule, configure an existing schedule or manually initiate a synchronization.
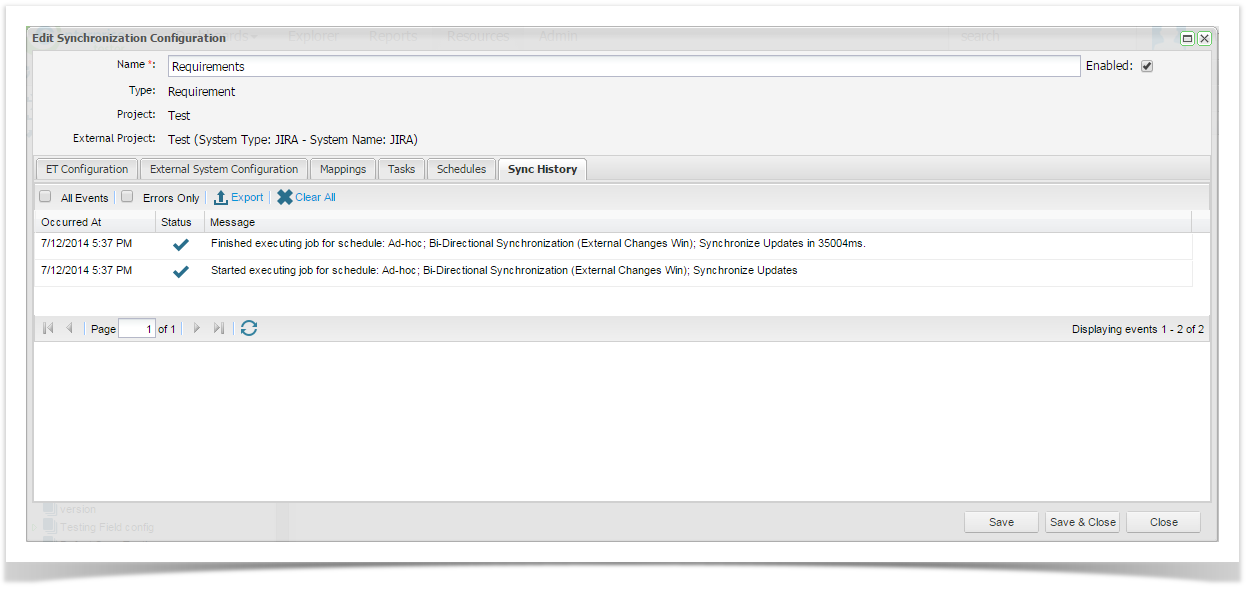
Synchronization History
You can view the Synchronization history from both the synchronization configuration screen and the individual synchronized entities. From the configuration screen you can view all synchronization events, select to only view errors, export the synchronization events to a csv file or clear the history.
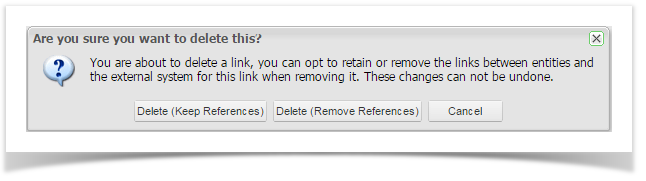
Deleting Requirement Project Links
Deleting requirement project links will stop the synchronization between Enterprise Tester and your external system. When deleting the link you will have the option to delete the link and remove all external link references or to retain these references. These include the trackback comments and the defect issue link placed in Enterprise Tester. Note that if you chose to delete the references. This will only affect Enterprise Tester. References to Enterprise Tester in your external system cannot be removed, but all references in Enterprise Tester to your external system will be removed.
Limitations
When synchronizing from ET to JIRA requirement to requirement relationships in ET are synchronized to JIRA.
When synchronizing from JIRA to ET, links between issues in JIRA are not synchronized to relationships in ET
Requirement Synchronization to JIRA does not currently support mapping to/from cascading select fields. When synchronizing from ET to JIRA, if you see an error message similar to this with the error "is an invalid parent option" this suggests you have tried mapping to a cascading select field:
No Format System.ServiceModel.FaultException: com.atlassian.JIRA.rpc.exception.RemoteValidationException: Fields not valid for issue: Errors: {customfield_10130=The option '1' is an invalid parent option} Error Messages: Remove the mapping to allow synchronization to work once again.Auto-map from ET to JIRA is not currently implemented ( Field values from ET are not added to JIRA automatically as they are int he JIRA to ET direction when using the auto-map feature).