Duette Schedules allow you to create schedules where individual or multiple sets of result files can be imported into Enterprise Tester, with the associated automated test, automated test assignment and runs being created automatically.
Features
Duette Schedules supports the following features:
- Ability to schedule importing on an ad-hoc, periodic or daily basis.
- Support for multiple schedules.
- Support for record summary and details history of imports.
- Ability to manually trigger an import schedule.
- Ability to import multiple files using a file name "capture" within the source path of the tests.
- Ability to import multiple files using a folder name "capture" within the source path of the tests (can not be combined with filename capture).
- Ability to combine multiple source files into a single automated test result.
- Ability to either always import results on scheduled run, or only import results if the source files have changed since last time.
- Ability to duplicate an existing import configuration.
- Ability to enable or disable import configurations and schedules.
- Ability to automatically maintain only a certain number of result files (automatically purging the oldest runs over the maximum number of retained results).
Creating an Import Schedule
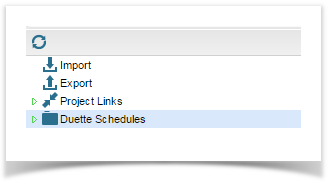
You can configure Duette Schedules from the Resources tab of the tree view navigator. When the Duette Plugin is enabled, a section called "Duette Schedules" is available.
If Duette Plugin is enabled and Duette Schedules is not available in the Resources tab, contact your Admin to ensure you have the correct permissions for Duette Plugin.
To create a new schedule, expand Duette Schedules to list all projects.
Right click on the project you wish to create the schedule for.
Select Add Schedule from the menu.
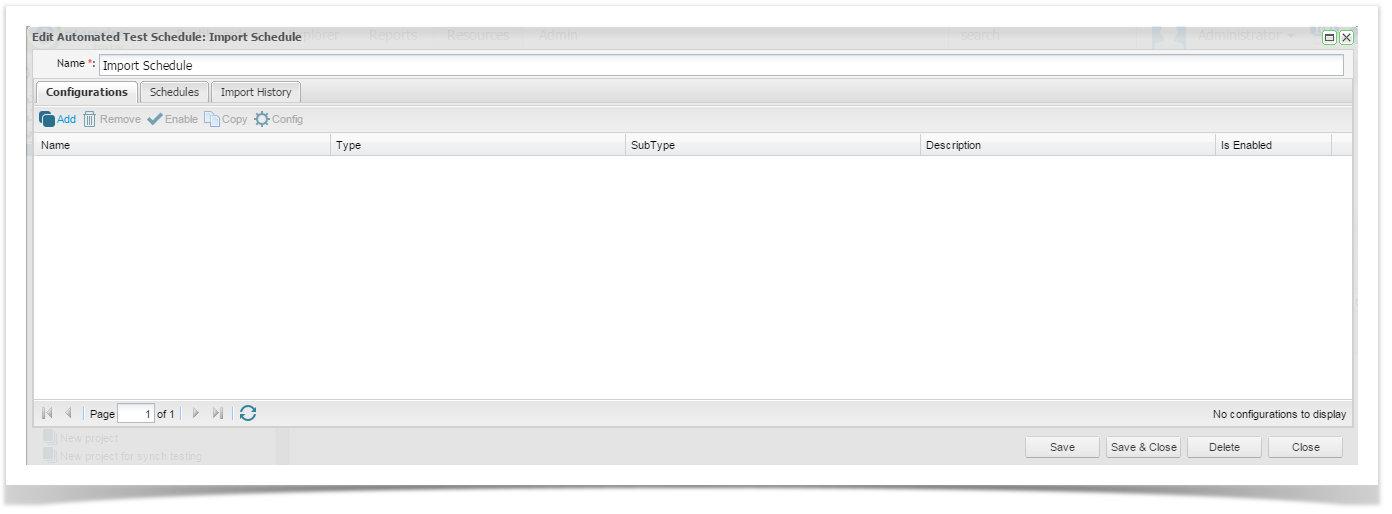
The Edit Automated Test Schedule screen will be displayed where you can add one or more configurations and set schedules for imports ( adhoc, periodic or daily intervals).
On the Configurations tab, select the Add icon.
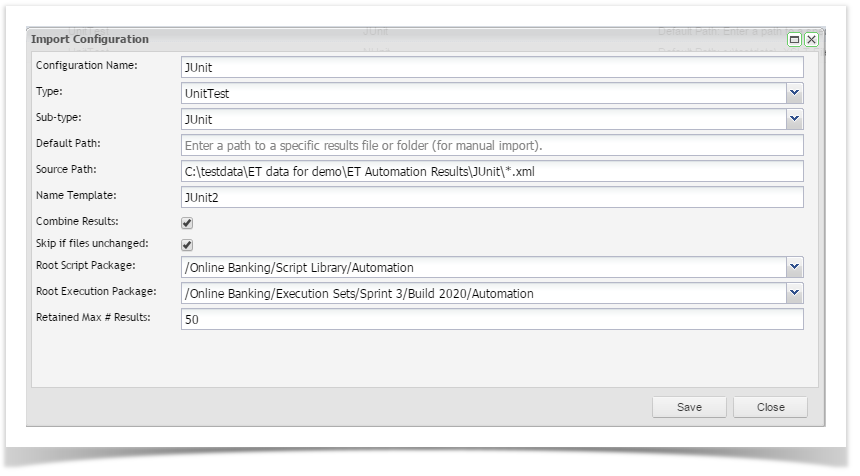
Complete the details:
| Field | Description |
|---|---|
Configuration Name | Enter a name for your Configuration |
Type | Select the test type from the drop down list. HP Quick Test Professional, IBM Rational Functional Tester,Selenium or Unit Test Results |
Sub-Type | Only applicable for Unit Test Results. Select from the dropdown list the type of results you are importing |
Default Path | If you also plan on manually importing results enter the pathway. Otherwise leave this field blank. |
Source Path | Enter the path to the results file to upload e.g. c:\testdata\{Name}.xml |
Name Template | Enter a name for the results files e.g.{name} |
Combine Results | Check to combine all results in the path into a single run. This can be useful for unit test where there maybe many xml files which comprise of a single run. |
Skip files if unchanged | Check to skip importing files if they have not changed since the last import. e.g. the tests have not run since the last schedule import. |
Root Script Package | Select the package/ folder in the Script Library where you would like the Automated Test Script created. |
Root Execution Package | Select the execution package to import the run results to. |
Retained Max # Results | Enter the maximum number of runs to retain ( in the run history of the automated test assignment). Runs outside of the retention period will be removed. |
Using the Source Path and Name Template
Creating a Single Automated Test from a Single File
In its simplest form a schedule can be created to import a single file as a result into an automated test assignment.
Example - Creating a Single Automated Test from a Single File
Source Path: c:\testdata\results.xml
Name Template: my result
Creating an Automated Test from a Folder of Results
Creating an Automated Test from a Folder of Results
Source Path: c:\testdata\
Name Template: my results
These both behave in the same manor as manually importing an automated test result and filling in the "Results Path" field on screen. In addition, zip files are also supported, which effectively works similarly to configuring a folder (with the contents of the zip file treated the same as the contents of the folder).
Capturing part of the path into the "name" variable
It is also possible to "capture" part of the path into a special variable called "name" which can then be referenced within the "Name template" to generate a unique name for each test.
Below is an example using files:
Examples - Capturing part of the path into the "name" variable
Source Path: c:\testdata\{name}.xml
Name Template: {name}
For a directory of files, here is what would be generated
| File | Generated Name | Comments |
|---|---|---|
| c:\testdata\report-results.xml | report-resullts | |
| c:\testdata\report.png | skipped, as it doesn't match source path | |
| c:\testdata\ui-results.xml | ui-results |
Source Path: c:\testdata\{name}\
Name Template: {name}
| File | Generated Name | Comments |
|---|---|---|
| c:\testdata\build123\ | build123 | |
| c:\testdata\builder456\ | build456 | |
| c:\testdata\test.xml | skipped, as file is not a folder |
Wildcards are also supported. In the Source path, you can replace the name with "*" . Wildcards are not supported in the Name Template field
Example - Using wildcards
Source Path: c:\testdata\*\
Name Template: {name}
| File | Generated Name | Comments |
|---|---|---|
| c:\testdata\build123\ | build123 | |
| c:\testdata\builder456\ | build456 | |
| c:\testdata\test.xml | skipped, as file is not a folder |
Limitations
There some limitation so the Source Path and Name Template fields. These include the following:
- A folder name with a file cannot be captured e.g. "c:\testdata\{name}\input.xml" is not supported.
The combine results option is not supported for zip files e.g. "c:\testdata\{name}.zip".
The combine results option is not supported when capturing folders e.g. "c:\testdata\{name}\" you can not use the "combine results" option.
If capturing files which include zip and non-zip files, the zip files will not be automatically expanded/traversed (but you can use the "combine results" option). In this case zip files are treated like any other file making up a single result.
Configuring the Schedule
Now that your configuration is complete you are ready to set up your Import Schedule. The import frequency can be configured from the Schedules tab. There are three options that can be configured:
- Adhoc
- Periodic
- Daily
Type | Period | Time |
Adhoc | N/A | N/A |
Periodic | Specify the synchronization frequency in minutes | N/A |
Daily | N/A | Specify the time using the (24hr clock) when the synchronization will occur daily. |
Once you have configured your import schedule, a summary of the configured import schedules is available. You can see the time of the Last Run, the Next Run (if applicable), whether the schedule is enabled or not and the current import status.
You can use the tool bar to add new import schedules, delete an existing configuration, enable or disable an existing schedule, configure an existing schedule or manually initiate an import.
Import History
You can view the import history from Import History tab.
From the Import History screen you can do the following;
- View all synchronization events
- Select to only view errors
- Export the synchronization events to a csv file
- Clear the history.


